


Making a Quilt for a Beach Styled Bedroom

When we created a new guest room I wanted it to have a beach look or a coastal feel but there wasn't much to choose from to buy in my local area. Solution....I'll make it!
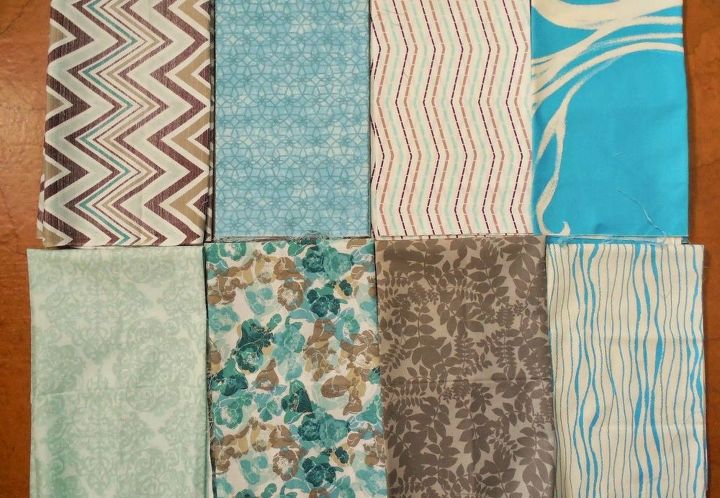
The first step was to chose an easy quilt pattern, I chose one with a simple block pattern. Next I selected the fabrics I wanted to use in my quilt, ocean blues and sand tones all in cottons.
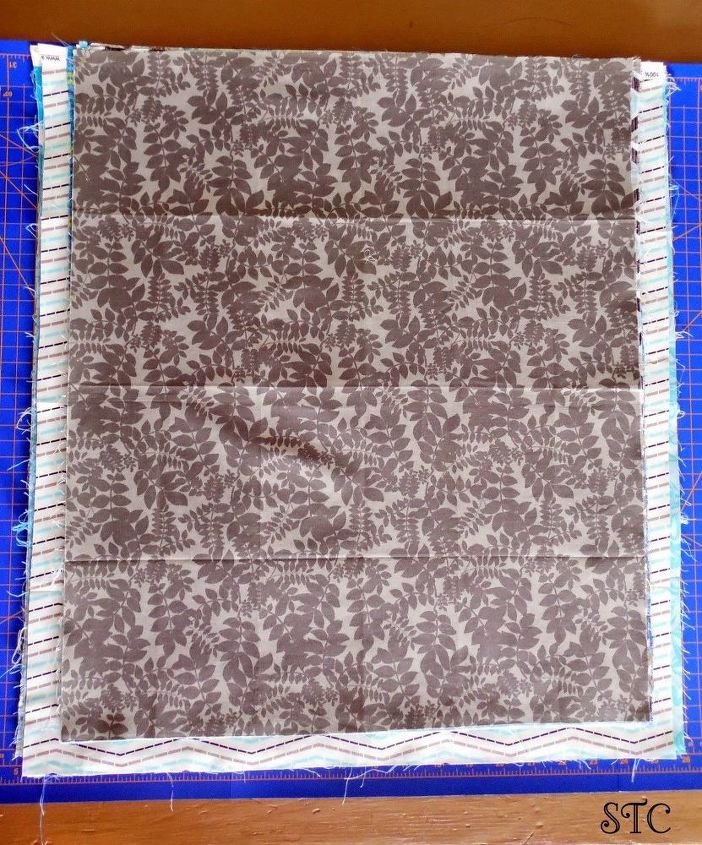
Open up the fabric pieces and iron out any wrinkles, these weren't pre-washed but they still had wrinkles to lose! The quarters were laid on top of the other as in line as I could get them.
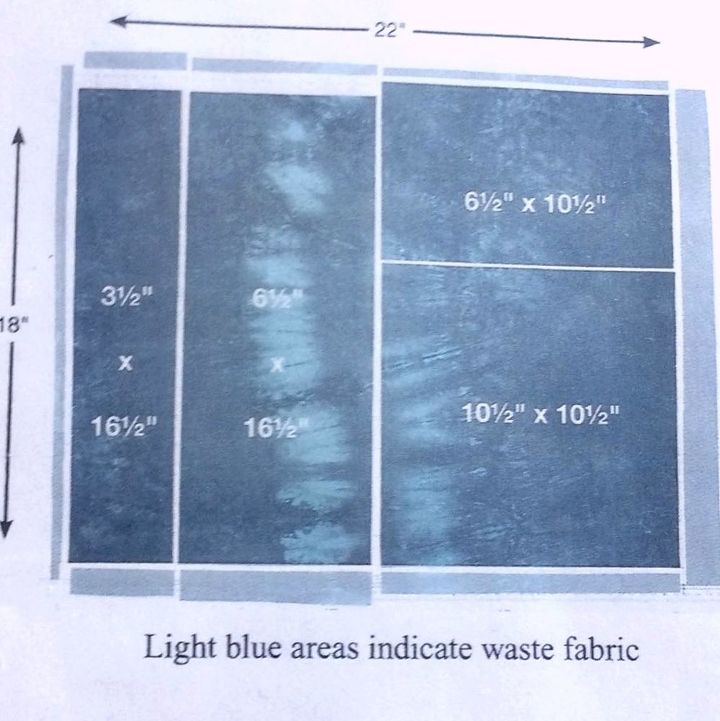
Here are the pattern measurements I went by, all cuts were made through all layers at one time. I used my rotary cutting tool and a quilters ruler, remember to measure twice and cut once! Next to mix up your blocks so that they all appear a little different in your final arrangement youll need to do this. Take the 1 fabric layer off the first column of fabric cuts on the left and place it at the bottom, were going to do a little juggling. Column 2 take the 2 top layers and place at the bottom, 3rd column take the top three and insert at the bottom of that column and the fourth one....you guessed it remove the top four and place at the bottom. NOTE :Do not rearrange them as you juggle them from the top to the bottom!
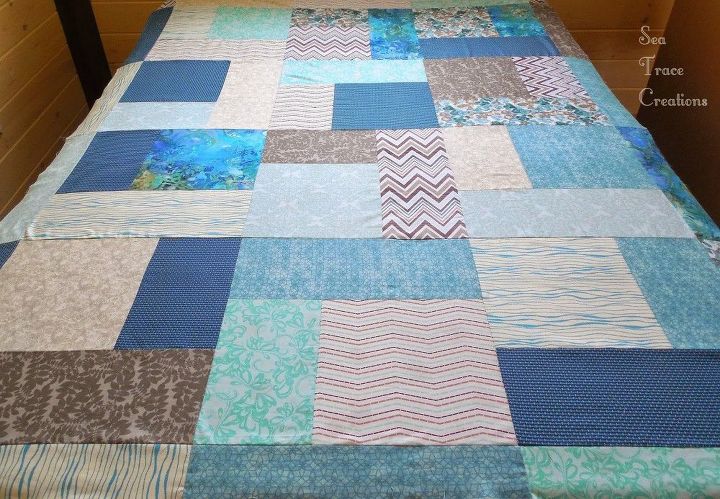
Now when all of the blocks get sewn together no two will be alike, how cool was that trick? See it worked, they are all different! Now I was ready to add polyester batting and a layer of fabric for the back to create the quilt sandwich. I pinned these 3 layers together all over with safety pins to ensure no movement when I sewed the sandwich layers together. I just followed along the straight lines on the top of the quilt to sew the layers together with my quilting foot (commonly called stitch in the ditch).
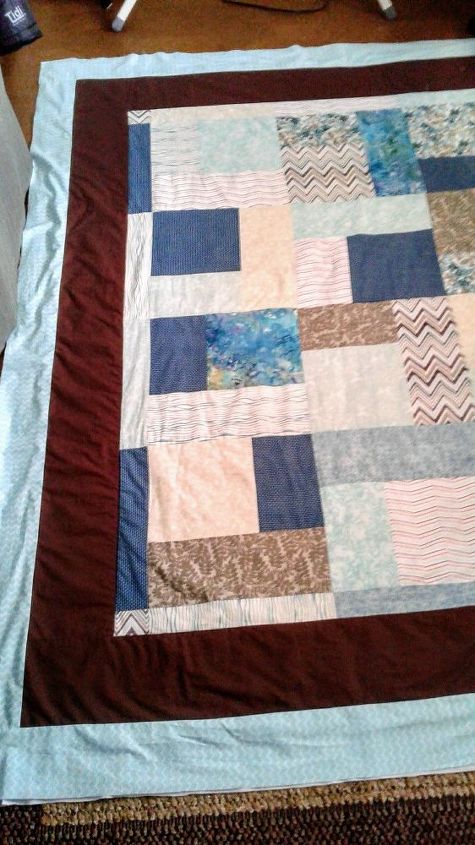
Next come the borders, frames of colors added outside your patterned part that not only accent the pattern but also give you added width and length to your quilt to create the size you'd like.
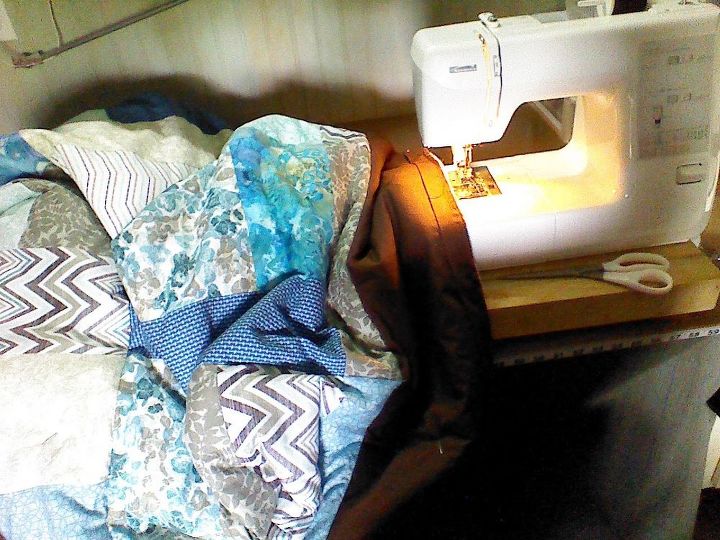
Here's a photo of the binding being added along the edge once the layers are secured together. BTW there are many great tutorials on YouTube that I viewed to learn these quilting steps especially for binding technique.
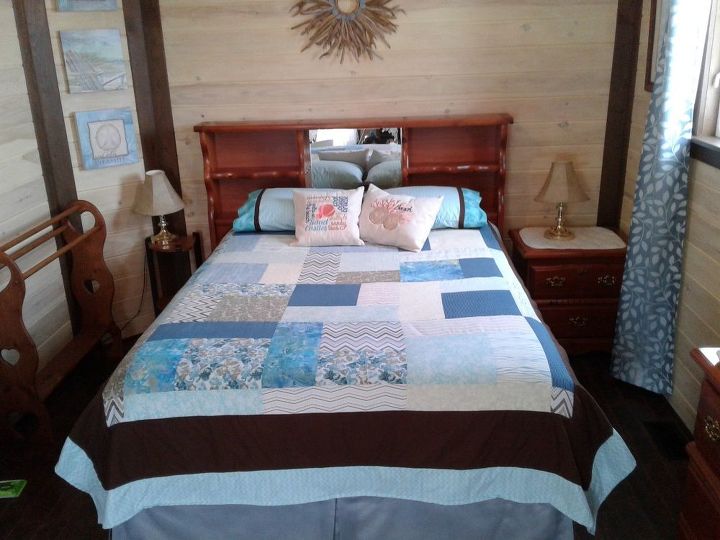
Drum roll....all completed along with matching pillowcases and diy bedskirt. It turned out pretty good and I'm looking forward to trying my next patterned quilt called Attic Windows. It should be fun and challenging but that's how we learn and grow! Thanks for viewing everyone!
Comments
Join the conversation
-
Yes! Inspired! You are very clear! I'm also glad to see you aren't a prof. quilter using a huge $10,000 machine. Your completely different pieces come together to really invoke a 'beachy' feeling without knowing what your intent was.
-
This is so beautiful. As a pre-beginner 😉, I'm looking for ideas & easy to make quilts. This looks doable for my skill set. Thank you for sharing.


Frequently asked questions
Have a question about this project?
What are the sizes of the pieces and the total of size of each square?
I LOVE YOUR QUILT. . .I'm no expert on using a sewing machine. Thing is I've had mine for abt 2 years now and I've used it maybe 10 times, which was around Christmas 2016 when I sewed up some pillows that I made for gifts to give my 3 daughters. I have been collecting different style quarters in color that have "OWLS" on them because I know/knew that one day I want to make a quilt for my bed. I know sounds silly but just can't help myself. . .lol. I honestly think now after reading your post that I may just be able to make one of my own. I was wondering though if you knew/remembered how many of those fat quarters you used? I'm still alittle iffy abt cutting up the fabric because my original plan was to just see them together as is but after seeing your post I'm inspired to step outside my comfort zone and attempt to do it. . . THANK YOU SO MUCH FOR SHARING. . .