


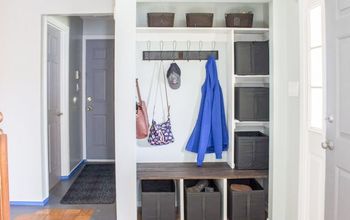
How To Create An Elegant Entry Way

by
Tammy Jones
5 Materials
$78
2 Hours
Easy
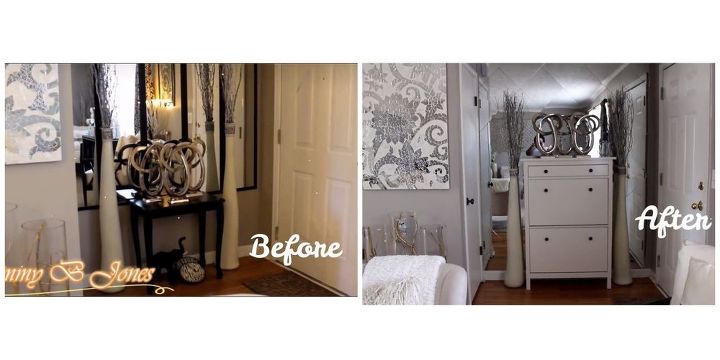
This project is now my new favorite. I turned my formally glam entry way into a more rich and elegant foyer. I used mirrored tiles to create the perfect backdrop behind my new IKEA shoe cabinet. And I saved myself $60.00 by cutting the mirrors myself. After you view the pictures you must see the actual video for more detailed and visual instructions.
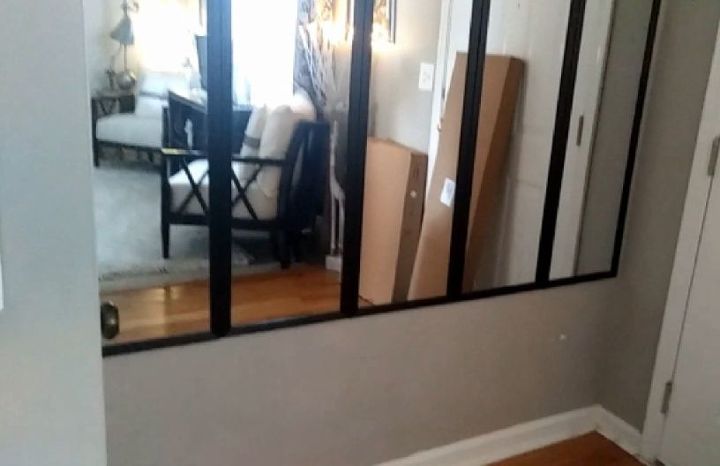
This is my old Entry way / foyer
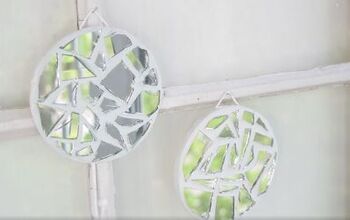
So this is what my space looked like prior to removing the dated panel mirrors that I purchased 7 years ago from walmart for just 5 bucks. These mirrors were centered on the wall and the top had eqaul space away from the ceiling as it do from the floor. These mirrors had to come down, but I will not tossed them to the trash I will take them down and cut them into 4 12X12 squares, just incase I need extra--sometimes cutting the glass takes you a few pieces before getting the hang of it
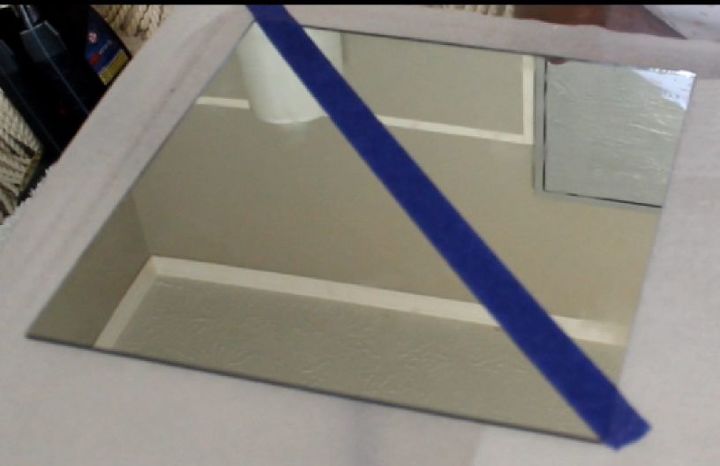
Tape off area before cutting Mirrors
By using painters tape I divided the 12 X 12 square in half diamond cuts or two triangles.
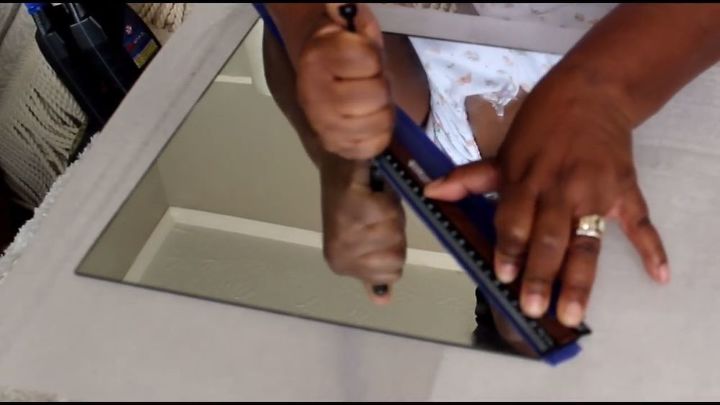
And i used a ruler also to hold my hand steady as I dragged my husky mirror cutter along the edges of the tape, then place the mirror on the edges for a smooth precise break.

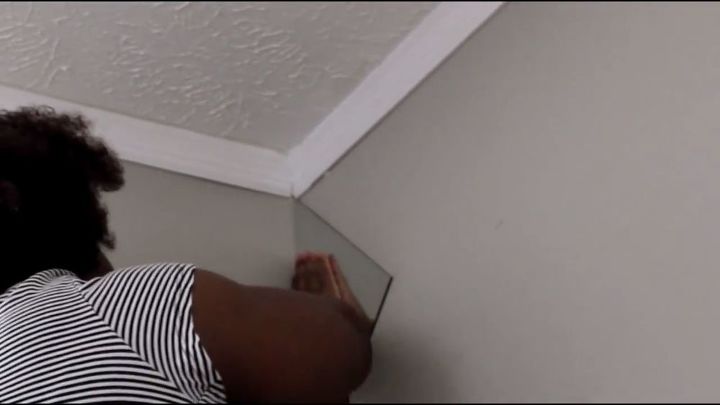
first in the corners I started with a cut half triangle shape and place the flat edge against the ceiling and then I place the tiles in a row going down and across.
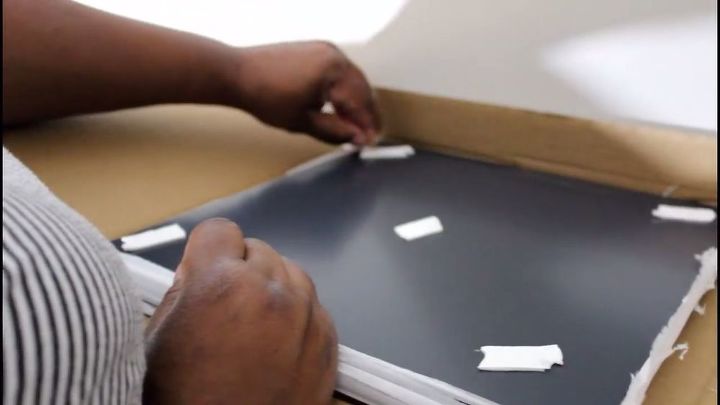
I used mirror mounting tape from walmart it is very sticky and its permanent tape it sticks like glue as soon as it touches the wall so make sure you have your angles lined up correctly.
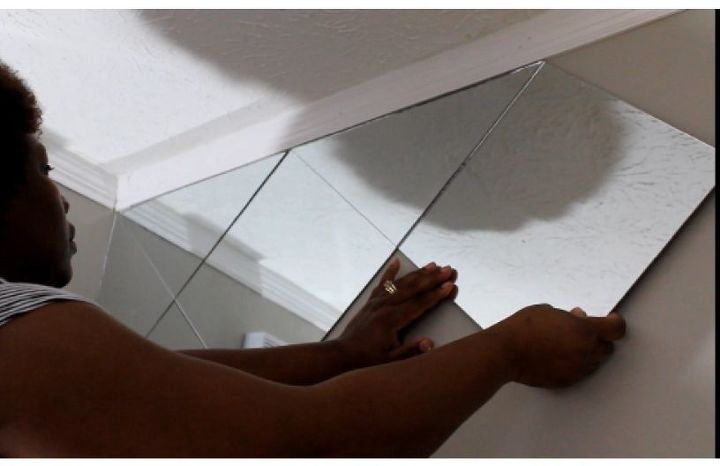
Follow the steps all the way to the baseboard. However if it looks like you are running out of space be sure to stop at a point that you can cut the squares in a rectangular shape and aline it along the bottom part of the wall making an even line closing any remaing space, and you will have a beautiful entry way that guest will love to chat about.
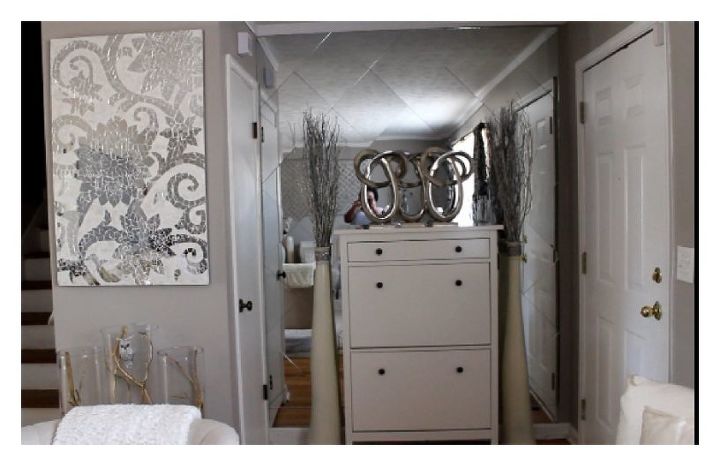
I also purchased the IKEA shoe cabinet as a shoe chatch all and mail storage. this item had to be bolted to the wall because it has only two legs so I had to leave just enough exposed sheetrock in the back of it so I could screw the dresser to the wall for support. Then i just styled it as you would any decor in your space. SEE VIDEO https://youtu.be/v2-SIASR0YA
{
"id": "4714626",
"alt": "",
"title": "",
"video_link": "https://www.youtube.com/embed/pK1lFLHRjuE",
"youtube_video_id": "pK1lFLHRjuE"
}
{
"width": 634,
"height": 357,
"showRelated": true
}
This video not only show you how I installed the mirrors but also how I created theis entire area starting with the IKEA hideaway shoe dresser. If you are not intereste please fast forward past that to 2:56 min in.
Comments
Join the conversation
2 comments
-
Gorgeous you did an amazing job. I like them both but Im like you the full wall would be my choice. I looking which wall I can do now.


Frequently asked questions
Have a question about this project?