


Two End Tables = One Storage Cabinet

Do you have a piece or pieces of furniture that you’re not using but you’re in need of something else? Deconstruction is the answer!
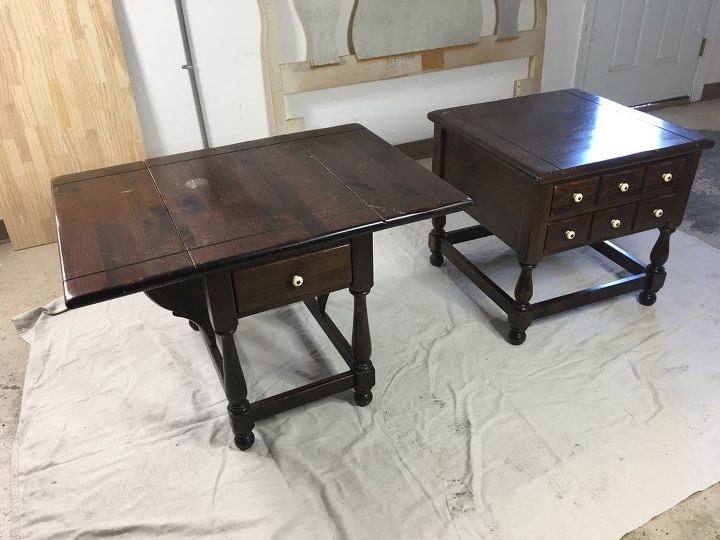
I found these two endtables on Facebook Marketplace for $20. The left one has two leaves that fold down and the right one has two drawers. I knew this is what I needed to make a one of a kind storage cabinet.
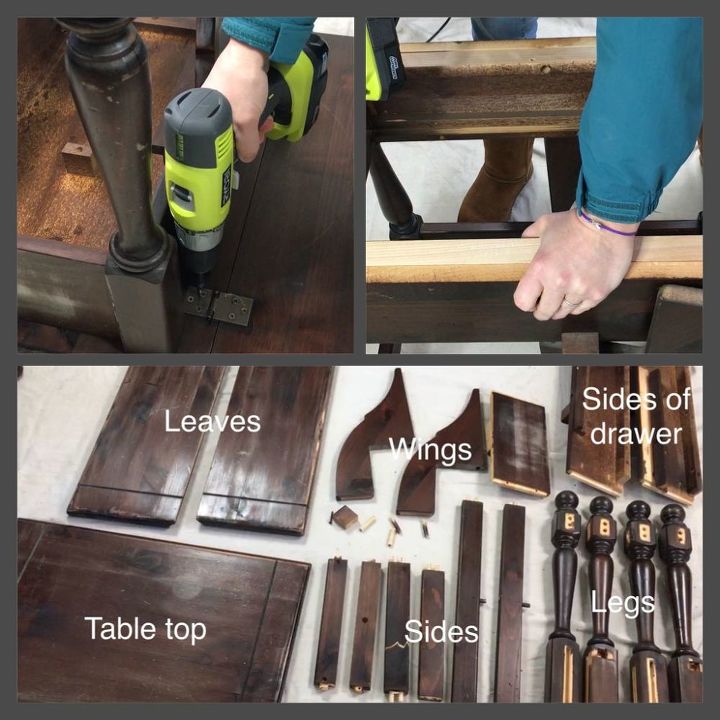
I began by disconstructing the table with the leaves. Using a screwdriver and a little muscle it came apart easily and I was left with a lot of pieces to work with.
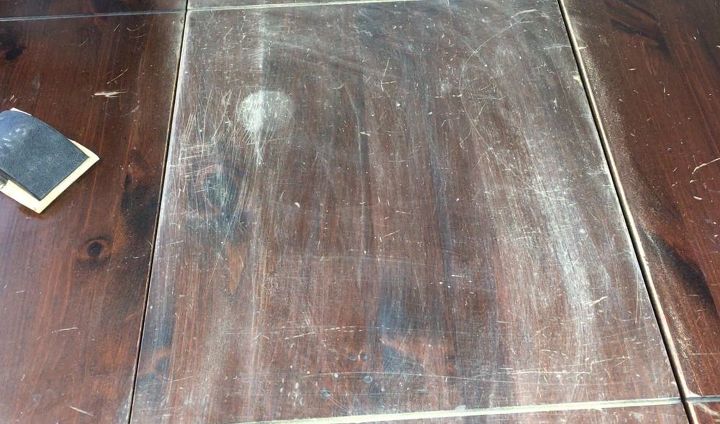
I sanded all of the pieces along with sanding the entire table with the two drawers.
Now for construction:
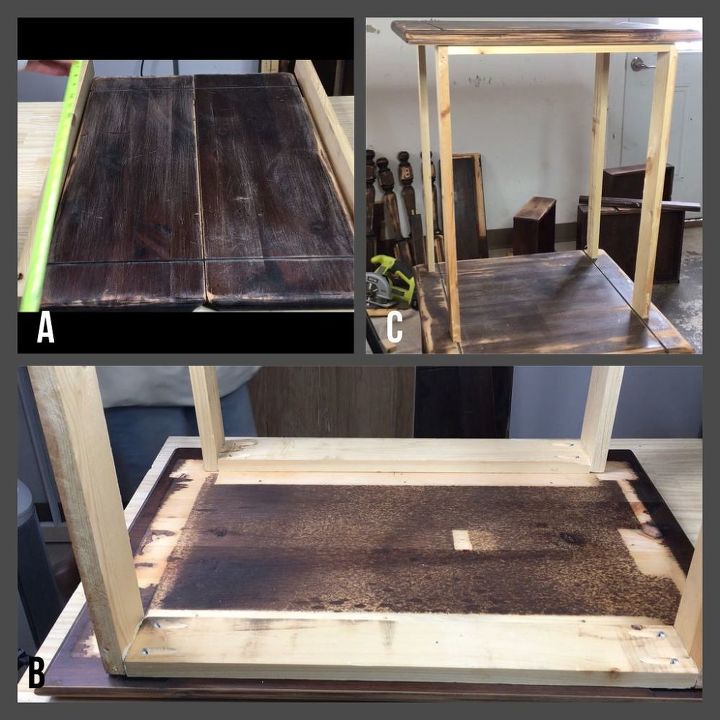
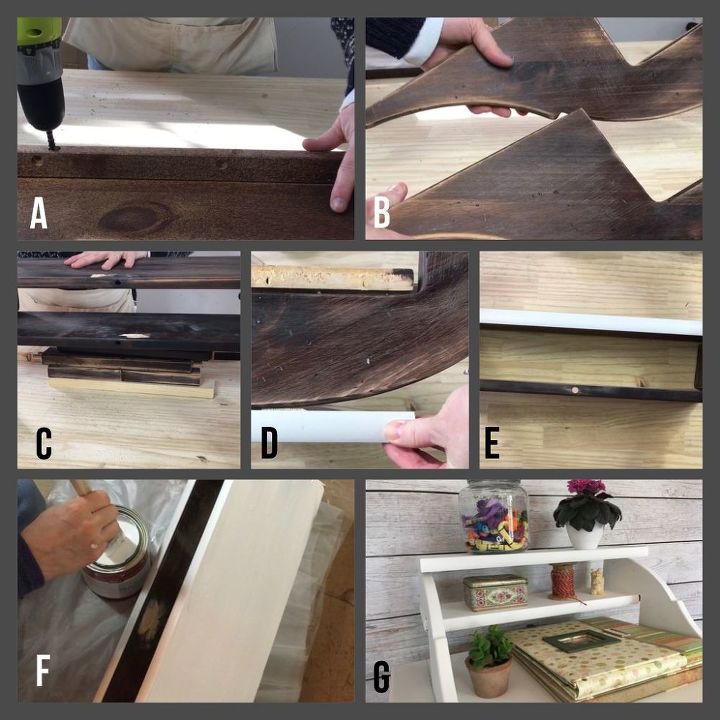
A-I wanted to make the leaves into doors so I measured them and build a frame using scrap 1”x2” pine
B-I build two “U” shapes for the front and back and attached the them to the top of the leaf table. This would be the top of the cabinet.
C-I place this onto the 2 drawer table to make sure it fit.
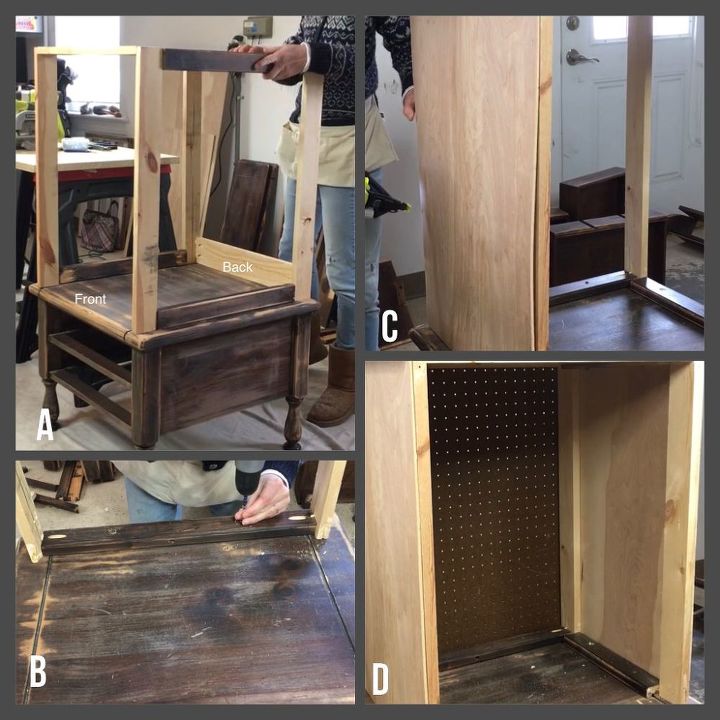
A-I used the side pieces of the leaf table to secure the ”U” shapes to the two drawer table
B-using screws from the orginial table
C-With scrap plywood I added sides
D-And pegboard to the back
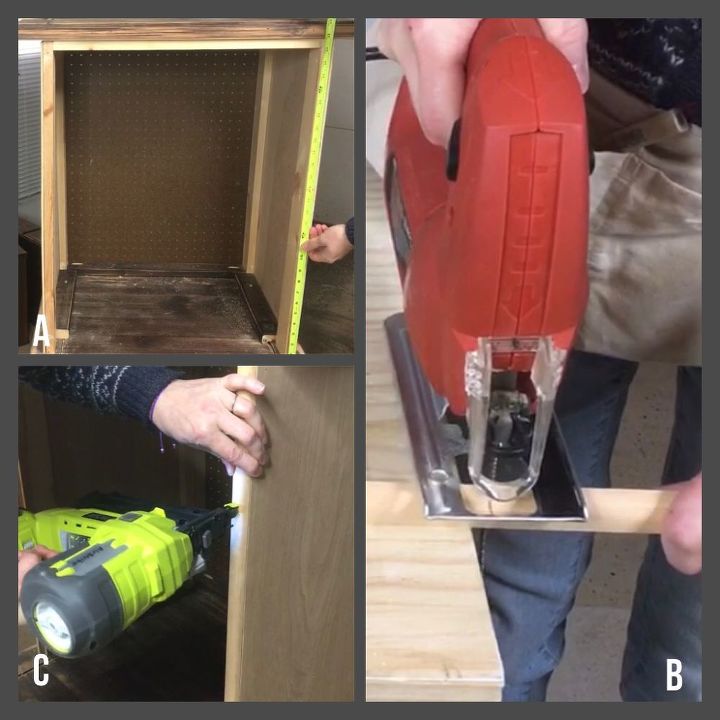
A-Measuring all around the cabinet
B-I cut trim
C-And attached with an air nailer
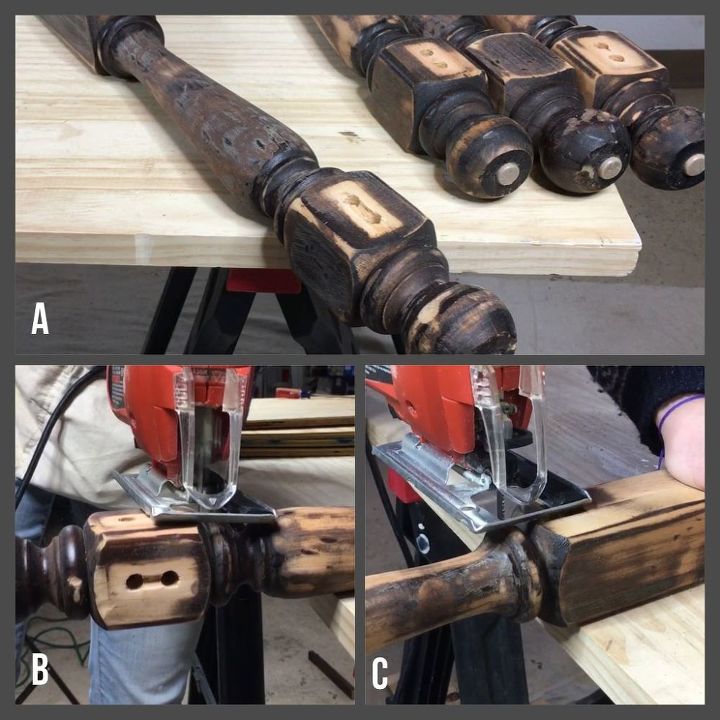
A-Using two legs from the leaf table
B-I cut off the bottoms
C-And the middle pieces to make risers for shelves
For the shelves
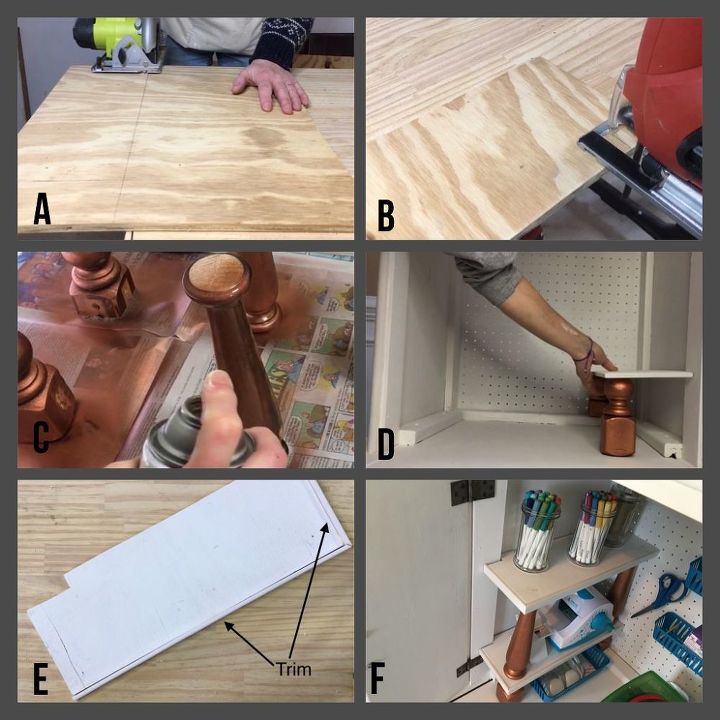
A-I measured and cut shelves from scrap plywood
B-Cutting out notches so they would fit flush to the sides of the cabinet
C-I spray painted the leg pieces copper and painted the shelves white
D-I placed the legs where I wanted them and made sure the shelves fit properly. I also added a small piece of wood to the side of the cabinet where the shelf would rest.
E-I added trim to two of the sides of each of the shelves
F-Using an airnailer, I attached the legs to the cabinet and the shelves to the legs.
For shelving on the top of the cabinet
A-I used the side pieces of the leaf cabinet, removing the small pieces that held the drawer
B-I used the wings that once held up the leaves
C-I attached the two side pieces to the wings with screws from the orgininal table. Because the wings were curved, I used small bits of wood to make the shelves level.
D-I added to rim to edges of the shelves
E-And trim to the front
F-I painted the entire shelving white
G-and attached it to the top of the cabinet with screws
Hardware
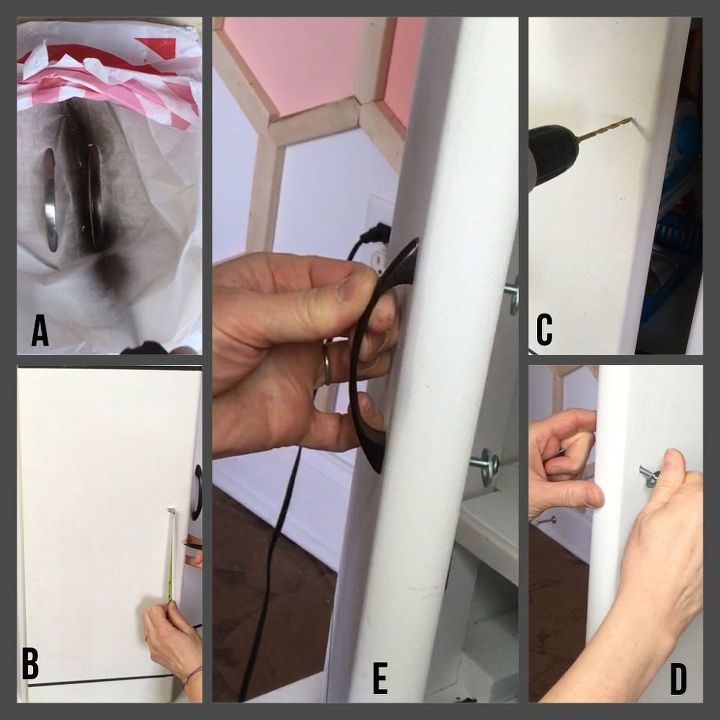
I spray painted the existing knobs and put them back onto the two drawers. I only had one knob left so I purchased two simple pulls
A-I spray painted them the same color as the knobs
B-Measured the front of the doors
C-Drilled holes through the doors
D- The screws that came with the pulls were a little long so I added a washer to the screw and screwed it through the hole
E-And screwed on the pulls
The outside of the cabinet was complete!
Now for the inside.
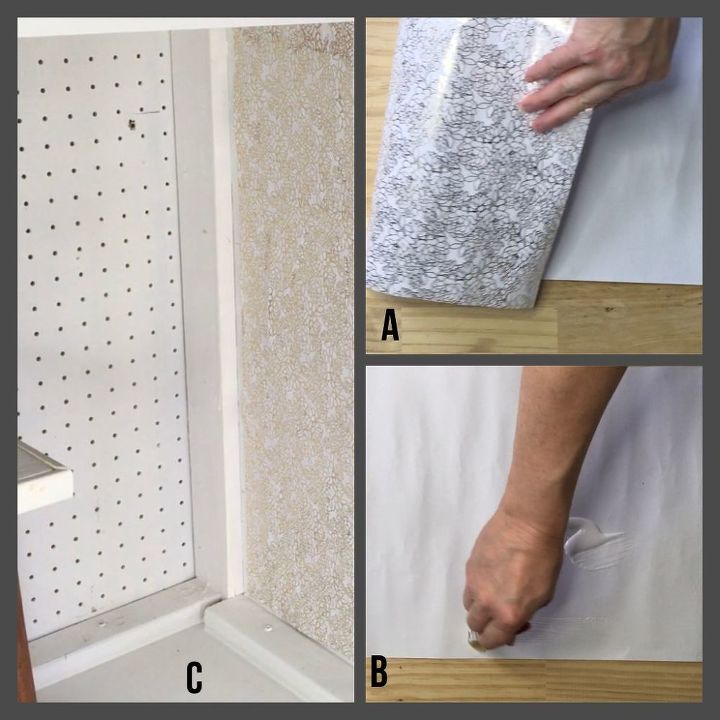
A-I wanted to dress up the inside a bit so I used wrapping paper I had on hand. I cut it to fit
B-Applied Mod Podge to the wrong side
C-And attached it to the inside side of the cabinet, smoothing it with a credit card
To add hanging space
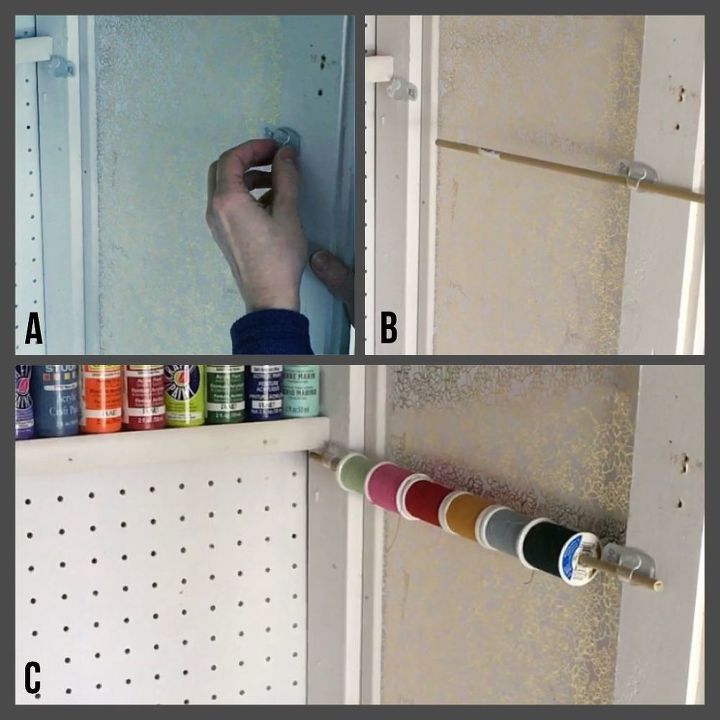
A-I attached cord holder Command Hooks to either side
B-Slid a piece of dowel through the hooks and cut it to size
C-I used this to hang spools of thread and washi tape
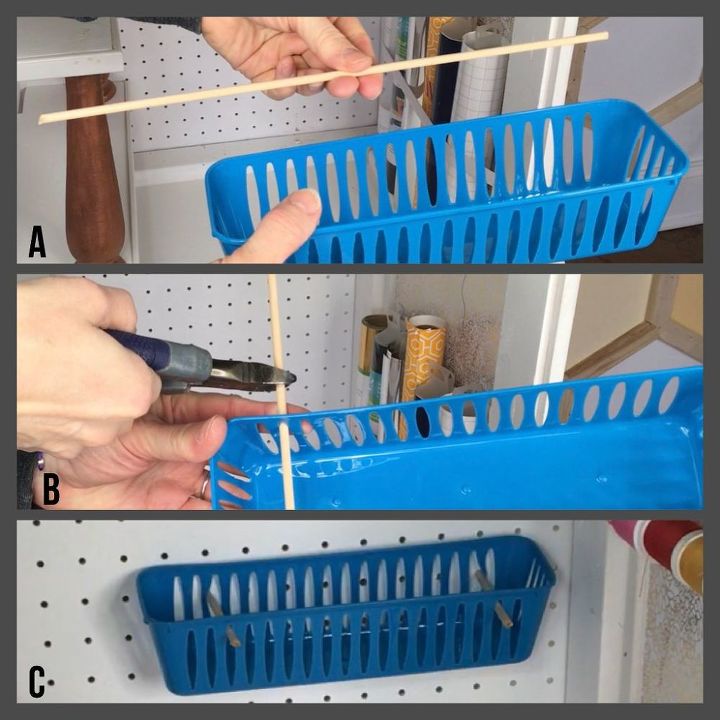
To add items to the peg board
A-I purchased dowel that would fit into the holes of the peg board and using a basket I had on hand
B-I threaded the dowel through the basket on either end and cut the dowel to size
C-I placed the dowels into the holes of the pegboard and hung the basket
I used the baskets to store smaller,lightweight items
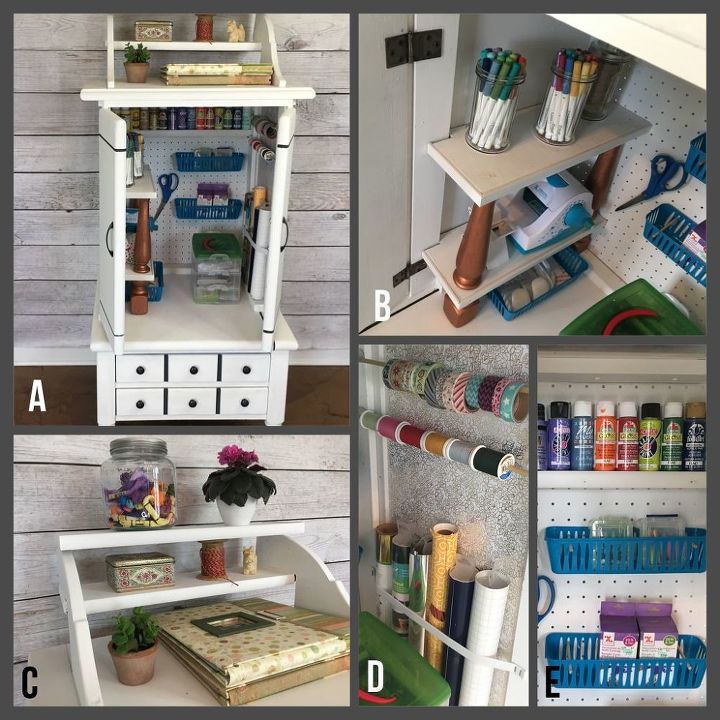
A-Here is the finished cabinet! The bottom is the orginial table with two drawers. The only thing I did to that table was sand it, paint it white and paint the knobs on the drawers.
B-The shelving holds pens, twine, my Xrons and a basket of odd and ends
C-The top shelving looks so pretty and is very useful
D-I stapled a piece of elastic to either side at the bottom. This is great to hold roles of paper and vinyl
E-The thin shelf at the top is made from one of the sides and trimmed out to hold paint bottles. More dowel pegs were added to hold another basket and a pair of scissors.
The only thing I had to purchase was hardware for the doors, a dowel and a few pieces of trim. Everything else were items I had on hand or pieces of the original side tables including the screws!


Comments
Join the conversation
-
Very cool. This reminded me of the children's story book: "Mike Mulligan and His Steam Shovel"
-
absolutely beautiful. Great job. I love it that women are getting into making different things out of things.


Frequently asked questions
Have a question about this project?