


Easy Custom Made Toilet Paper Holder

by
Sherry
5 Materials
$10
5 Hours
Easy
The sky is the limit for how you can design this. I chose a simple small box with a shelf for a phone or another small object. It can be created to hold a spare roll of toilet paper if you'd like. It fits inside the dimensions of a standard wall.
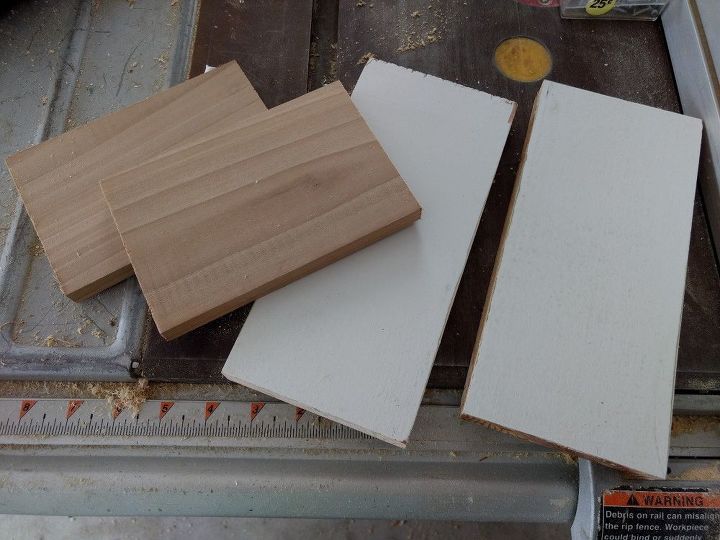
I started with scrap wood that was laying around. The dept is 4" for each piece. This measure will fit perfect within a 2 x 4 constructed wall (with 1/2 drywall). I should note that I used the back of the drywall from the bedroom wall as the back of my box.
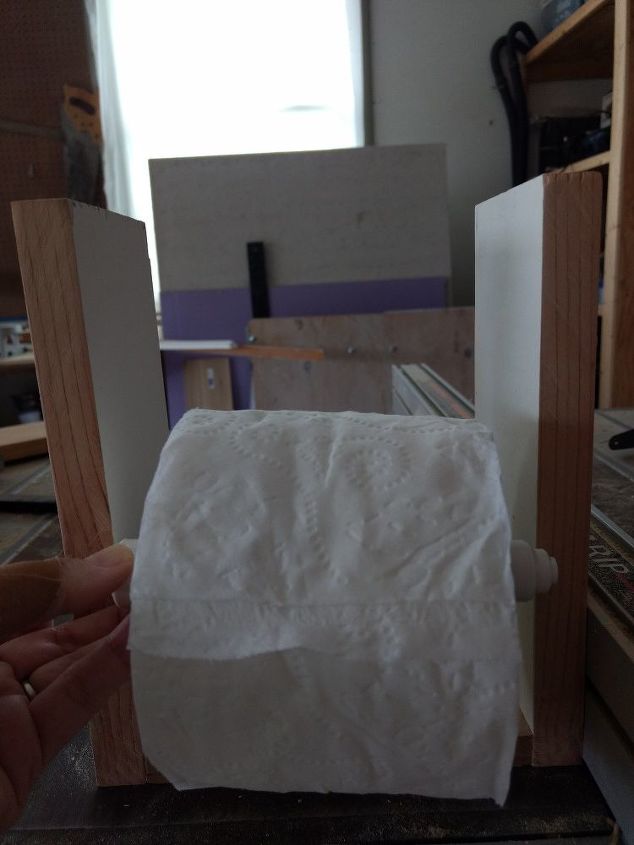
This is how I figured out how wide to make my box, so that the spring rod would have a little tension and there would be plenty of room for the paper. You can just measure the rod and subtract approx 1/2 inch. This would be your inside width measurement.
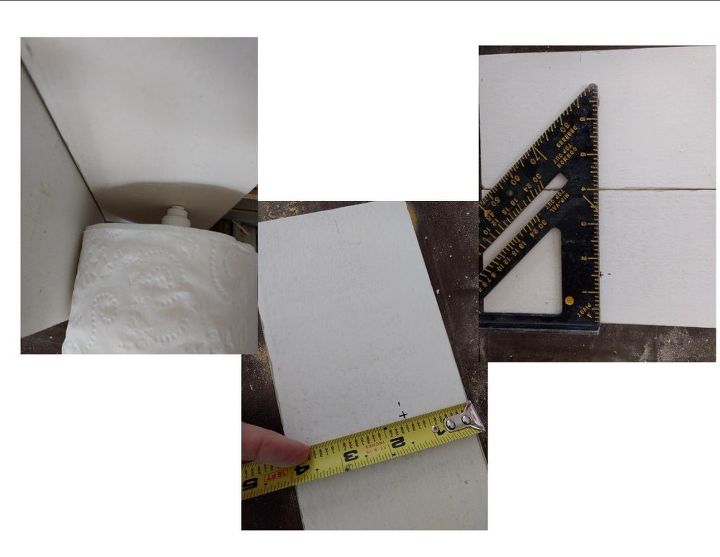
Next, I figured out exactly where the spring rod should be placed in the box. It cannot be centered from front to back or the toilet paper will not fit. I set mine at 1 1/2" from the front of the box and 3" from the bottom. I then marked the location on each side piece so I'd know where to drill a small hole for the end of the rod.
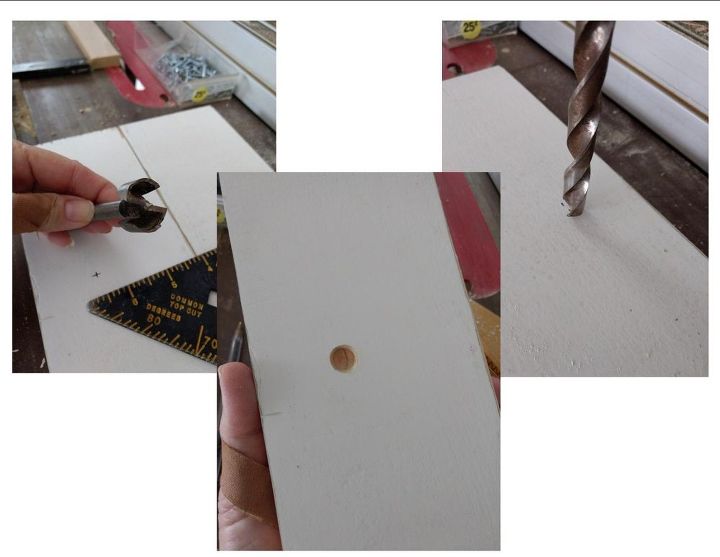
You'll then drill a small hole in each sidewall (not too deep). I recommend a hinge boring bit/forstner bit (pictured left), but a regular drill bit will work. I didn't have a small enough boring bit, so I just used the one on the right.
HELPFUL TIP: So you don't tear up your wood, start drilling in the reverse direction to get it started before starting to drill in the forward motion.
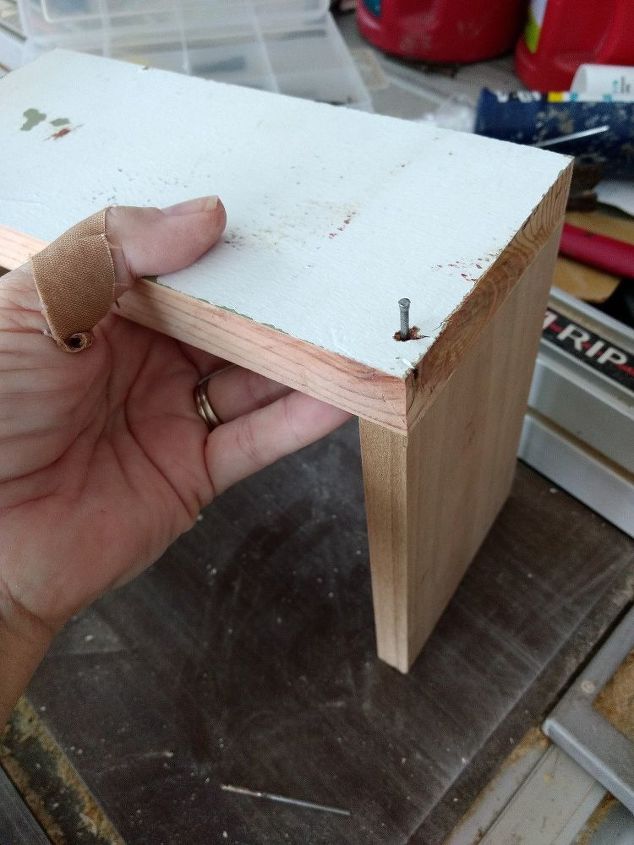
Once that was done, I made my box. I just glued and nailed it together (pre-drilling for the nail holes so the wood wouldn't split). If you want to add a shelf like I did, you'll need to measure where you want it and run your sides (before construction) through a table saw or use a router to create a groove for your shelf to slide into. There's always the option of just nailing it in without the groove, but it gives it more stability. I just used a good old hammer and finish nails, but a nail gun is great too.
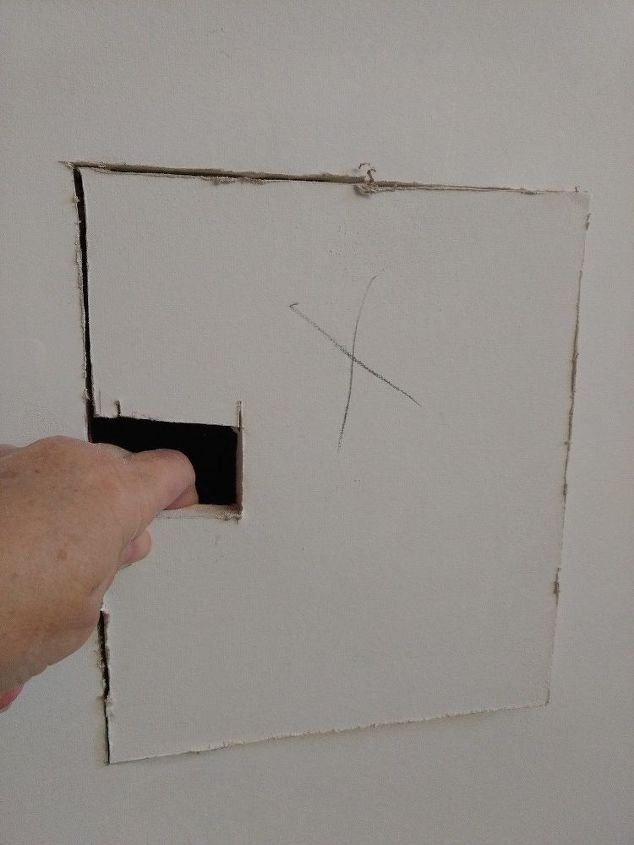
Once I finished the box, I held it up to the drywall and made sure it was plumb and level before tracing around it. It is not necessary for this to be right next to a stud, but I chose to attach mine to one. The back of the adjoining wall and the surrounding drywall (along with the front trim) really keep it in place quite well.
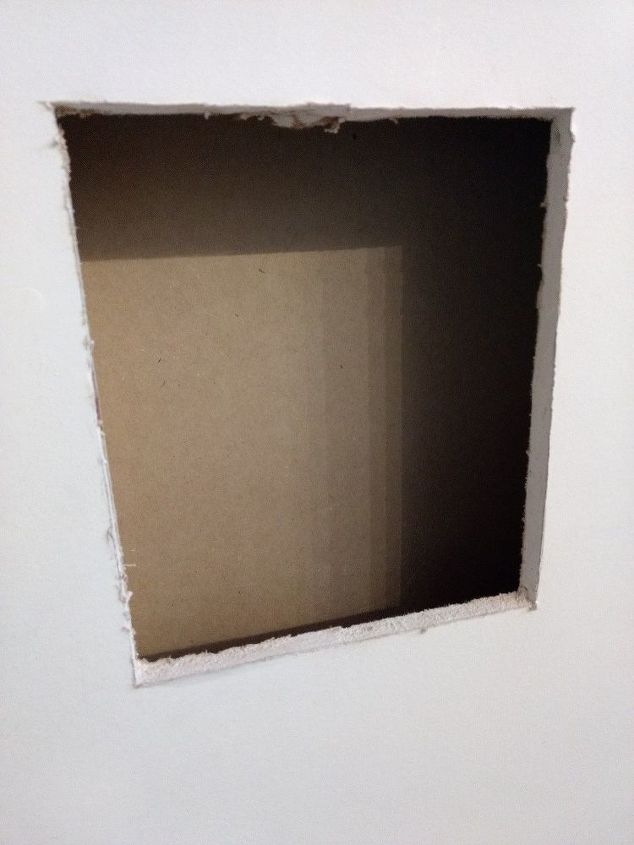
Here is the hole for the box. I used an oscillating tool to cut out my drywall, but you can use a box cutter or a drywall saw.

Next step is putting the box inside the hole. I had a stud to the left of it, so I placed one screw through the side where the spring rod hole is. I then caulked all the seams.
LESSONS LEARNED: It's a pain to try and caulk such tight spaces, so if you want to avoid this, make your box with a back on it and also paint it before assembly. I had to use an artist brush to get in the small areas.
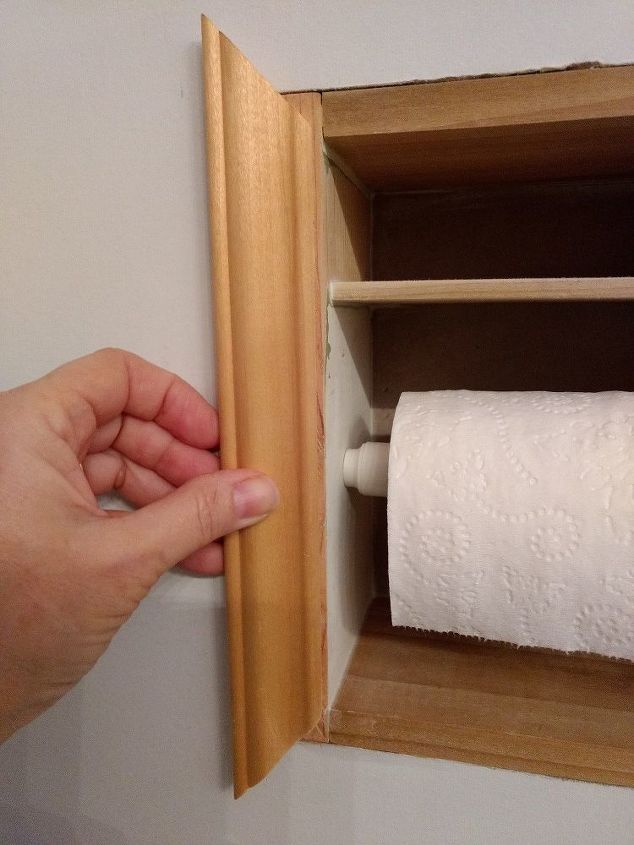
I attached this small trim around the perimeter of the box with a nail gun, leaving approx. 1/16" - 1/8" reveal. After all pieces were attached, I caulked the seams and used wood putty in the nail holes.
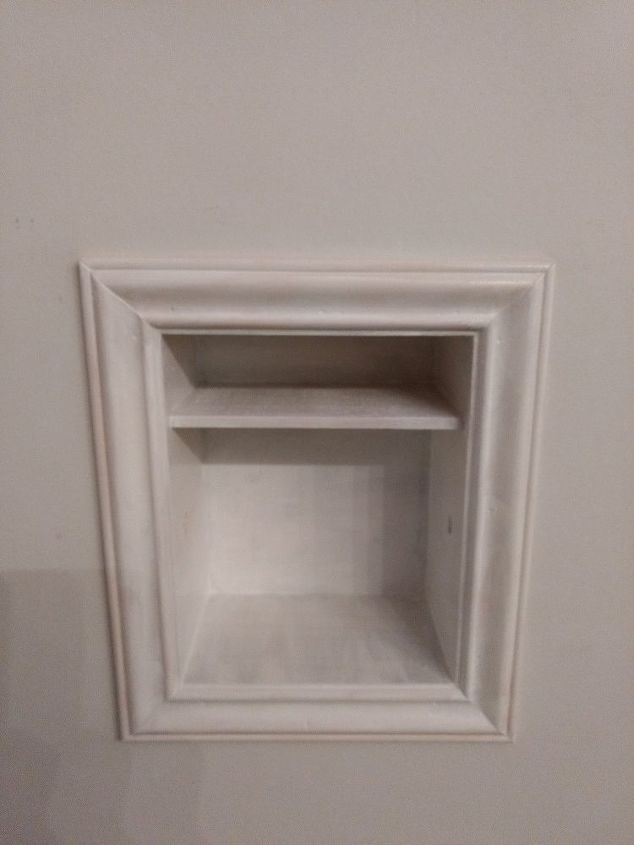
Here's what it looked like after the trim was installed and one coat of paint was applied.
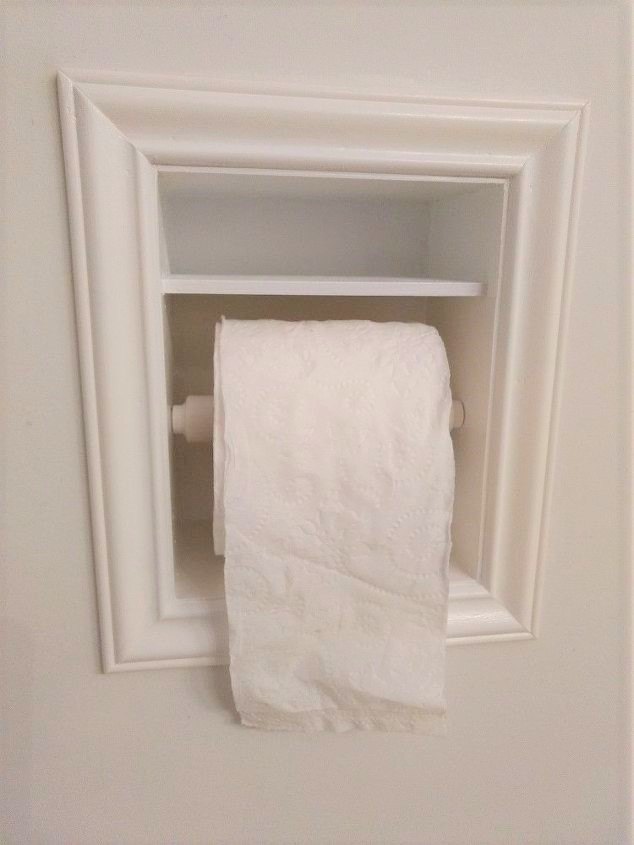
Here is the final project! I am quite pleased with how it turned out. I like the fact that it utilizes the unused space between the walls. It was an easy project, but a bit time consuming having to wait for caulk and paint to dry. I hope you like it too. 


Frequently asked questions
Have a question about this project?