


Vintage Gas Heaters Go Solar
4 Materials
$13
2 Hours
Easy
OK, I dare say I've had this old gas heater for 5 or so years waiting for inspiration, with the time to follow through with that inspiration, to strike.
When my son bought his house it was inside the fireplace, not hooked up to
anything, just sitting inside.
He was going to toss it, over my dead body!!
I have one similar that has been moved to a ton of different places in the house that I picked up at a thrift store on half price day for a song. (I won't mention how long I've had that one....)
What had I planned for either of them?
Who knows, but I had to have them.
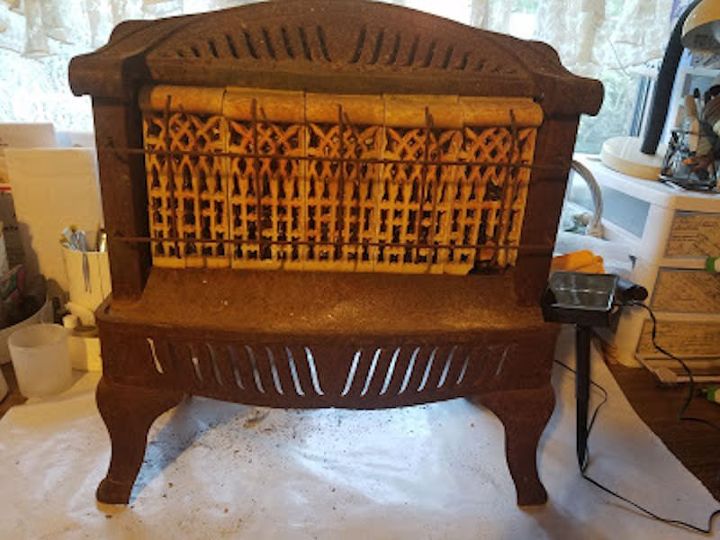
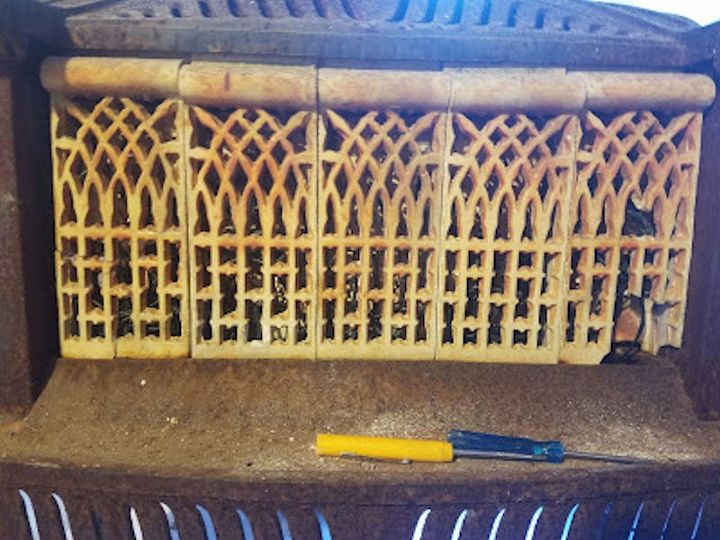
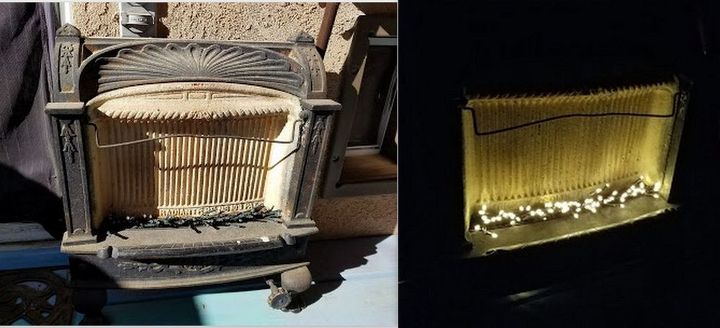
Ornate and pretty
This one from my son was more ornate.
It got my creative juices flowing.My light bulb lit!
Use solar string lights to create an imitation fire behind the front which had ceramic/stone/tiles? carved/cut detailed sections that I imagine used to hold the heat?
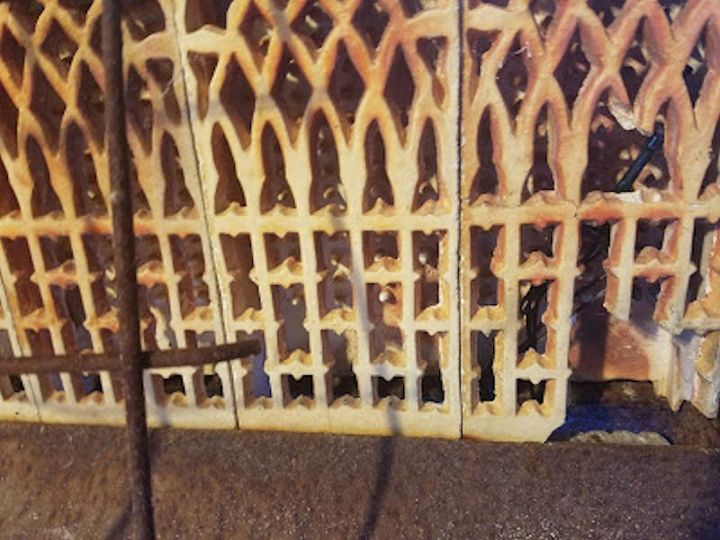
Some tiles were broken. I wanted to fix them.
This whole project was played by ear.
I removed the metal grate, that I imagine acted as a safety precaution when the ceramic tiles were hot?
Yes, I know I have a lot of question marks.
Hey, just guessing how these would work here! 

Gathered what supplies I thought I would need.
GE Silicone (since this would be going outside, GE Silicone handles the fluctuations in temperatures better than others, imo)
Solar Fairy Lights (in love with these things!)
A pokey tool (something to adjust the lights positioning behind the ceramic tiles)
I removed each broken section out and siliconed them back together.
There were pieces missing, but did the best I could.
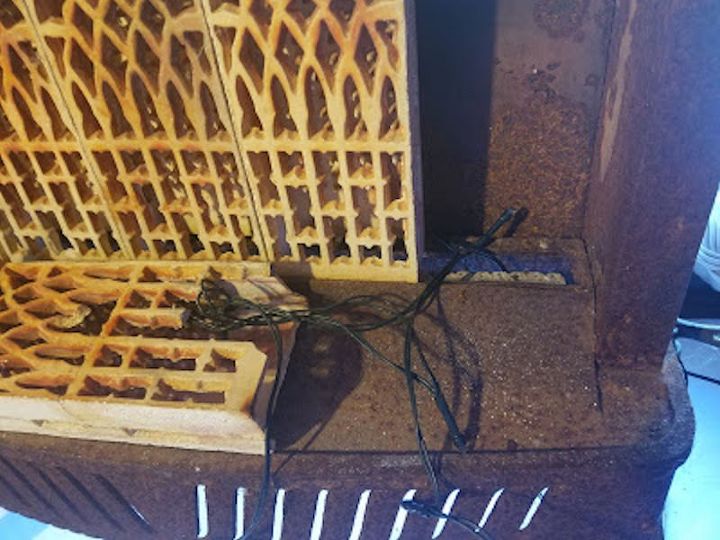
I went out and measured how long the light string would need to be to reach where I needed to put the solar receptor. Didn't want to run short!
I left the tiles dry over night. While they were drying I started weaving
the lights behind the ceramic tiles that were still in place.
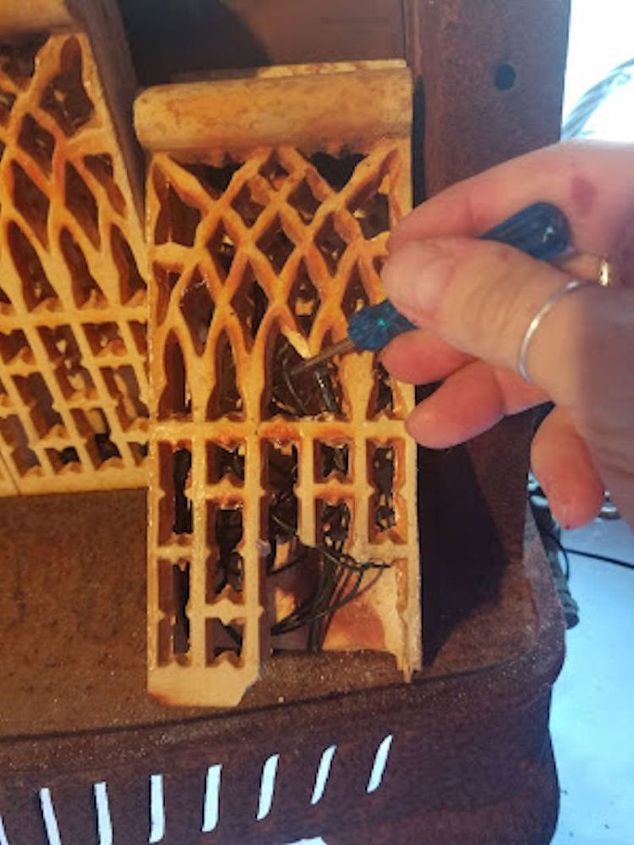
Once dry I placed the repaired tiles back in, using my pokey tool (turned out to be 2 tiny screwdrivers)
I gently worked and weaved them around so they wouldn't be in a clump.
After the empty space behind the tiles was full, I still had quite a bit of length of lights left.
I really didn't want any lights to show outside of the heater.
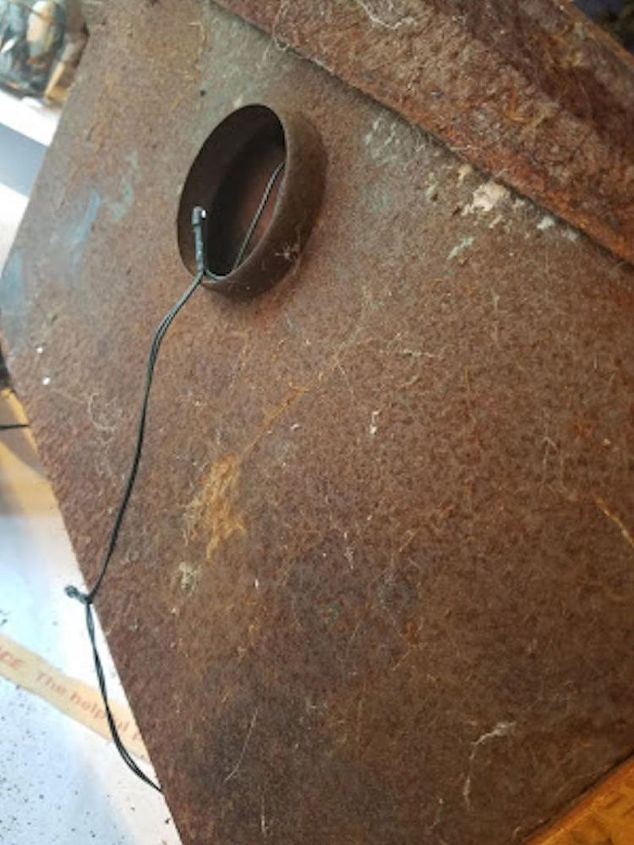
I looked around the back and saw a hole, guess that is where the gas pipe would have hooked up.
I brought the light string up and pushed the rest of them inside the hole.
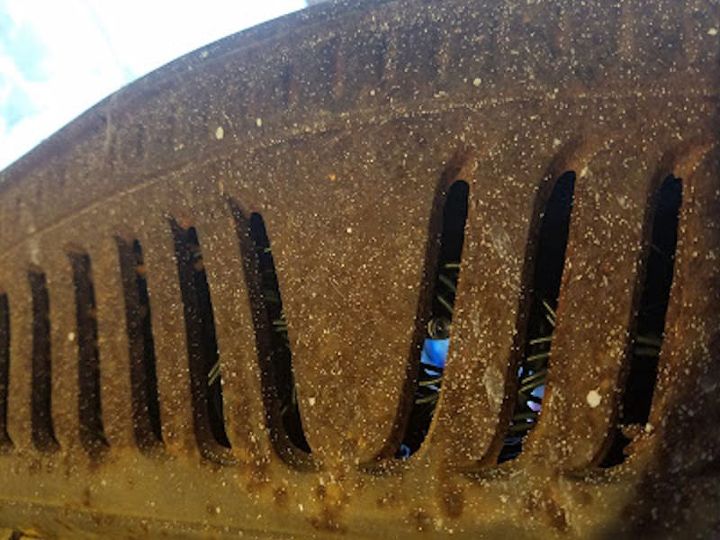
Lo and behold it led to the empty space along the top that had cut outs in it. I worked the lights as evenly as I could all through the length of the top.
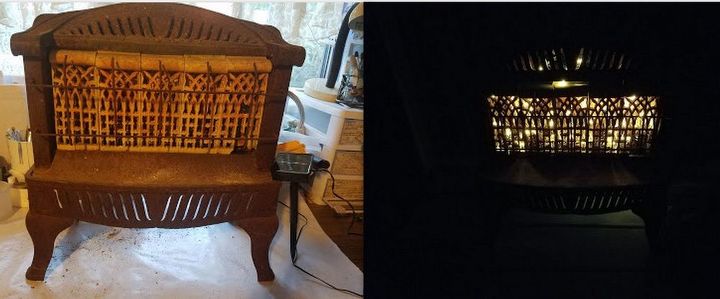
Now by day it just looks like an old heater,
but come night .....
It comes alive!
I'm surprised how it could pass for a mini fireplace!
Here's the other one I had. Not as ornate as my Son's.
But I still love it. It must weigh 10 times as much as my son's!
Wasn't quite sure how I was going to place the lights, there wasn't anything to hide them behind.
I ended up just running them along the bottom where the burner? is. It looks like flames would have come up from there. And that's just what it looks like at night.
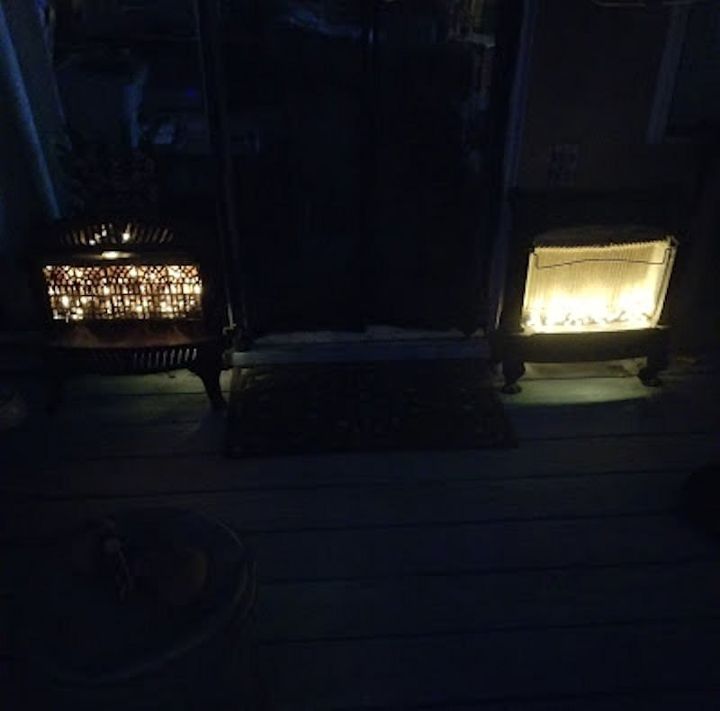
I wanted to be able to see them from inside the house as well as outside. I placed one on each side of my sliding glass doors.
You see the backs from inside and a subtle glow of the lights.
I love that I don't have to turn them on and off or pay the electric company to use them.
I love how they turned out.
For more info and photo's visit: http://dragonflytreasure.blogspot.com/2018/01/vintage-gas-heaters-go-solar.html

Want more details about this and other DIY projects? Check out my blog post!


Frequently asked questions
Have a question about this project?