


Stop Tripping!! (The Breaker)
8 Materials
$60
3 Hours
Advanced
A problem arose when the outlets in the kitchen were used they tripped the breaker. To solve this problem we needed to investigate what was causing the breaker to trip. We just installed a back splash to the kitchen a few months ago. Now a new electrical line was added from the breaker box into the mother-in-law suite about two years ago. And all of the new wiring was suppose to be tied into the new electrical line. And this is the problem the new line that was added all of the outlets were supposed to be tied into the new line. So now we have to tear out all the hard work. It’s time to get to DEMO. If you are not comfortable with dealing with electric PLEASE CALL AN ELECTRICAN.
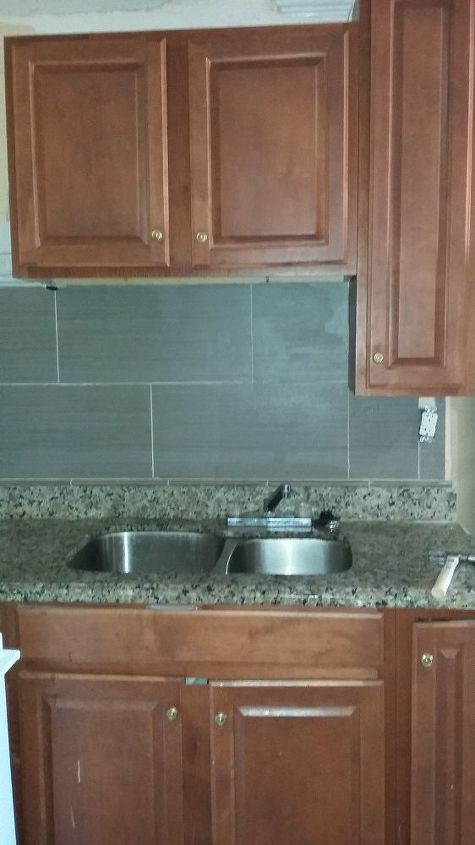
Before DEMO!!

Before DEMO!!
If you are not comfortable with dealing with electric PLEASE CALL AN ELECTRICAN.
1. First thing first-DEMO!!
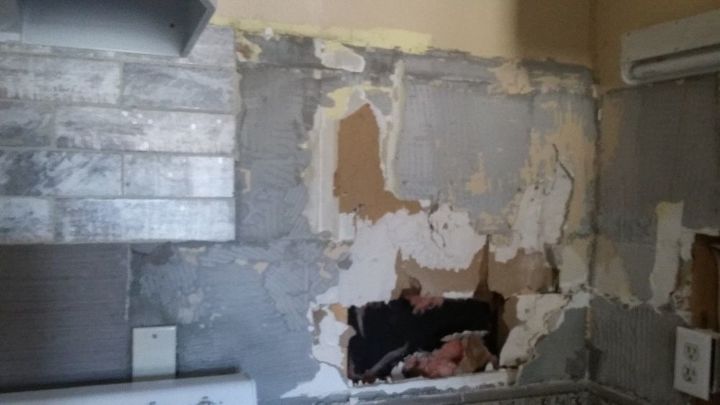
In the Middle of DEMO!!
2. PLEASE LOCATE AND MAKE SURE THAT THE BREAKER IS TURNED OFF BEFORE ATTEMPTING ANY REPAIRS!! Now it’s time to make sure every stud is uncovered and being able to see all the wires within the walls and which ones were connected to each other.
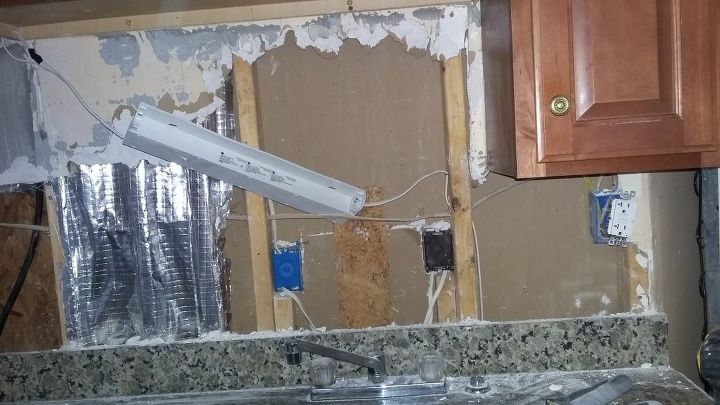
Follow & Label Wires
3. We need to mark all the lines. NOTE: Use a pattern that you are used to so it won’t be confusing to you once you get started. See what lines are connected to which outlet or other sources of power.
4. The white wires that you see are supposed to be yellow. The yellow wire is the 12/25 (which is the new wire color for wiring outlets) and the white wire is the wiring from 33 years ago. (Right) The problem is there were too many outlets and can lights connected to so few electrical lines.

Pulled White Out & Joined the Outlets
5. To wire and outlet you put the black wire to the gold side. Attach the white wire to the silver side of the outlet. The exposed copper color wire connects to the bottom green screw. For the bottom green screw make a small hook like; so the copper wire can hook onto the green screw and tighten.
6. To connect from one outlet to another you drill a hole in the middle of the stud (beam). The drill bit size to use would be ¾ “. And pull your cord through the holes that you drilled. I normally start from the end and work my way back to the beginning. Because I never want to come up short on the wiring. I also pull out about 6” inches for each connect.
7. So once you have attached the wiring to the 1st gold, silver, and ground on the outlet; you then pull your wiring through the holes until you get the next outlet.
8. You will continue doing this until you have made it to your last outlet.
NOTE: You are able to attach 6 outlet to each other. If you are attaching a GCFI outlet, the proper way is your wire that has the power coming from the breaker box goes in the side that is labeled: “LINE”. And the outlet that needs the power goes into the other side.
9. After attaching 4 outlets and 1 G.C.F.I. together I went to turn on the breaker checking to make sure that everything was wired properly and up to code. If the green light comes on from the G.C.F.I. all you wiring should be correct. And problem solved.
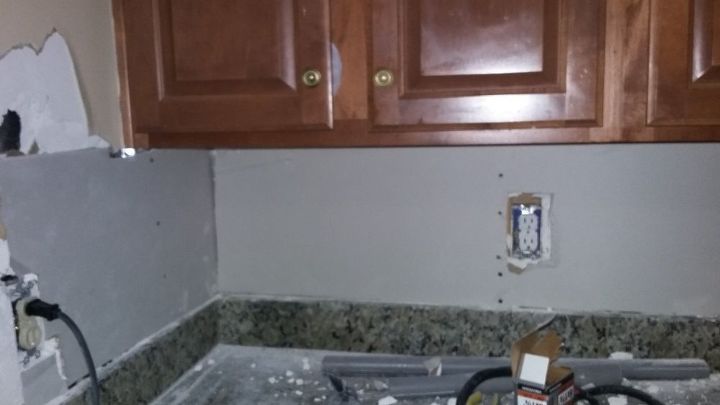
Closed Wall with Sheetrock
Now you have to close up the walls with sheet rock. I hope this has helped someone with their wiring issues.
Comments
Join the conversation
2 of 4 comments
-
Great tips and tutorial. Did a lot of wiring in my day. Codes are different in all regions of the country. Everyone should check their local codes. Where I live Romex is not code. We have to use electrical thinwall conduit and run the wires through it.
-
Wow. That's amazing how different cities,counties, and/or just different parts of the world require or don't require the same thing. I think if this code works for one it should work for all. That's just one personal opinion. Thank you for your time. Have a good D.I.Ying day.,


Frequently asked questions
Have a question about this project?