


Shabby Chic Magazine Rack With Quote

by
Lauren Z
4 Materials
$5
2 Hours
Medium
Transform plain items like this magazine rack for pennies using spray on chalk paint.
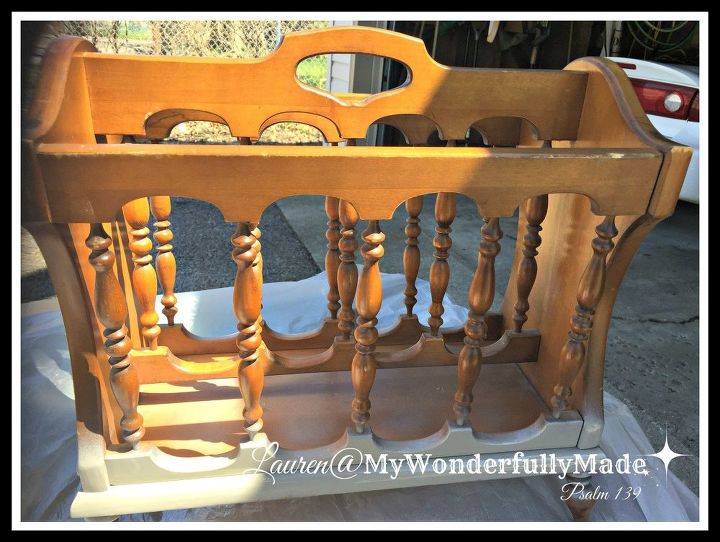
Using Rustoleum Chalked Spray Paint, there was no need for sanding or priming. Even though this was a smooth, glossy finish, the paint covered in just two coats. The spray paint makes it easy to get into all of the 'nooks and crannies' of a piece like this.
Elevate any simple piece of furniture by adding a hand-painted quote! Print your quote out on computer paper to adjust size and positioning on your piece. Cut a piece of graphite paper (found at your local art supply store by the roll) and tape it underneath your print out with the graphite side against your furniture. Using a pen, simply trace over the letters to transfer your quote.
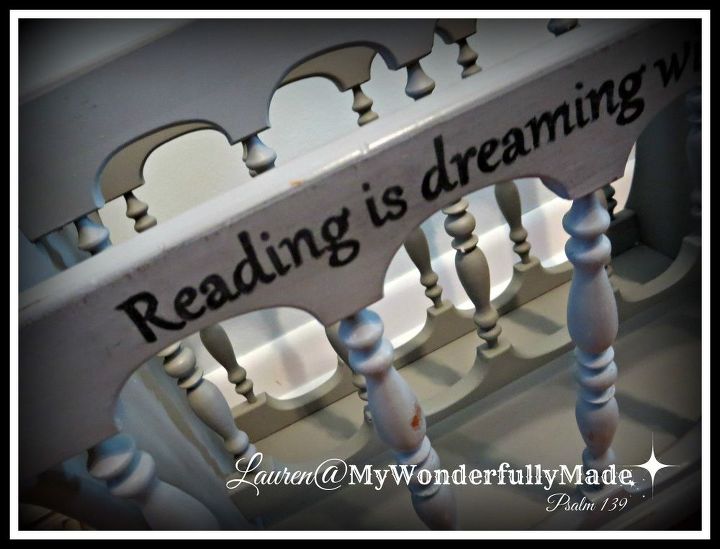
Elevate any simple piece of furniture by adding a hand-painted quote! Print your quote out on computer paper to adjust size and positioning on your piece. Cut a piece of graphite paper (found at your local art supply store by the roll) and tape it underneath your print out with the graphite side against your furniture. Using a pen, simply trace over the letters to transfer your quote.
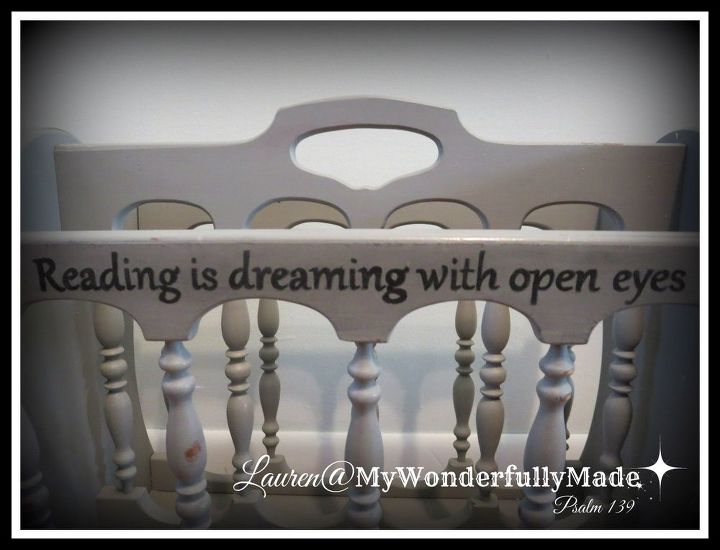
The 'trick' to easily painting in the letters is to thin your paint. I just use regular acrylic craft paint. Put a small amount into an old lid or other flat container. Dip the tip of your brush into some water, then grab some paint onto the brush and begin painting. I would also invest in a fine-tipped, quality brush from the art supply store. Mine is a Round #2 brush and cost about 8.00 but I've had it for years and if you care for them, they'll last a long time.
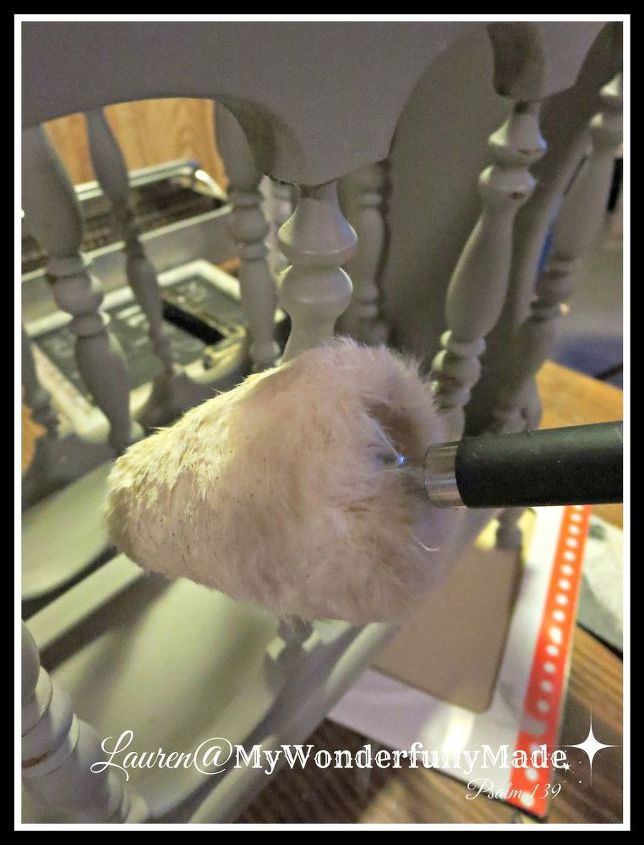
Once I was finished, I lightly distressed the words and the rest of the rack 'here and there' to give it an aged look. I then finished with a coat of clear wax, buffed to a soft shine. I used a 'fuzzy' buffer attachment on my cordless drill. It's great for getting detailed spots like these spindles buffed to a nice shine.
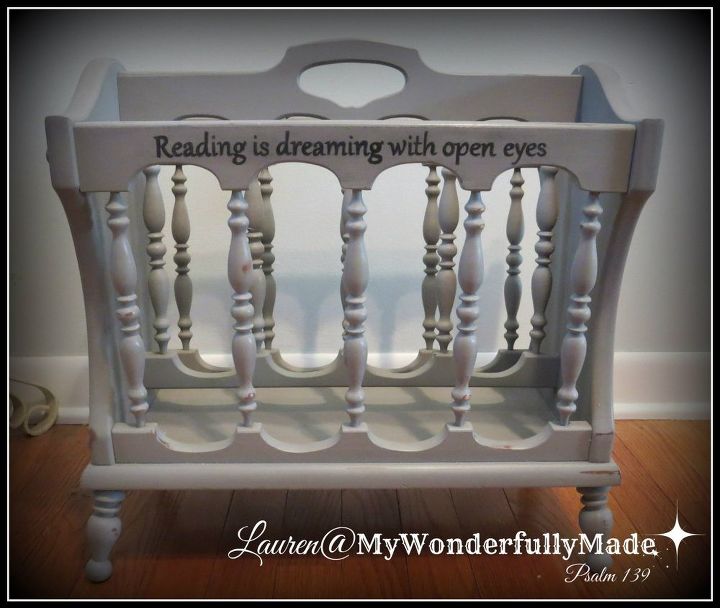
A 5.00 magazine rack with a new life.
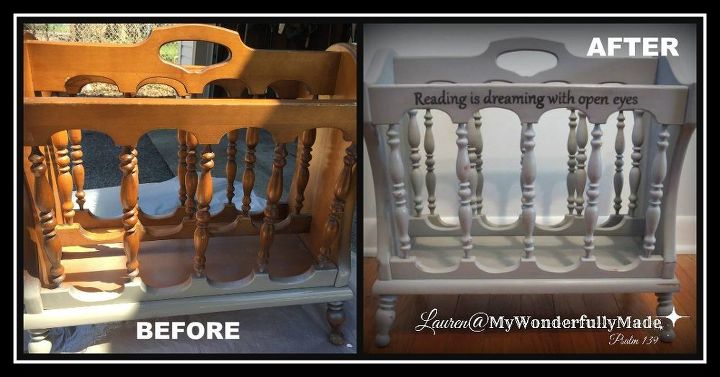
Painting and personalizing = total transformation and a one-of-a-kind piece of furniture.
Resources for this project:
See all materials


Any price and availability information displayed on [relevant Amazon Site(s), as applicable] at the time of purchase will apply to the purchase of this product.
Hometalk may collect a small share of sales from the links on this page.More info
Want more details about this and other DIY projects? Check out my blog post!


Frequently asked questions
Have a question about this project?