How to Design Shabby Chic Pumpkin Centerpieces

This is not your typical pumpkin! Why do pumpkins need to be orange? Well in my house they don't, I wanted something that matched my farmhouse style so I designed these easy pumpkins that are rustic but elegant.
So let's not waste time, it's October already, but these are fast and you can use them until Thanksgiving.
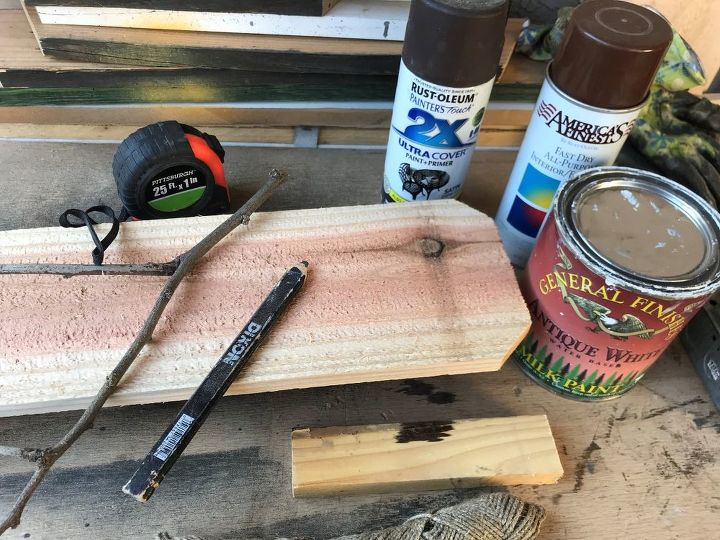
Tools and Materials:
Spray paint (dark and light brown)
White chalk paint
Pencil
1x1 wood block
Branch
Twine
Nail gun
Wide 5.5" fence board
1. Cutting the Wooden Pieces
Let's get started!
Grab the fence board, the top of the board will already have the dog ear as they call them. Leave that and cut straight at 8" then use that as a template to cut all the rest.
2. Creating Different Sizes
Laying the dog ear on top of each of the boards and cut both sides to match one at 10" and 12" and 2 at 8" to make a set of 4 pumpkins.
3. Paint the Wood
Now that the wood is cut take your 2 brown paints and randomly spray the wood pieces not covering it all. However, you do want to paint all the sides
Next you will dry brush the white on top
The way to do dry brushing is to have very little paint on the brush.
Then you lightly push down.
Apply as much white as you want but do not fully cover it. This gives you depth.
Let these dry, it should only be a minute or so because you're using very little paint.
4. Assembling the Pumpkins
Once the paint is dry, grab a 1x1" wood block and cut it to fit in between the "dog ears."
Use a nail gun to attach the block. Nail it from the front for stability.
This is the back view once the block is attached.
You could paint the block but I didn't because I'm always in a hurry lol!
5. Adding a Branch Stem
Now, cut a branch from a tree outside and nail it on top of your pumpkin. Be careful not to get your fingers in the way, and ensure you nail it at a slight angle.
6. Finishing Touches
To complete your shabby chic pumpkin, embellish it with some twine. Simply tie a knot around the branch for a rustic look.
Here are my pumpkins. I turned one horizontal and left the rest vertical. I made a few of the following sizes: 8",10", and 12".
Discover More DIY Pumpkin Ideas
They look great on trays for the kitchen island or anywhere for this fall season!
Hope this inspired you to try a nontraditional color this year! Think outside of the box!
Happy fall y 'all
Enjoyed the project?
Resources for this project:
See all materialsComments
Join the conversation
-
 Cindy Holton
on Oct 18, 2018
I really like this. . Very good idea.
-
 Shelly L Nemeth
on Oct 20, 2018
Thanks
-
-
-
 Ern23833638
on Oct 18, 2018
Very cute....Iam going to give it a try!
-









Frequently asked questions
Have a question about this project?
What will remove tree sap from car without causing damage to the paint.
i am pretty sure can we try this with light orange and darker orange, cant we? just to be more traditional.
Did you misspel paint?