


Hand Carved Spatula
2 Materials
$10
8 Hours
Medium
This project will look great in your kitchen. In this tutorial, I show you how to carve a spatula from olive wood. The olive wood grain is spectacular, and it smells so good while carving. Carving is such a joy. You feel more connected with the wood and the object you're creating.
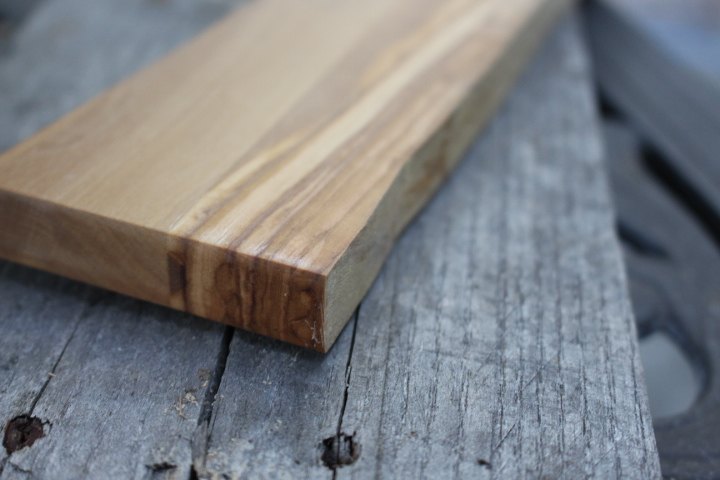
I like to use hardwoods for my handmade kitchen utensils. In this case, i had some olive wood lying around, and it was just the right dimensions for this spatula. The board was approximately 1/2 inch thick. The finished spatula is around 14 inches long.
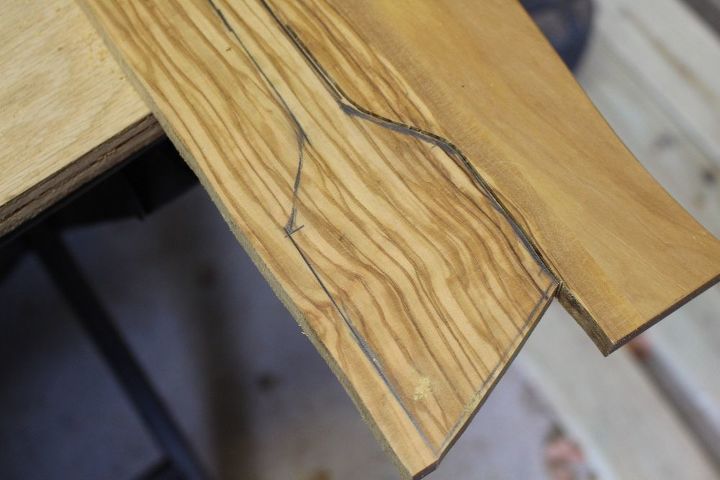
I went ahead and traced out a shape and design for my spatula. I tried to pick a section of the wood with the best grain pattern. You also want the spatula oriented lengthwise with the grain.
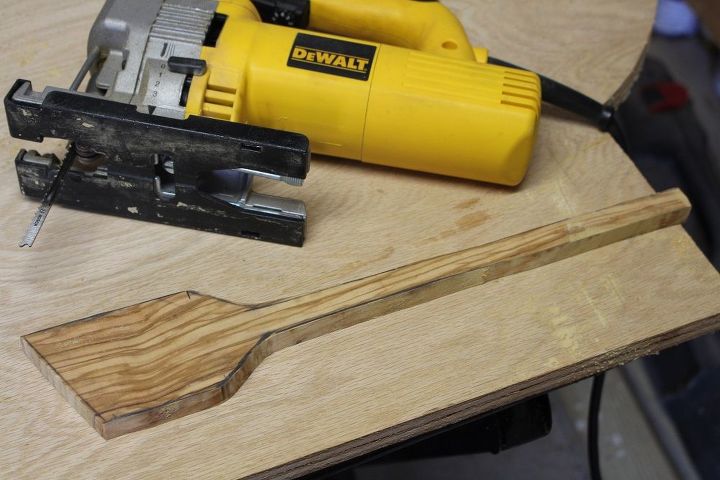
Used the jigsaw to cut the spatula out of the olive board. It helps to use a quick grip clamp to hold the board while sawing.
It also helps to use a curve-cut type of blade with the jigsaw.
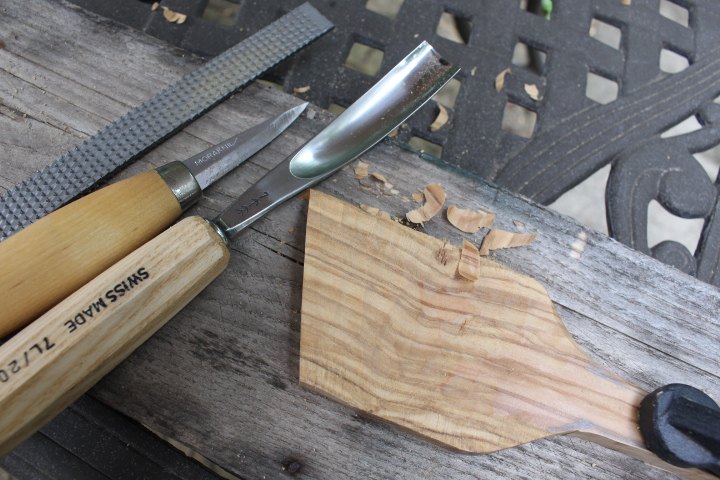
Here are some of the carving tools I used. A carving knife, a gouge, and a rasp. The more expensive carving tools are found in specialty woodworking stores, but you can find cheaper tools in hobby stores.
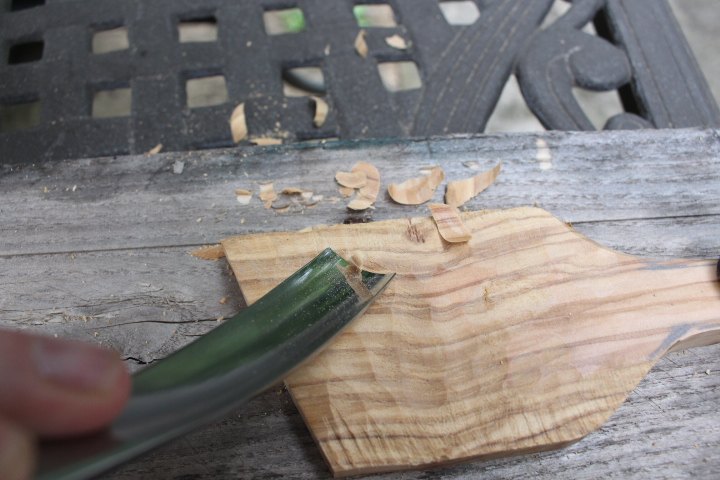
You need to secure the the spatula as you carve. Make sure the carving tools are moving away from your other body parts. It's no fun to cut yourself with these sharp tools.
As you carve, your hands naturally become a gauge for sizing up the spatula. When it feels pleasing to your hand and looks good to your eyes, it's done.
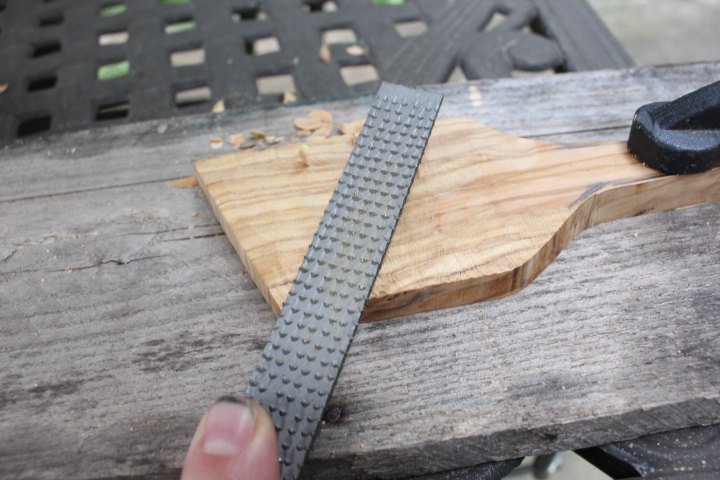
You can use a wood rasp to remove a lot of wood fast.
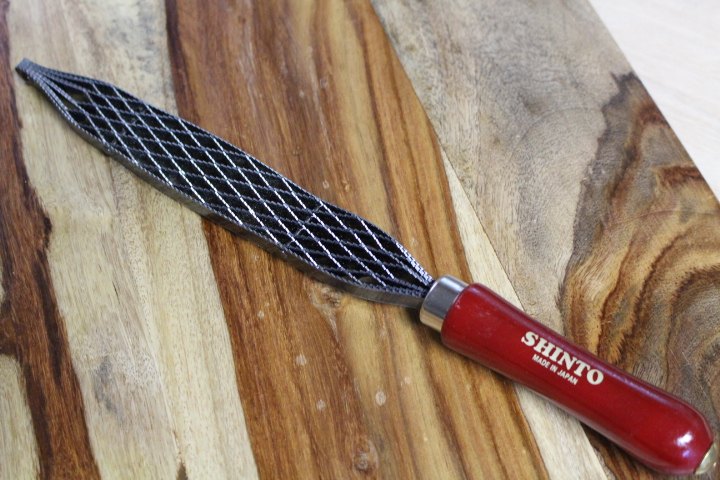
Another tool that comes in handy is the Shinto rasp saw. It has a fine and course side. Removes wood fast like the regular rasp file.
If you have a belt sander, you could also use it to remove wood at a faster rate. These tools could all be used in place of the carving knives, if you don't have one or don't feel proficient yet.
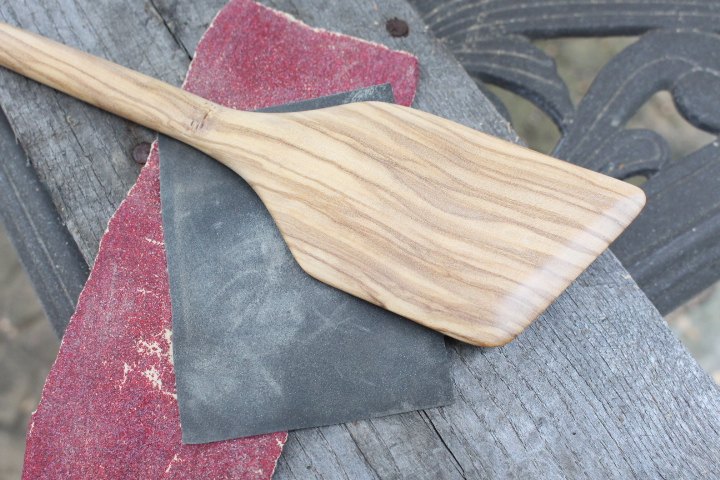
Use some course sandpaper like 80 grit and 120 grit. Then go finer with 220, 320, and 500. Put on the dust mask and protect you lungs.
This will take some time, but it's very relaxing. Again, your hand becomes the gauge and will help you decide when it's done.
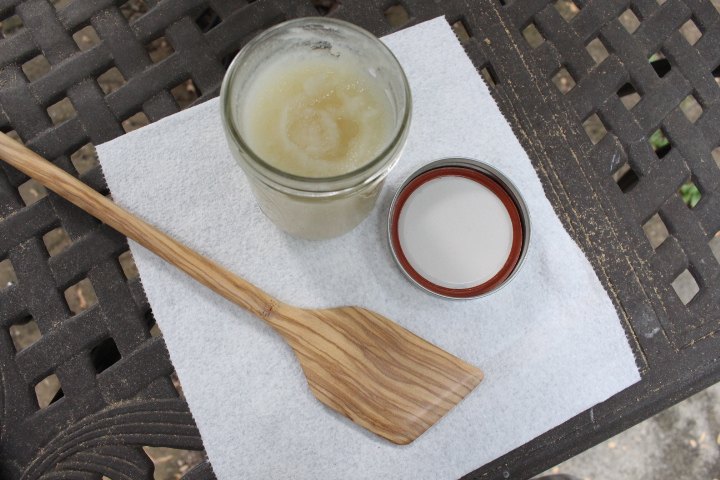
I used my homemade beeswax and mineral oil mixture for the finish. I love using this stuff. It makes the grain pop and puts a nice finish on the spatula. Thanks to my dad the beekeeper for supplying the wax.
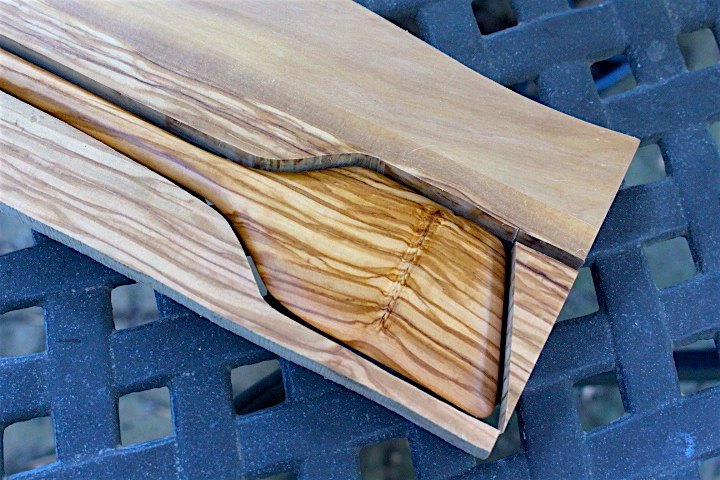
Here is the finished spatula. It works great and the hard olive wood should hold up for a long time. Be sure to check out my blog link below and view the full-blown tutorial.
Thanks for reading my tutorial! I invite you to check out my website: Four Oaks Crafts. If you like my tutorials, please subscribe and when you do, I'll send you a free Home Shop Safety & Tool Checklist. This list has helped a lot of people plan and organize a safe shop.


Any price and availability information displayed on [relevant Amazon Site(s), as applicable] at the time of purchase will apply to the purchase of this product.
Hometalk may collect a small share of sales from the links on this page.More info

Want more details about this and other DIY projects? Check out my blog post!
Comments
Join the conversation
2 comments
-
Good looking spatula. Love the woodgrain. Good share.


Frequently asked questions
Have a question about this project?