


Happy July 4th Challenge

by
Jennifer
7 Materials
1 Day
Easy
I try to make a new decoration every year for the 4th of July! This year I made a mobile, a peace sign and a few other things that will be in another post! All made from scrap wood pieces that I gathered together after several other bigger projects that I had made.
First one is the peace sign !
!
!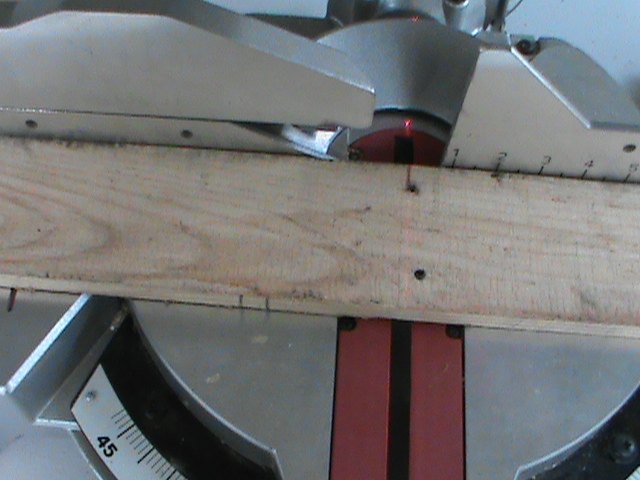
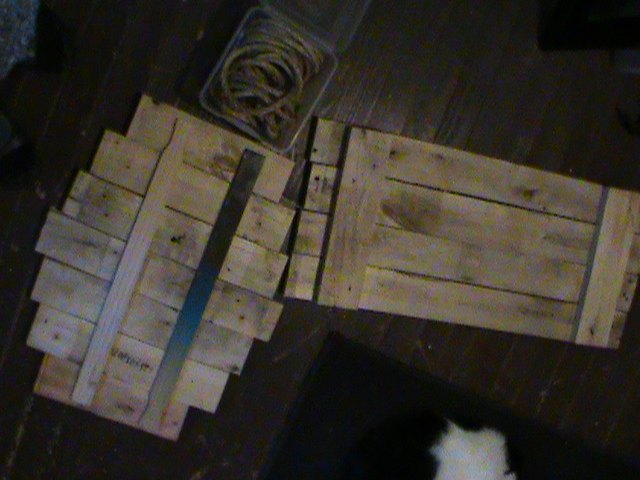
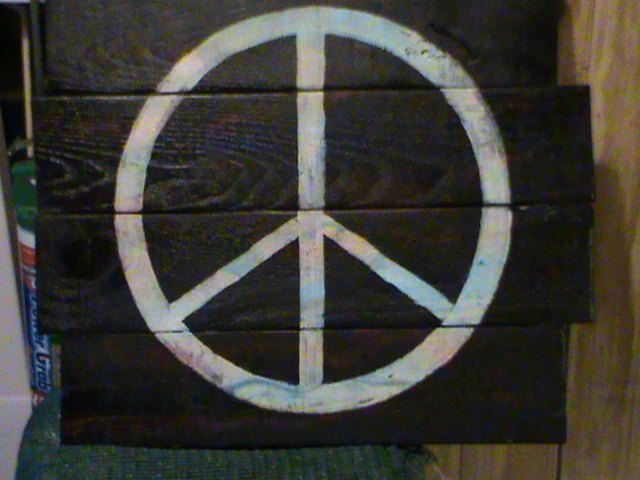
I have a bunch of scrap wood so I'm making several signs. I ended up making 5 different signs from just a few leftover pallet boards. The peace sign is 4 pieces of wood, about 16" x 14" overall. That is a pretty good size!
I used screws and wood glue on this sign. Sometimes I will use nails or the staple gun, it really depends on the size of the wall hanging/sign and the type of wood I'm using.
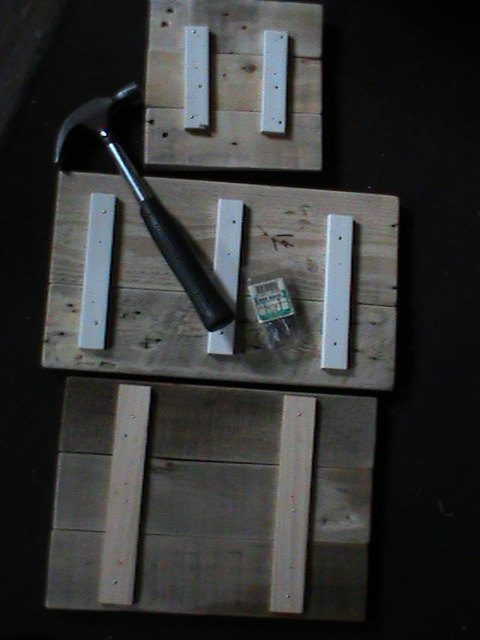
All of the wall hangings/signs I make are basically put together the same way, at least 2 pieces wood on the backs to hold them together along with adhesive in between the pieces of wood. One staple, nail or screw for each piece of wood used to make the front on the wall hanging/sign. For example, 2 pieces of wood on the back with 3 pieces of wood on the front would equal 6 screw, nails or staples or 3 pieces of wood on the back with 4 pieces of wood for the front would equal 12 screws, nails or staples. Super easy to put together! The peace sign has 2 back pieces and 4 front pieces of wood would equal 8 screws I used !
!
! 
Now for the front design! The fun part of making a sign!
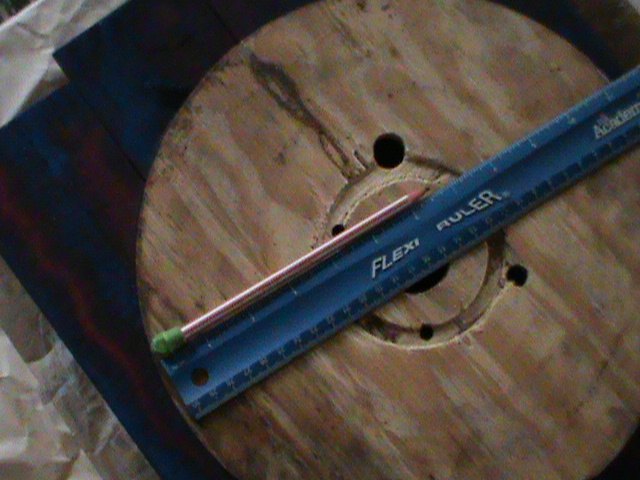
Anything round will work to outline a circle and a ruler will make some straight lines!
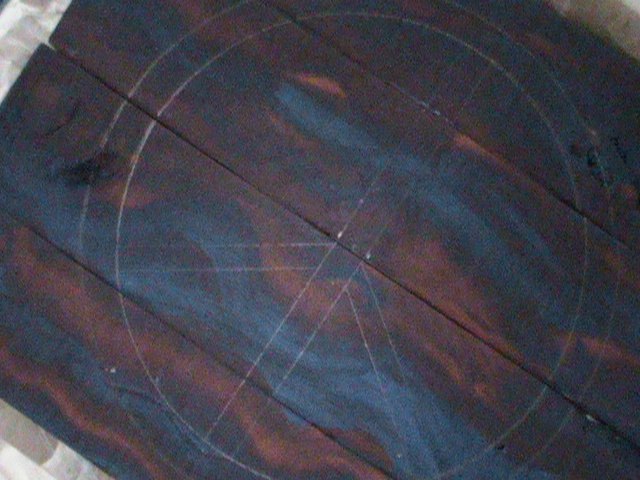
WaLa a peace sign!
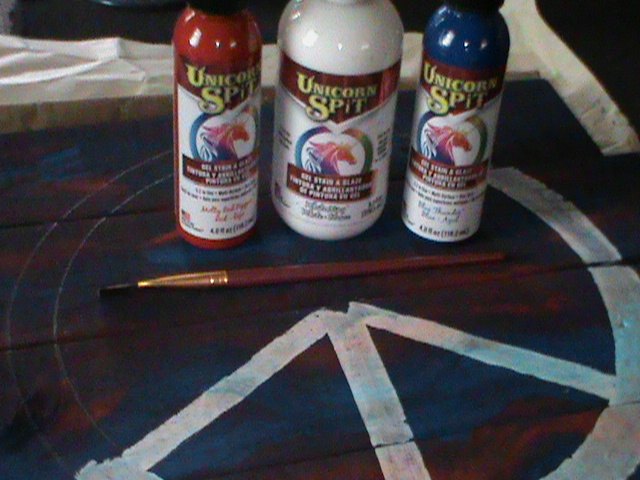
I used Molly Red Pepper, Blue Thunder and White Ning Unicorn SPiT! Just squirt some on the wood, take a paint brush and make waves ! Again super easy stuff!
! Again super easy stuff! I love the way this stuff looks on wood !
!
!
The last thing to do is seal with an oil based sealer like a gloss clear coat of spray paint or some poly! I used Rustoleum 2x clear gloss.
You can see the blue and red under the white peace sign  ! Pictures are hard to get with the darker colors but it is very cool looking when you look at it in person!
! Pictures are hard to get with the darker colors but it is very cool looking when you look at it in person! Now onto the next one !
!
!
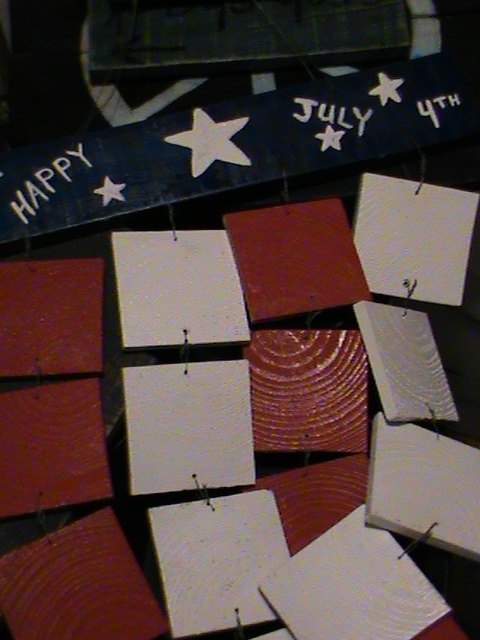
I cut a bunch of slices of wood from some 4"x 4" posts last year for another project that didn't work like I wanted it to so I scrapped that project but I still had all of those wood slices that needed to be used for something ! I used some of them recently on a wall art project but still had a lot more so I thought a mobile would be cute for the 4th of July decor!
! I used some of them recently on a wall art project but still had a lot more so I thought a mobile would be cute for the 4th of July decor!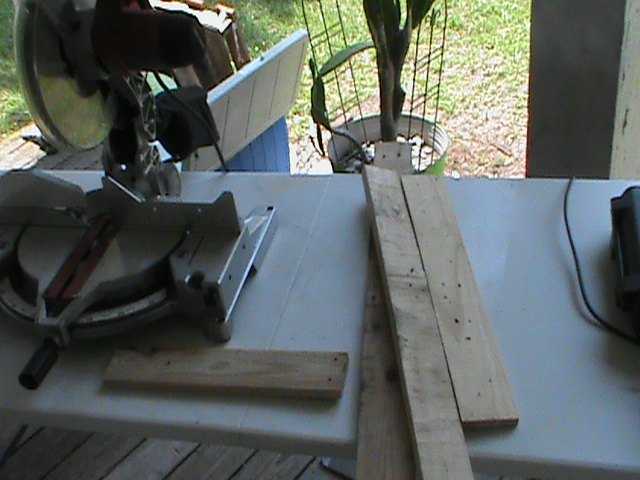
I used a scrap piece of pallet board about 15" long and painted it blue. I drilled 4 holes to hang the squares from along with 2 more holes at the top to hang the whole mobile!
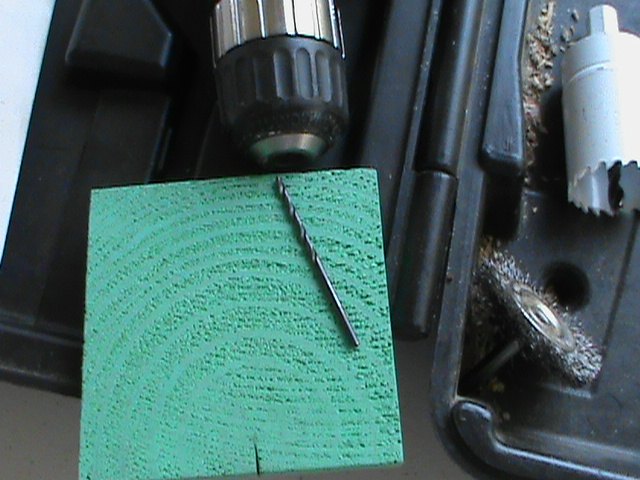
16 square slices, 4 rows with 4 squares in each row.
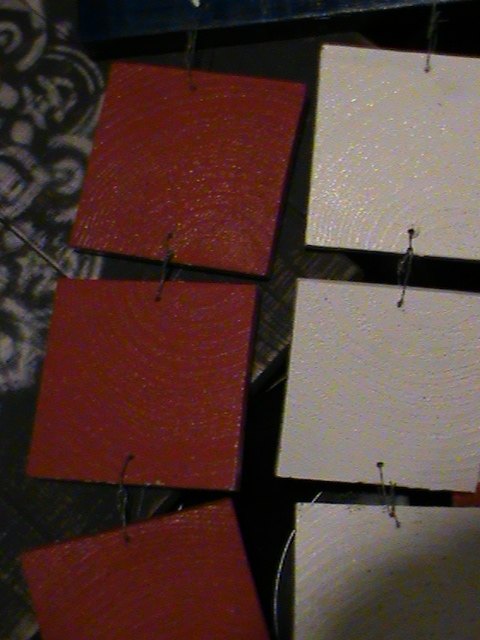
I then drilled 2 holes, 1 on the top and 1 on the bottom of 12 squares and only the top of the last 4 squares. I painted 8 squares red and 8 squares white, I then used some wire to attached 4 squares together to make one row and repeated this 3 more times to make 4 rows of 4 squares Whew did y'all get all of that it sounds hard but it really isn't!
Whew did y'all get all of that it sounds hard but it really isn't!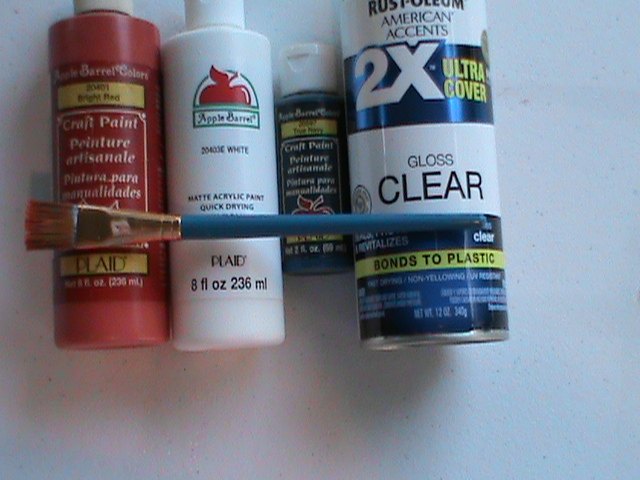
I used acrylic paint for this mobile and sealed with a clear gloss spray paint.
I painted a few stars and Happy July 4th on the top piece, I then added the wire for hanging the mobile and finished!!

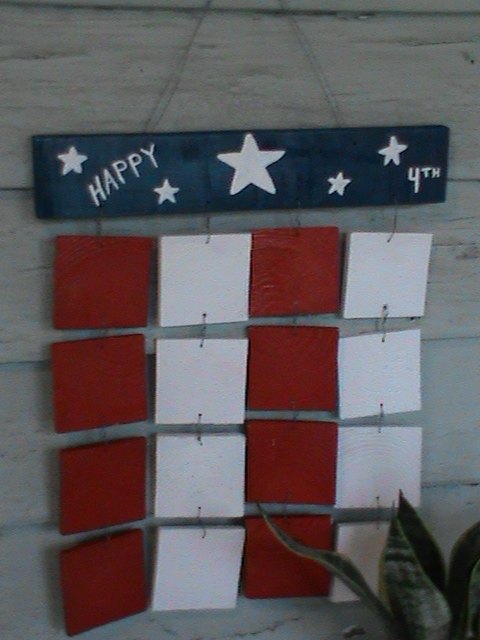
Opps!! I thought I was finished but forgot to paint the word July! Well I did you can see that in the picture above, some days!
! Well I did you can see that in the picture above, some days! 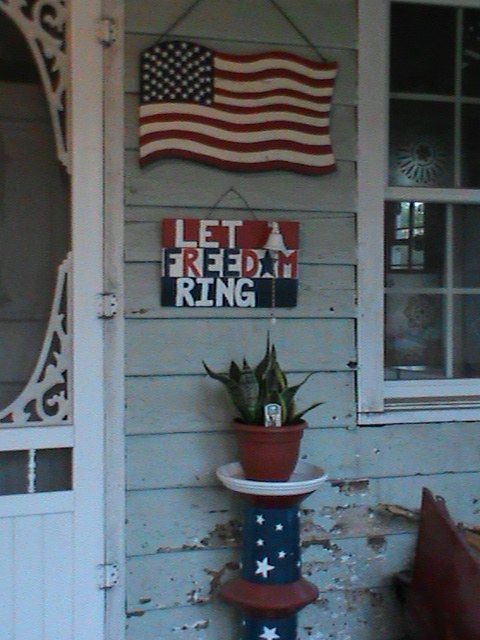
Now I will add this to the other Americana decor I made for outside!!
Any questions or comments are always welcomed!  Thanks for looking!!
Thanks for looking!!Resources for this project:
See all materials


Any price and availability information displayed on [relevant Amazon Site(s), as applicable] at the time of purchase will apply to the purchase of this product.
Hometalk may collect a small share of sales from the links on this page.More info
Comments
Join the conversation
4 comments
-
Oh how fun and patriotic!
-
This looks like fun, have cut my wood and painted some of them. I may make the top banner a bit wider for more space and ability to put more letters on it. I shall take a finished picture and post.
 !
! !
!


Frequently asked questions
Have a question about this project?
How did you go about your plant stand? Cute projects!!