


Easy DIY Brick Backsplash
Update your kitchen with an Easy DIY Brick Backsplash! This affordable project is perfect for beginners who are looking for that classic farmhouse style! See the full tutorial and links to materials here.
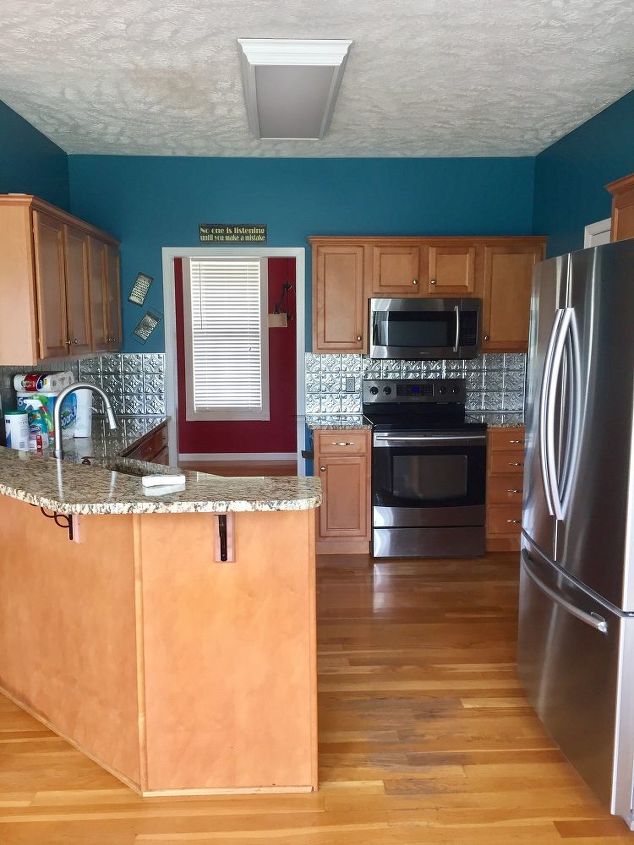
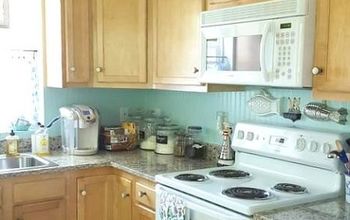
I love a good DIY project. When we moved into our house I really wasn’t very crazy about our kitchen. The layout is awkward and the previous owners style was hard for me to get past. We contemplated ripping the whole thing out and starting over, but I had such a hard time justifying that kind of expense. I mean the kitchen worked, the countertops and cabinets were in good shape, it just wasn’t me. So, I decided to take on the kitchen as a bit of challenge. How can I improve a space that I don’t like on a modest budget? Turns out, it was easier than I thought.
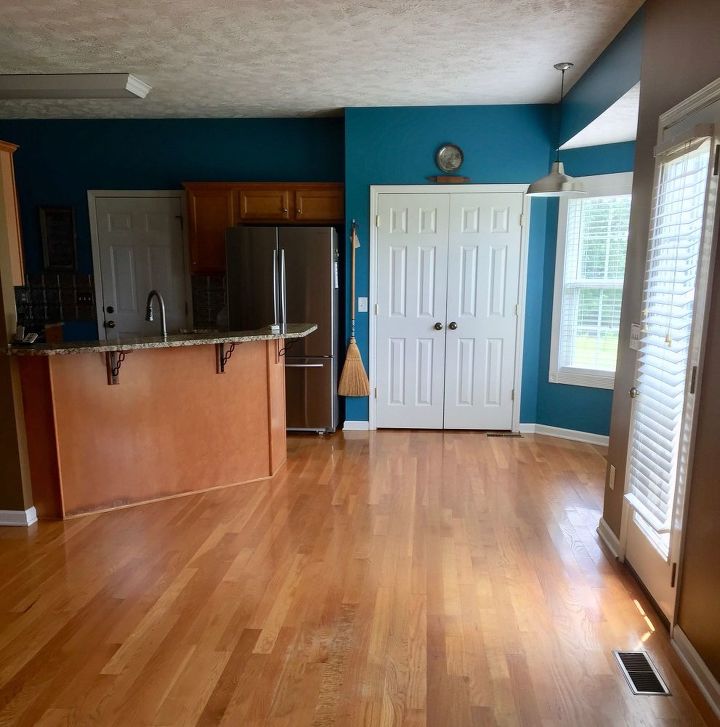
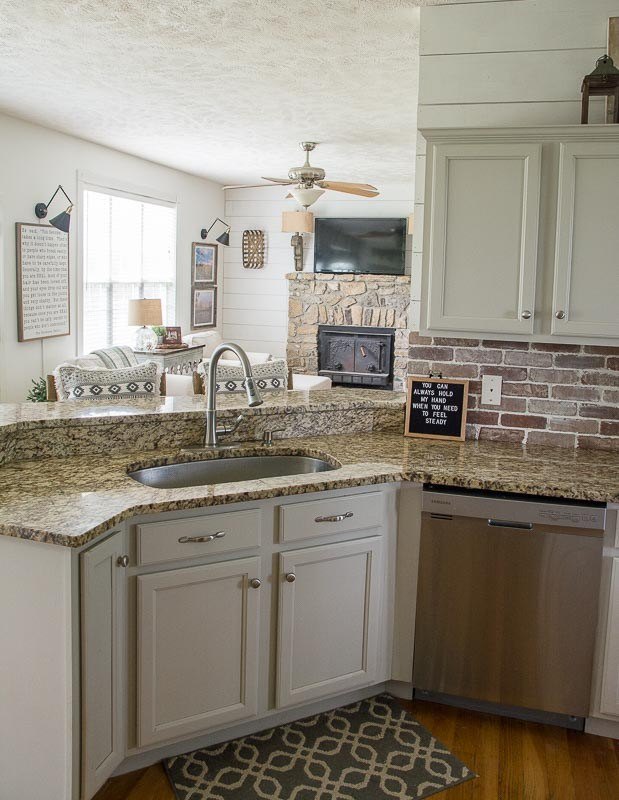
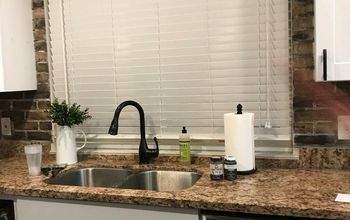
Before
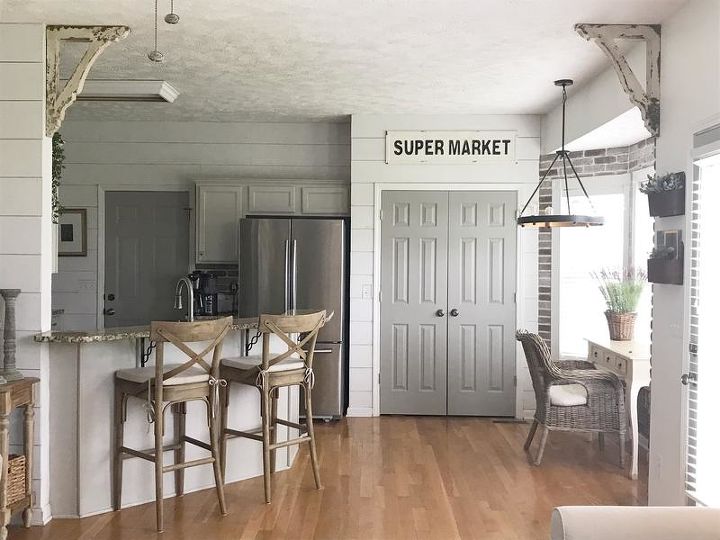
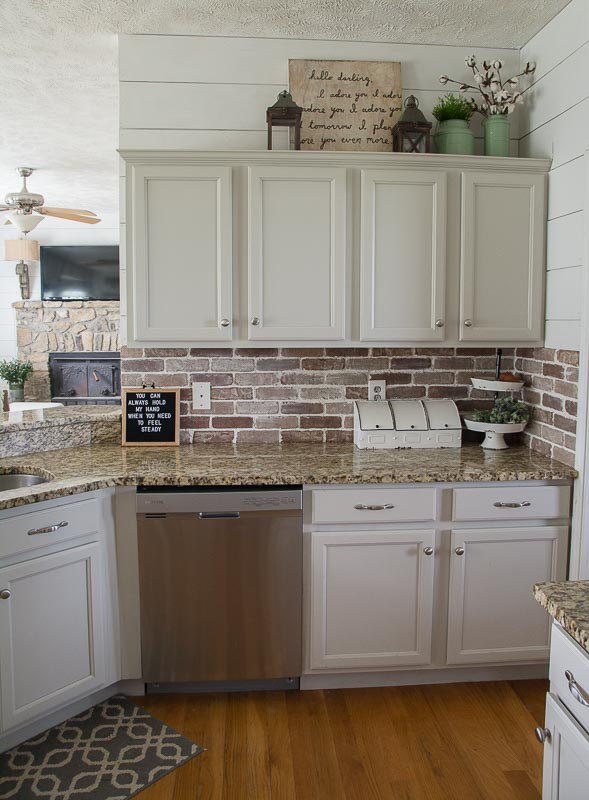
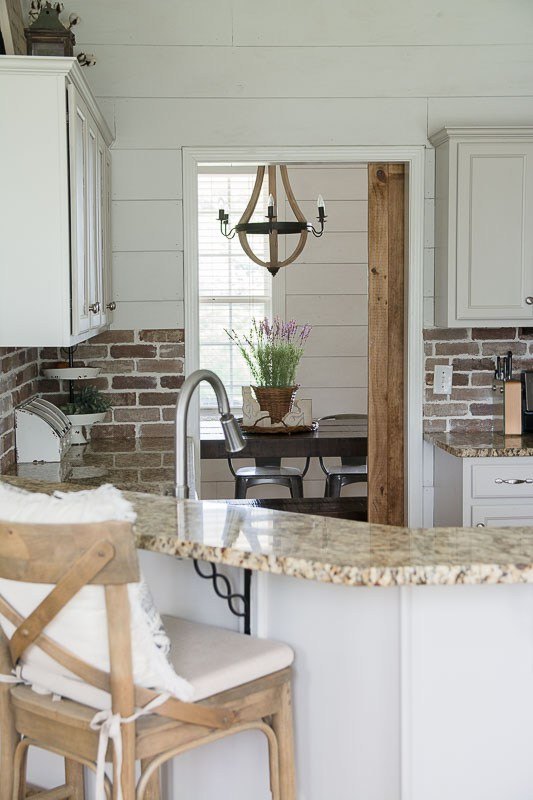
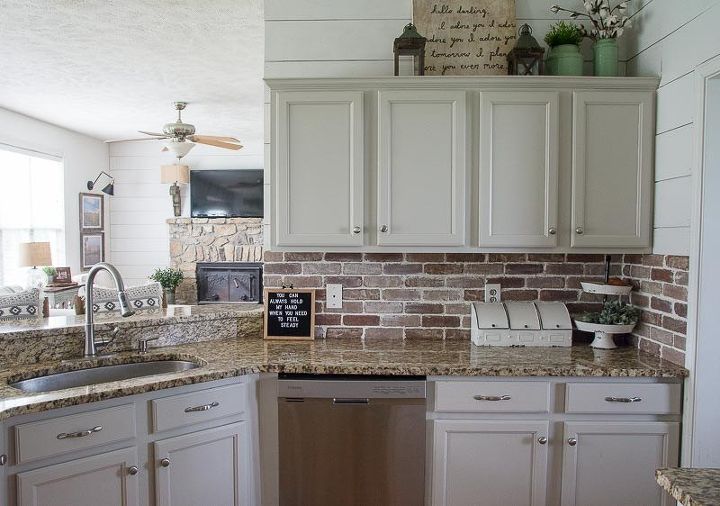
After

Materials
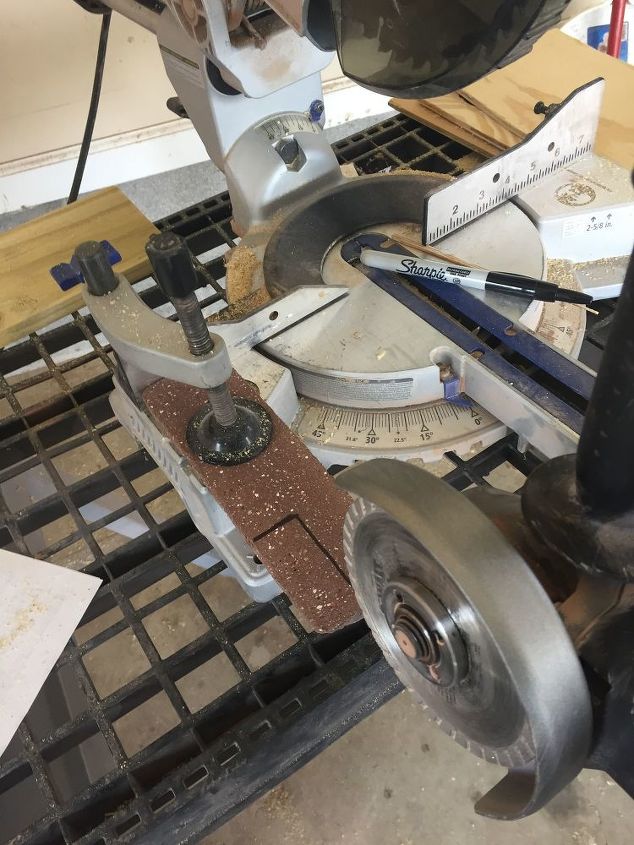
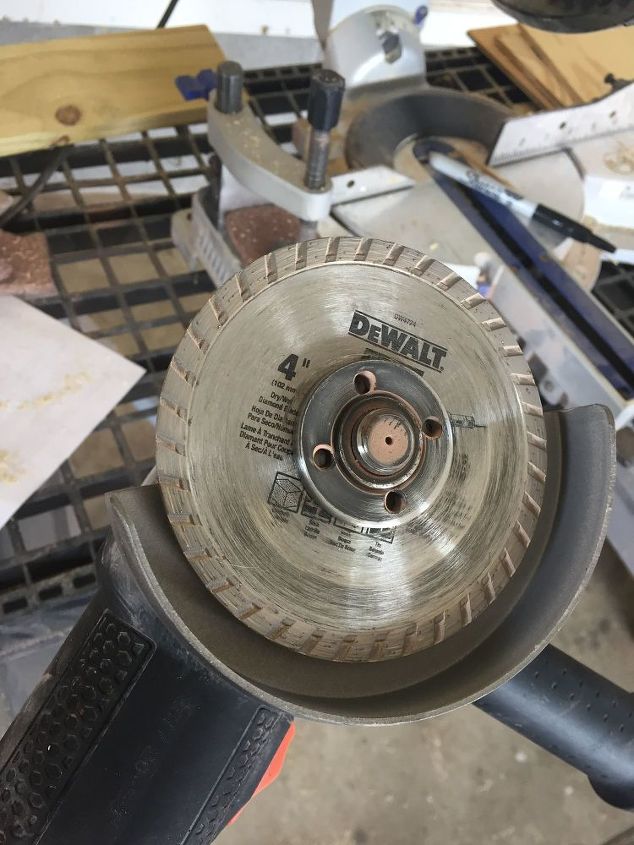
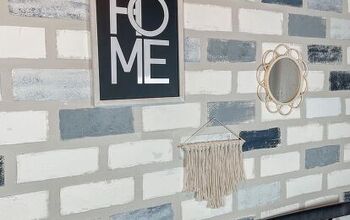
I knew I needed thin (about a half an inch) brick, which can be tricky to find at first. I decided on special order Old Mill brick pavers from Lowes, you can now get them on Amazon too! The pavers come in several different colors so I mixed two colors to get a more authentic look. If you want your backsplash to look very uniform you could certainly just use one color, but if you like the feel of different tones you will definitely need to mix two or three different pavers.
I picked Rushmore, a pretty uniform gray brick and Castle Gate, a red brick that had more variation. I liked the depth the two colors added and since my countertops are a fairly “busy” granite pattern I thought the different tones helped meld the look better.
Resources for this project:
See all materials


Comments
Join the conversation
-
Unbelievable ❣️ What a fabulous makeover. Love it!
-
looks great. I too would like to know about the walls too. If you went on a budget diy you might have drawn the lines for the shiplap affect but I am not sure which route you went. They look great.


Frequently asked questions
Have a question about this project?
Can you do the thin bricks like you used over existing backsplash tiles?
Do you use a duster to clean it? Is it water proof?
Absolutely beautiful! I love the white, the corbels, and the shiplap. I even love the brick. The variegation makes it nice. (My aunt had old 60’s metal cabinets and “flat” red brick backsplash. Never my favorite! 😉). Very nice makeover!