


My First Solo Project - Guest Bathroom Blah to Beachy...continued!
I have a love/hate relationship with my cats. While they are so very lovable when they want to be, I hate they can also be holy terrors.
Case in point:
You might recall my guest bathroom I turned from "Blah to Beachy," all by myself. I took so much pride in this particular project because it was the first one I did without (much) help from my hubby. Also, I was thrilled it had been published on many different websites, all thanks to the publicity I received from Hometalk. 
Well, my cats didn't care. You know how I know this? Just look at what they did:
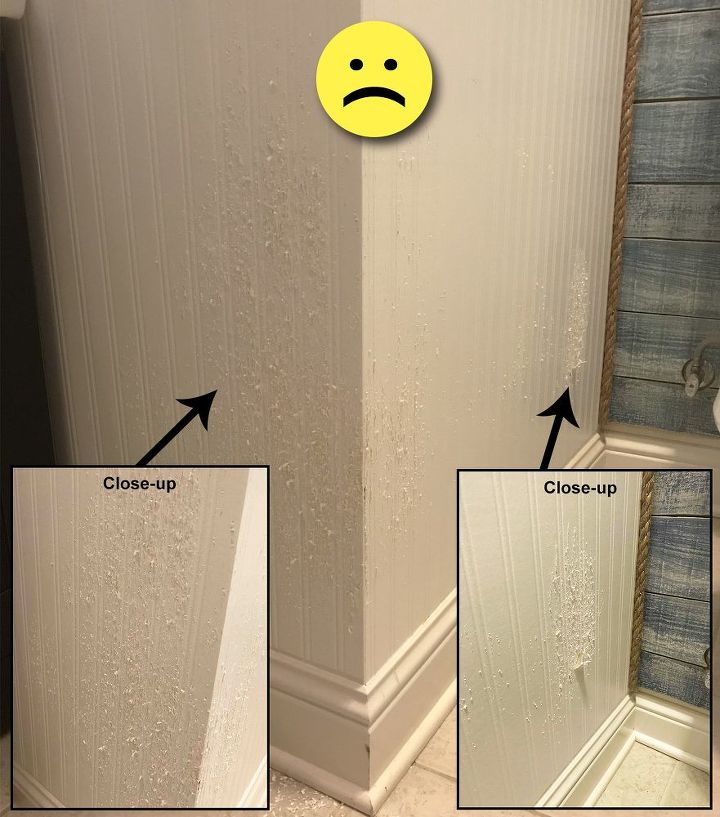
Infuriating, isn't it?
However, I learned a very valuable lesson from all of this and I feel I should pass this information along to you- DON'T USE BEADBOARD WALLPAPER IF YOU HAVE A CAT. Instead, use the real stuff.
Since I didn't use the real stuff, the following shows how I overcame my predicament:
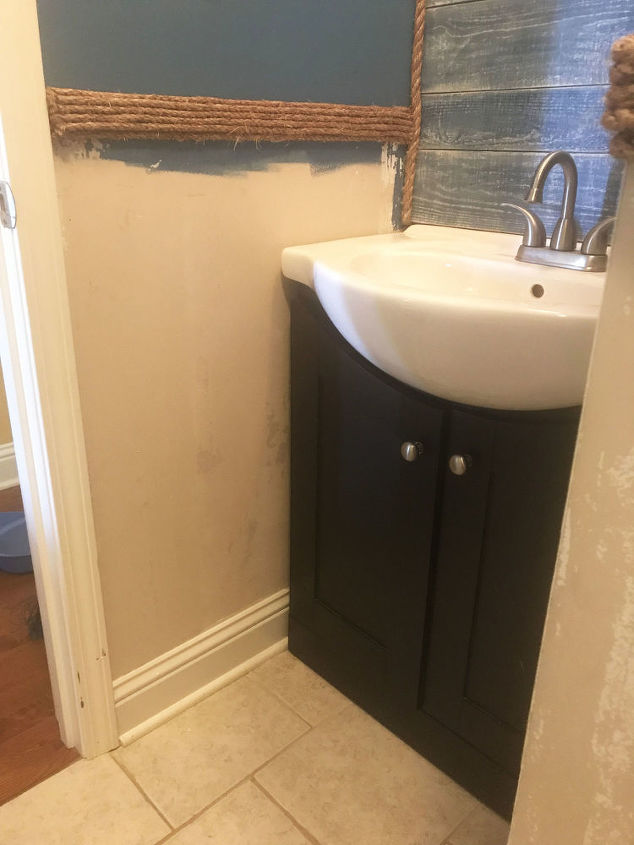
First thing's first. I had to remove the rest of the wallpaper the "Feline Foes" had already started taking down. 
Once I started taking it down I noticed that the walls hadn't been properly sized (aka, primed). Therefore, no matter that I scored the walls and soaked them in both Dif and plain water, I still managed to remove part of the drywall. I tried to fix it with joint compound but I think it made it worse. Luckily, the bad lighting in there is very forgiving of my horrible painting skills.
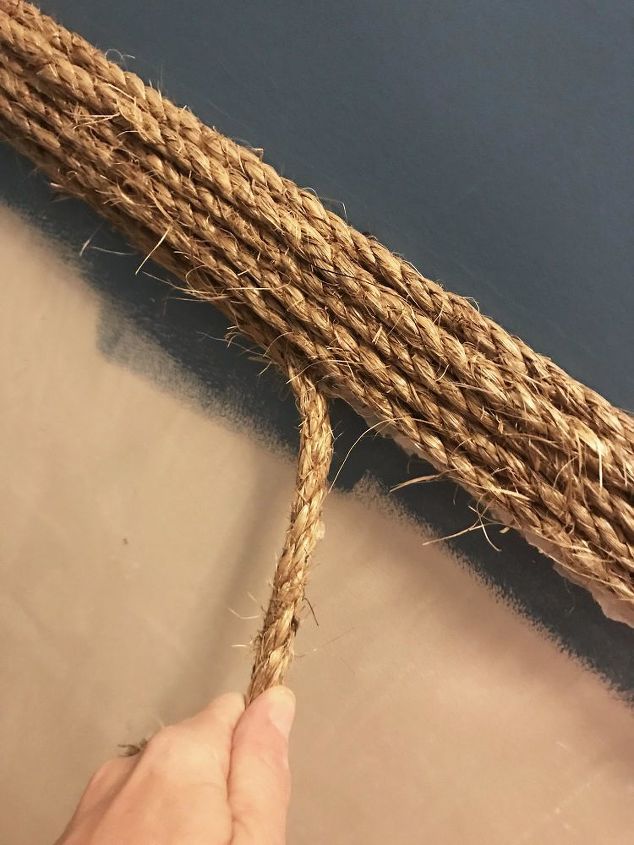
Next, I needed to remove the bottom layer of rope I had applied to the wood trim so that the other wood trim would sit flush against it.
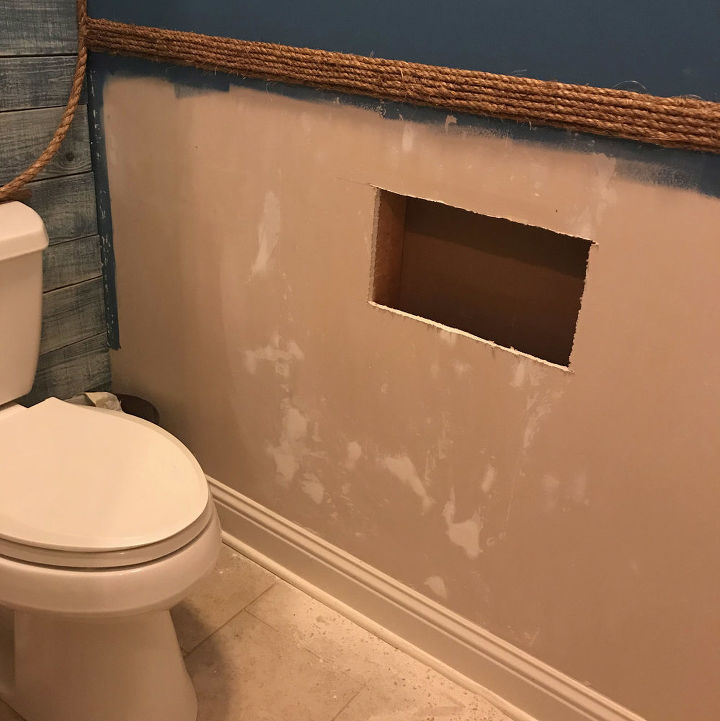
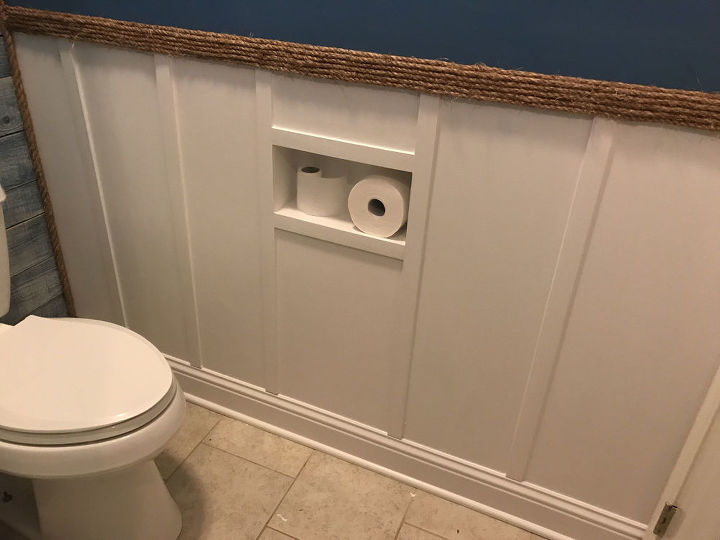
My next order of business was to cut a hole into the wall. "Why?" you ask. Well, since the bathroom is so small, we didn't have a really good place to put a toilet paper holder. In every place we considered, it would have interfered with something/someone. The only solution we could come up with was a toilet paper cubby.
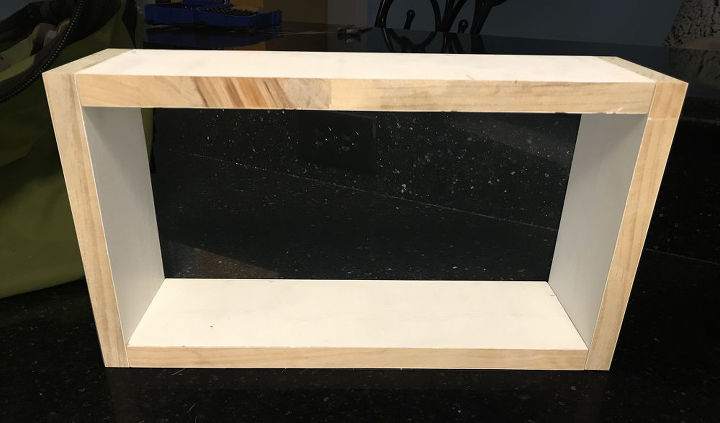
After that, I measured the space between two studs and cut four pieces of MDF to fit.
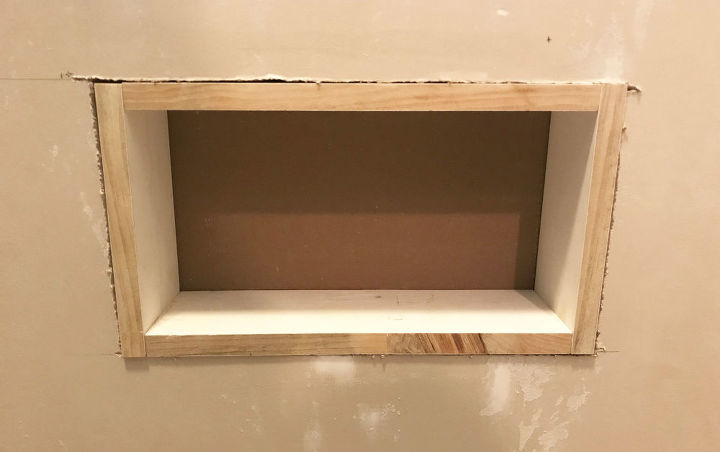
Then secured it to the studs with screws...
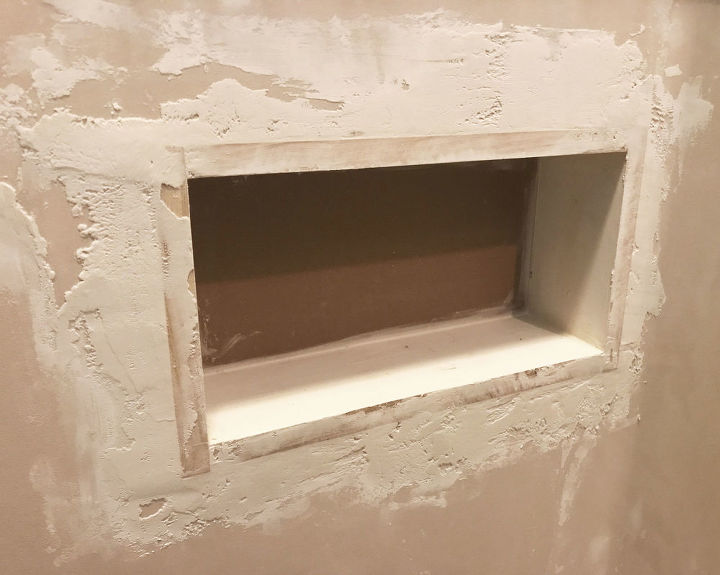
I slathered it with joint compound...
and finally I sanded it.
I was so proud of myself. It was as smooth as a baby's bottom. 
-Or so I thought.
After I painted it, it was apparent I wasn't as good of a "mudder" as I'd thought. I was going to have to think of a way to hide the imperfections while I moved on to the next step: the faux board and batten.
You might not agree with the methods I used here. I figured, since I didn't want the "board" sticking out from the baseboard, I was going to need a very thin piece of wood. By doing so, I wouldn't be able to nail it nor screw it to the walls (the board would split from the nail or I wouldn't be able to screw it into a stud). Thus, leaving me with only one option. Gluing it. So that this wouldn't be a long, drawn out affair, I had to use a glue that would adhere almost instantaneously.
Q: Any guesses on what I used?
A: my trusty hot glue gun.
I had used it previously in that bathroom years ago when I glued the rows of rope to the wood trim and they are all still securely attached. My only worry would be on how the sheetrock would handle when I decide to change my bathroom and take them off. I thought the only logical thing to do was to prime the wall. So, I gave the walls a couple coats of paint before I stuck the trim on.
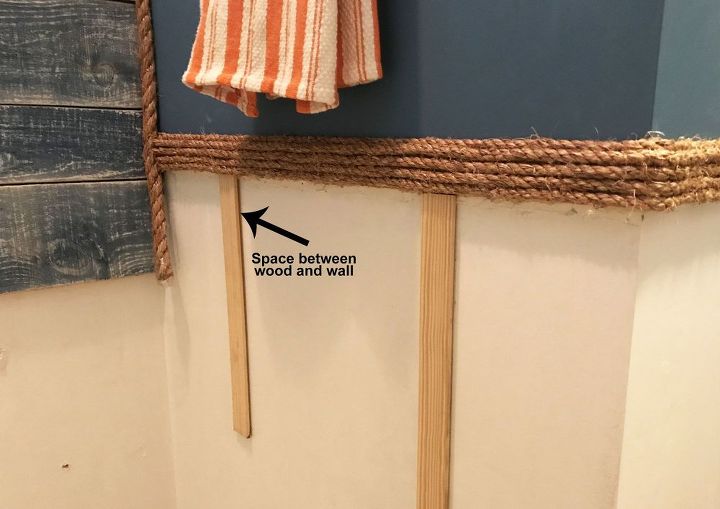
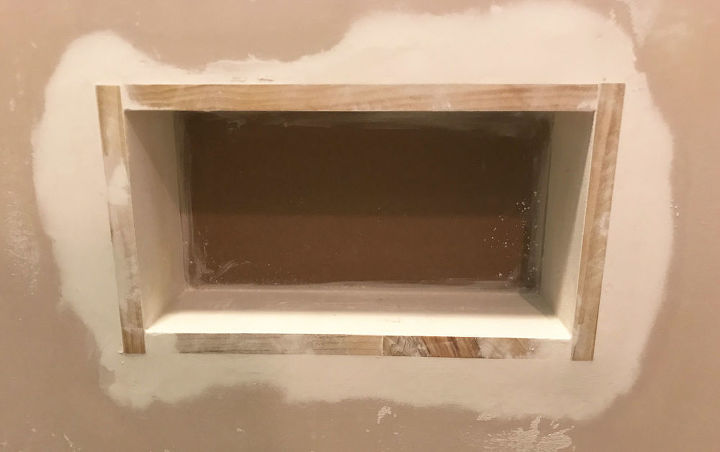
Since the hot glue was somewhat thick, it caused the wood to stick out a tiny bit. That was an easy fix.
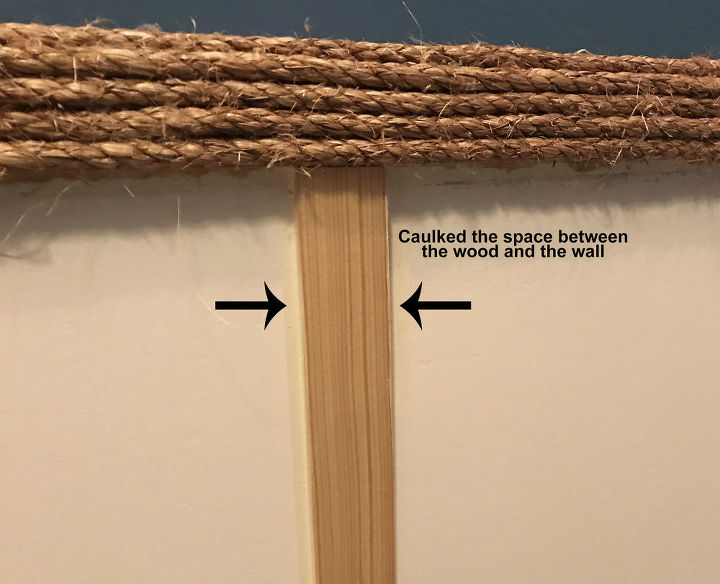
I simply caulked that space before I painted it.
Finally, I went back and reglued the original rope to the wood trim.
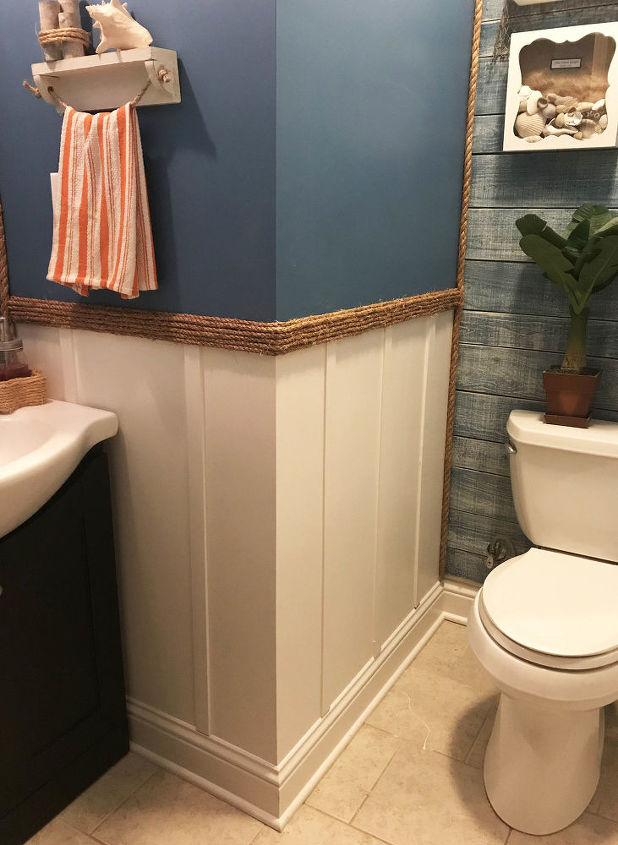
Don’t get me wrong...I’m still really mad at my cats. But I will say, I think I might like this new look even more than how I originally had it. What do you think?
You can click on the link below to see my original post from three years ago.

Comments
Join the conversation
-
Nicely done! Glad you revised your approach instead of banishing your kitty! Looks amazing! Excellent work all by (mostly) yourself! You should feel proud. :) Love the rustic/nautical theme you chose.
-
I only just came upon your first post-LOVE IT! I have a scratch happy cat, wonder what was so interesting to them?
Anyway, I had saved it to go back and make my list of parts I want to use in my Oasis -bungo, up popped part 2. It's a Winner. Love love the whole ordeal and it's outcome .;-)


Frequently asked questions
Have a question about this project?
Where did you purchase the shadow boxes for the shells? I'm in the process of changing a room into a nautical theme and would love to incorporate our shells in this manner. Also, from where did you purchase the fisherman's net? Thanks