


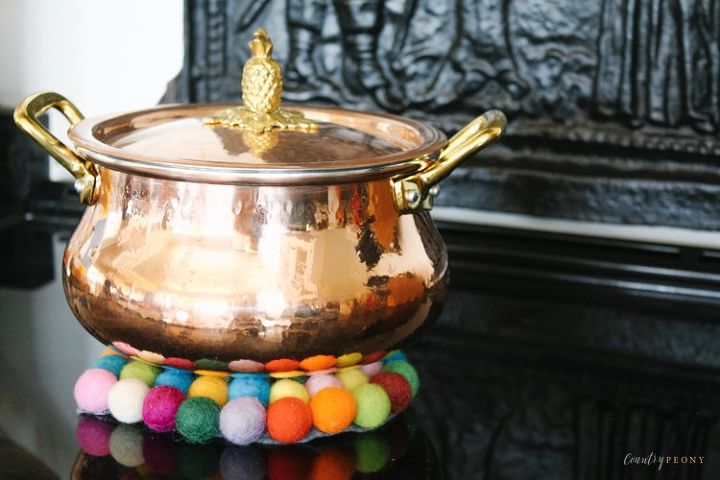
DIY Felt Ball Heart Trivet
Add a little extra love to your baking with this felt ball heart trivet. Perfect for Valentine’s Day, or to use in your kitchen throughout the year!
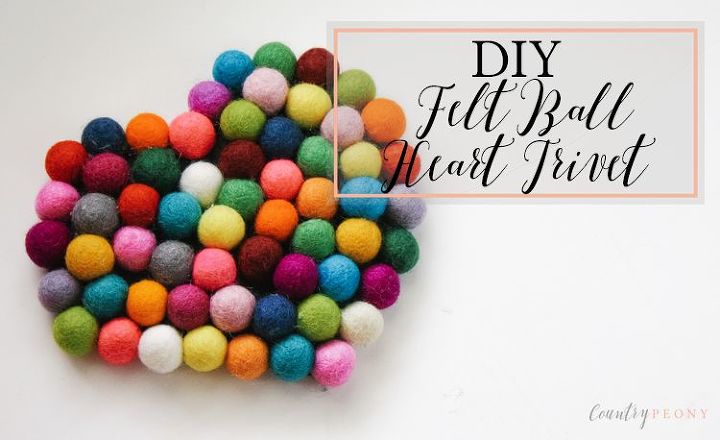
My goal is to adorn my household with items that make me smile (full of character and personality). With Valentine’s Day around the corner, I thought it would be so fun to get in on the felt ball trend and turn an essential kitchen item into a cute showstopper. This felt ball heart trivet can be used for Valentine’s Day or all year round, and it will make you smile every time you use it!
To see the full blog post, please visit my blog post.
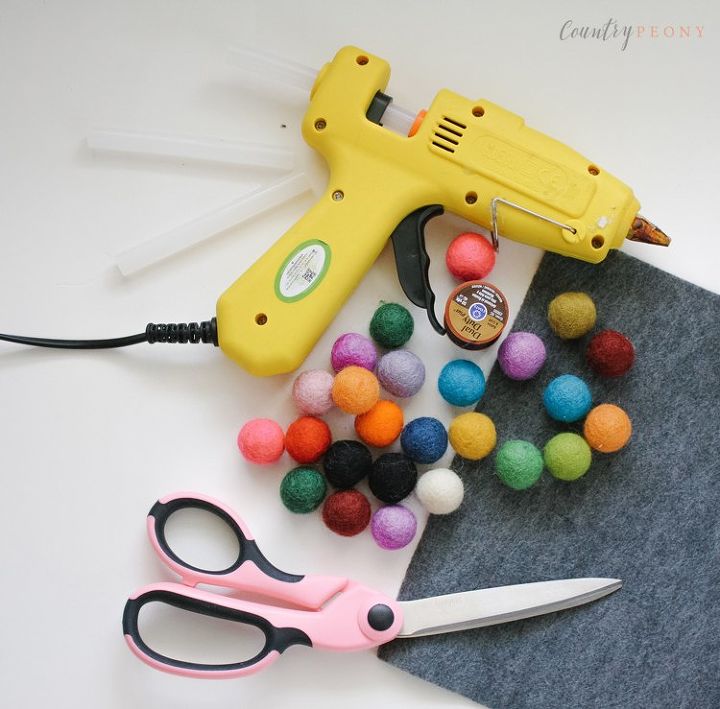
To make your own felt ball heart trivet, you will need:
- (affiliate link) Felt Balls. I used these felt balls from Amazon and I was very impressed with the quality. I used size 20 mm, but 15 mm would also work for this project.
- Sheet of Felt
- Hot Glue Gun with Glue Sticks
- Needle and Thick Black Thread
- Scissors
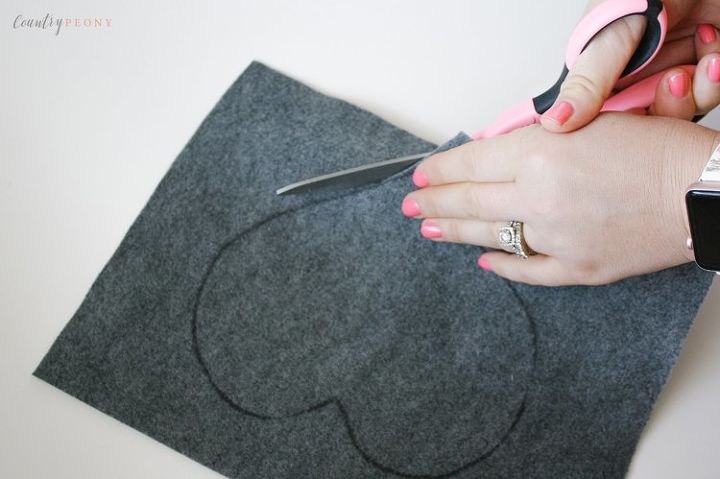
Step 1: Use a stencil or freehand the shape of a heart onto the felt sheet, then cut out the heart.
*I drew a heart onto a piece of paper. Once I was happy with the shape of the heart, I cut it out and used it as the stencil for the trivet.
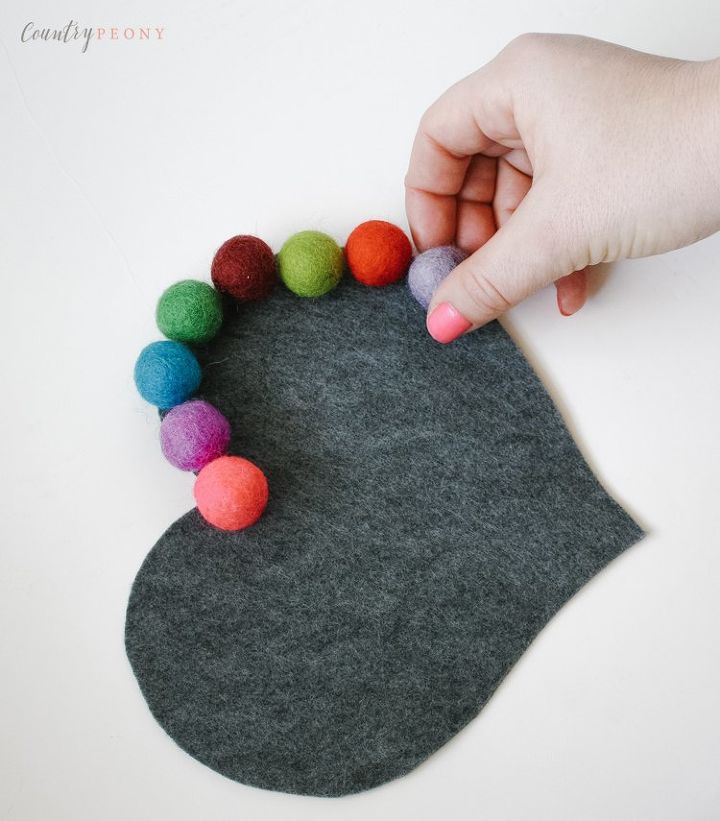
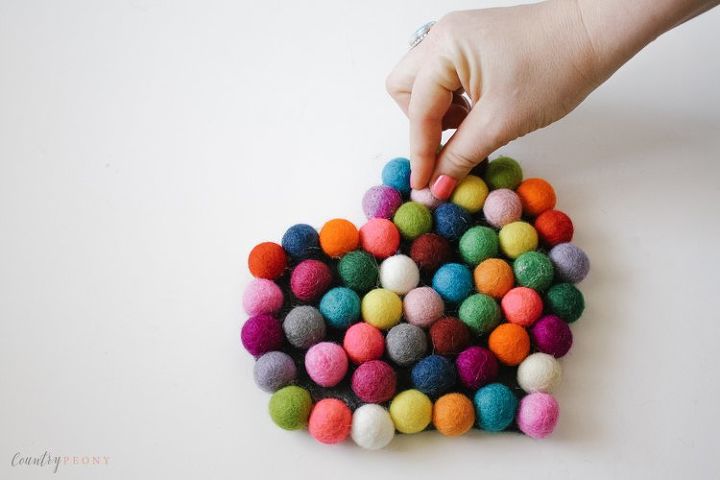
Step 2: Determine the color pattern of the trivet by laying out all of the felt balls onto the felt heart. Once you are done, take a picture of the pattern so you can reference it later if your felt balls roll off the felt heart.
*If you want to take it a step further, you can use straight pins to keep the felt balls in place. However, I wanted some flexibility as I was attaching the felt balls to the felt heart so I didn’t use pins.

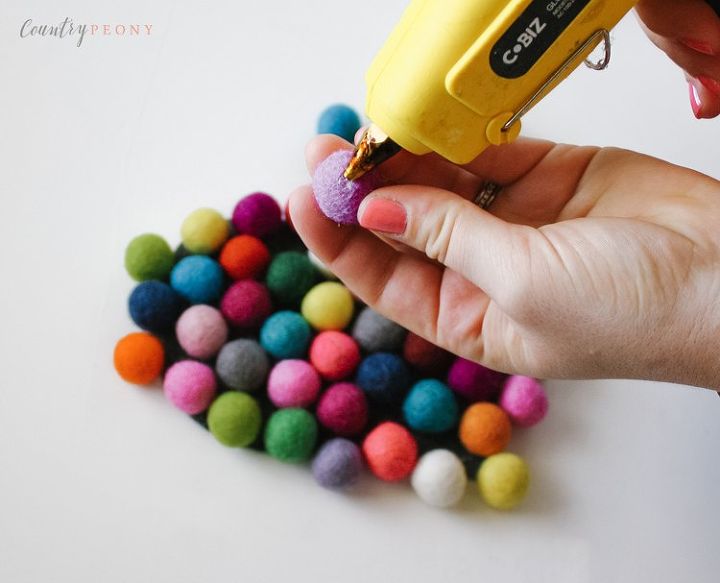
Step 3: Very carefully, start at the edge of the heart and remove each ball one at a time, and hot glue it to the felt heart. Glue each ball very close to each other so there is minimal gapping.
*Make sure that you don’t get any hot glue at the top part of your felt ball because the hot glue will not stand up to the high heat from the pots and pans that will later be on the trivet.
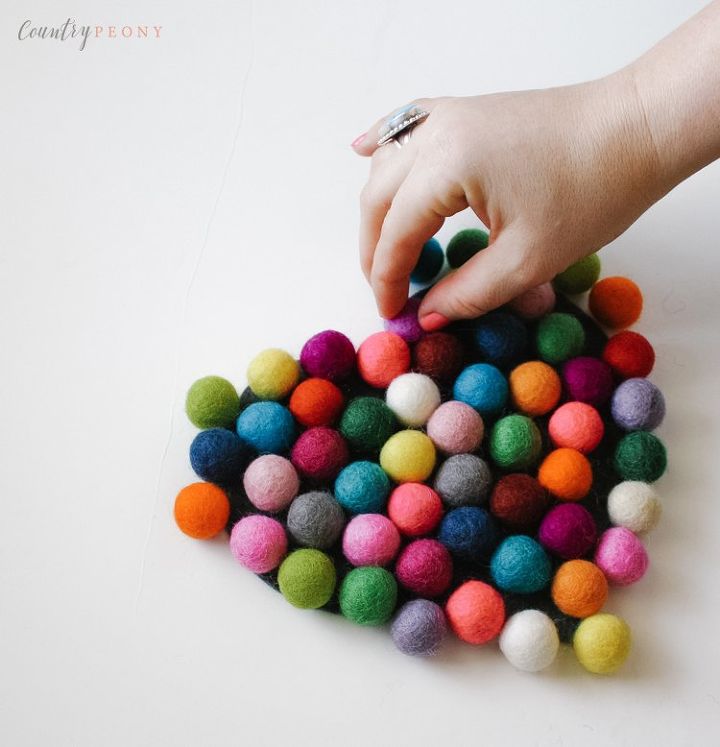

Step 4: Once you glue the balls to the outer edge of the heart, hot glue the felt balls into the interior of the heart one at a time. Continue to glue each ball closely to its neighbors. You may need to stretch or squish some of the balls to fit into the spaces so the heart is fully covered.
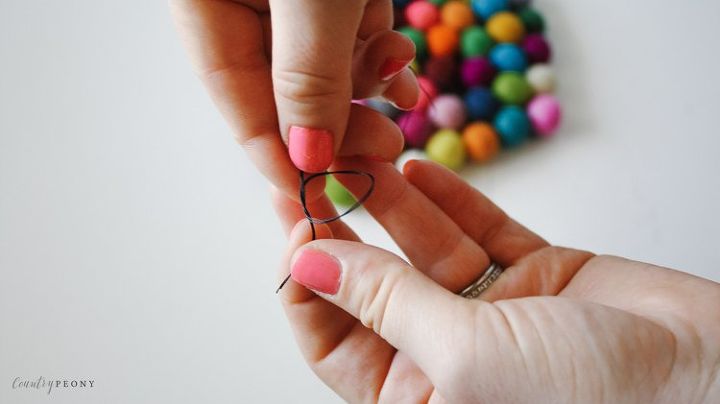
Step 5: Once you hot glue all of the felt balls to the felt heart, thread a needle and double knot the end. Then, thread through the bottom of the felt heart and into the felt ball on the end.
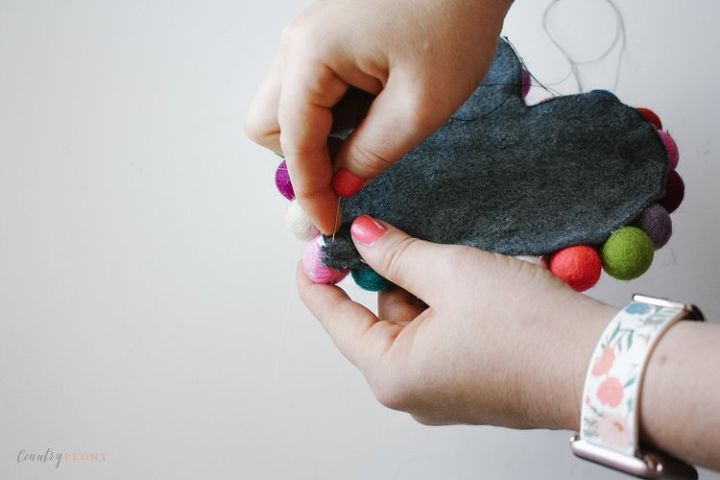
Step 6: One at a time, thread each ball on the outer edge of the heart trivet to one another. Use your best judgement, but about every 4 balls thread through the back of the felt heart so that the balls are also attached evenly to the felt heart and each other.
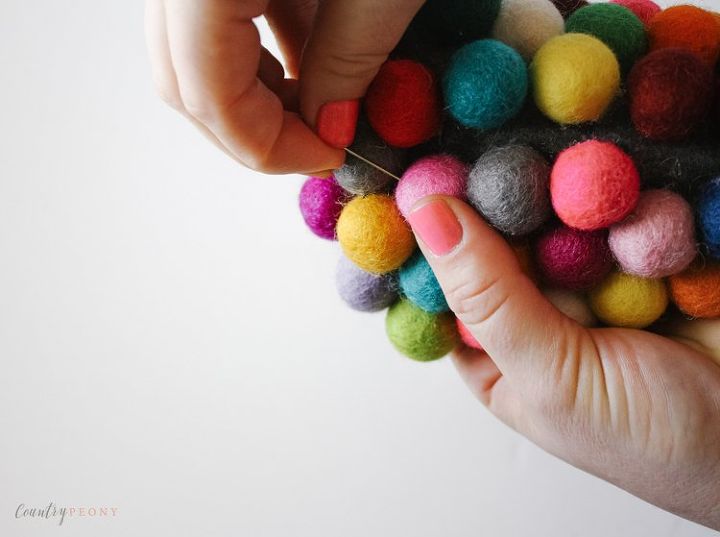
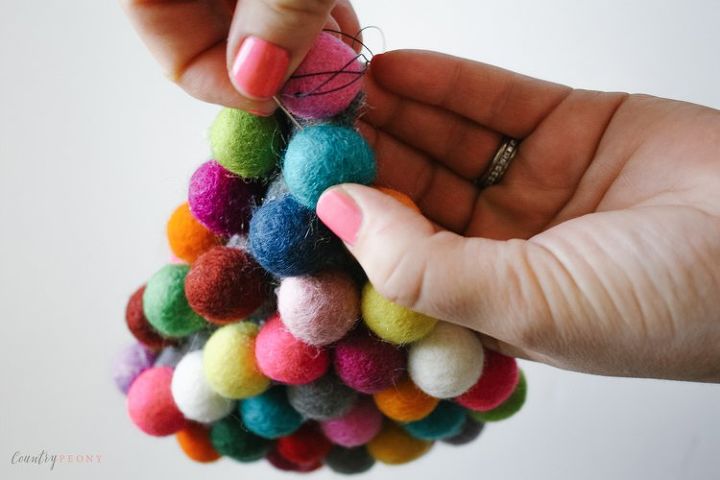
Step 7: Once you attach all of the balls together and to the back of the felt, then take your needle and thread through the balls in the middle. Repeat the process until you thread through all of the balls in the middle of the heart.
Step 8: After you apply thread to all of the balls, thread the needle through to the back of the felt heart. Then secure the project with a double knot.
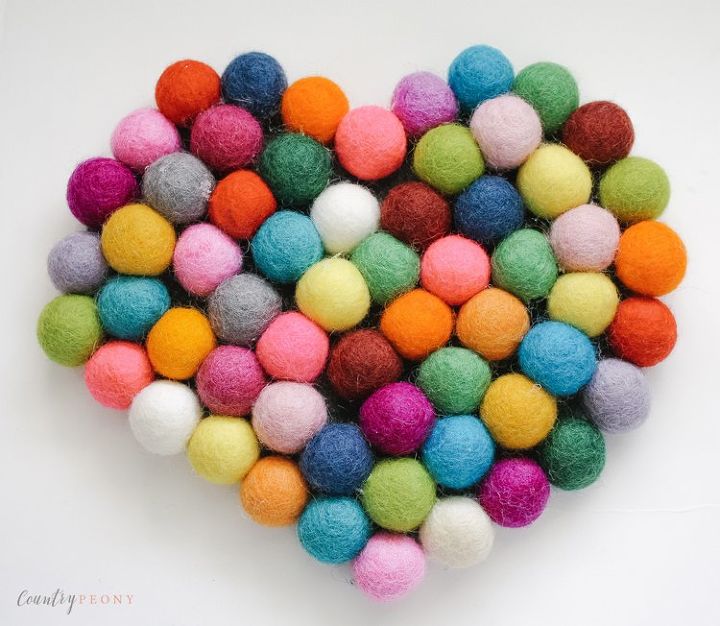
Step 9: Enjoy your colorful and whimsical trivet!
Resources for this project:
See all materials


Frequently asked questions
Have a question about this project?