


Repairing Wood Damage With Bondo
Sometimes wood repairs call for something faster and harder than wood filler. Like, when my shutters ended up getting Dry Rot Damage. The damaged area was so large and thick, that Bondo made the most sense for this repair.
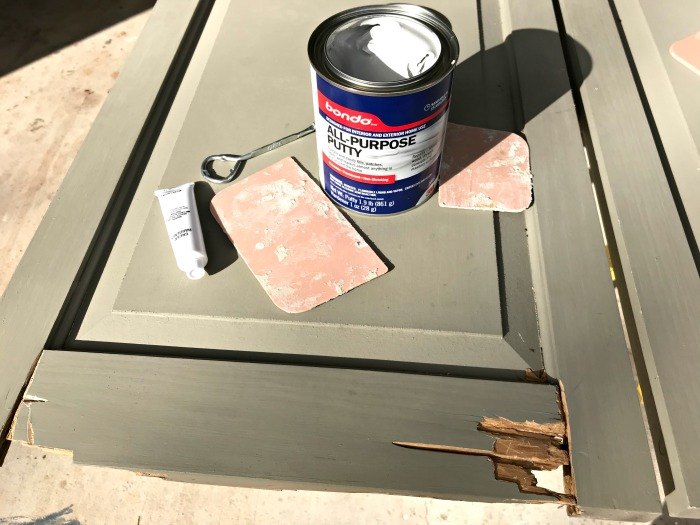
Bondo makes an All Purpose Putty, that works on wood and a wood filler. I went with the putty this time because it dries super fast and a little harder than wood filler. And, because I am painting these shutters. If I needed to stain a large wood patch job. I would have used all wood filler or at least a good 1/4" surface of wood filler with Bondo underneath.
I have read online some people saying that Bondo cracks and shrinks. Maybe that's true of a different Bondo product or in areas with extreme cold. Our house painter used Bondo to patch a porch column of ours a few years ago and it has held up perfectly. But, I'm in Houston. So, we generally only have a handful of days around the freezing mark a year. So, with that said. Let me tell you what I did and recommend.  More details about this tutorial can be found on my site.
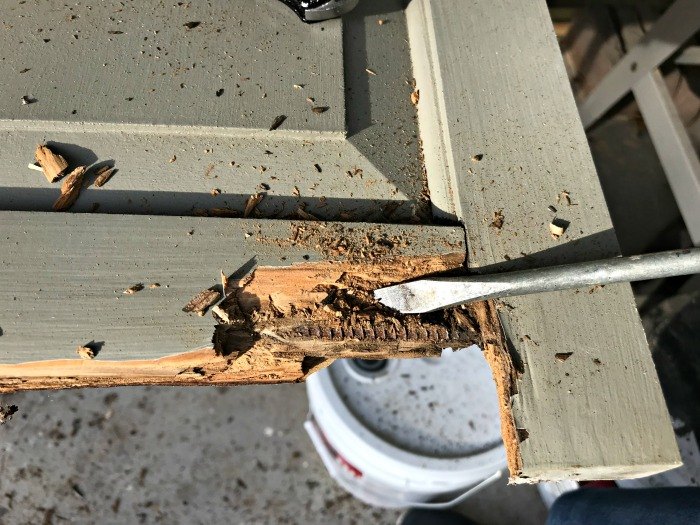
I picked away all the soft wood with a screwdriver and box knife. The dry rotted wood is so soft it flakes away. You'll easily know which wood is not rotted because it will be hard and a lighter color.
Check out the full YouTube video to get the complete tutorial and see how I mixed and applied the Bondo.
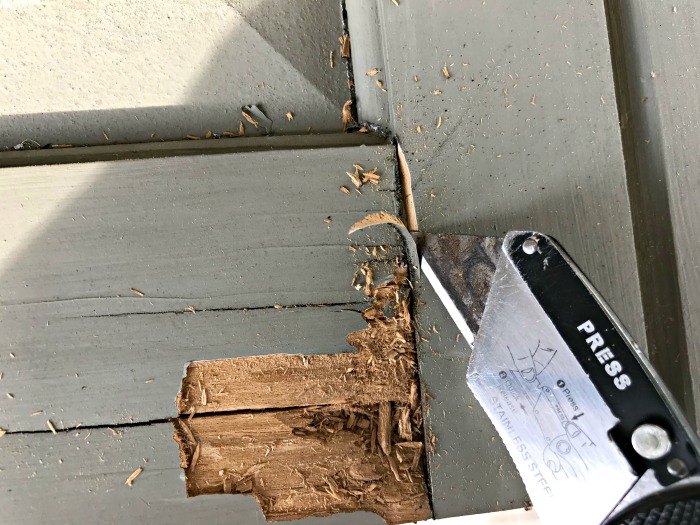
Wood rot is so soft that it's easy to pick away the rot with putty knives.
If you're PATCHING BROKEN WOOD or furniture, make sure that the wood is structurally sound before patching. Wood glue and/or screw any loose pieces securely together before patching.
ALSO, I wouldn't recommend Bondo for patching spots with routed, curvy details or moulding. Stick with wood filler in those areas becuase it's easier to mold and carve it into shape before it starts to dry.
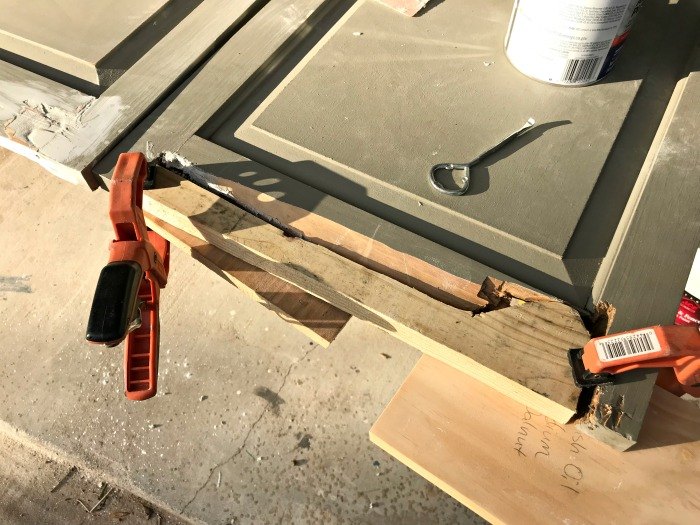
This shutter had so much damage, it was best to patch a large section with new wood, then fill in the remaining gaps with Bondo.
This shutter had less damage, so I was able to remove the dry rot with a screwdriver and box knife. Then fill in with Bondo. This damage took 2 attempts with Bondo. Once on this side, then 30 minutes later I flipped the shutter over and filled in with Bondo on the other side.
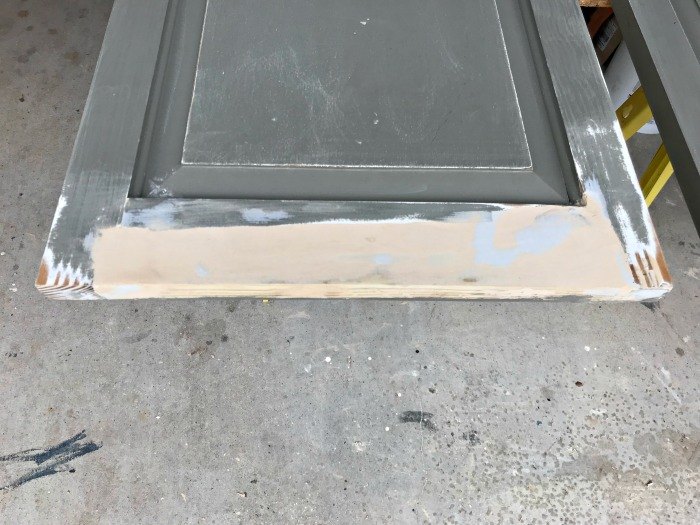
Here's the patched area, sanded and ready to paint.
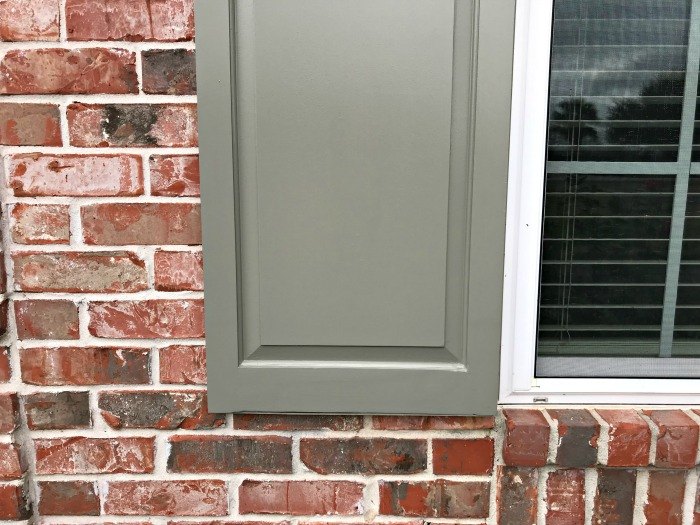
All patched up and back on the house. 
Watch this video to see exactly how I mix and used Bondo in this video. Good luck with your repairs, guys!
Resources for this project:
See all materials


Comments
Join the conversation
-
I have a wood fence that has several “peep” holes and I needed something to be a filler.,I’m going to try Bondo and bark bits and sealant for the holes!
-
Bondo is wonderful for so many repairs. You can get different kinds to do different materials like concrete.


Frequently asked questions
Have a question about this project?
What is that little tube that’s being spread on the bono
I have an old fashioned round beautiful table from my mother. I'm going to redue . They couldn't ever find the middle piece so I want it to look nice without notice and don't want it to come apart. Will that wk. Or is there something better. And will it take the stain
Where do you buy Bondo?