


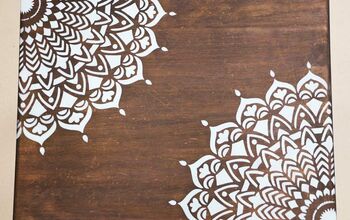
How to Create Raised Texture on Furniture

Give your furniture a fun refresh with raised stenciling on the drawers! This is an easy way to help cover up a lot of small dings, as well as add detail to a plain piece.

This is what we started out with. The drawers had a rough texture of them, and had chipped veneer. I just loved the details on the side though!
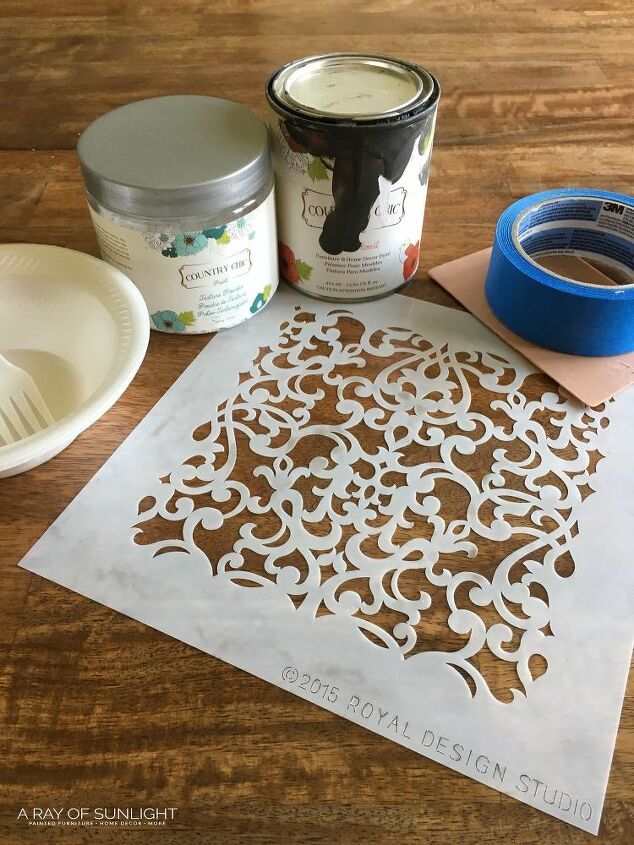
To create the texture I grabbed a stencil, Country Chic Paint Texture Powder, Country Chic Paint in Dark Roast, a plastic scraper, some painters tape and a bowl and fork.
Get 10% off your first order of Country Chic Paint when you use code rayofsun10 at checkout.
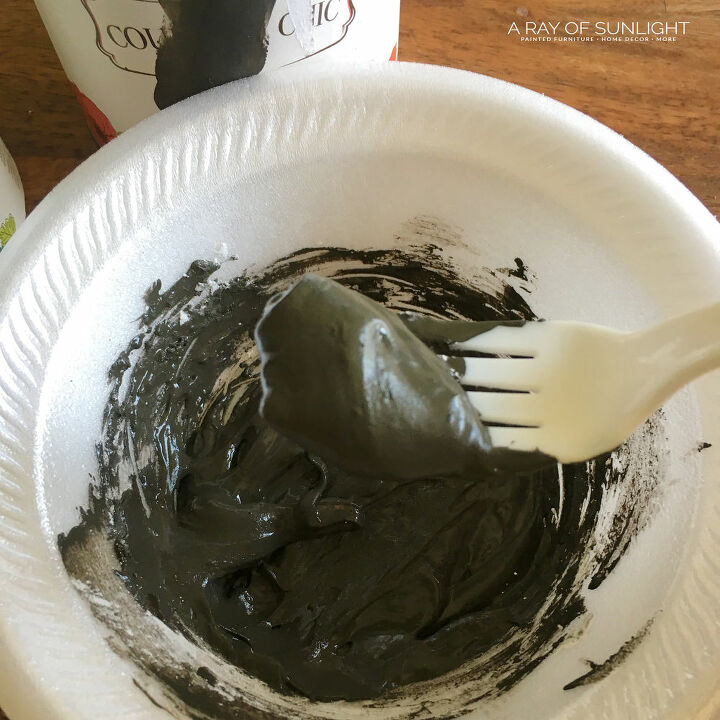
Mix equal parts Texture Powder and Dark Roast to create the paste. I like to use the brown colored paint to mimic the look of wood.
The paste should be about the thickness of peanut butter.
You can mix whatever color of paint in the powder to create the color you want.
Before applying the paste, I made sure the piece was prepped for paint by cleaning it, lightly sanding it and wiping off the dust. I also primed the dresser with shellac to prevent any bleed through.
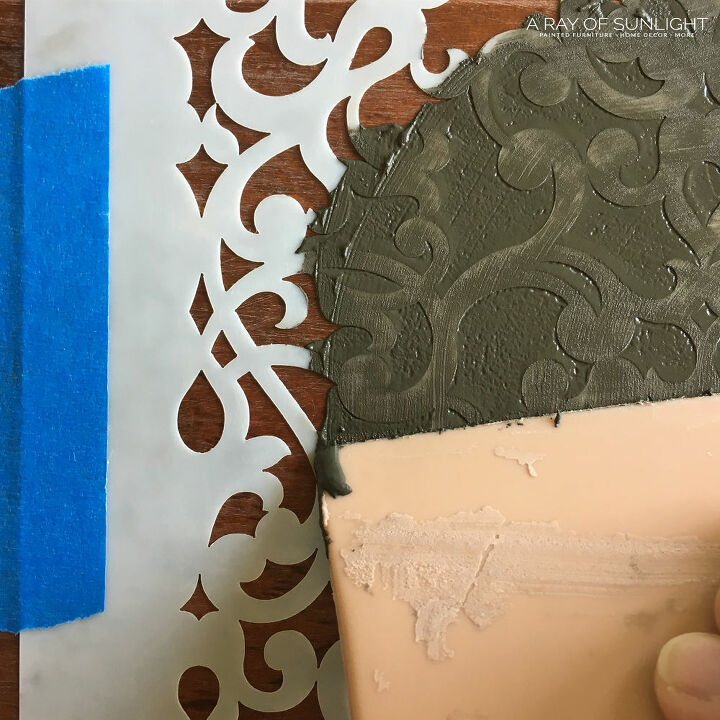
Then I centered the stencil on the drawer fronts and taped it in place with painters tape.
Once it was positioned, I spread the texture paste over the stencil and smoothed it out. Scraping the excess off of the stencil as I went.
Since I was working with a smaller stencil, I had to move it quite frequently. No worries though! Just match the edges up and keep spreading the texture paste all over the stencil.
You may also want to wipe off any excess paste with a damp paper towel or rag as you go. Otherwise it gets to be quite messy, and the paste gets everywhere.
Once I was done with the stencil and scraper I washed them off with hot soapy water to get the paste and paint off before it dried hard.
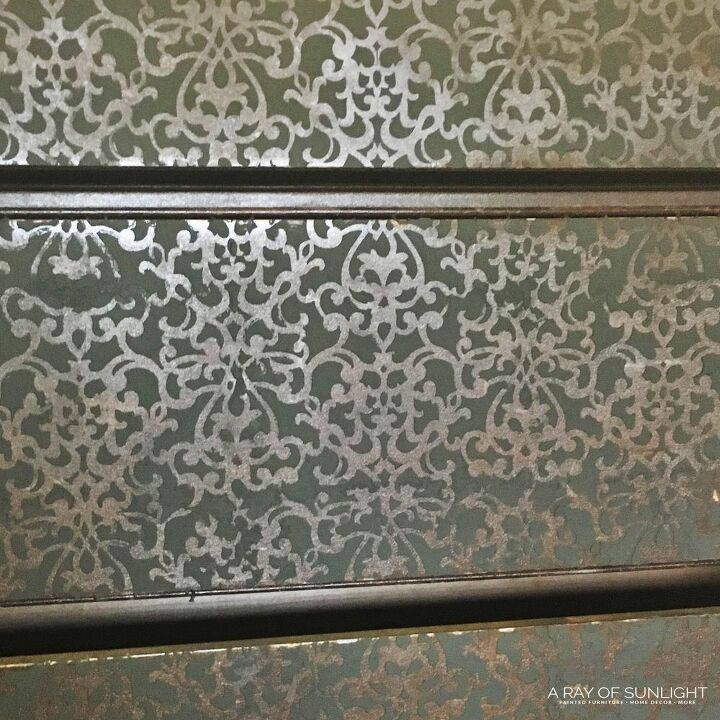
Once the paste was all over the drawer fronts I let it dry completely overnight.ts I let it dry completely overnight.
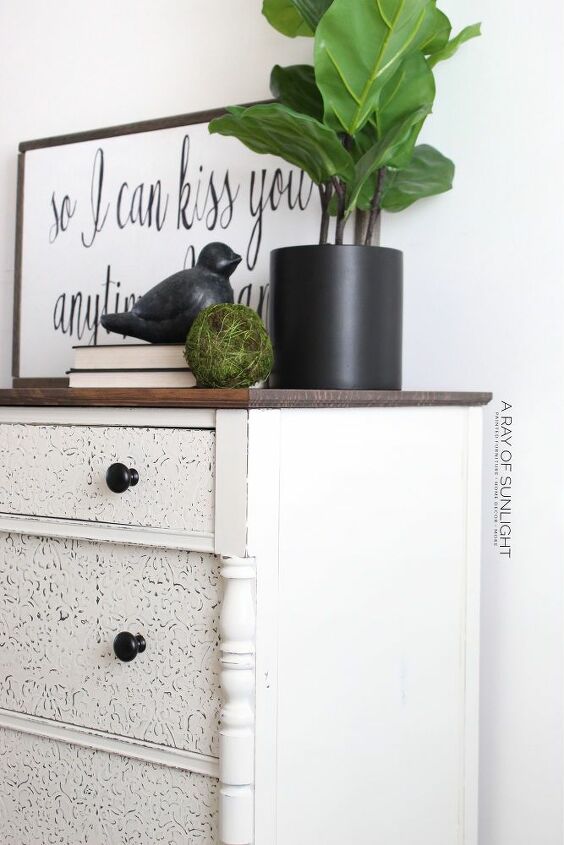
I painted the dresser in a creamy white chalk paint and distressed the edges ad texture with 220 grit sandpaper.
Once the paint was dry I sealed in the paint and texture with my favorite waterbased polyurethane.
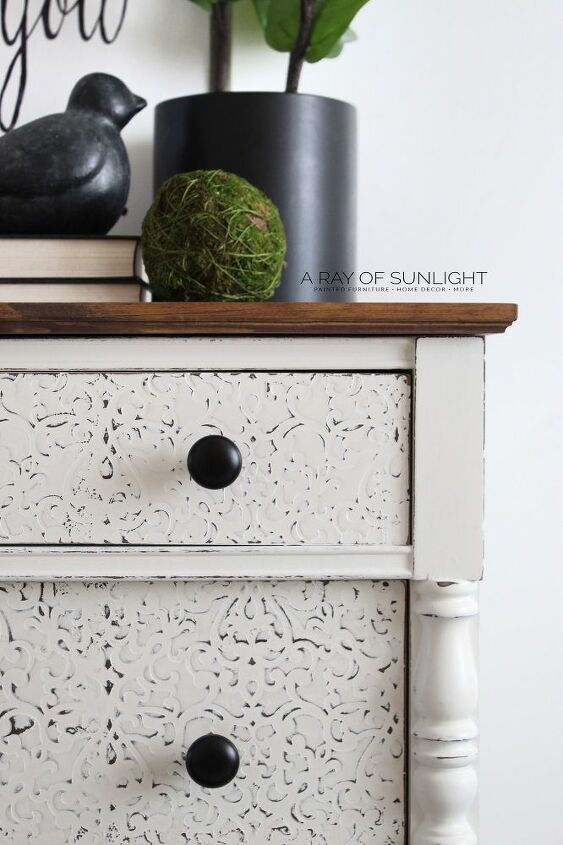
The top was damaged beyond my repair, so I replaced it with a new piece of stained wood. And then I updated the knobs with new black knobs.
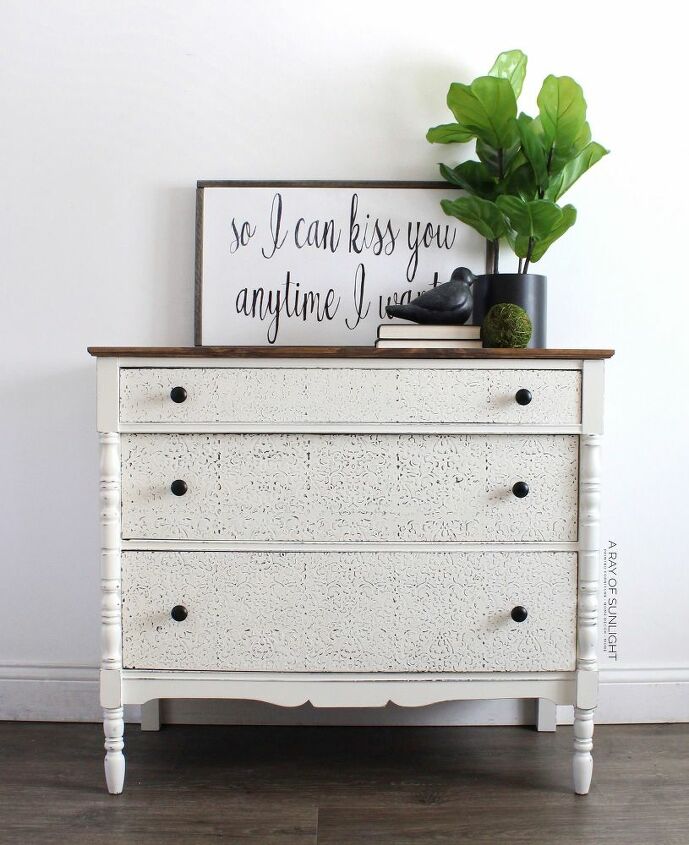
You can switch up the pattern by choosing a different stencil, different paint colors and by not distressing the paint. Let your imagination run free and have fun!!
Comments
Join the conversation
-
This is beautiful. I loved it even in one of the earlier stages--the green with the wood showing through. In the photo, the wood looks golden. I really appreciate the other comments, too. Thank you for a great idea.
-
Well I don’t know if I should do it because 1 I am clumsiest and if I mess up I would ruin my stuff but it is a good idea


Frequently asked questions
Have a question about this project?
Why didn't you do the sides too?
Can you tell me where to purchase the stencil?
Where can I purchase these products