


Walnut Cutting Board With Epoxy Resin

In this tutorial I will teach you how to produce Walnut epoxy resin cutting boards that you can make as a gift for any special occasion or Holiday, or keep them for yourself and enjoy the beauty for practical use or decor. This project is Beginner/Intermediate level in skill. You don't need all the fancy tools to create these cutting boards. I will mention what alternatives work just as great to get the project done. Enjoy!
If you enjoyed the written tutorial please check out the video and thumbs up/subscribe. I appreciate all my fans and to you taking the time to check out my content!
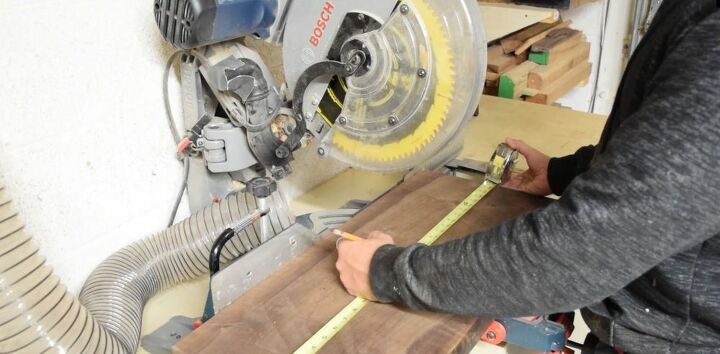
Cut out a 17 inch piece of Walnut, or any size that you prefer, leave at least 1-2 inches extra so that you can trim up after the epoxy as hardened.
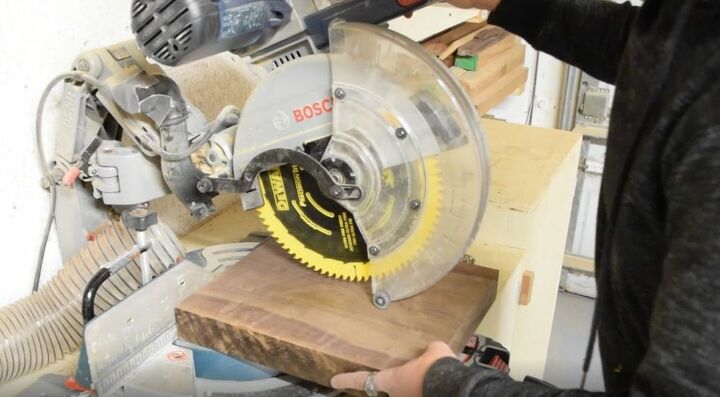
Cut the Walnut in half if you have a large width piece. Mine was around 12 inches, so I decided to cut it down to around 6 inches. The width is personal preference.
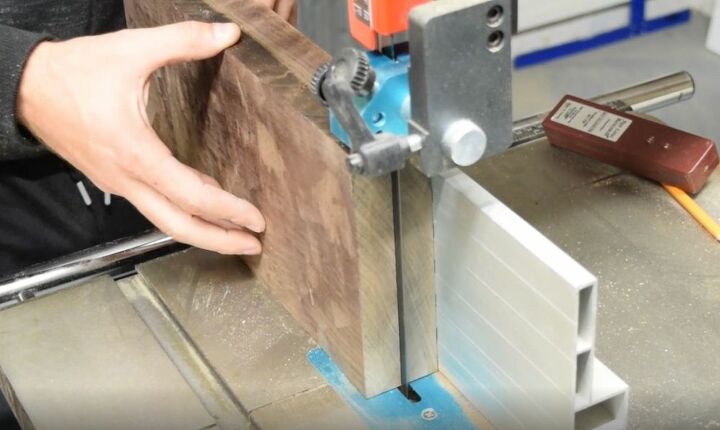
As you can see I am using 8 quarter Walnut (2 inches thick) and I need to cut it in half. If you don't have a bandsaw, purchase a 1 inch or 3/4 inch thick piece for your cutting board. Out of my 17x12x2 Walnut I am able to slice it all down to 17x6x1 so that I have 4 pieces for 2 cutting boards.
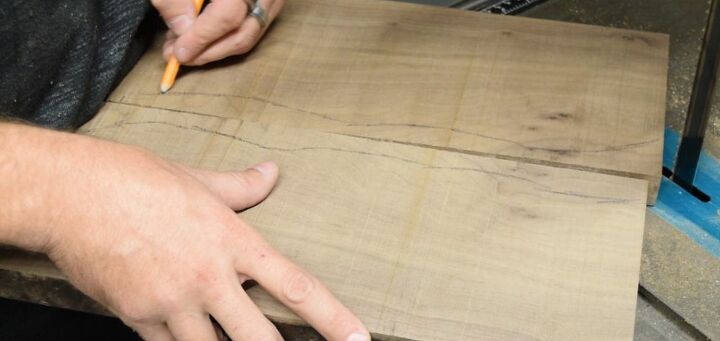
Take the two pieces of Walnut and put them side by side, draw some squiggly lines in whichever pattern you'd like. This doesn't have to be precise as you want it to appear like a flowing river. For this part if you do not have a bandsaw, I recommend a scroll saw or jigsaw. A handsaw or coping saw might also work.
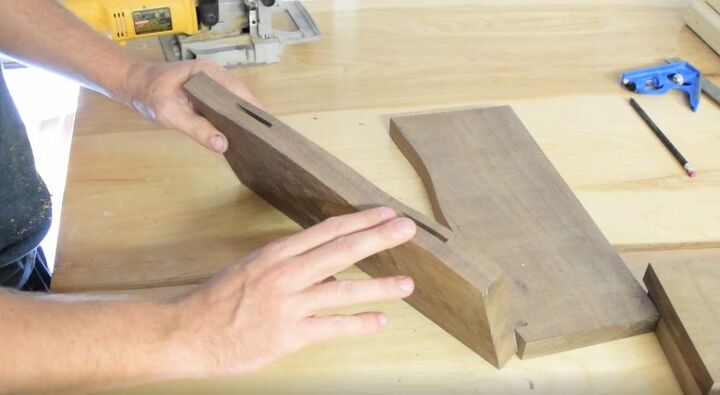
I used my biscuit joiner to cut these notches on the inside so that the epoxy has more to bond with. I recommend doing this. If you do not have a biscuit joiner, use a small hand chisel and carve out some slots. Be careful not to pull the chisel towards you.
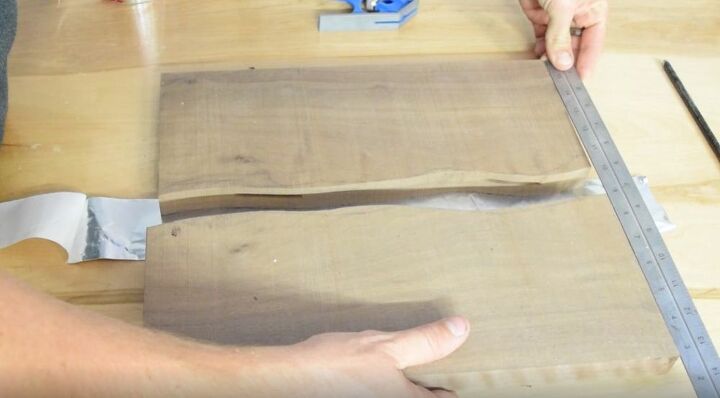
Put down a piece of Aluminum tape and press down to make the Walnut stick. Use a ruler to measure the width and make sure it is where you'd like it to be. My board ended up around 15 inches wide total. The more width the more epoxy you will need. I used about 12-14 ounces of epoxy per board.
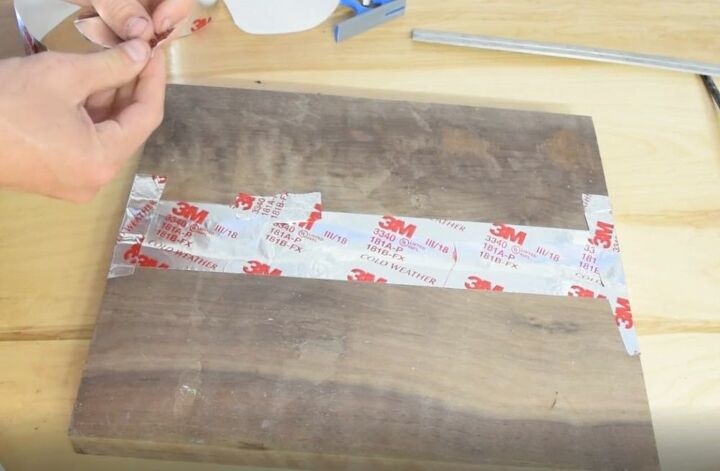
Be careful when picking up the board and be sure to press down on the edges to secure the bottom, add extra pieces of tape so that you won't have any leaks. I prefer to double up on the edges as I have had blow out before and its quite the mess to clean.
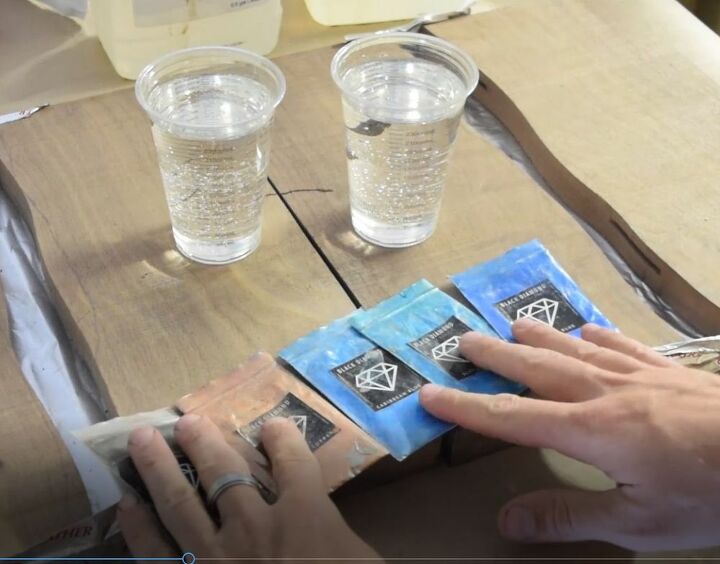
Mix up 12-15 ounces of epoxy for your board. The two cups in the picture are for two cutting boards. Pull out your pigments and begin mixing them with the epoxy. I used Three types of blue for one, Blue/Green, Cobalt Blue and Caribbean Blue. For the other board I used Liberty Copper, Mahogany and Vivid Orange. Be sure to mix for at least 5 minutes to ensure the epoxy is well stirred.
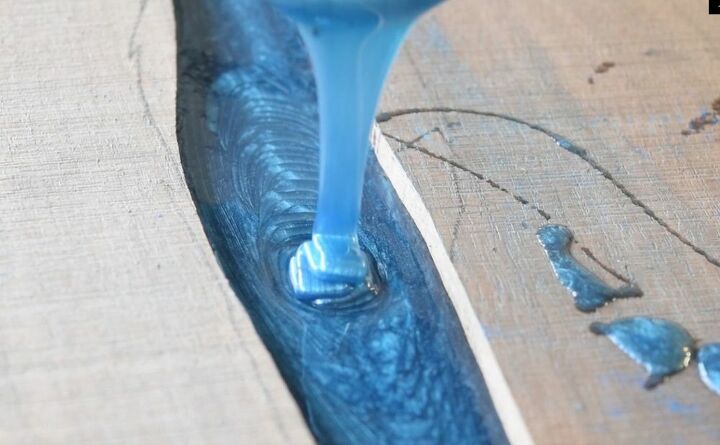
Pour away and enjoy the day! Should I trademark that? Stir it up and make some cool swirls in the epoxy. It does tend to revert back, so I like to revisit the epoxy every 20-30 minutes to ensure it stays swirled.
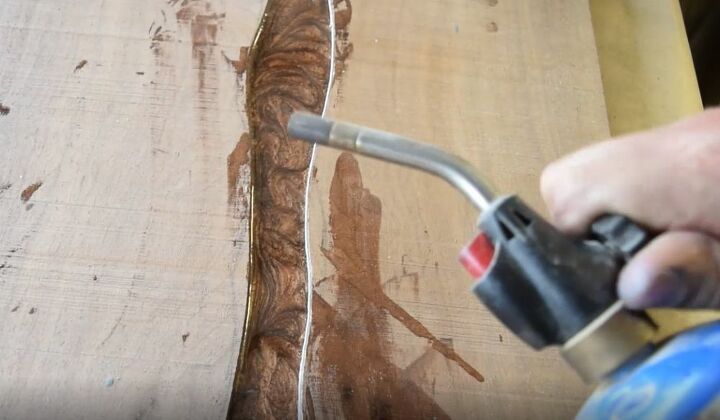
You can use a torch or heat gun to pull the bubbles out of the epoxy. Don't get too close, light passes are all you need.
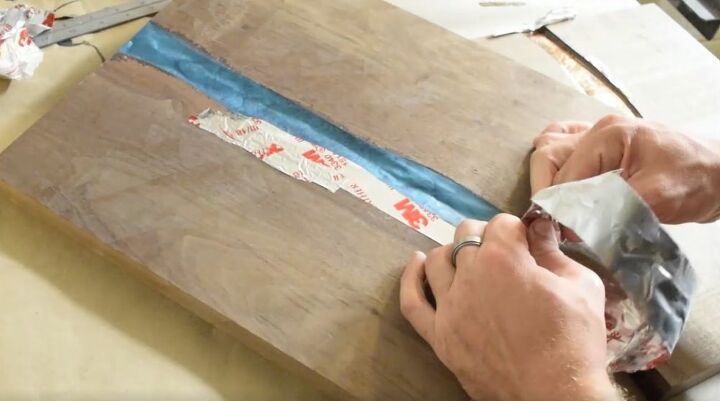
Come back the next day and peel the tape off.
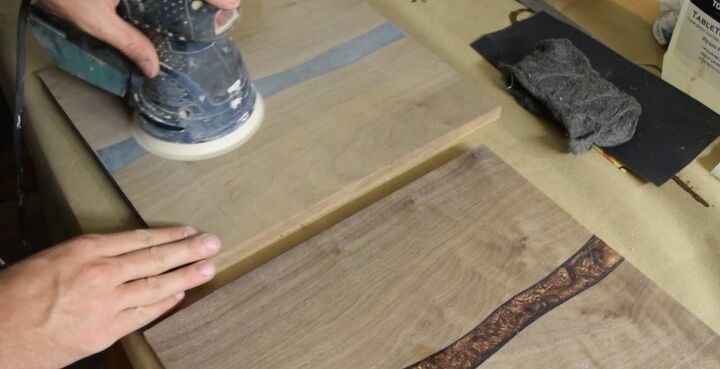
Trim up the edges and sand away! If you have a planer, plane it down to save time. You will get low spots if your tape bends and it will take awhile to get rid of. Using a hand plane will work also.
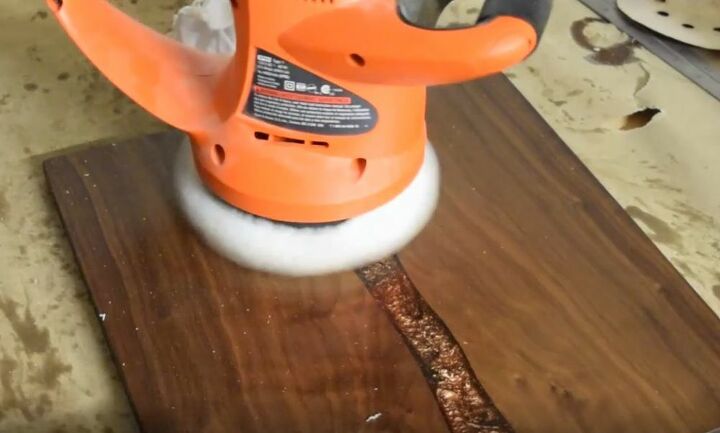
I prefer to buff it out after sanding but its not needed. I wasn't a fan of the wax I used for this project, so I would say try a mineral oil instead.
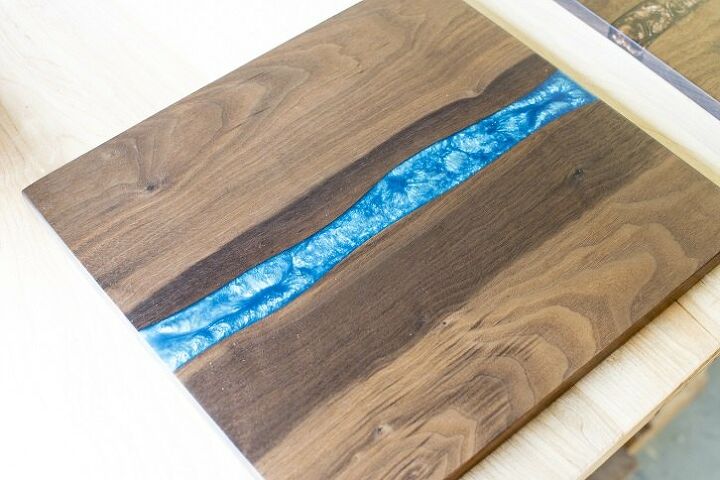
And there you have it! The finished project. What a gorgeous gift for anyone looking to add beauty to their lifestyle. Thank for you reading and enjoy!
Read this guide on how to clean a wood cutting board for tips on keeping your new masterpiece in good shape!


Comments
Join the conversation
-
Really great explanation in the video. Would love all these tools!! Beautiful finished cutting board!
-
These boards are beautiful. You have awesome tools that make it look easy.


Frequently asked questions
Have a question about this project?
What brand of epoxy do you suggest for holding up on a cutting board?
Where do you purchase your wood from?
what is the make and model of your 6 inch band saw?