


Secret Jewellery Box
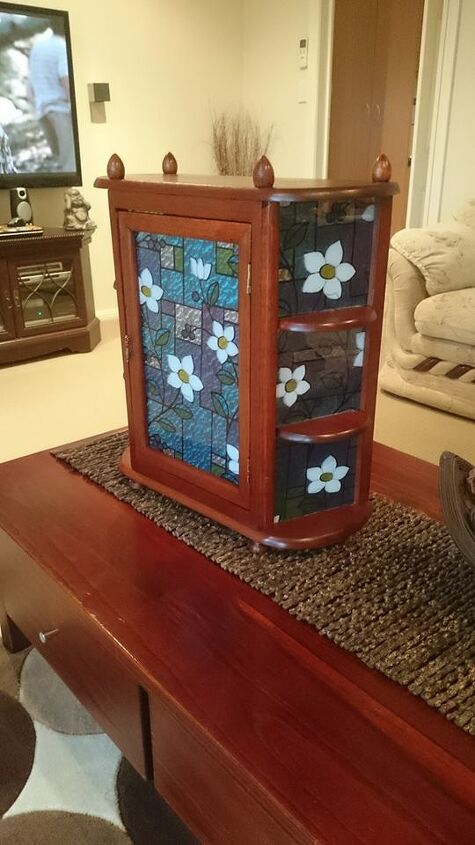
I found this vintage display cabinet on Facebook market place a few years back when I first started doing DIY from repurposed furniture. I knew it was to old fashioned to restore and sell. My next idea was a hidden jewellery box that can be put on a table or hung on a wall. To the average eye it was just a display box but inside you could store all your jewellery.
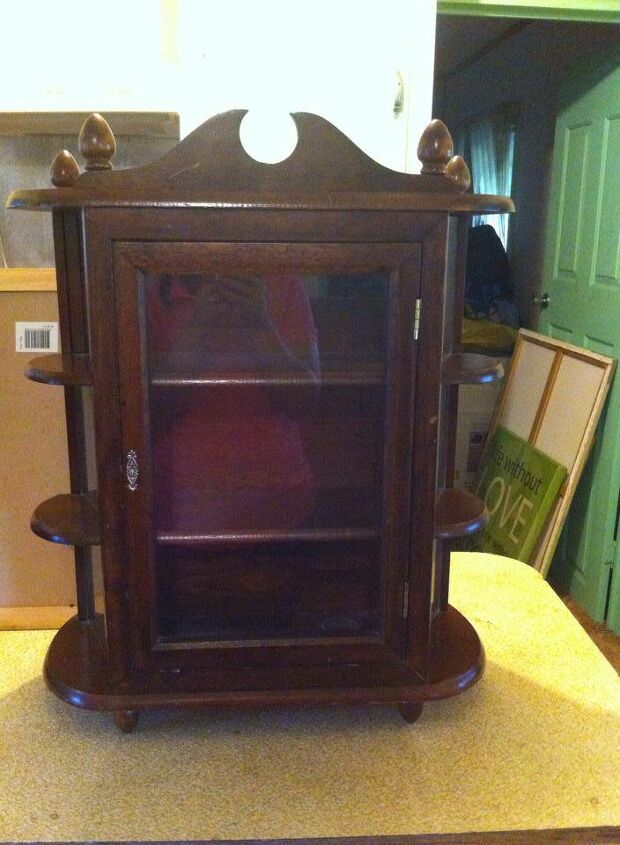
The colour was really outdated and the little arch on the top gave away its age. To start the whole cabinet was taking apart to make it easier to sand all the pieces to remove all the dark stain. Cedar stain was added and 2 coats of varnish to seal in the colour.
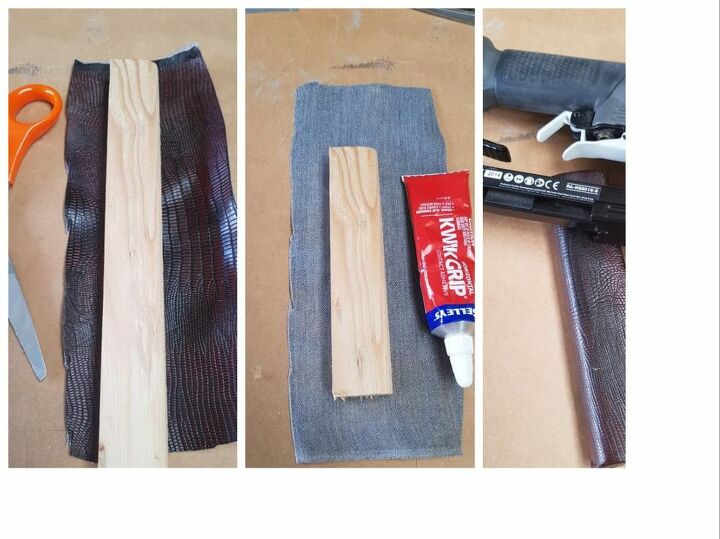
I cut thin pieces of wood and covered them with the leather for the ends of the shelves, to stop all the jewellery from falling out. The leather was glued in place first and then I used a staple gun to secure it in place. Because of the shape of the box, the frame kept the shelves in place.
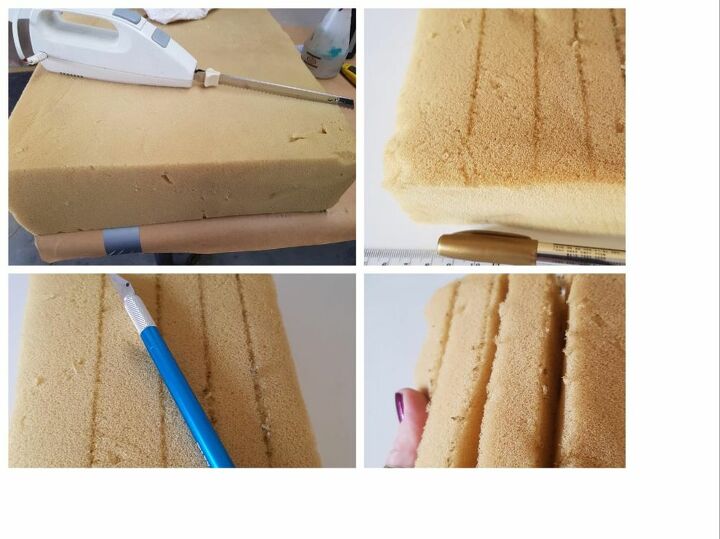
To make the ring display, I found an old foam mattress and cut a piece to size to fit into the top and the middle shelf of the box. Once I had a snug fit I measured out the foam to add some slots for the rings to fit into. A craft knife was used to cut the slots in the length of the foam. I tested the depth to make sure they were deep enough to hold the rings in place.
To make partitions for earrings and other bits and bobs. I covered the base of the box with velvet fabric first. Next, I cut scraps of plywood to make small partitions with. These were also covered with the velvet fabric using multi-grip glue. I made the partition so they would be a tight fit. They were also glued into place.

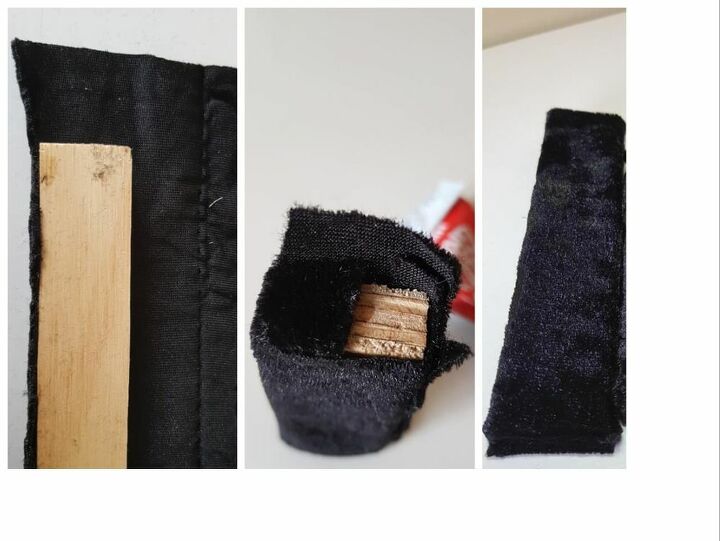
Black velvet fabric was used to cover the foam. To glue the velvet to the foam I used a spray adhesive and sprayed it into the slots first. Next, I used a ruler to push the fabric down into the slot. I found that if the fabric was not glued to the foam when the ring was removed the fabric pulled out too. Start at one end and glue the fabric into each slot.
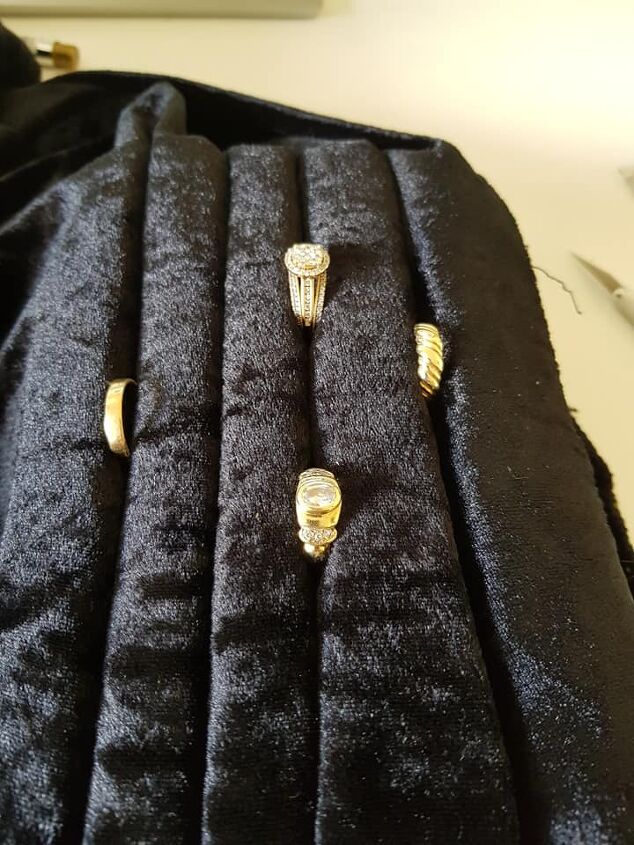
The excess fabric is cut away and all loose fabric was glued to the bottom. You do not see the sides or the bottom once the foam is inside the box. My foam was also not cut as straight as I would of like, but using a carving knife was the easiest way I found to cut the foam. The foam was then glued to the inside of the box using Kwik dry glue.
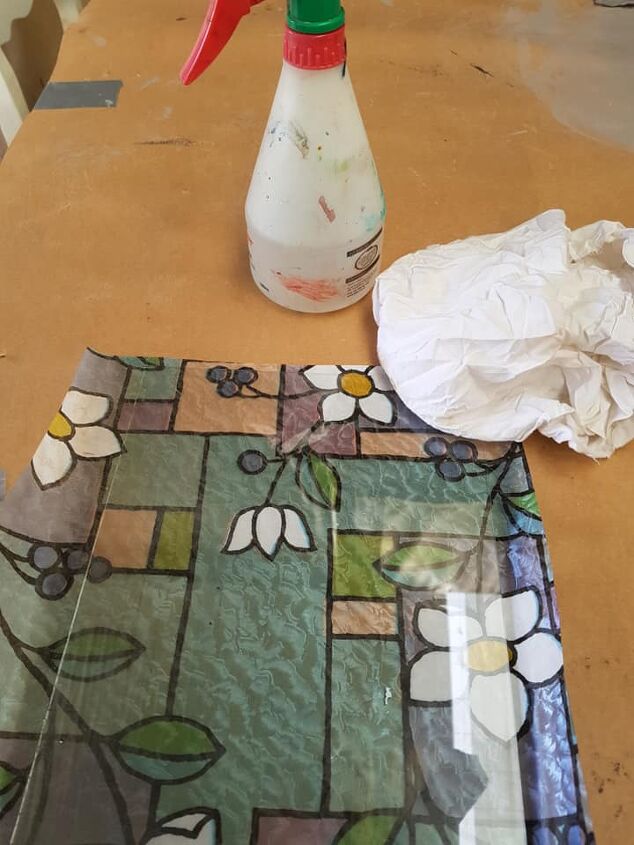
Because I did not want anyone to see that it was a jewellery box I covered all the glass on the box using a window film. I chose a stained glass effect film which was very easy to use. I put my glass on top of the film and cut around the glass to get the correct size.
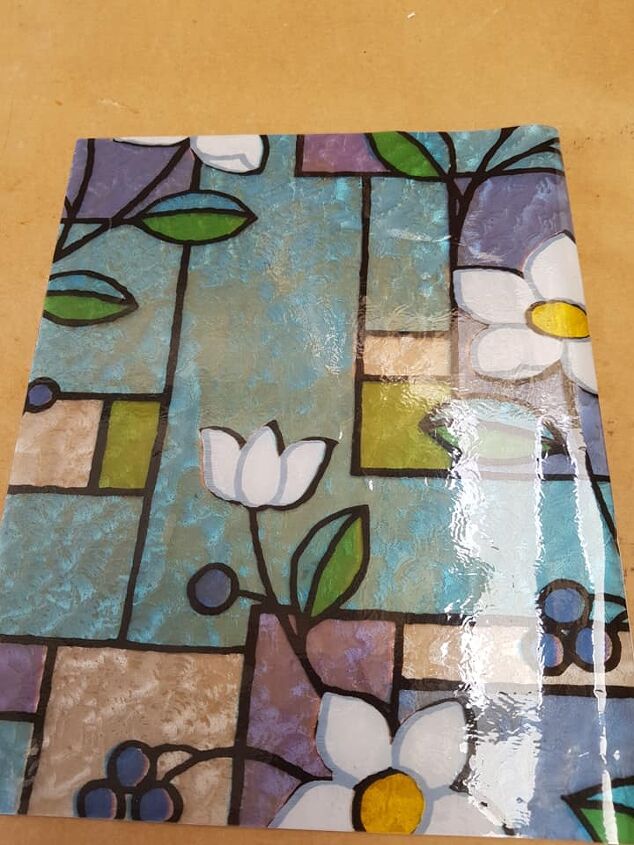
To get the film to stick to the glass, I sprayed water on the glass first and then added the film. Using a soft cloth smooth out the film. If there are still water bubbles visible use a credit card to push out any excess water.
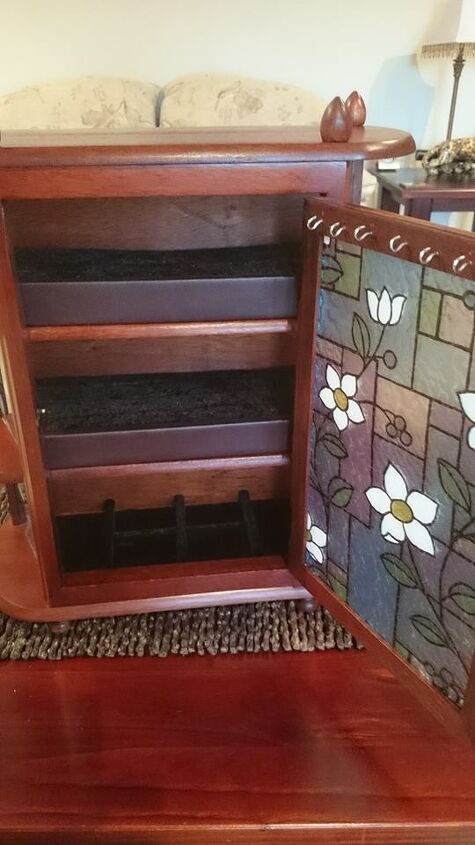
I added small hooks to the top of the inside door to hang necklaces up.
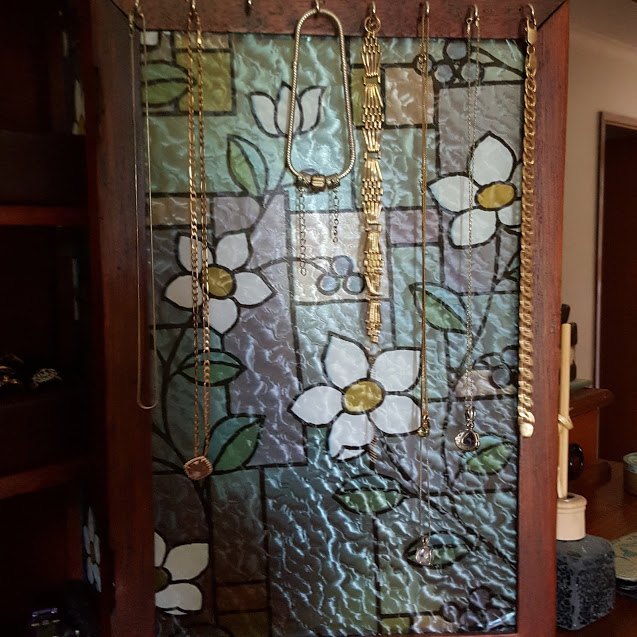
Necklace and bracelet hooks.
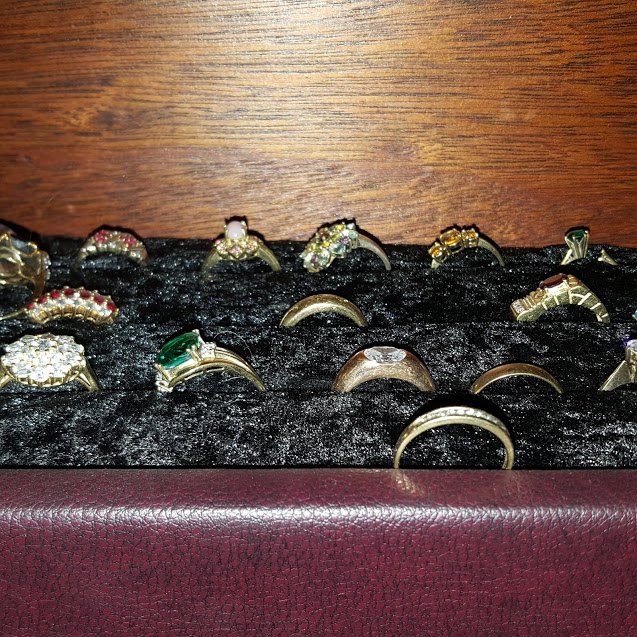
Ring display
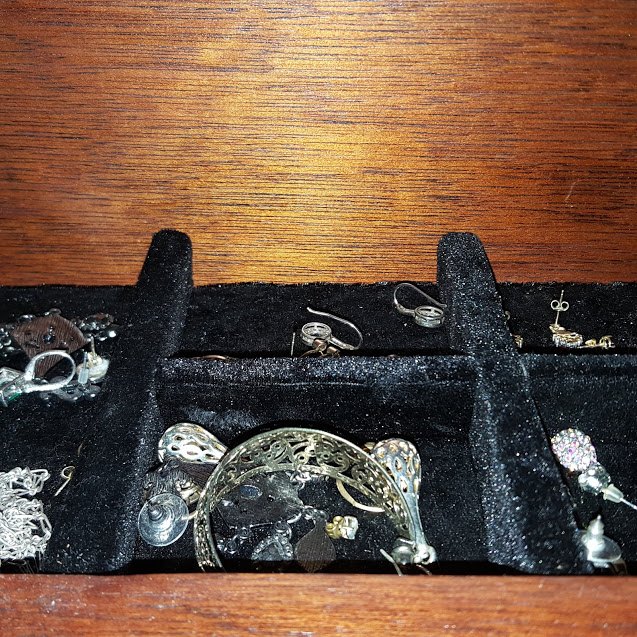
Storage for bits and bobs. Looking for more jewellery stage ideas check out this bracelet stand made from recycled materials. If you have a larger collections why not try and make this jewellery cupboard made from an old table.
Side view of little windows
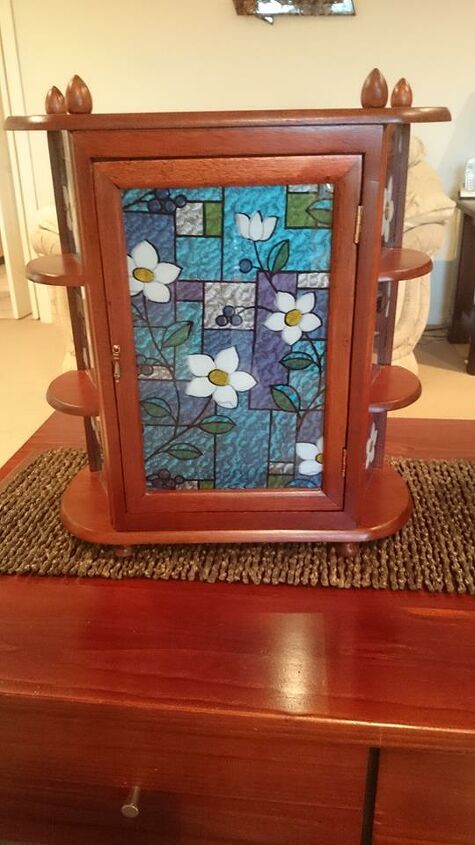
Secret jewellery box that can sit on a table or be hung on a wall and your jewellery will not be visible.
Looking for a new DIY project check out this great horse racing game that can be played by people of all ages. Hours of family fun.
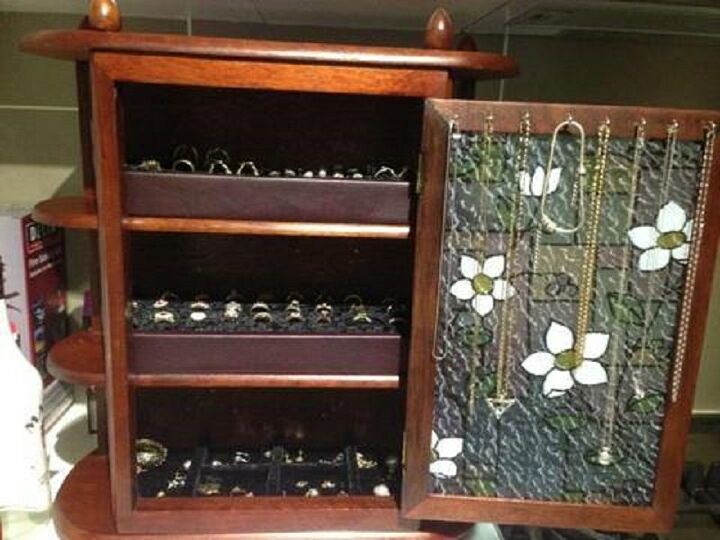
View of inside fully stocked.
Resources for this project:
See all materials


Comments
Join the conversation
-
Love this adorable, useful and gorgeous idea! Thanks for sharing!


Frequently asked questions
Have a question about this project?