


Acid Etched Glass Canisters
Dress up your plain glass canisters with acid etching. This is a super quick and easy project!
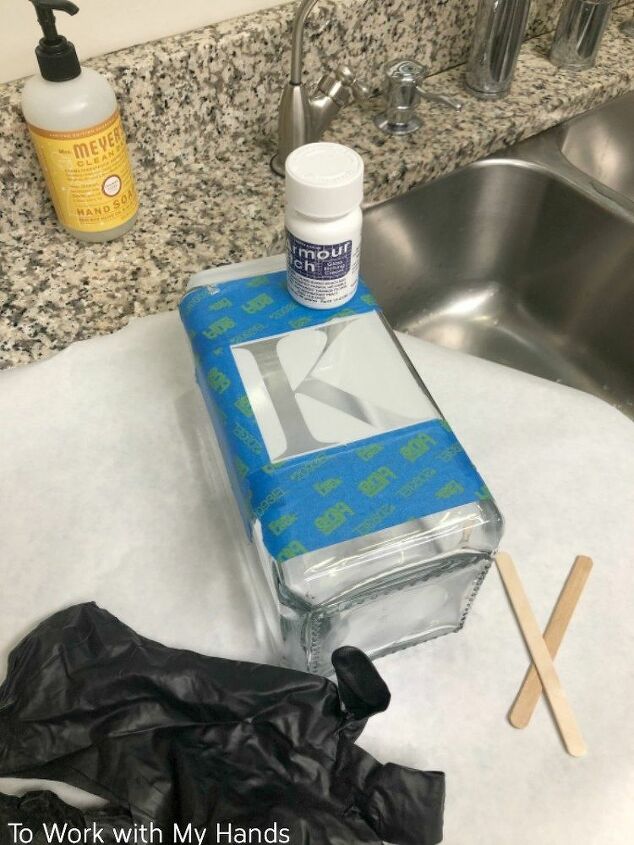
Here's what you'll need to etch your glass project:
- a glass canister (flat sides makes this much easier).
- stencil
- painter's tape
- Armour Etch etching cream
- craft sticks
- disposable gloves
- paper to cover your work surface
- a supply of running water
Acid etching isn't hard, but you are working with an acid that can easily burn your skin. Don't take shortcuts on safety! Be sure to cover your work surface with craft paper or newspaper and wear disposable gloves.
First, align and secure your stencil onto the surface.
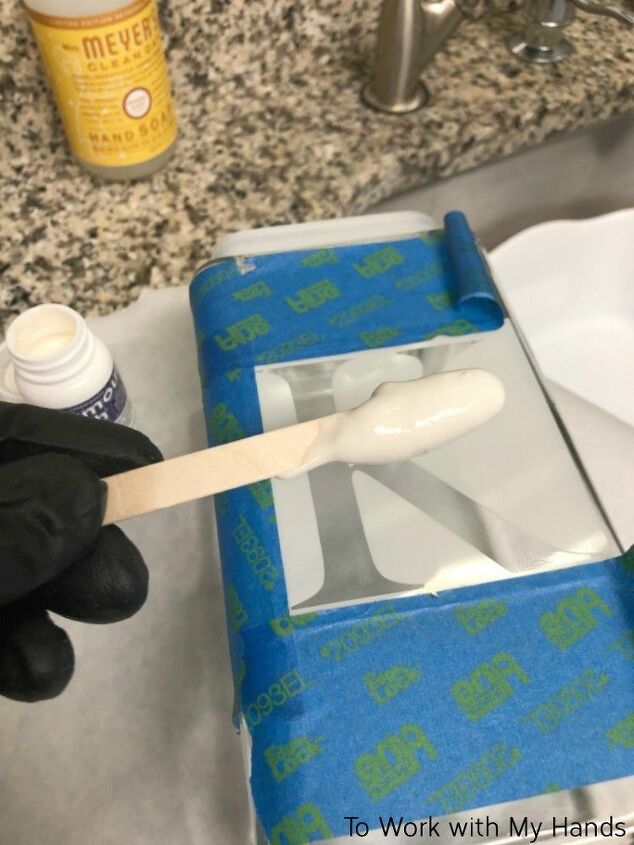
Using the craft stick, dip the etching cream from the bottle and smear it over the exposed area of your stencil. Etching cream is pretty thick, so you don't have to worry too much about it dripping as long as you don't get a huge glob.
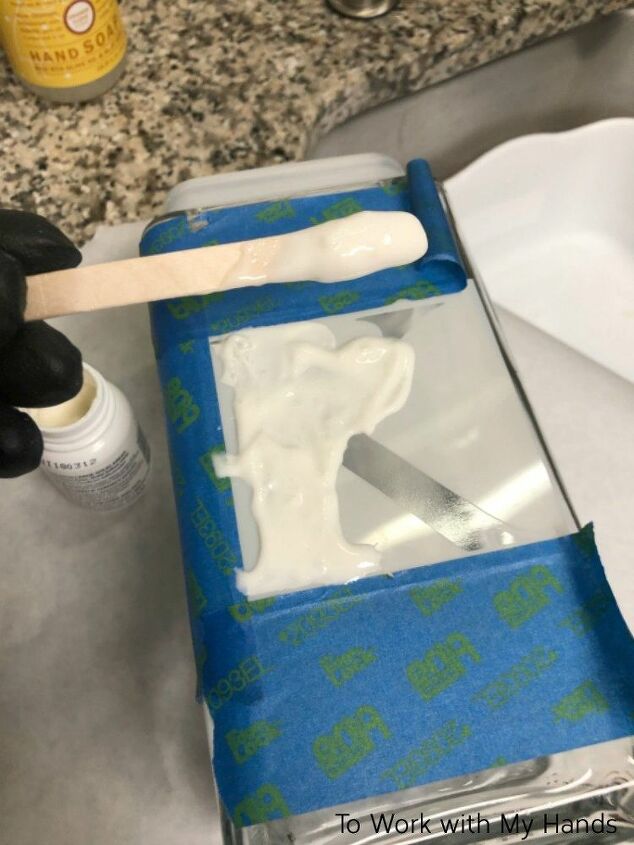
Make sure you cover the transfer area well.
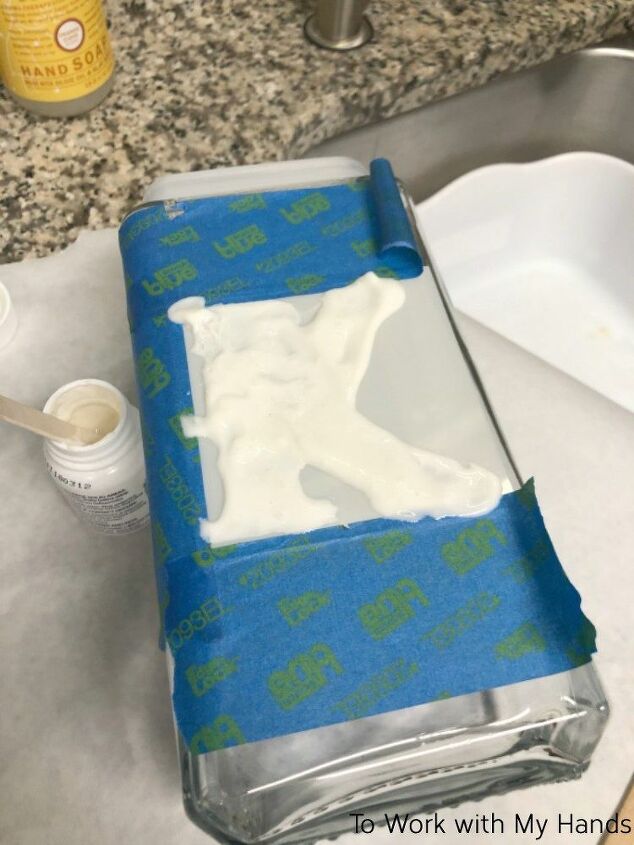
Let the etching cream sit for one minute.
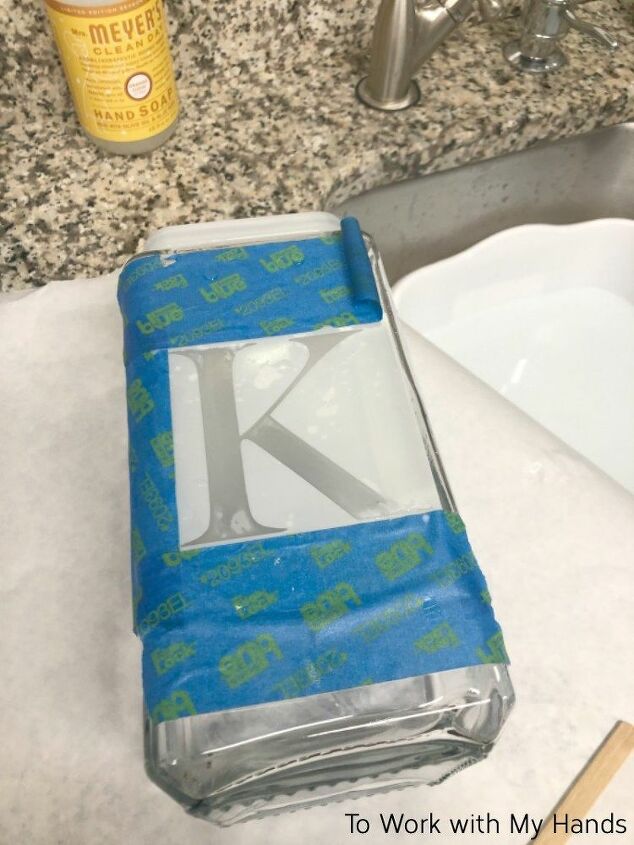
After the wait time, rinse the etching cream under running water. If any of it clings to the glass or stencil, you can wipe it off with your gloved finger.
(I used a dishpan in the bottom of my sink to catch the rinse water instead of washing it down the drain.)
At first, it won't look like anything happened, but when you dry the glass, you'll be able to see the etched design.
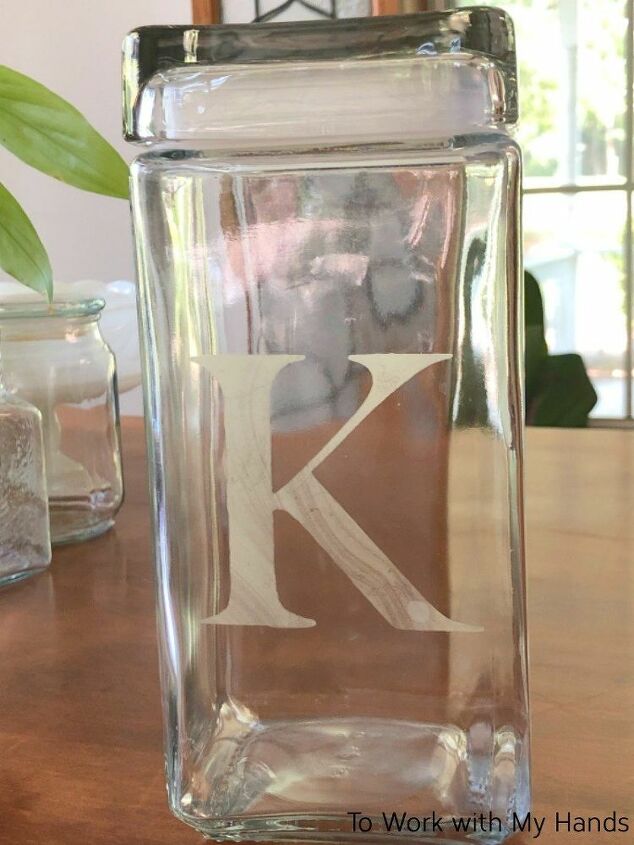
This was only a minute or two after drying the canister.
And that's how easy it is to acid etch glass!
Resources for this project:
See all materials


Frequently asked questions
Have a question about this project?