


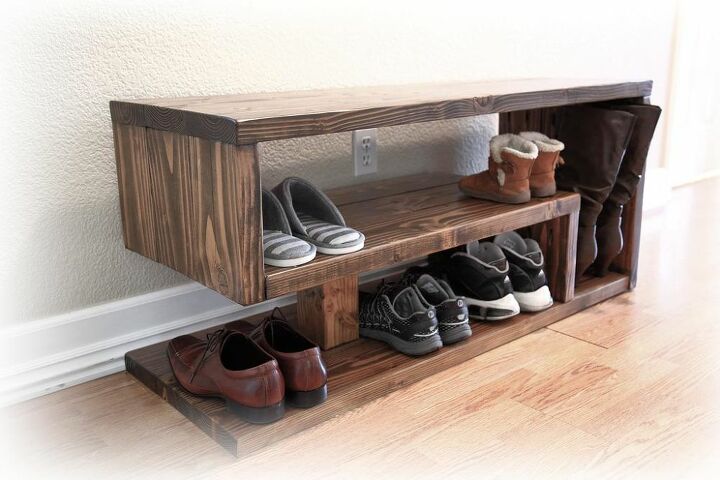
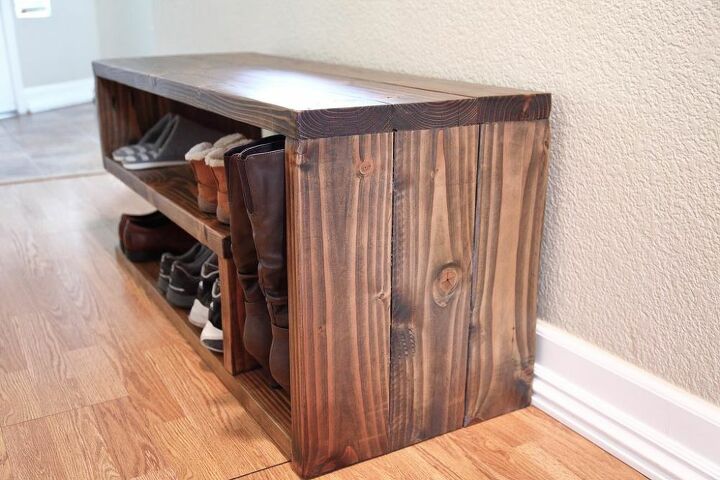
Shoe Rack Bench

This DIY shoe rack bench is very simple to make and cost about $30 of material. It’s very sturdy and could also be used as a bench for seating.
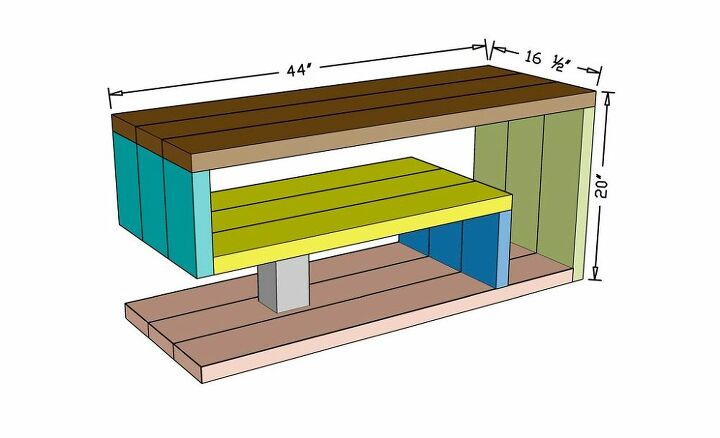
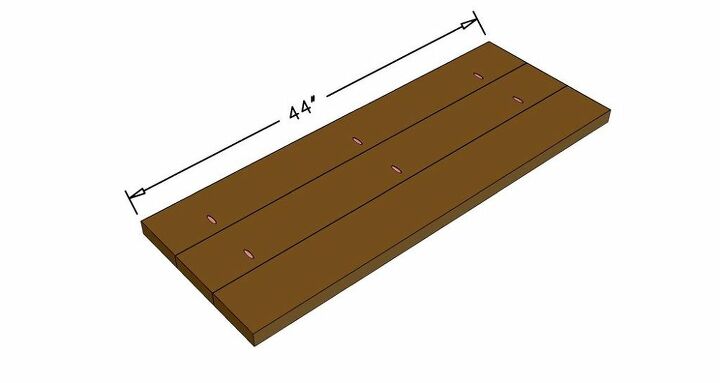
These are the dimensions
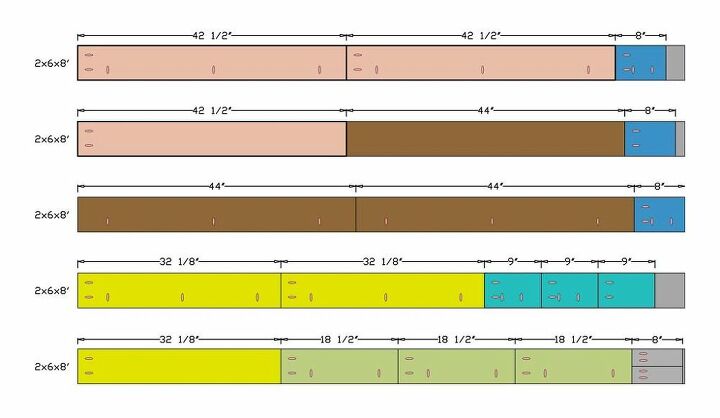
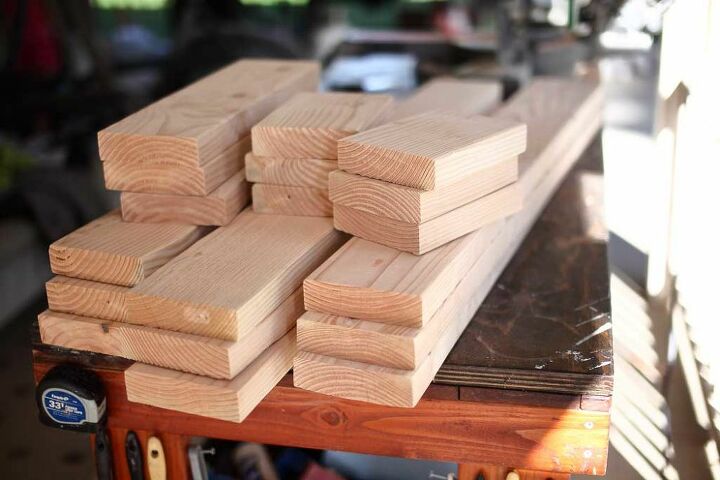
Here's my cut list
Step-1 Cut and Assemble Top
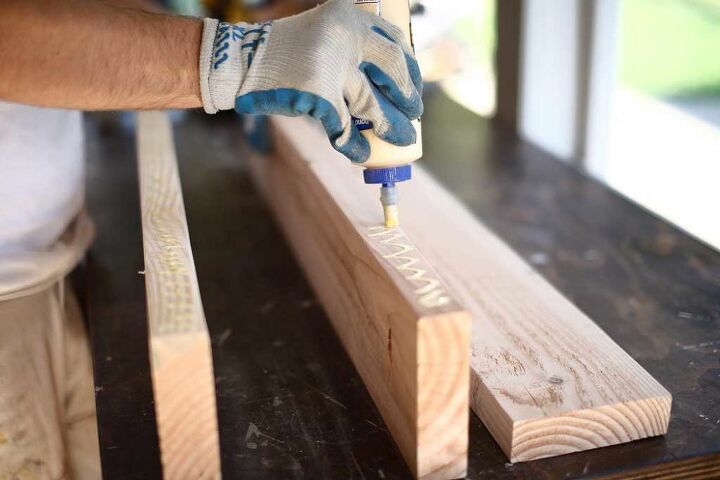
Using Miter Saw cut 2x6 44" long (x3) and drill pocket holes on two of the boards.
Clamp the boards together and screw them using 2 1/2" pocket hole screws.
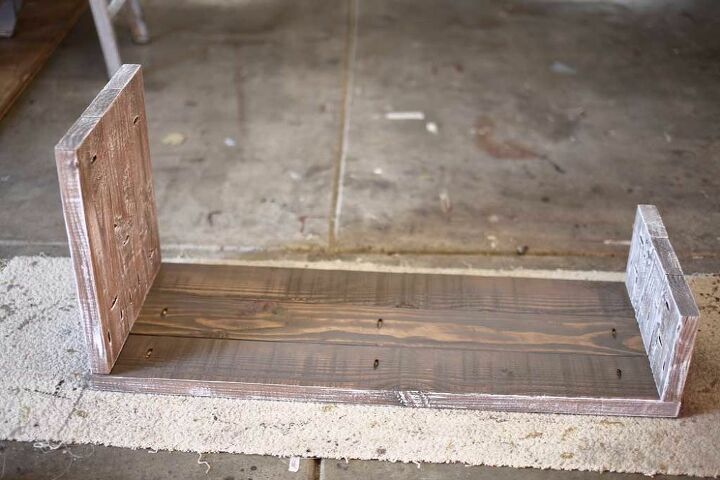
Step-2 Assemble Sides of the Bench
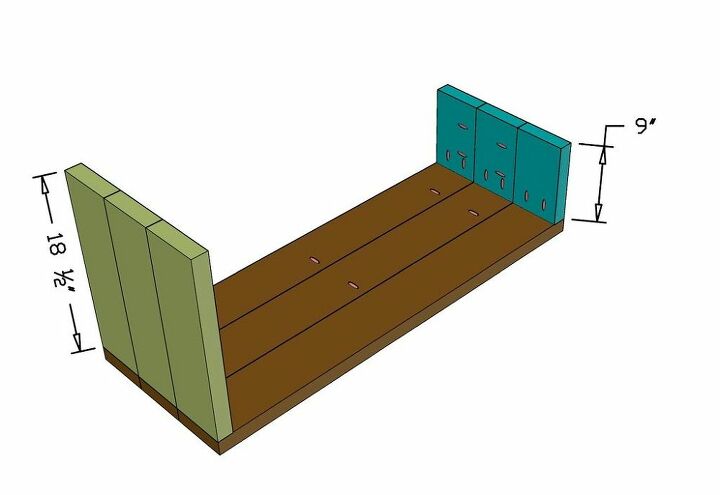
Cut 2x6 9" long (x3) and 18 1/2" long (x3). Drill pocket holes as shown on the cut list. Clamp the boards before screwing them in. This will prevent the boards from shifting while screwing.
Step-3 Assemble Middle Section
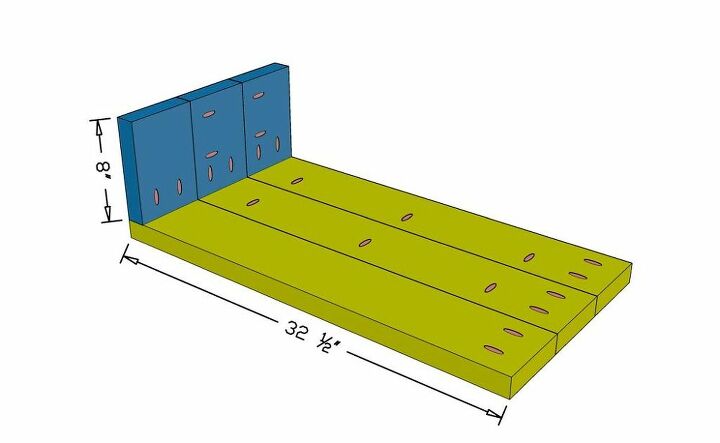
Now cut 2x6 8" long (x3) and 32 1/2" long (x3). Drill pocket holes and assemble the middle section.
Step-4 Temporary Pieces
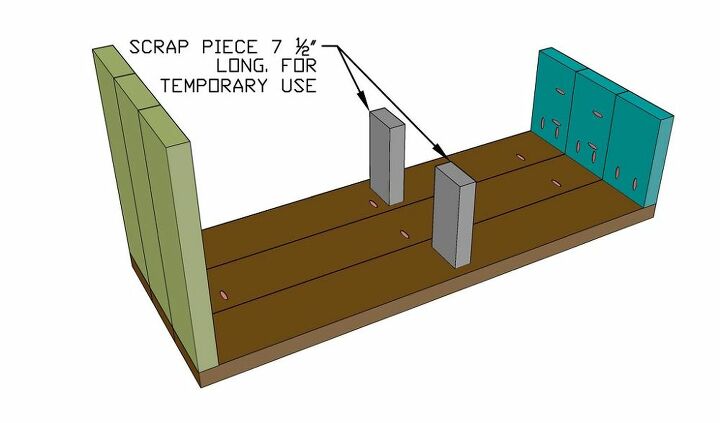
Take two scrap pieces and cut them to 7 1/2" long. This will be used temporarily to hold the middle section.
Step-5 Attach Middle Section
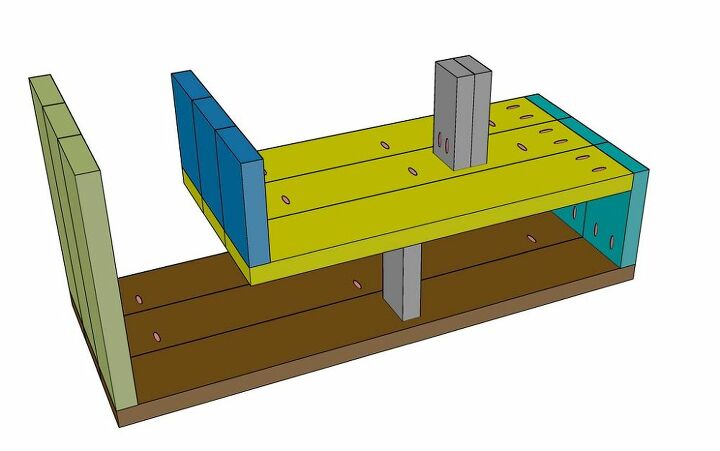
Now take the middle section and place it over the temporary scrap pieces and attach to the side boards. After that, attached the middle support blocks.
Step-6 Attach Bottom Section
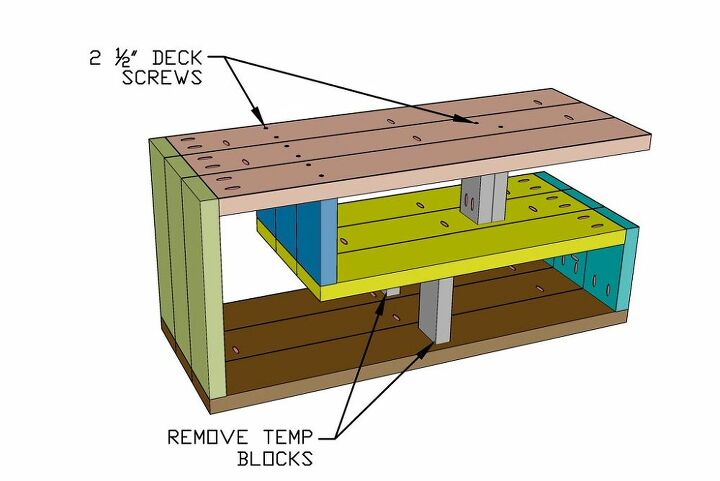
Finally place the bottom section and attached it to the side. Use 2 1/2" wood screws to secure to the middle section and support block. After everything is secured, remove the temp blocks.
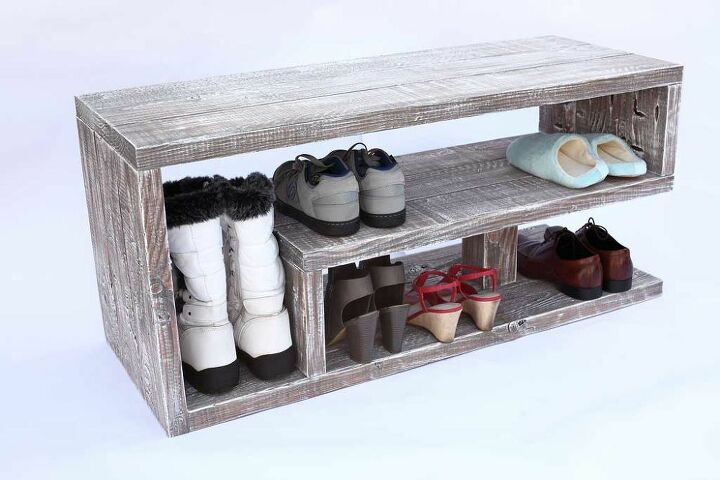
That's it, you're all done with this beautiful shoe rack bench.
Resources for this project:


Comments
Join the conversation
-
Very creative and exceptionally well done . Thank you !
-
awesome work!! i need this


Frequently asked questions
Have a question about this project?
Yes, I'm going to do this. May I ask why the pocket holes are there?