


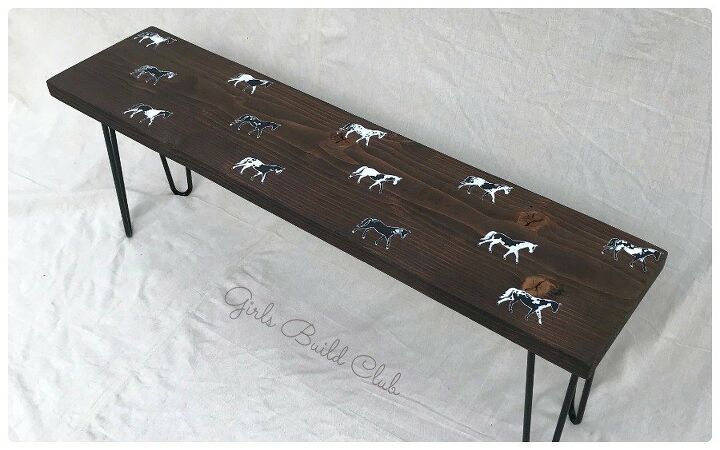
Painted Horse Bench DIY
This painted horse bench is perfect for the girl who's a little country at heart! This project uses one horse stencil that you can customize to create some variety in your herd of horses. :) There isn't much skill involved. I just opened a horse book and started giving my painted horses random splotches here and there.
For the full tutorial, go to my blog post at this link - GirlsBuildClub.com.
The bench itself is as simple as can be. I made it from a single board and bought some hair pin metal legs for it on amazon, and the legs were quite cheap at about $10 each!
As for time, I think it did take me a while to paint all those horses, but it was a nice lazy weekend, and quite relaxing to paint and watch the design unfold. I can't wait to see what you come up with!
You can customize this technique to your own style by choosing your favorite animal and finding a good silhouette of it online. Good luck and have fun!
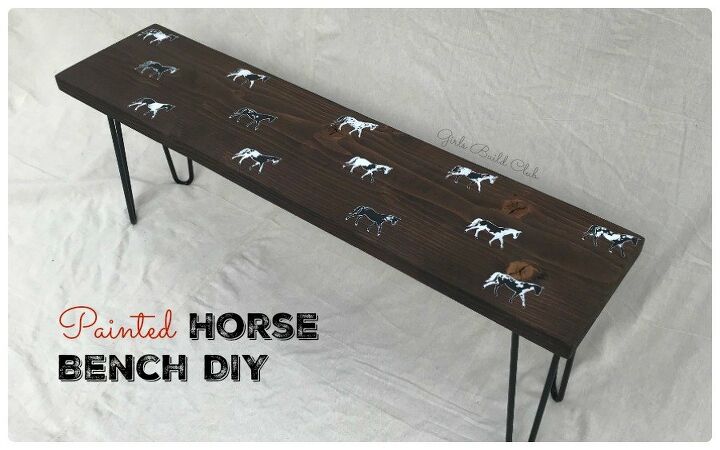
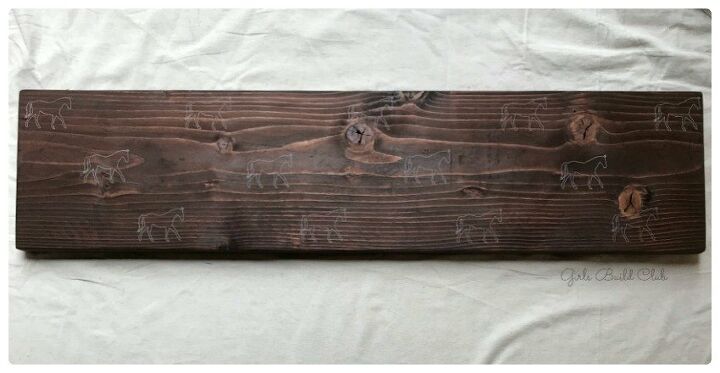
Painted horse bench DIY with hair pin legs...the finished product!
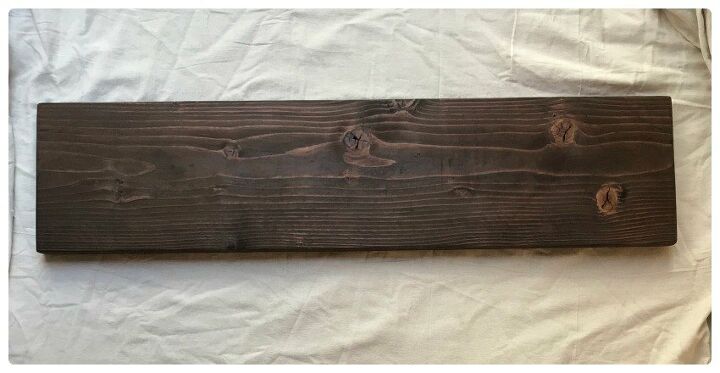
I started by prepping the bench seat, which is simply a 2" x 13" board. I sanded down all the edges, and stained it with the color "honey" by Minwax. I looooove this stain color.
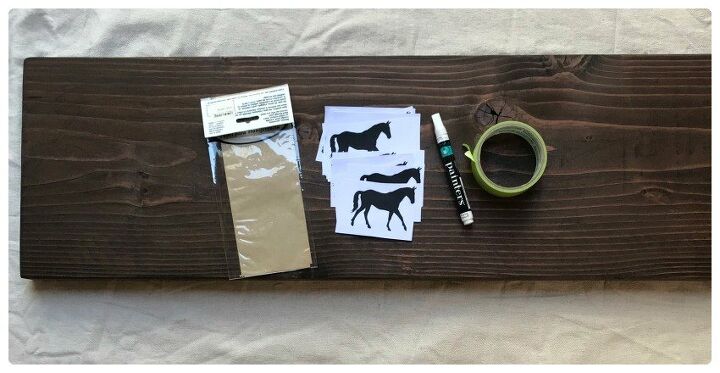
I found a horse silhoutte online that I printed out to use as my stencil. See that package of tan paper? It's white carbon paper. I will spread that out, white side face down on the bench. Then I'll put my horse stencil on it and trace the horse stencil with a ball point pen. That will transfer the white outline to the bench...
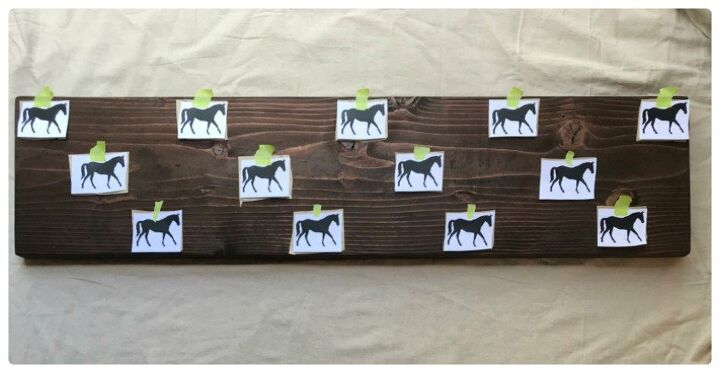
I arranged the horses perfectly and taped them down so they wouldn't move when I traced them...
Now you can't quite see it in this photo above, but I've cut out tiny squares of the white carbon transfer paper, and placed it underneath my horse silhouettes.
Can you see the very faint horse outlines here? I did that by tracing the horse silhouette on top of the white carbon transfer paper.
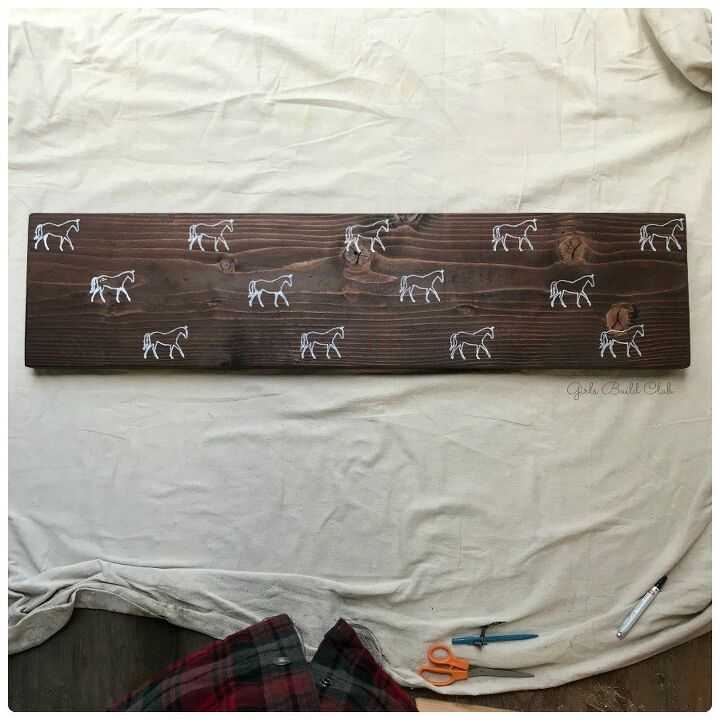
I went back over the faint lines with a white paint pen.
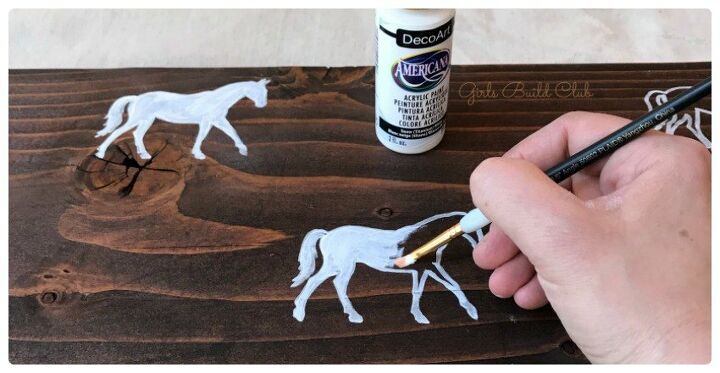
Then I filled in each horse outline with white craft paint. This is nothing special...just $0.99 a bottle at any craft store.
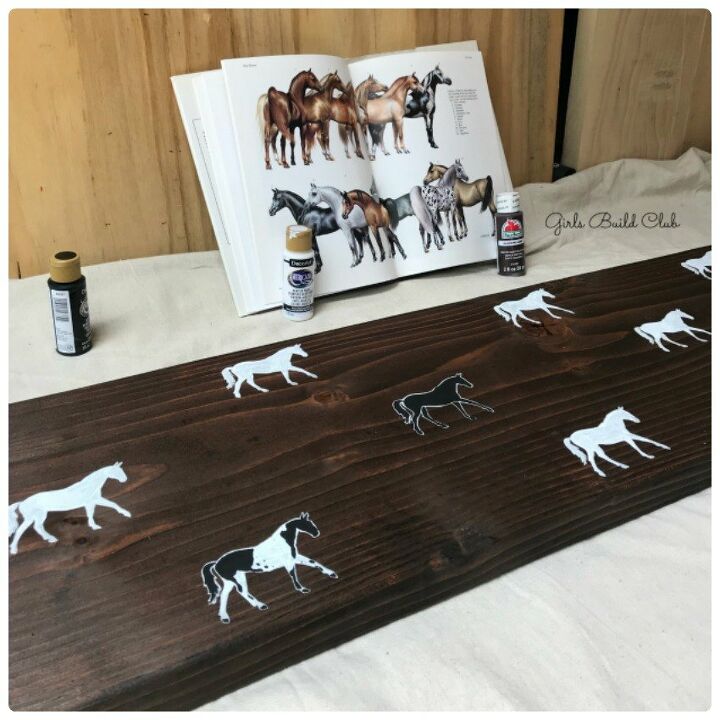
This is where it gets fun for me. I opened my horse encyclopedia that I found at GoodWill thrift store and started adding splotches of black paint to my horses, trying to mimic what I saw in the horse book.
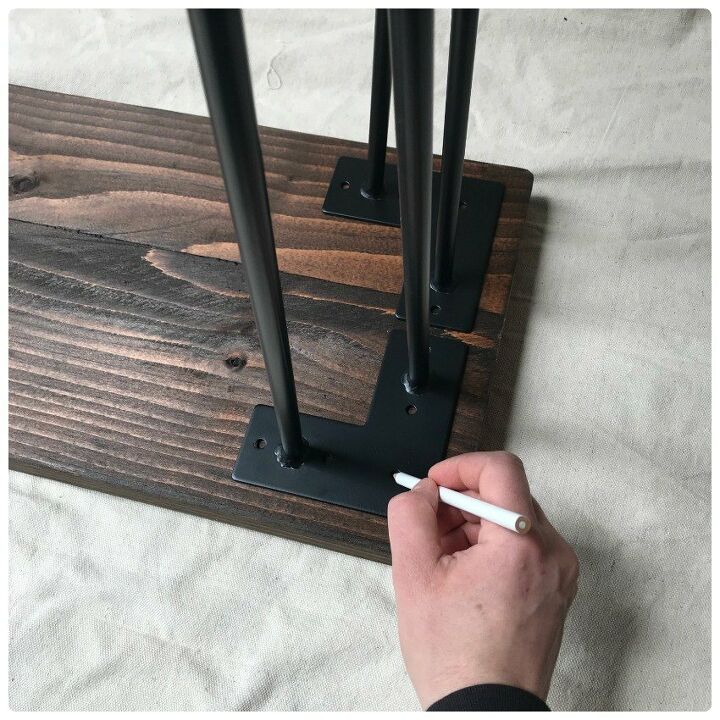
At the end I turned over the bench, and screwed on some hair-pin legs. Then I did 3 coats of oil based polyurethane by Minwax. It added a lot of depth to the finish.
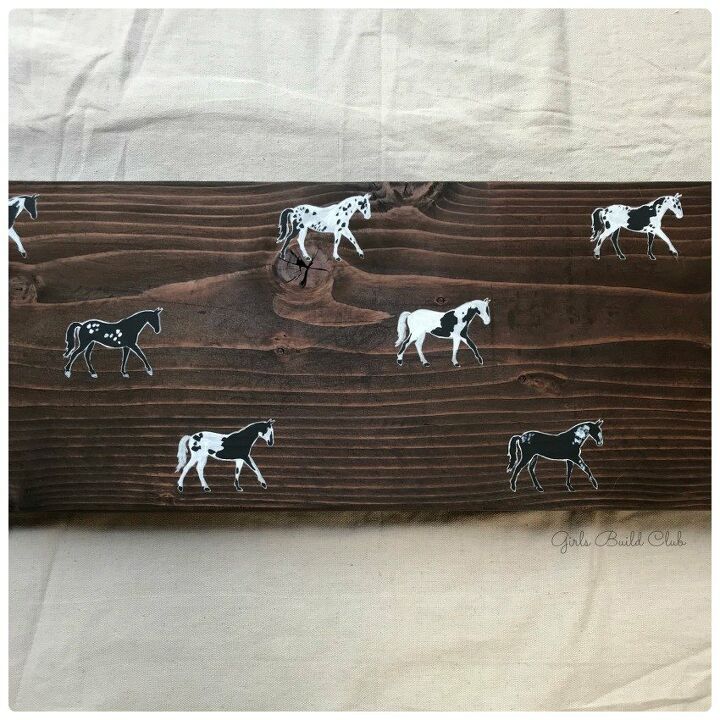
Here's a closeup of the painted horse bench. This ended being one of my favorite projects!
What do you think? Will you try this design with your favorite animal?
Wouldn't it look great in a country farmhouse entry way, right under the coat rack?
If you enjoyed this project, I think you'll like the Girls Build Club newsletter.
Thanks for stopping by! For the full tutorial and details on the products I used, check out the blog post!
Thanks!
Liesell @ GirlsBuildClub.com
Resources for this project:
See all materials


Comments
Join the conversation
-
Can't wait to make this with my barrel racing grandgirl!
-
I do love this!


Frequently asked questions
Have a question about this project?
This is awesome. Did you poly over it and if so what kind of Paint pens do you use?
Did I miss this? What was the reason you traced the horse and filled it in, instead of using the stencil and brushing the white horses on the board? Seems like it would have been easier. Anyway - I love it.
Hi, LOVE this! Actually have two 2x ? boards on my front porch left by previous owner and have been trying to think of a way to use them. This idea is perfect! Thank you. Oh, how long is your bench??