


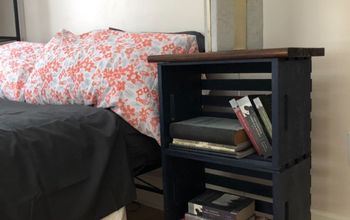
Transforming a Desk Into Two Night Stands

I found an old, broken sewing machine desk at a local thrift store for $12. The sewing machine was missing and the top piece that covered the sewing machine when it was under the desk was missing, so it didn't even work as a plain, old desk. I thought if I could remove the broken middle part of the desk, I would have two end tables or night stands, and so began my next project.
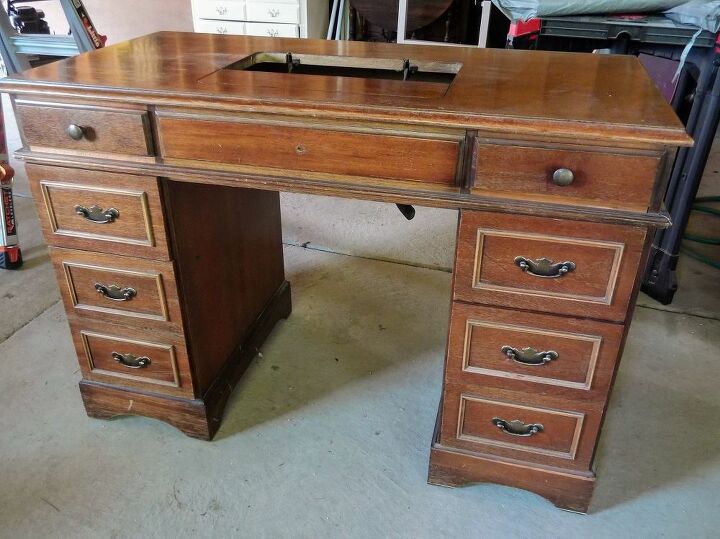
This is the desk as I bought it. The two bottom drawers on either side were not the same size - the one on the left looks like two drawers, but it actually pulls out as one giant drawer. The right side drawers are all separate. So I knew right away, I was going to remove those drawers and make them open shelves.
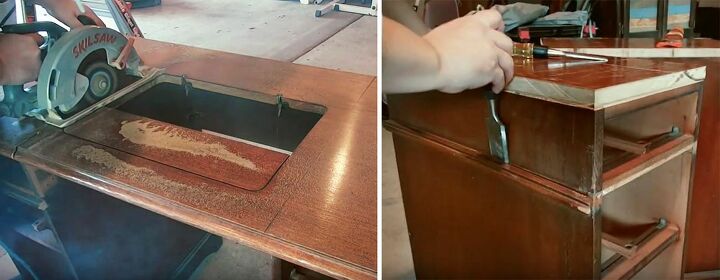
The first step was to remove the middle section of the desk and the trim. After using a straight edge to mark the lines where I needed to cut out the middle, I used a circular saw to do the cutting. I also used a circular saw to remove the top trim. For the trim that was wrapped around the body of the night stands, I just kind of chiseled off those pieces.
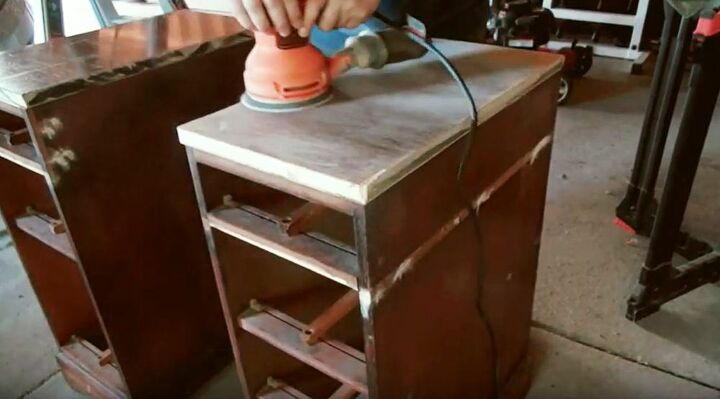
I used wood filler to fill in all the holes and any big scratches, dents, etc. Then I used 120 grit sandpaper to do a quick sanding over everything.
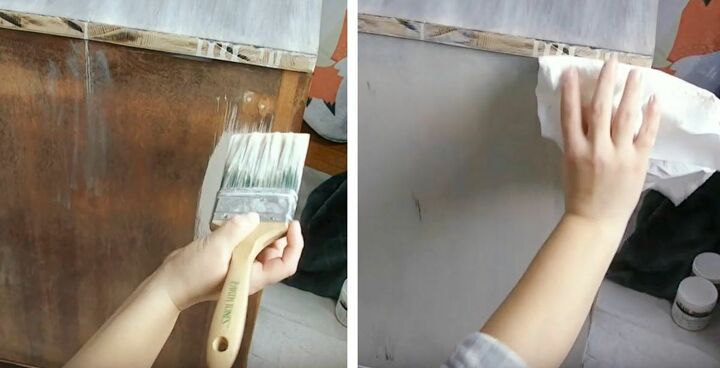
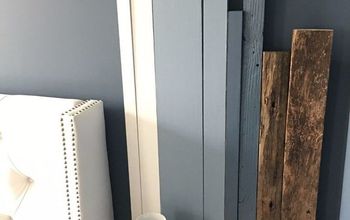
My painting plan was to blend two different colors using a color wash technique and dry brushing. I started with a tan color, added some water to dilute the paint, stirred it really well, and then applied it as the base coat. Once I had one section done, I used a clean rag to lightly wipe away any excess - because it diluted with water, it was thin and a little more "drippy" than regular paint.
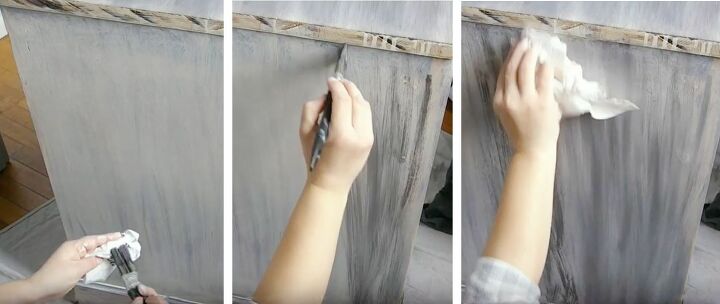
Then I used a dark gray paint for the dry brushing. I would get a little paint on the brush and then dab it on a paper towel. Then I used light, quick brush strokes to apply the color. I worked in small sections because I wanted to blend the paint before anything dried. To blend the paint, I used the same rag that was used to remove the excess tan color and I wiped over the gray streaks.
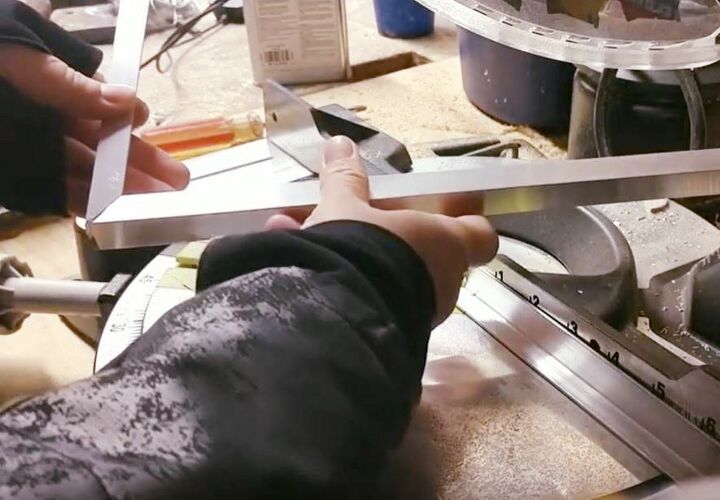
For the new trim, I wanted black metal to go around the top. So I picked up some aluminum corner moulding and used a miter saw to cut it at an angle, to create a frame that would fit around the top of each night stand.
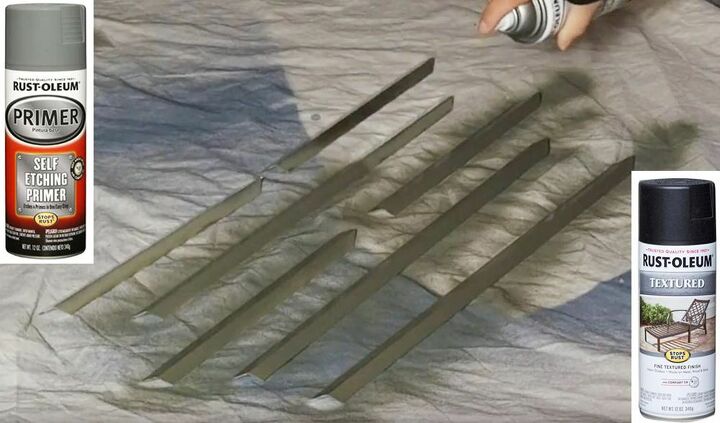
For all of the metal pieces, including the trim, corner braces, and handles, I used a self-etching primer and then a textured spray paint for metals in a black color.
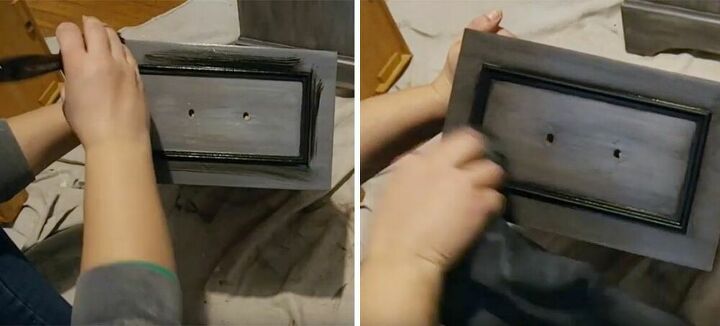
For the top coat, I used furniture wax. First, I brushed a layer of clear wax over everything. Then, to add a deeper, darker finish, I added black wax. I lightly brushed the black wax on top of the clear wax, then used a microfiber rag to blend the black wax into the clear wax.
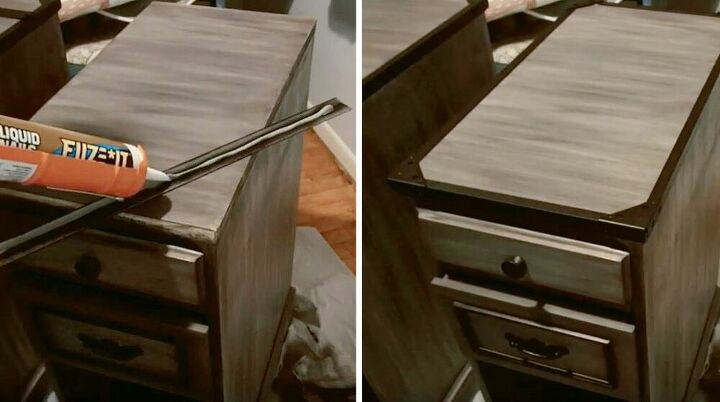
I used liquid nails to apply the black metal trim. Then, as an added style piece and to make the trim extra secure, I added corner braces on each corner.
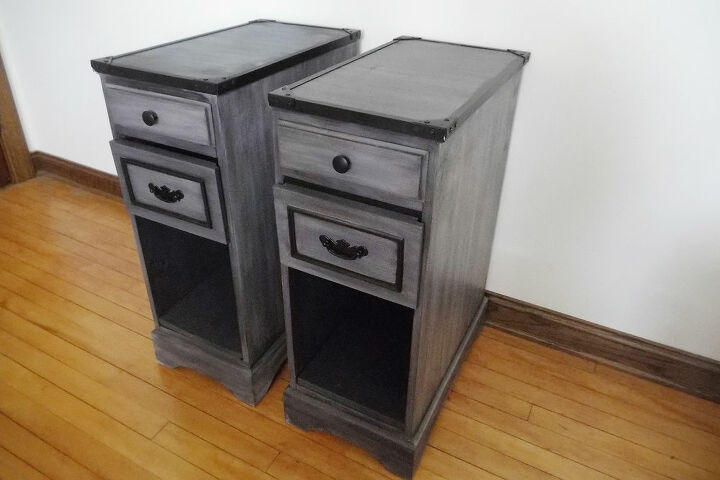
Here is the finished look.
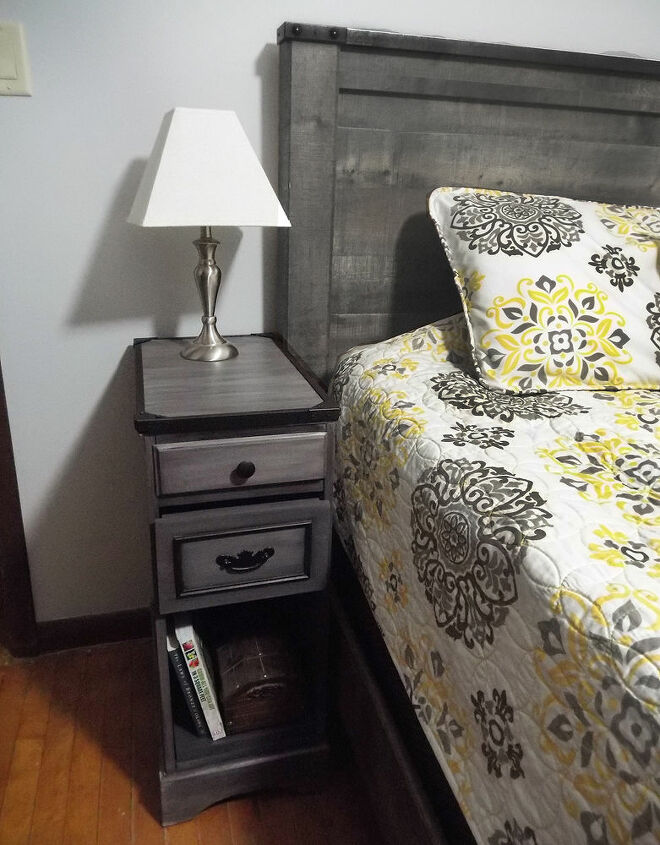
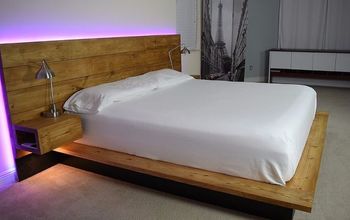
The goal was to create night stands that would mimic the rustic/industrial style of a headboard. It isn't a perfect match, but I think they fit together nicely.
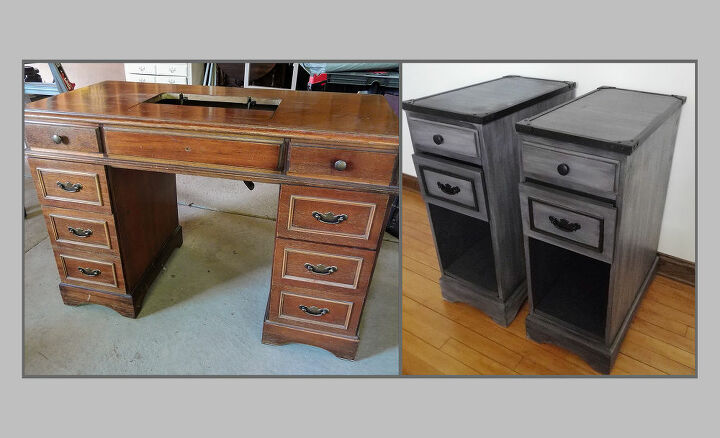
Before and after
Resources for this project:
See all materials


Comments
Join the conversation
-
These turned out gorgeous. Love the blending!
-
Great after!


Frequently asked questions
Have a question about this project?
Wow! What vision! What stage in the process did you paint the trim on the drawer fronts black and what did you use?