


Scrap Wood Christmas Trees
Do you have a pile of scrap wood waiting to be used? Maybe you have little ones gracing the halls and heart of your home and you are looking for decorations that if knocked over or touched can’t be harmed too much. Or maybe you are searching for a neighbor or friend gift. These sweet little trees are sure to steal your heart.
First let’s start with our materials list.
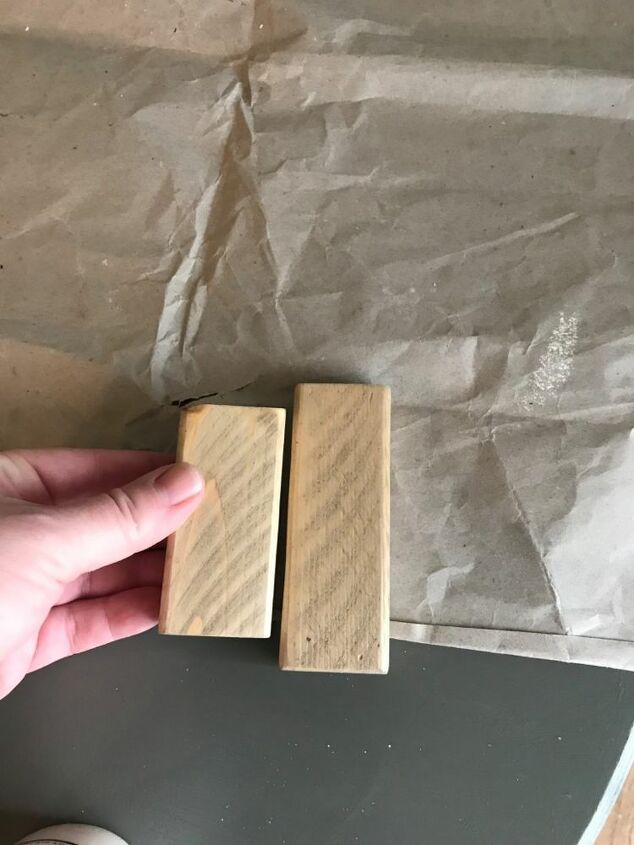
• 1x2 wood board (or scrap pieces)
• 2x2 wood board (or scrap pieces)
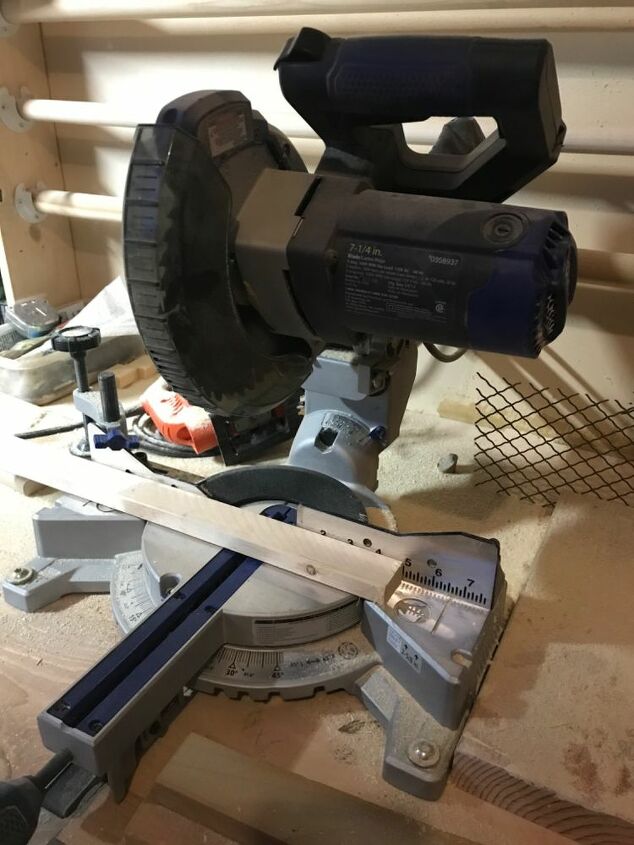
• circular saw
• sand paper (220 grit)
• wood glue
• paint (green, white, brown)
• ribbon
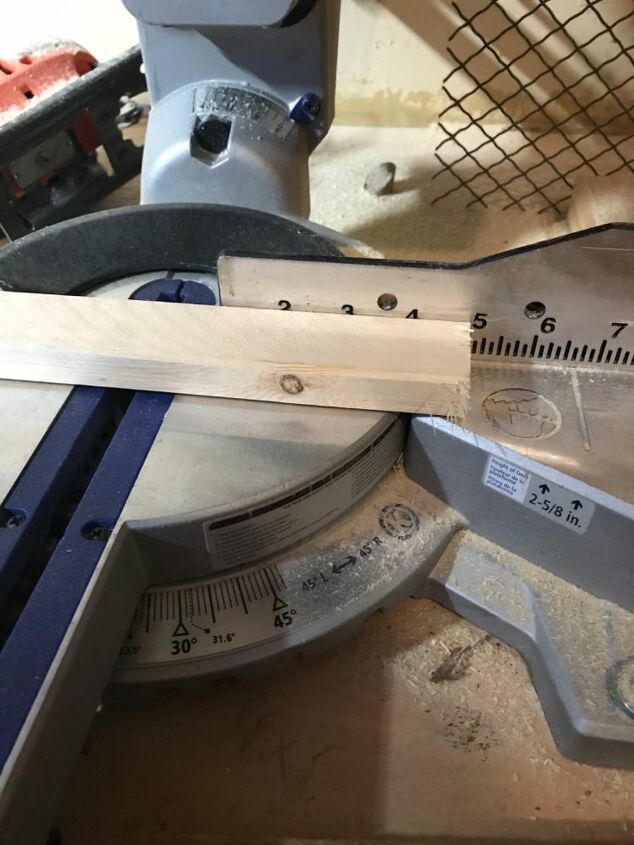
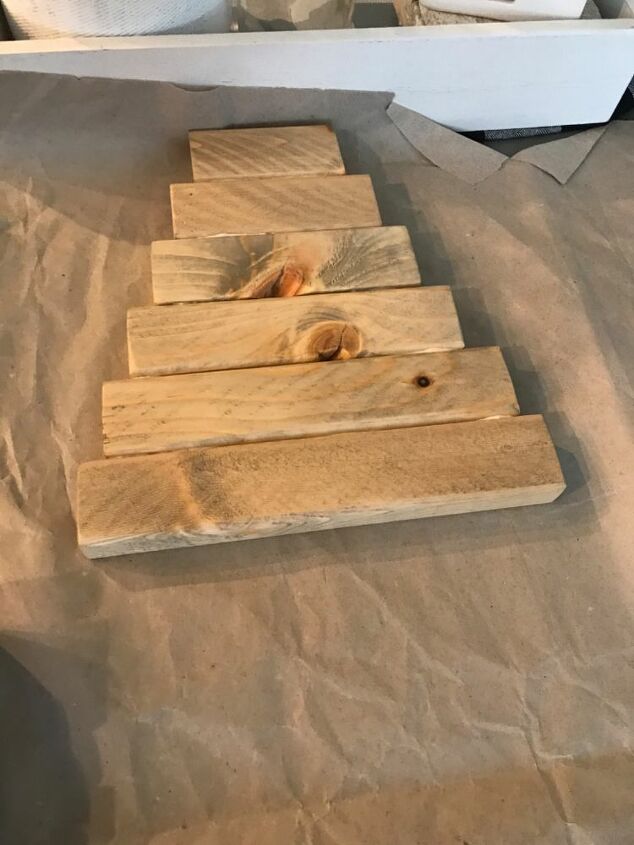
You’ll want to start by trimming down your scrap pieces or cutting your boards. I use a circular saw. Cut the 1x2 boards at 2”, 3”, 4”, 5”, 6” and 7” (these pieces make the tree). Then cut the 2x2 board at 2” (this piece is the base, or trunk, of the tree).
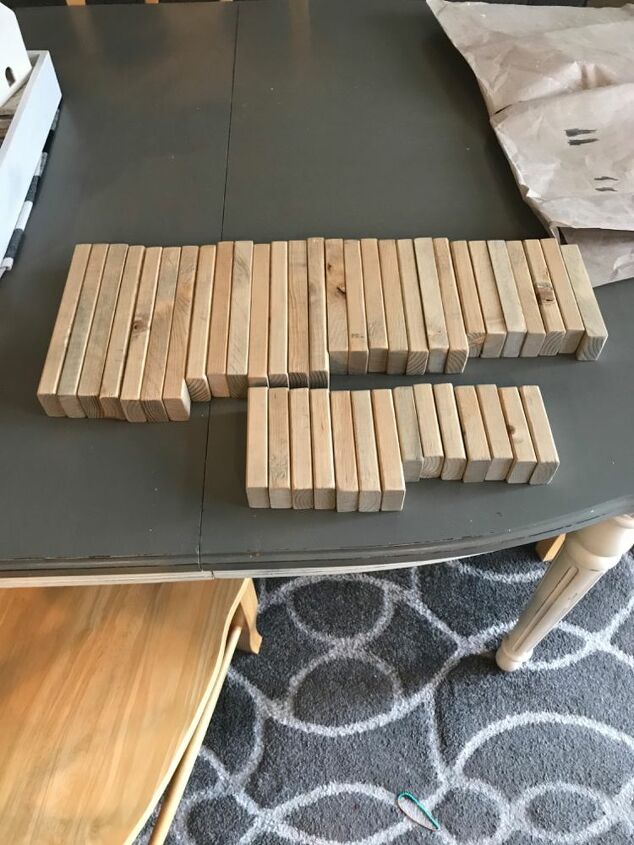
Once all my boards are cut (I made multiple trees) I sand the edges and rough spots.
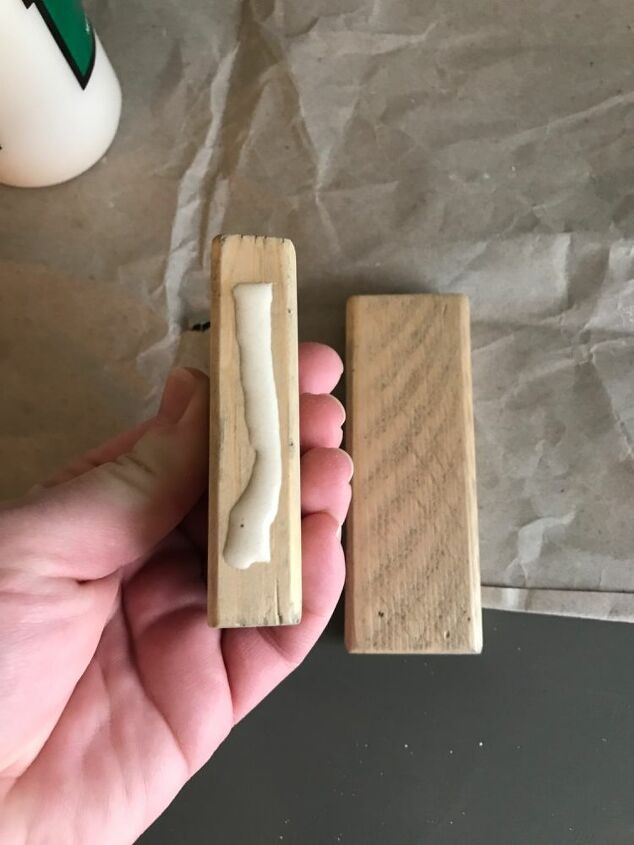
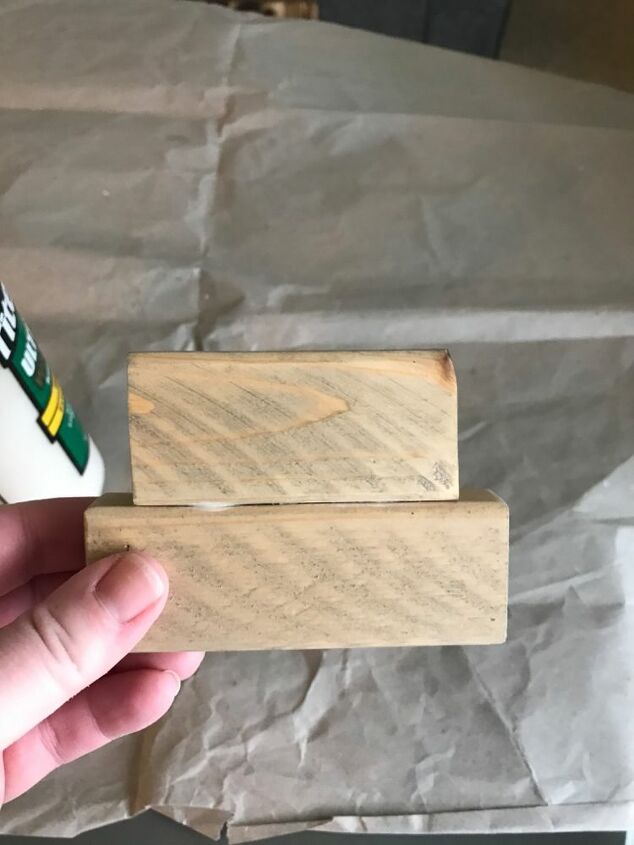
Then I glue them together. I like to put the glue on the smaller piece and then attach it to the larger piece. This is the easiest way for me to gauge where to put the glue and how to place each piece.
Place the two pieces together. I like to apply pressure for 10-15 seconds before moving on to adding the next piece.
If the glue seeps out, I use a paper towel to wipe off the excess glue. Then I’m ready to apply the next layer/piece.
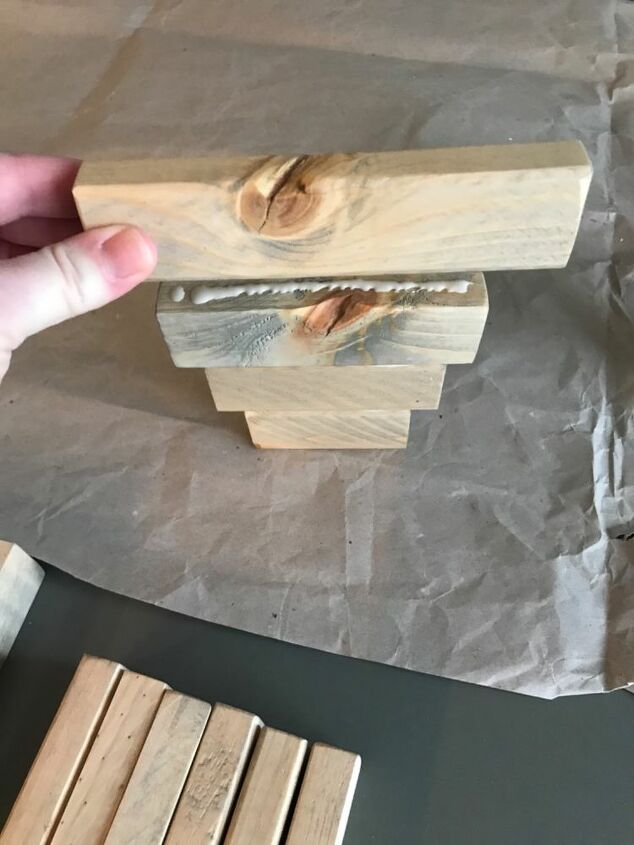
I tip the tree upside down add the glue onto the top piece then add the next layer, again applying pressure for about 10-15 seconds. Repeat this process until all layers have been glued together except the 2x2- base piece.
I let my glue dry for a hour or so (sometimes over night depending on how my day is shaping up to be). Once the glue is dry, I paint the trees white and different shades of green. You can use acrylic paint, chalk paint or what ever kind of paint you choose. Make sure to paint your 2x2 piece as well.
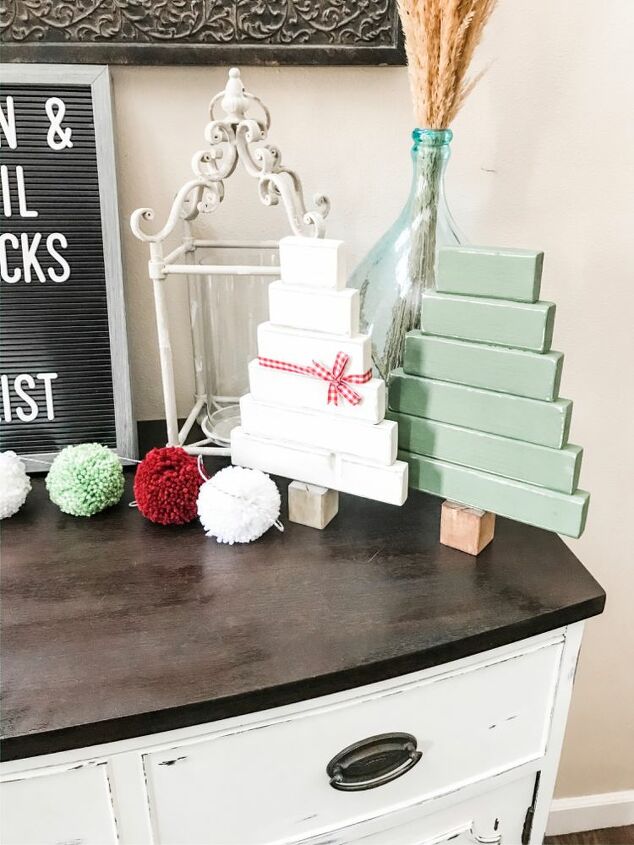
Once the trees are painted and dry, I glue the 2x2 inch piece onto the center of the bottom of the tree. Then if my wood is dented, has knots or character spots, I use the sand paper and distress the edges. The final touch is adding ribbon to the tree to give it a little bit of character. I use 1/2” up to 1” wide ribbon. This is where you can use your creativity and add glitter, sparkles or bling anyway you like.
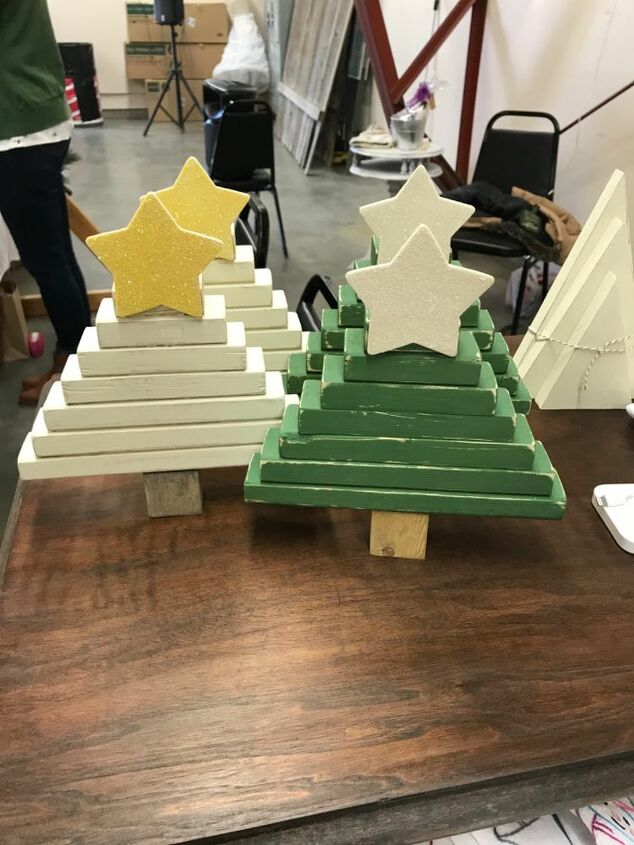
We tried stacking the pieces flat instead of on their ends. They look like a chunky tree. We used 1x2’s for these as well. We cut the pieces at 2”, 3”, 4”, 5”, 6”, 7”, and 8”. We found some star shape cut outs at the craft store and added them to the top. I wasn’t fond of how the stars looked on the taller trees so I only added them to the chunky trees. Again, be creative and try different things to see what you like best.
We had paint, sandpaper, the saw and wood glue already on hand, so the coat of this project ended up being fairly inexpensive. About $10 for wood and several colors of ribbon.

Lastly, decorate with them. We’ve placed them on our buffet in our front entry, used them on our dining table for centerpieces, placed them on our mantle, grouped them on our stairs and even used them on our covered porch. To see more of what we do and how we style our pieces head to our Instagram @beaus_and_belles
Resources for this project:
See all materials


Comments
Join the conversation
-
I have some scrap wood. Its more trim then any thing. I'm sure I an oull this off. Very adorable.
To the teacher kids are way to excited. You might get a week and a half out of the kids. Thank you for being a teachers hardest job every next to parenting. May be extra small breaks in between classes. Maybe a speed winter project. Bribery use candy or pretzels or something. If quite during class and class participation a quick snack. Kids like food. Lol
Just some ideas. That way every one is learning and having fun doing it.. back to the trees they are so very cute. Thank you for sharing.
-
Omg! I think you just solved my problem of how to do a tree with 30 cats! Im not a crazy cat lady but I do foster many...too many right now... Im thinking on a much bigger scale and if I can anchor it to the wall/ceiling they can climb it all they want! Thank you!


Frequently asked questions
Have a question about this project?
I'm already planning to borrow your cute sign for my classroom decorations. A fuzzy (styrofoam n yarn, maybe?) snowman/woman with real twigs for arms, googly eyes, tiny pebbles for a mouth, holding up this sign on a popsickle stick. Maybe they'll be better behaved for the next three weeks. 🤞