


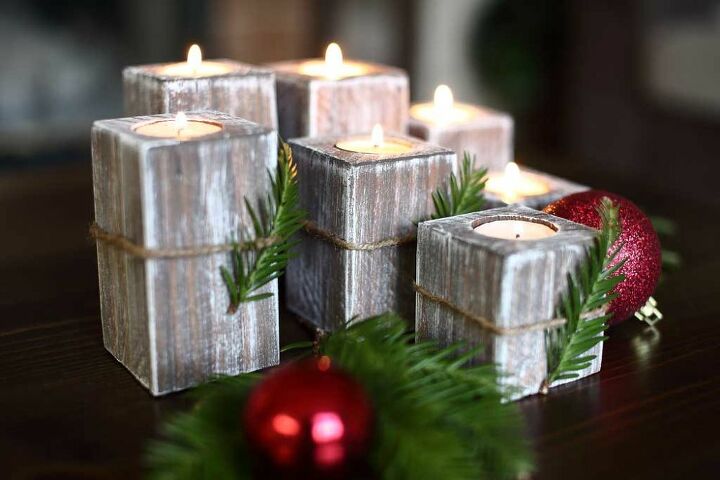
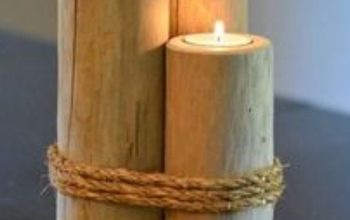
DIY Wood Candle Holder

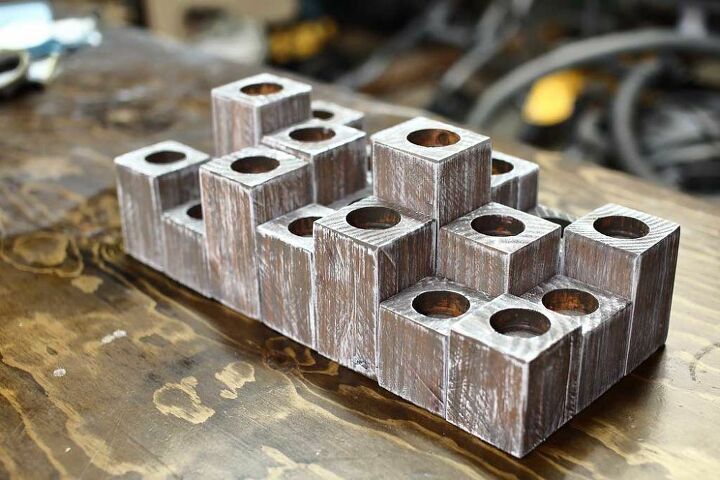
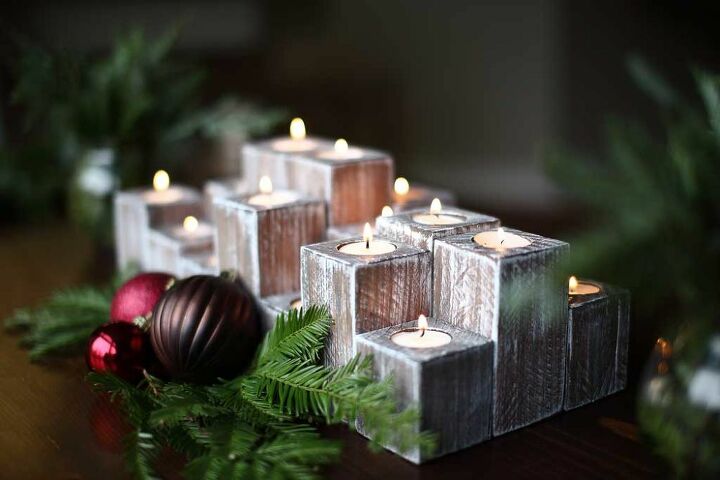
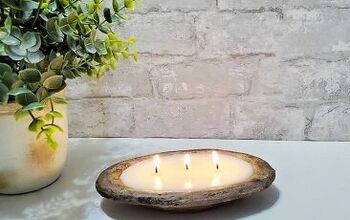
I think every woodworker has a pile of leftover scrap wood from other projects. Typically, I don’t throw away small wood pieces and try to use them on small wood projects. I’ve made these DIY Wooden Candle Holders from my scrap wood pile. If you love candles this might be a perfect project for you to try.I really like the whitewash effect from my previous projects that I've made, for example, Shoe Rack Bench and Mirror Frame. I used the same stain and white paint to create a similar appearance for these candle holders. Since I had a bunch of 4x4 pieces, I made 21 wooden blocks with different heights. I trimmed the 4x4 blocks to 2 ½” x 2 ½” because I wanted them to be smaller, but I’ve seen people use 4x4 blocks with just a hole on top for the candle.These wood candle holders could be put together as a dining table centerpiece or separately on the shelves throughout the house. There are so many different ways to use these and for any season of the year. You could use Tealight Candles with real flames or Flameless LED Tea Light Candles on a battery that flicker like a flame.To download printable PDF or this tutorial please visit my website TheDIYPlan
Tools for this project
• Drill • Tape Measure • Sander • 1 1/2" Drill Bit • Table Saw • Miter Saw
Material List
• 4x4x6' (x1) • 1 1/2" Candles • Pre-Stain • Briarsmoke Stain
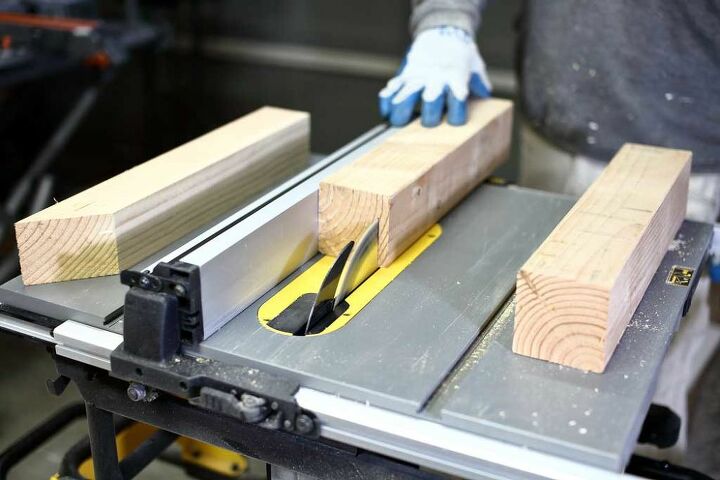
Step 1 - Trim 4x4 Board to 2 1/2"x2 1/2"
The actual size of 4x4 is 3 1/2"x3 1/2". This is too large for these types of candles. So we need to reduce the actual size to 2 ½” x 2 ½”. Take a 4x4 board, and trim 1/2 an inch on all four sides using a table saw. You could just trim 1" from two sides to get the job done quicker, but then you'll have one rounded corner and three sharp corners. So that's why I trimmed all four sides. I didn't have a full 6-foot long board but I had smaller 4x4 scrap pieces laying around from my previous projects. And it works just as good.

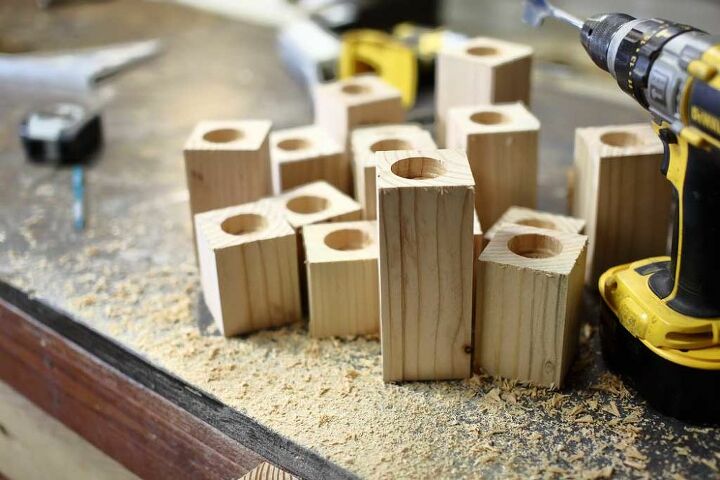
Step 2 - Cut Candle Block Pieces
Then with a miter saw, cut the 2 ½” x 2 ½” board into small blocks ranging from 2” to 6” long. I didn't provide lengths for these blocks, because these are totally random and you could cut any length that you'd like. You would need 21 of these blocks.
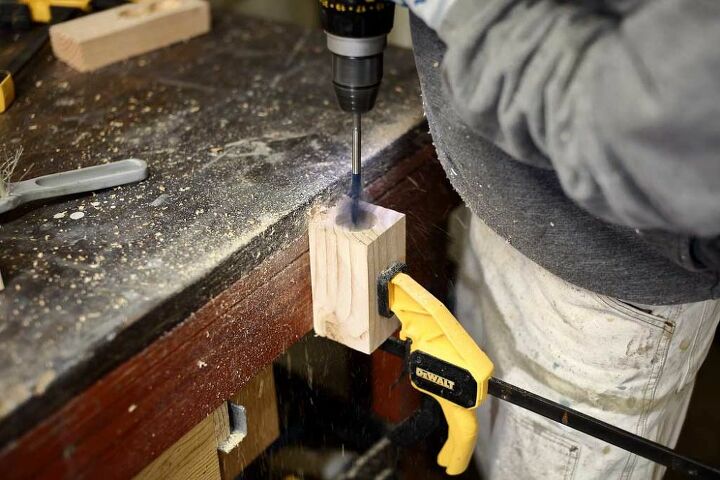
Step 3 - Drill 1 1/2" Holes for Candles
Once all 21 blocks are cut, use a ruler or a square and draw a line from one corner to the next. Then draw another line from the other two corners creating an X on the top of the block. The center of the X is the exact middle where you need to drill the hole for the candle. Drill a ½” deep hole using 1 ½” full thread tip drill bit.

Step 4 - Sand the Wood Candle Blocks
Now using a random orbital sander, sand any rough edges.
Step 5 -Stain and Paint Candle Holders
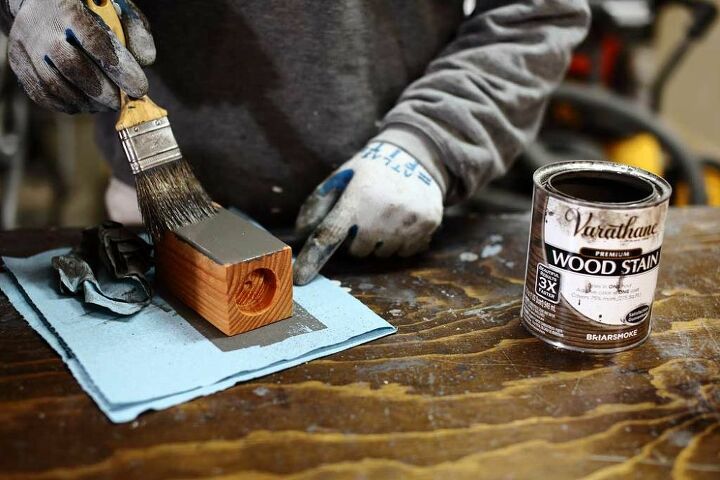
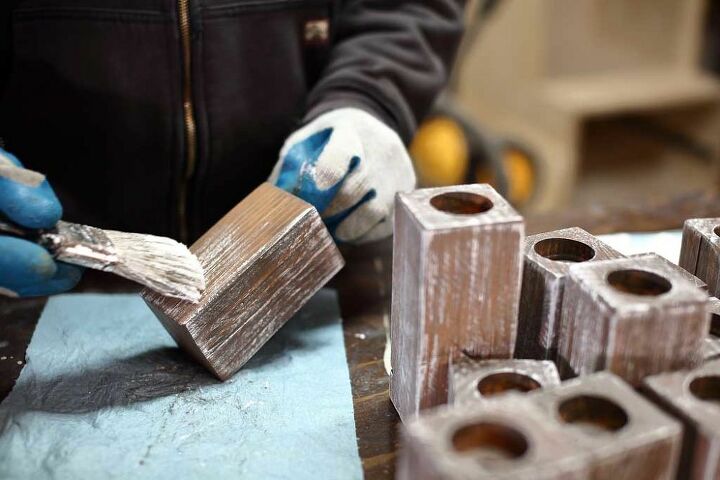
For this step, you could stain or paint any color you want. I used Briarsmoke stain and white paint. First, apply a coat of pre-stain, then Briarsmoke stain and wipe it off with a shop paper towel. Then lightly brush white paint over the stain to make a whitewash effect. You could arrange these wood candle blocks any way you'd like. You're done with the DIY Wood Candle Holder!
Comments
Join the conversation
-
Great way to use up scrap pieces of wood. These would be awesome as a centerpiece on the fireplace mantel. Great job.
-
So pretty! Great instructions too. Thanks for sharing. 🕯


Frequently asked questions
Have a question about this project?
What did they attach all of the pieces with