


DIY Weathered Open Shelving

by
Staci Marie
6 Materials
$49
2 Hours
Easy
Our home is a mix of woods and whites. A rustic farmhouse feel, if you will. I love the look of open shelving and wanted to add it to a blank shiplap wall. I also love the look of old weathered wood that has been neglected out in the elements. The problem with that is that many times the wood is not strong enough to use for projects. So, I decided to do a faux weathered wood look using stain and paint. This DIY will show you how I created the "old weathered" wood shelf and how we hung our open shelving.
Material List:
- Industrial Forged Steel Floating Shelf wall brackets with lip 2 packs of 2 - 4 total brackets)
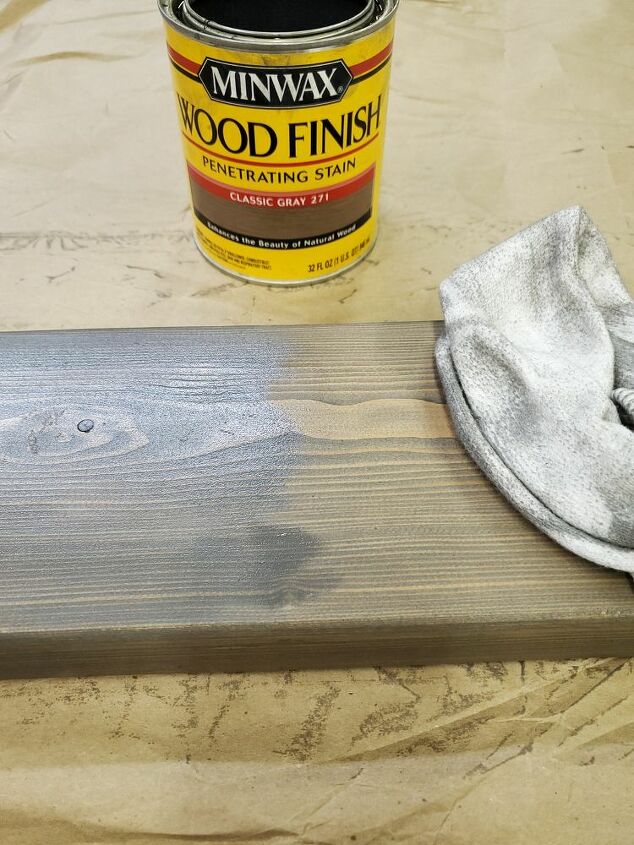
- Stain
- Paint (& water)
- 2x6x8 #2 Board
- Screws and Wall Anchors
- Drill
- Pencil
- Tape measure
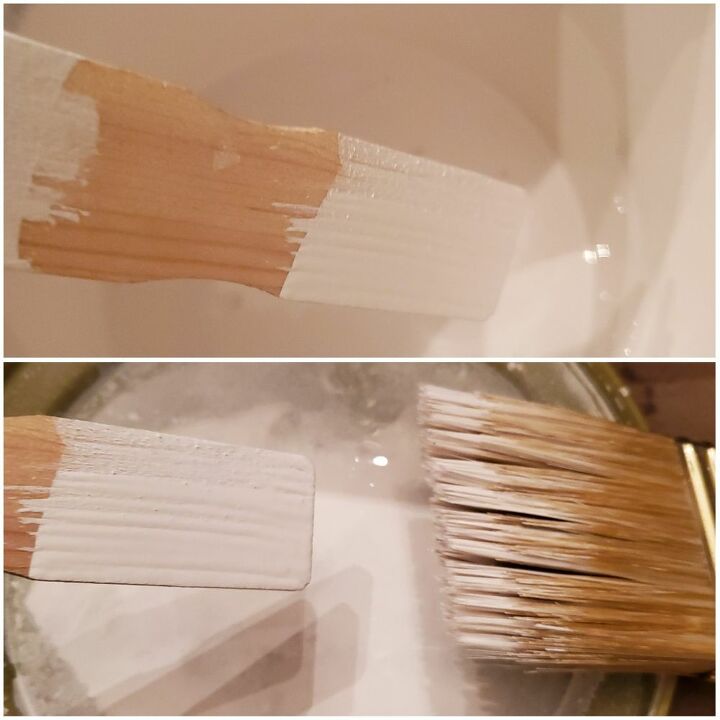
Once the stain was dry, I mixed some Behr white paint with water. I used a 2 inch Wooster angled brush (my favorite brush for painting and projects).
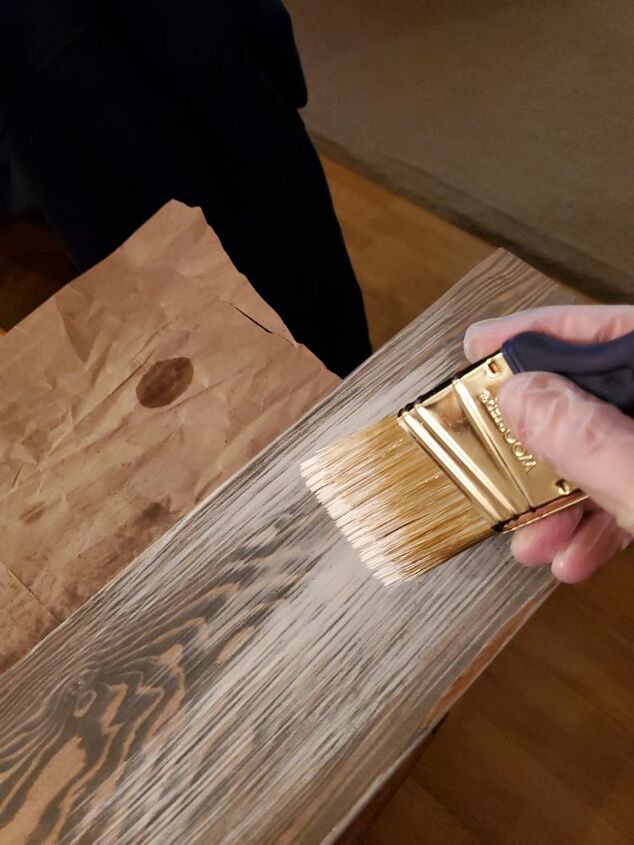
After dipping your brush in the watered down paint, dab and brush off any excess until you get the desired look you're after.
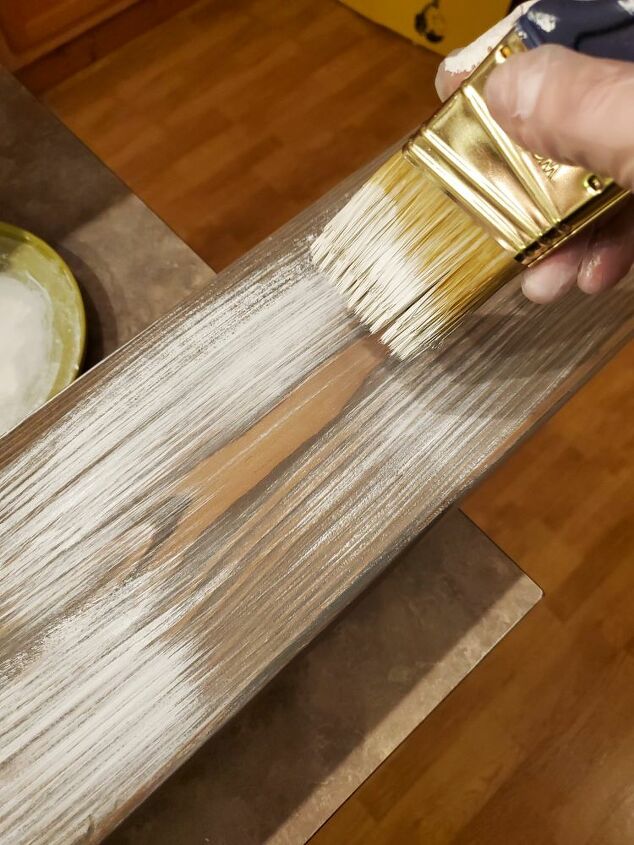
The look I was going for was a weathered board that had been painted but over time had worn off in areas. I like seeing the brush strokes, the stain and the wood grain. Makes it rustic and old looking to me.
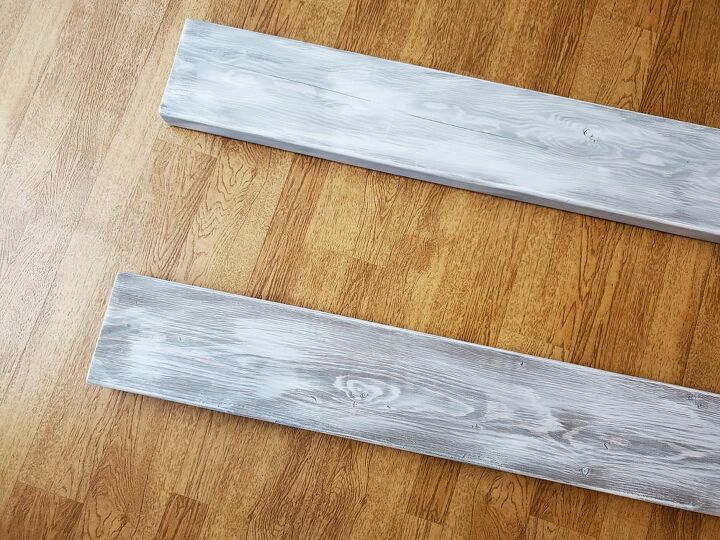
As you can tell, each board will come out differently. If you are okay with that then this technique is for you. If you try it and don't like it you can either sand it all off and start over or you can just paint it a solid color.
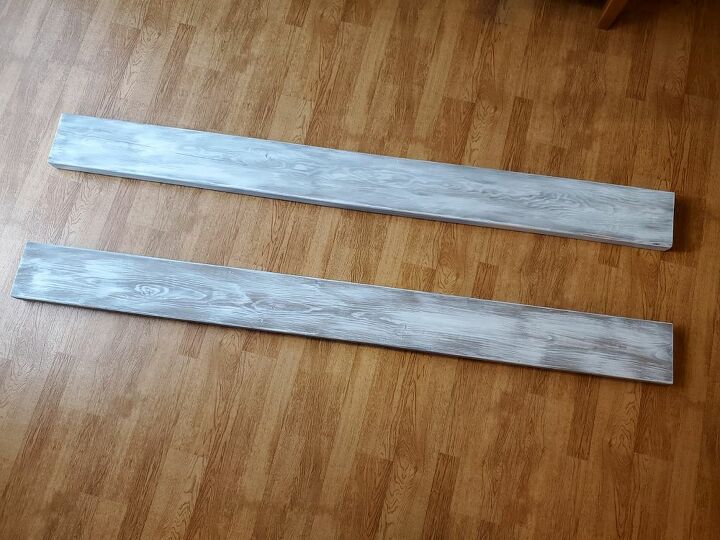
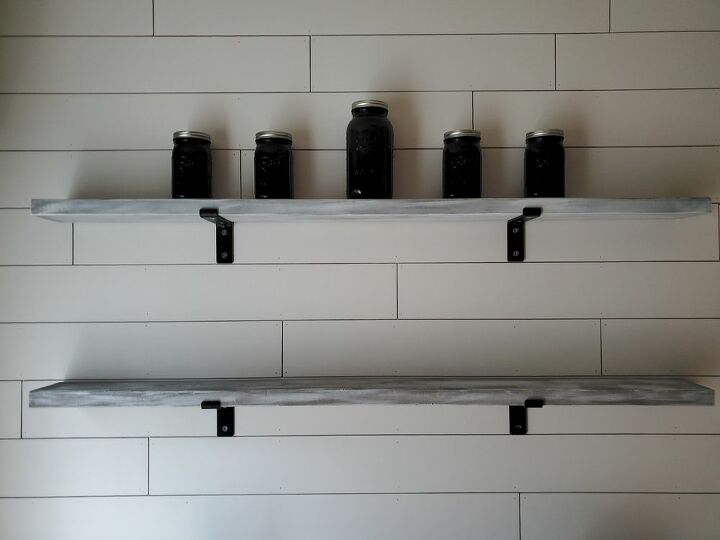
This is what my shelves ended up looking like when finished.
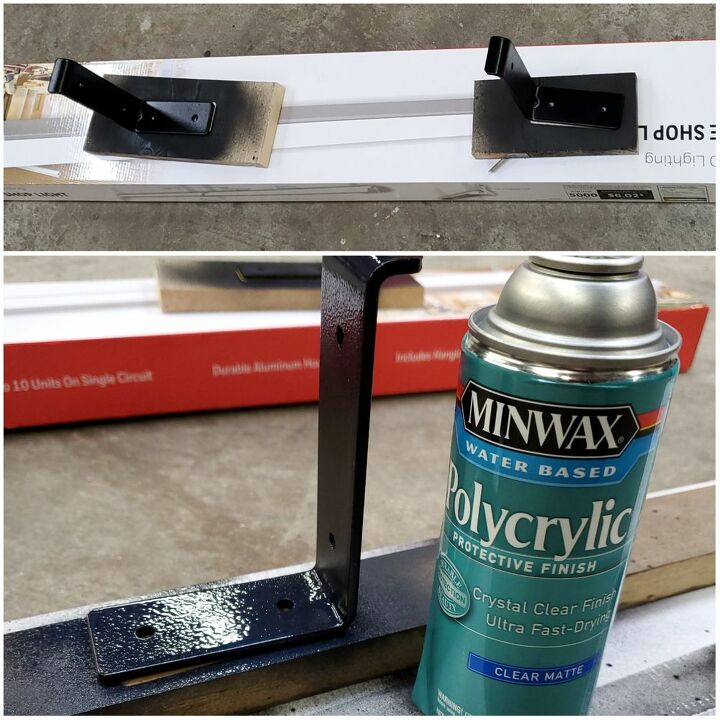
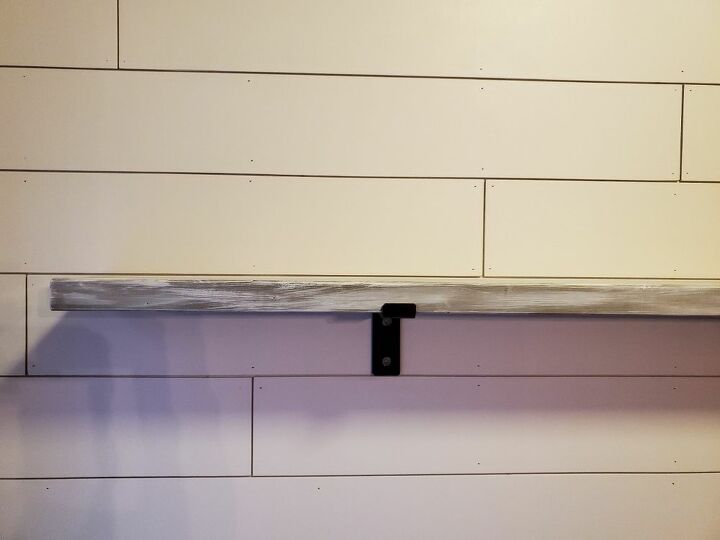
I wanted a farmhouse open shelf look so I found some industrial forged steel brackets with a lip on Amazon. They come with a rustic finish on them with a shiny protective coat. I wanted a matte black bracket so I lightly sanded them down with a Scotchbrite pad to remove the shine. Then spray painted them with a black paint and protected them with a matte polycyclic spray.
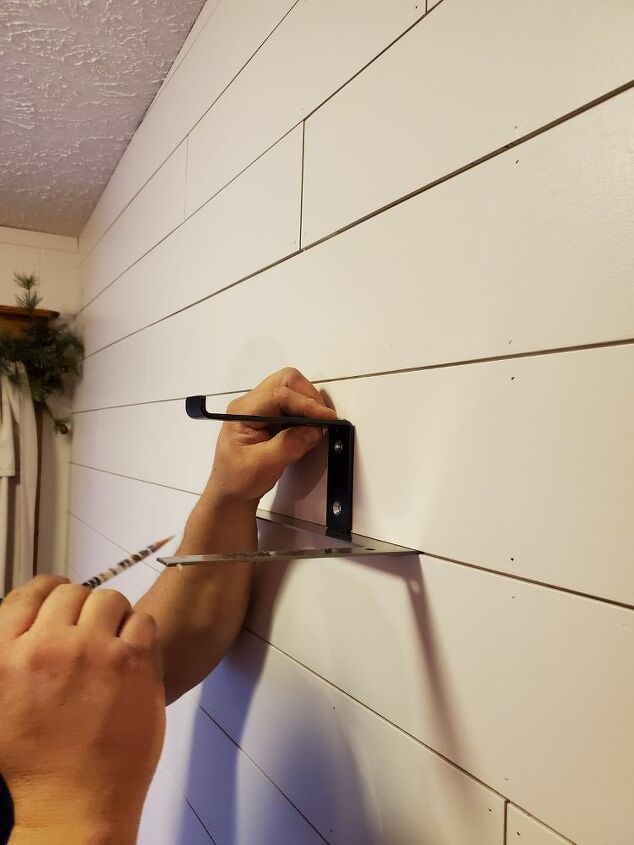
When we were planning out our bracket spacing we decided to use the bottom of our shiplap as a guide for the brackets since we knew it was level. My husband used a flat edge to make sure the bracket stayed level while marking the screw holes on the wall.
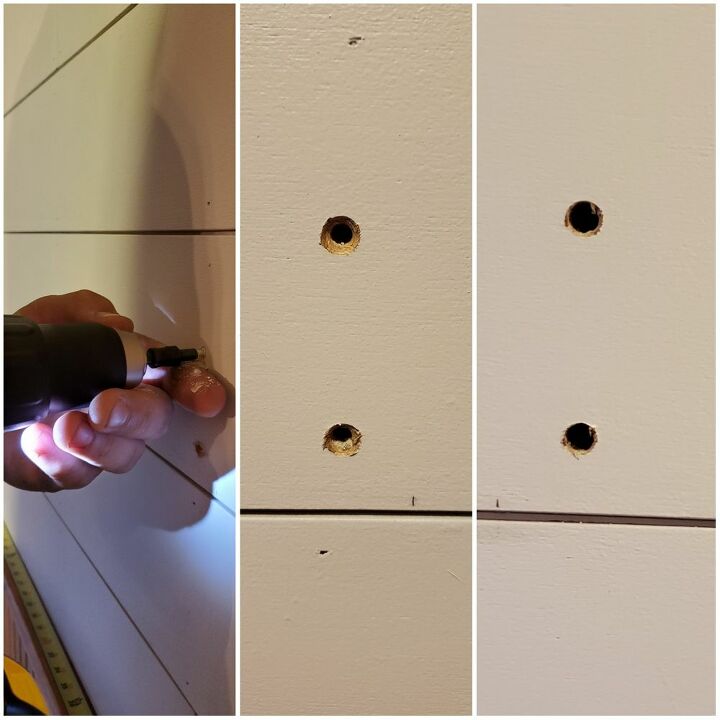
Then he used a drill to make holes in the wall and shiplap.
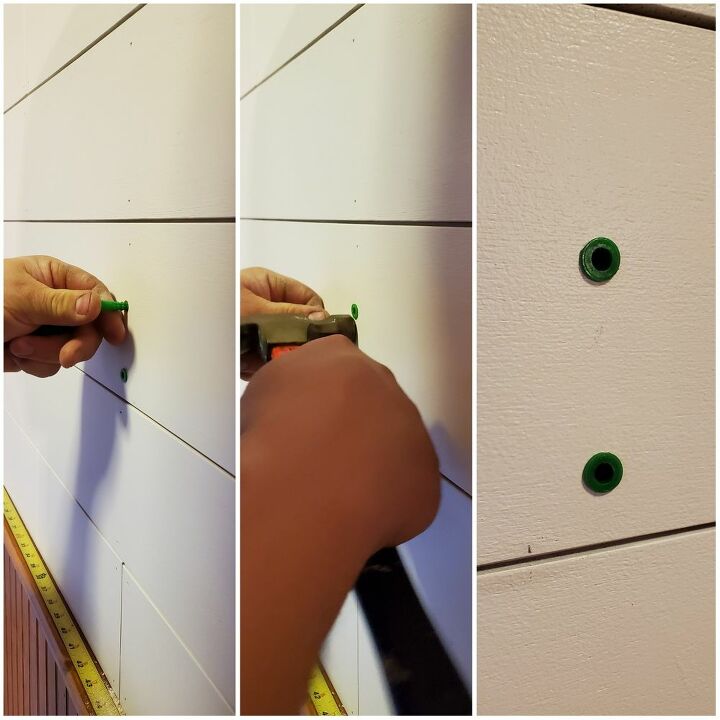
We didn't hit any studs so we had to use plastic anchors. Once the holes are drilled, gently push the anchor into the hole and then finish by lightly tapping the anchor with a hammer until it is flush to the outside of the wall.

Once the anchors are in you are ready to screw your brackets securely into the wall.
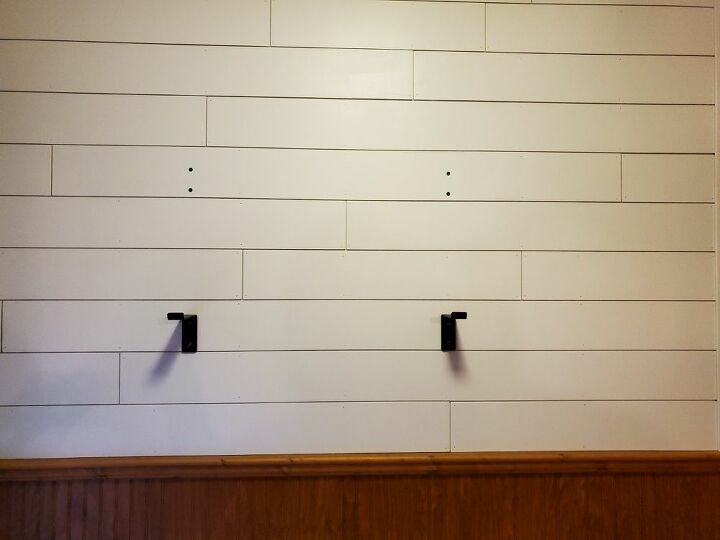
We started with one set and then moved to the top shelf.
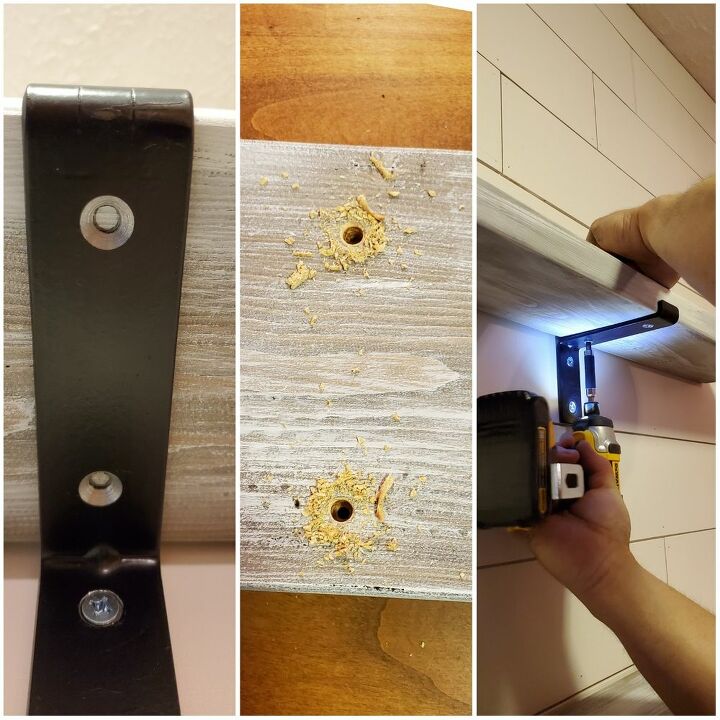
Once the brackets are on the wall you can add the shelf boards. On the bottom of the board we marked the screw holes and then drilled smaller pilot holes to insure the screws go in straight.
Once the shelves are screwed to the brackets you are ready to decorate.
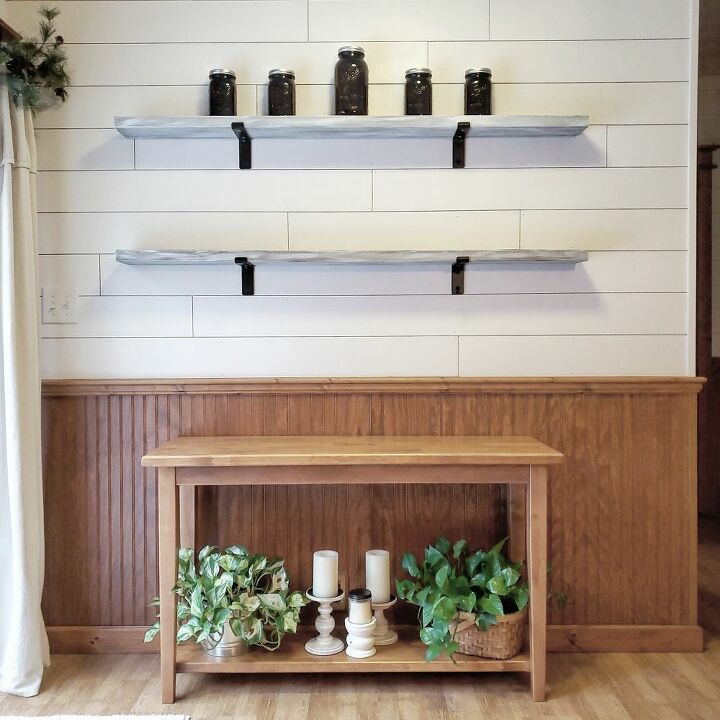
I LOVE my new open shelves!! Let me know if you give this project a try!
Resources for this project:
See all materials


Any price and availability information displayed on [relevant Amazon Site(s), as applicable] at the time of purchase will apply to the purchase of this product.
Hometalk may collect a small share of sales from the links on this page.More info
Comments
Join the conversation
4 of 15 comments
-
remodeling a 1930 house love the weathered look. what width was your shiplap?
great job
-
I did this in my bathroom with a coastal theme and used a bright blue paint and pipe brackets and industrial pipe for shelving


Frequently asked questions
Have a question about this project?