


Stunning Serving Tray That You Can Easily Make Yourself.

Very popular these days are handmade serving trays. Any paint color, stain or personalization will make them perfect for your home or as a gift. Recently I gave one to a friend with her family name as a housewarming gift!
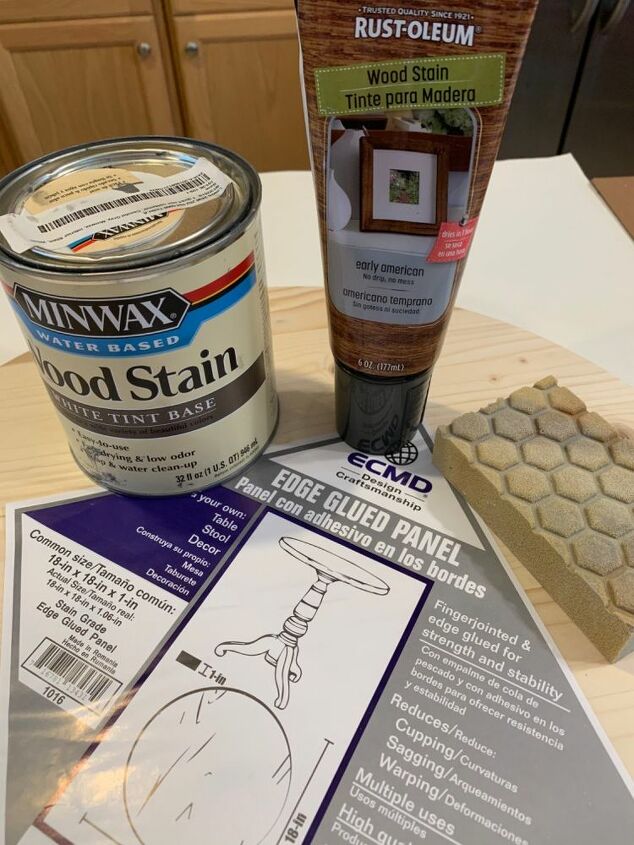
Supplies needed is an 18 inch round wood, your favorite stain/paint, sandpaper block and handles. I also use a cutting machine so I can design and cut my own stencils. The amount of time it takes to complete this project includes drying time between coats of stain and paint.
I continue to learn new tricks so I was hoping this idea would work out and it did. I wanted the wood to have more than one color. So I decided to use an Early American brown stain along with Coastal Gray. I give the wood a light sanding before I begin especially around the edge.
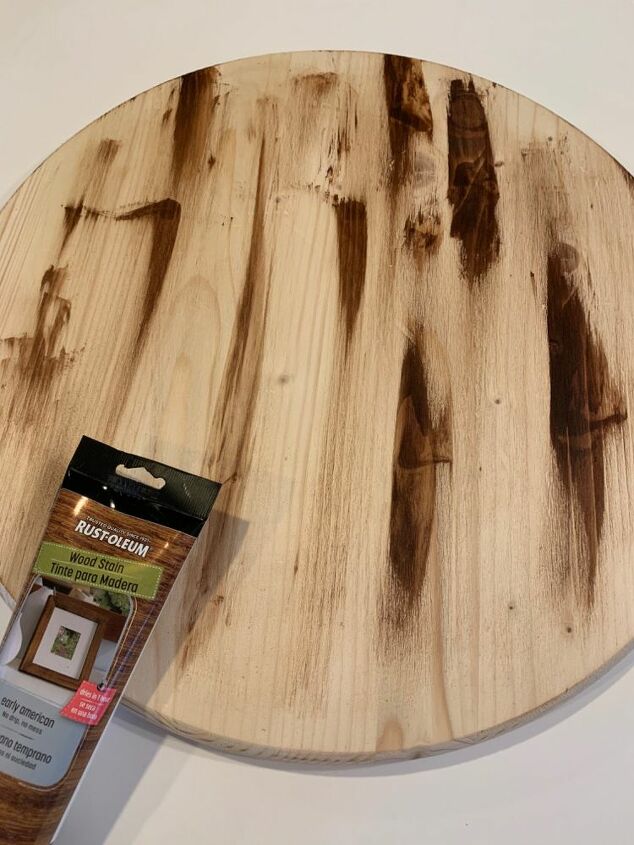
First I applied the brown stain here and there. Wiping it off according to the directions.
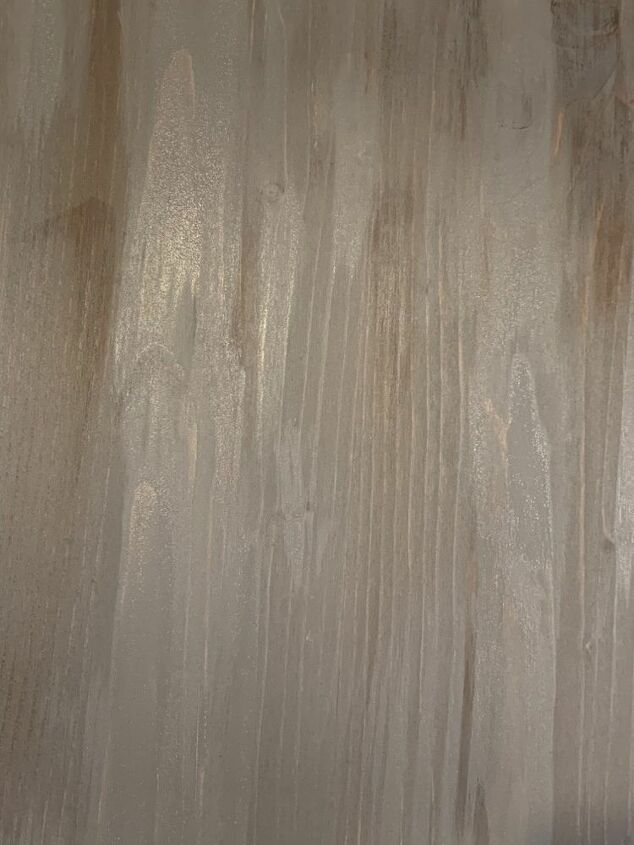
After it dried I added the coastal gray stain over the entire piece.
I didn’t let it sit very long before wiping the excess stain off. That allowed the undertones of brown to show through.
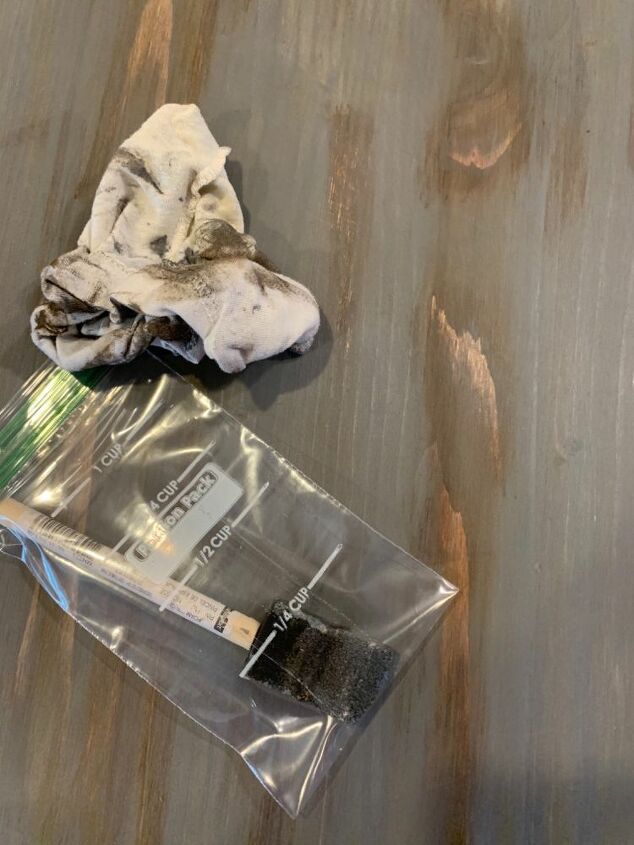
I used a sponge brush and a rag. I keep the sponge brush from drying out by placing it in a small vertical snack Ziploc baggie.
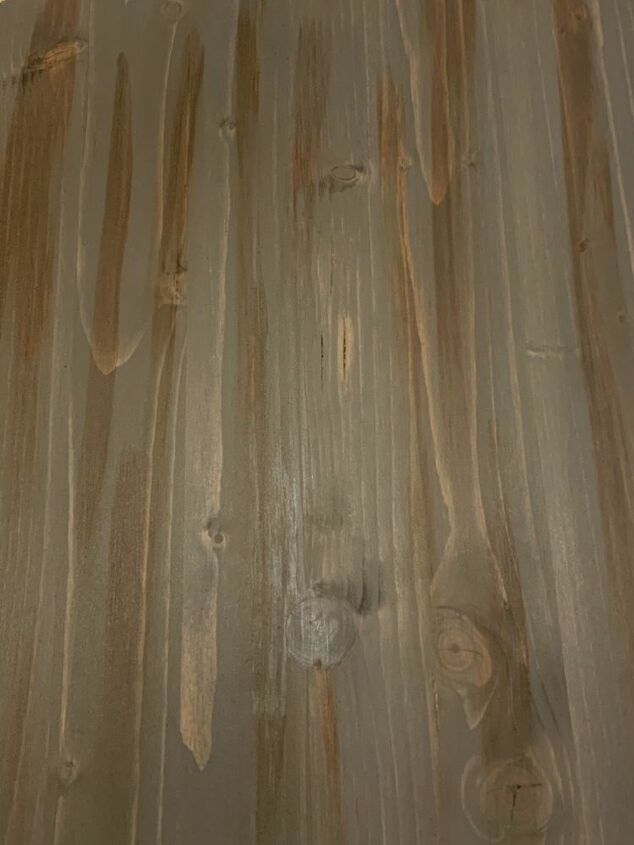
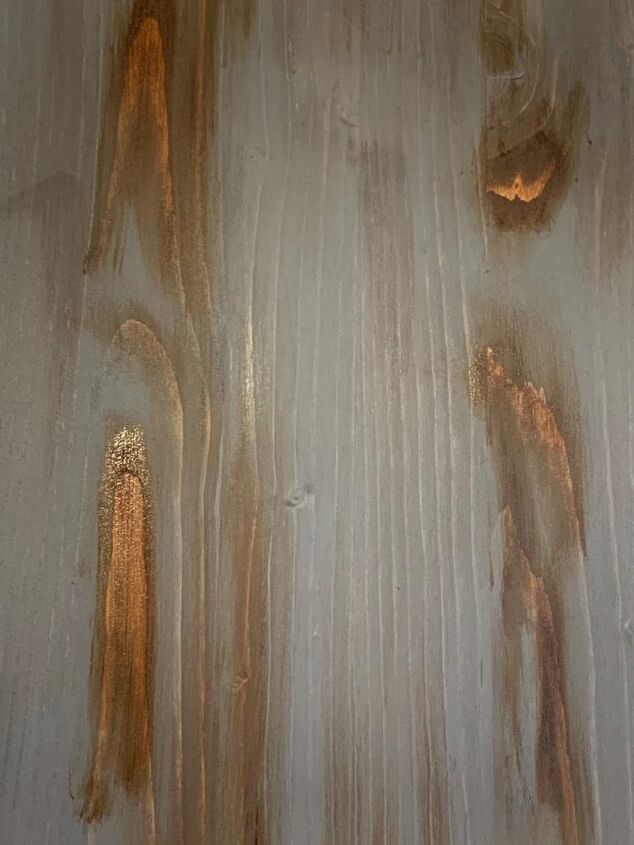
I continue to apply additional stain color here and there, and wiping it off, until I have the look I desire. I think the colors turned out great. Don’t you?
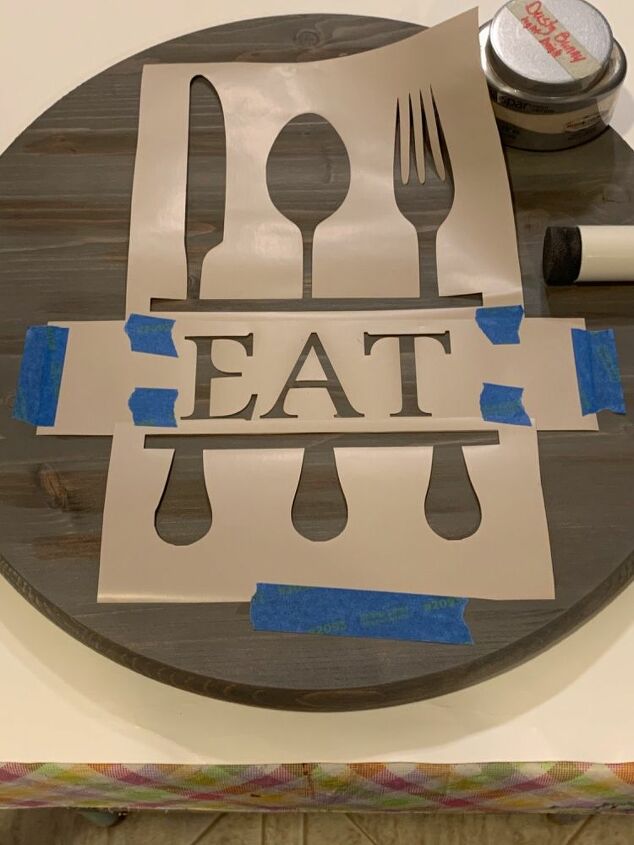
I saw this similar design on Pinterest but with my computer and Silhouette Cameo machine I was able to design my own version. Tip: Instead of purchasing stencil material I buy shelf liner paper from Walmart that is cheap cheap cheap! And it works really really well.
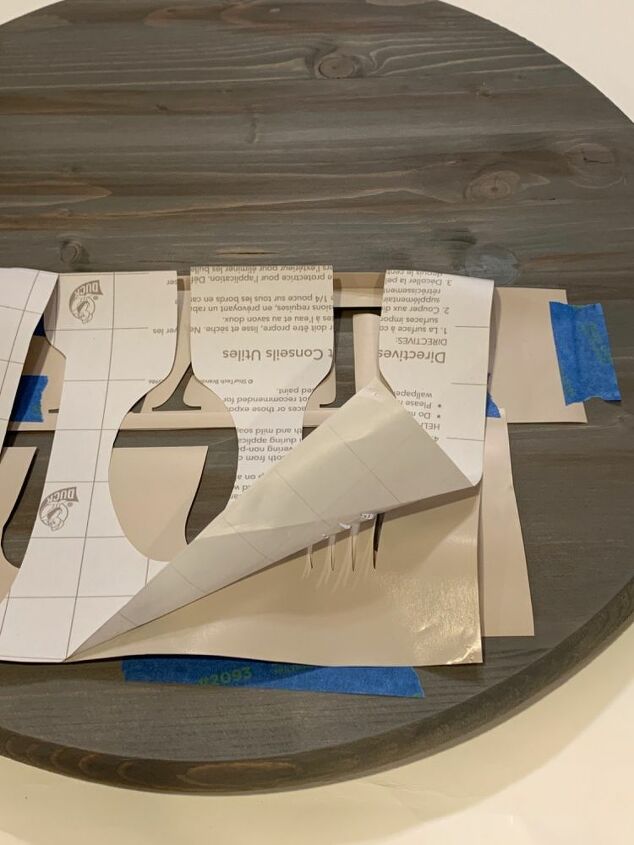
I place the stencil where I want it and keep it in position using painters tape. I don’t peel the entire backing off at once. Peel the backing off the top portion first and press it down into place. Then it’s easier to little by little take more off and continue pressing it into place.
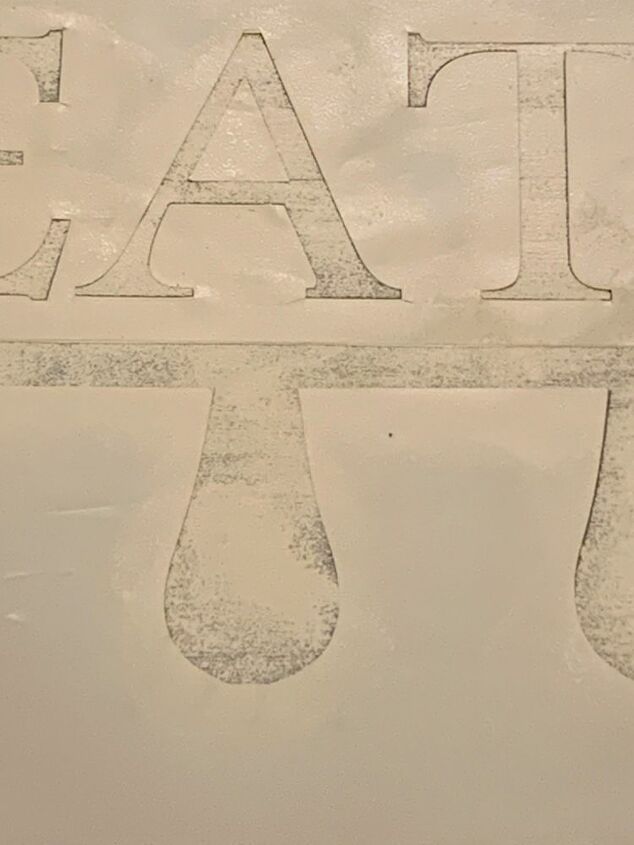
When you apply paint to your stencil make sure that you dab any excess paint off of your applicator first so it won’t bleed under the stencil. I wanted to come away with not complete coverage. A little splotchy was my goal.

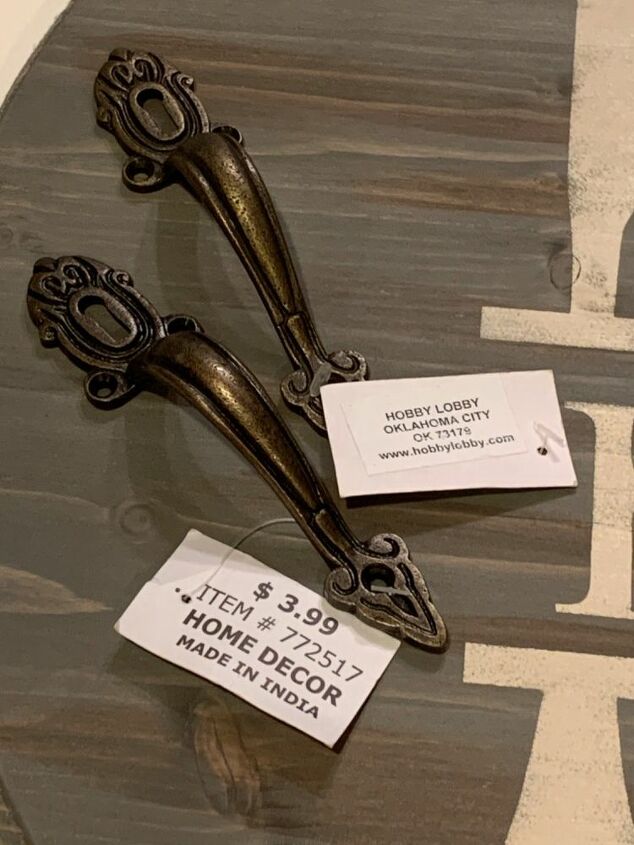
Since I enjoy making trays I love purchasing a variety of handles. I got these from Hobby Lobby on sale. Aren’t they beautiful?

Before adding the handles I gave the piece two coats of finish. I actually put a satin finish that I got on sale on the backside. But because I like the look of flat paint I saved my more expensive General Finishes “flat out flat” top coat finish for the top.
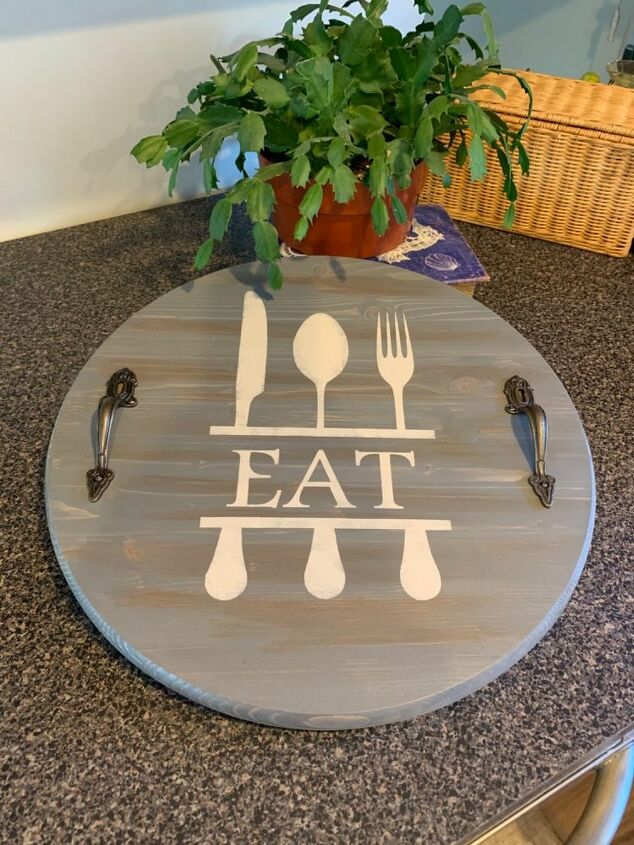
I decided that the strokes of the wood grain should go left to right on the finished piece. This is one decision you need to make when applying the stencil. I hope this inspires you to make one of these yourself.
Enjoy 💕


Comments
Join the conversation
-
Very creative idea. I actually have that same table top. I just might try this.
Thank you for sharing ❤️
-
Great. If you have any questions just let me know


Frequently asked questions
Have a question about this project?
Where can u buy stencils?
Omg, I love the stencil. I want to try to make one and perhaps for X-mas gifts. Can you send me that stencil? I would really appreciate that?