


How to Build an Impressive Boot Tray Out of Wood

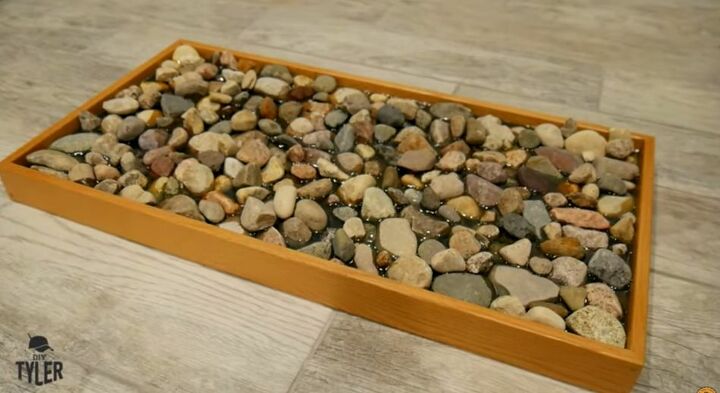
Having small, customized items like this river rock boot tray in your mudroom or entryway makes a big impact on the design and feel of a space. Not only is this unique and impressive tray completely functional but it also adds a beautiful visual piece that your guests can’t help but notice.
Tools and Materials
- Hand Sander
- Hand Saw
- Planer
- Jointer
- Band Saw
- Table Saw
- Miter Saw
- Red Oak wood pieces
- Titebond III
- Titebond Fast Acting Adhesive
- Rocks
- TotalBoat Epoxy Kit
- Straight Clamps
- Spring Clamps
- Hand Drill
- Dowels
- Paint Sprayer
- Rustoleum Ultra Polyurethane
- General Finishes Water-based Stain
- Color Pigment
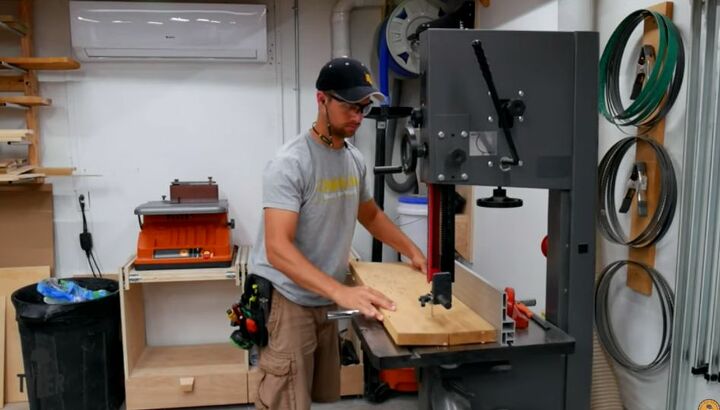
For this project, I used two fairly large pieces of Red Oak that I had on hand. They were not in the best of shape, but they were solid and I knew they would do the trick.
To get the wood ready to make the boot tray, there were a few things that I needed to do. I started with a rough re-saw on the bandsaw to cut them into pieces that would be nice and straight. Next, I put them through the jointer to square them up and sand the edges. The pieces then went back to the bandsaw to trim them so that I wasn’t working with so much material that would be cut off later anyway.
Finally, I ran them through the planer to make sure they were are all nice and parallel before beginning the build.
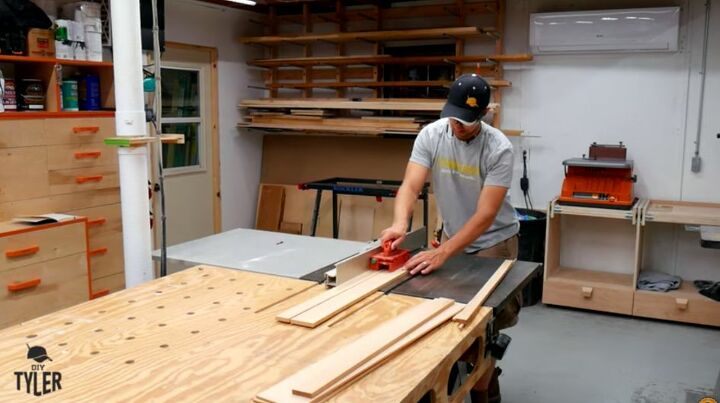
With the Red Oak trimmed up and sanded, it was time to cut the pieces I would need for the boot tray. On the table saw I cut three pieces that were 1/4” thick for the bottom of the tray and 4 pieces that were 1/2” thick by 1 1/2” tall for the sides of the tray.
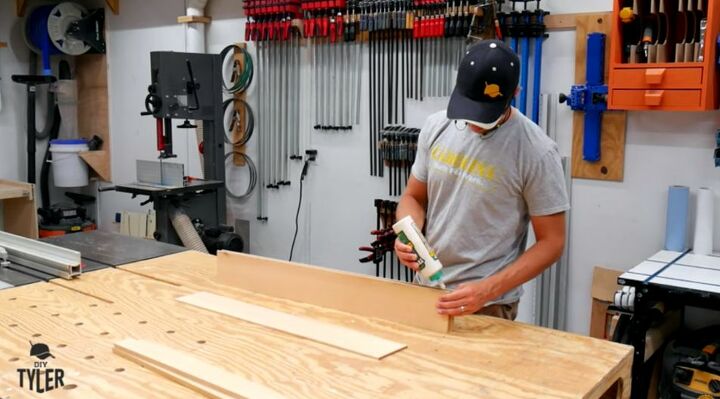
To make the bottom of the boot tray, I took my three pieces of Red Oak that were 1/4” thick and glued them all together. I used Titebond III to glue them since it’s a waterproof glue and would hold everything tight when I put the epoxy in later. With the edges glued up, I used some large, straight clamps to hold the pieces together while they were drying.
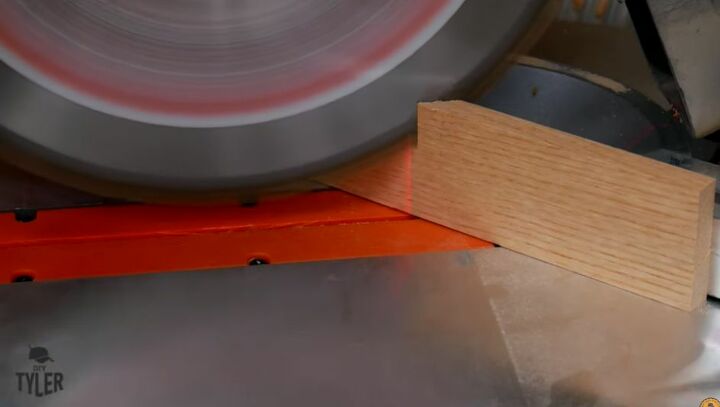
For the sides of my new boot tray, I needed two pieces that were a little longer than the bottom board and two pieces that were a little wider than the bottom board. To make the sides fit together well, I used the miter saw to cut a 45-degree angle on each end. Tip: make sure all of the cuts are facing in toward the middle of the tray!
Each of the side pieces also needed a Dado cut into it about three-quarters of the way down. The Dado cuts would hold the bottom of the tray tightly in place and seal the edges so no epoxy would leak out when I was filling it.
With the miter and Dado cuts made on all four pieces, I used my hand sander to smooth them all out. I wanted to make sure that there were no splinters or rough edges in order for them to fit together perfectly.
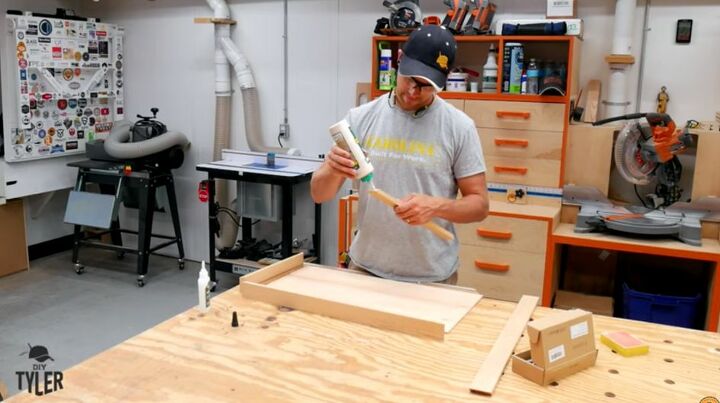
It was finally time to build the new river rock boot tray. I had to work quickly at this point so I made sure I had everything I would need handy. To get each mitered corner attached together, I mixed some of the Titebond III with a little Titebond Fast Acting Adhesive and then slipped the bottom piece into the Dado cuts. I immediately added some spring clamps to hold it all together and then left it to dry.
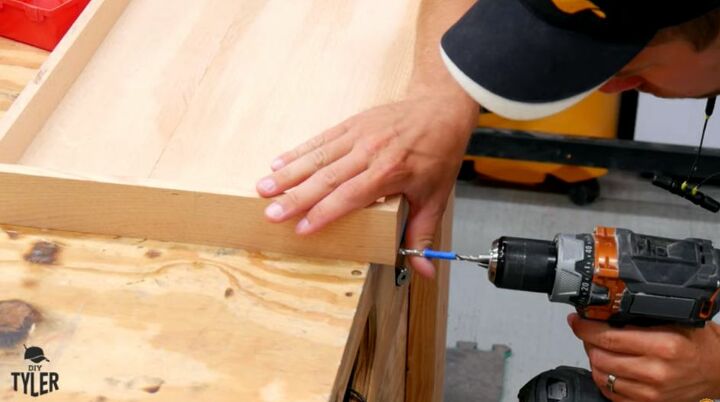
Glued mitered corners are not always the strongest, so I wanted to give them some extra support before filling the tray. I drilled a hole through each corner and popped in a dowel with some glue. After the glue was dry, I trimmed off the extra pieces of dowel with my hand saw and then sanded everything down again until it was smooth.
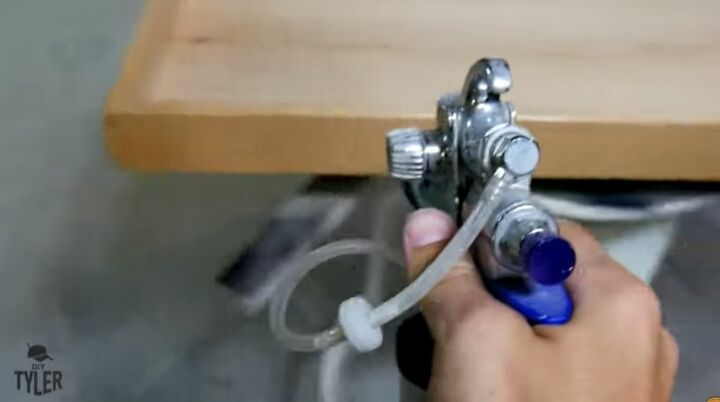
To give the boot tray a beautiful polished look, I added a small amount of a General Finishes water-based stain to some Rustoleum Ultra Polyurethane. The stain added just a hint of color to the topcoat giving the tray a rich, natural look.
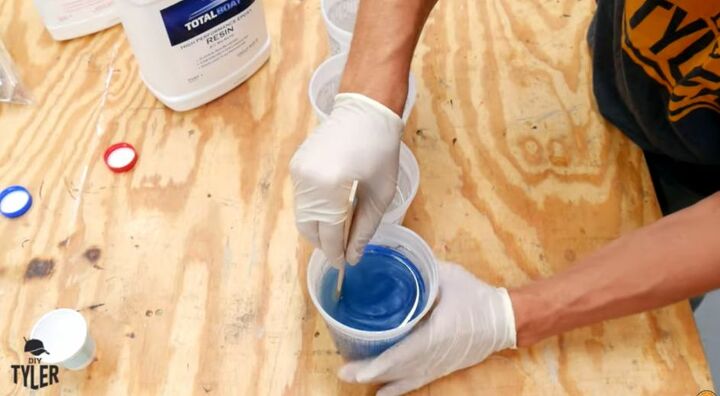
After letting the top coat dry overnight, it was time to add the epoxy. I used TotalBoat epoxy for this project at a mix of two parts resin to one part hardener. I find this epoxy really smooth and great to work with so I would definitely recommend it. Since the epoxy I was mixing would be at the bottom of the tray under the rocks, I wanted it to look like water. To get that look, I added some blue color pigment to the epoxy when I was done mixing the hardener and the resin.
Once the resin, hardener, and color were mixed and really well stirred, I pour the mixture into the wood tray. I filled the tray about a third of the way up but wish I had used a little less so that it didn’t show so far up the rocks.
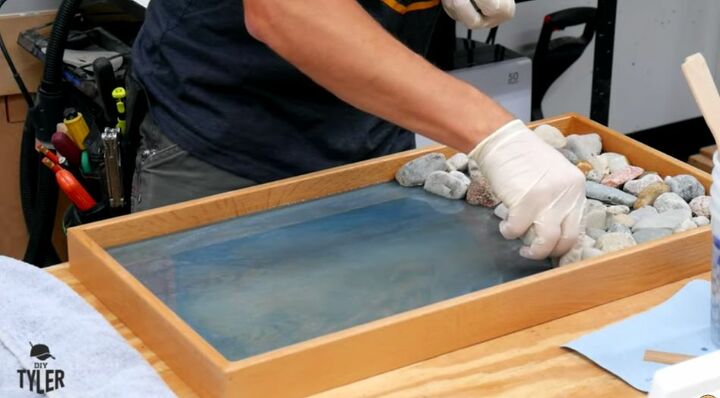
As soon as the bottom of the tray was filled with the epoxy, I began gently placing the rocks in it. I placed them in one at a time as opposed to dumping them, in order to keep the epoxy from splashing up. It took a little work to get the rocks all in order, but I wanted to make sure there were none sticking up overly high and that they were all touching each other.
Once the rocks were all in place, I left my new boot tray to dry again overnight.
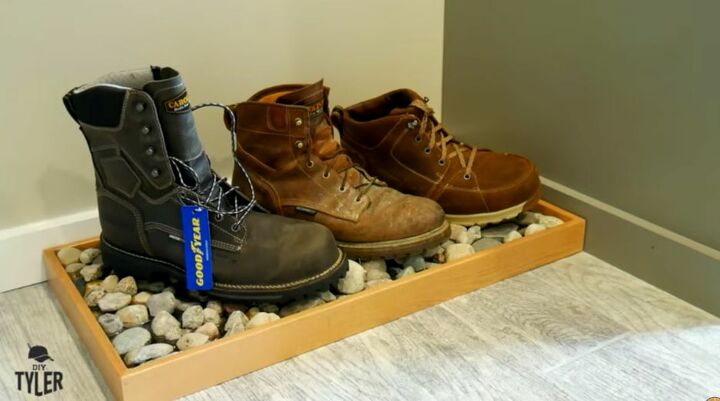
I am really excited about how great the new boot tray looks in the entryway. Not only does it look good, but it is perfect for setting my work boots on when I’m at home. The rocks allow the water to drip off the boots and keep the floor dry and clean. I hope that you will grab some leftover wood from your workshop and try making one of these impressive boot trays soon. You won’t regret it!


Comments
Join the conversation
-
Not a wood worker, but might try this with the lunchroom tray I swiped 50 years ago in college! I never throw anything out!
-
LOVE this!!!!


Frequently asked questions
Have a question about this project?
Looks very nice, but how do you clean it? I mean, doesn't it eventually fill up with boot crap between the rocks? I live in the city and everything gets white from the salted sidewalks.
How much leeway do you have before the epoxy hardens? I may want to try a larger or longer one.
Why not just place absorbent material into the bottom of the tray then put in the rocks loose.When things start getting dirty,just empty the rocks into a culander for washing,replace the absorbent material then replace the rocks when dry?