


Custom Deep Floating Gallery Frame
I love to paint and I've been practicing a lot so I have a bunch of canvases that need framing. Getting them framed at a store can be pretty pricey so I decided to make my own!
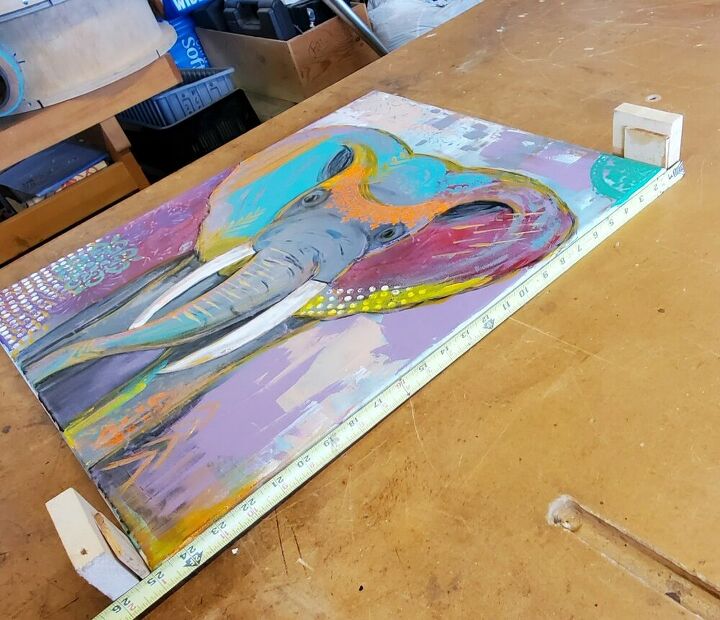
I wanted my frame to be floating and deeper than the actual canvas. I decided on a 1/4 inch gap around the entire painting. I used 1/4 inch spacers and 3/4 scrap pieces to get the exact measurements of each piece for the frame and I used 1 1/2 inch by 3/4 inch pine board.
For a 20x24 canvas I had the following cut list:
2- 25 15/16
2- 20 1/2
The canvas can be a little thicker in certain places so that's why I like to use the spacers and scrap pieces to get the actual measurements instead of just figuring it based on what the canvas size says.
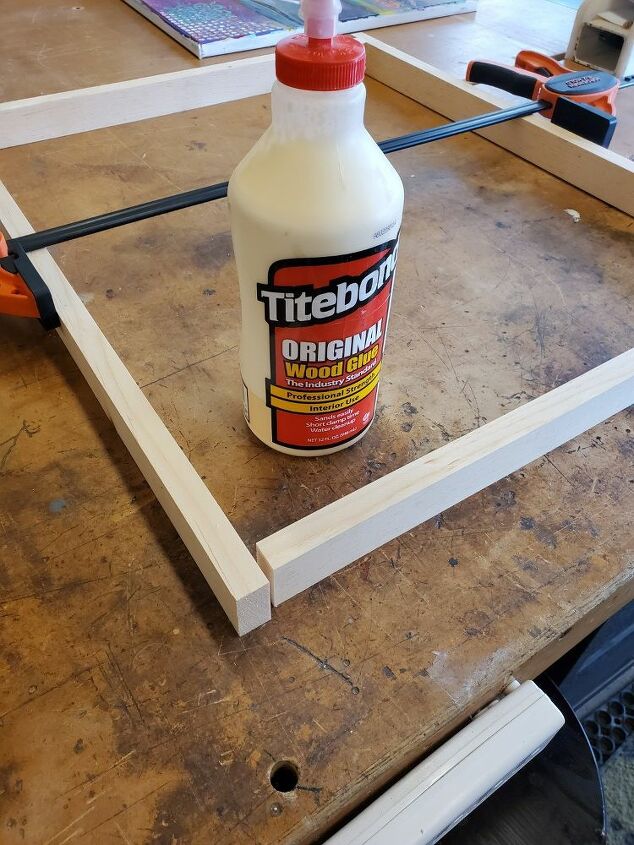
I used a small amount of wood glue and some clamps to hold the pieces in place so I could nail it up.
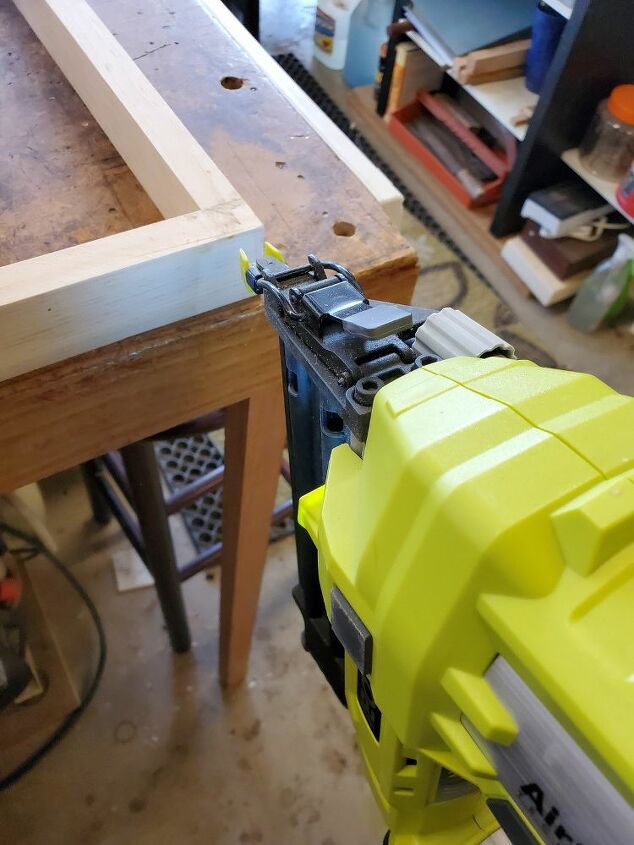
I used a nail gun and shot 2 nails into each joint. I made sure to stay away from the edges enough to not cause the wood to split.
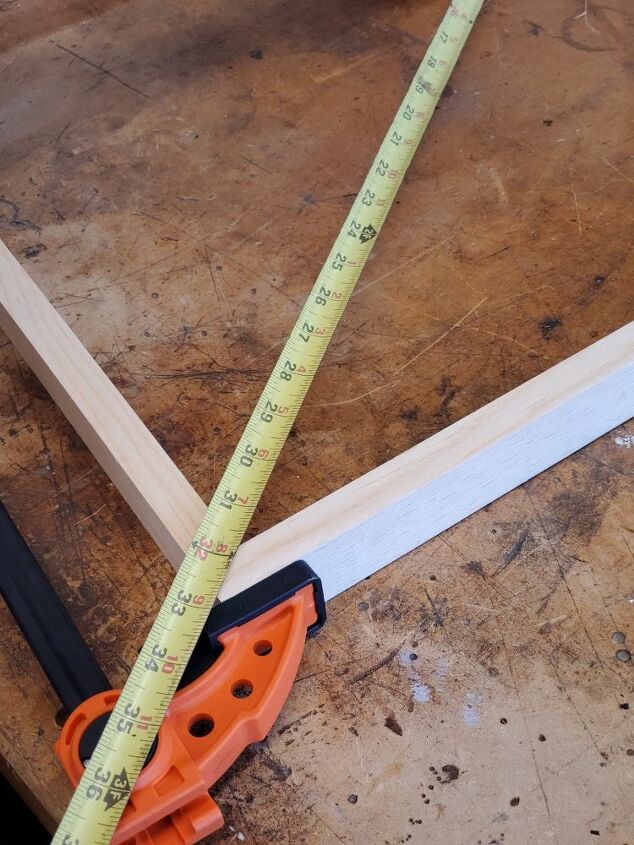
I measured each diagonal to make sure the frame was nice and square. It was a little off the first time I measured so I adjusted the clamp just a bit to pull everything perfectly square.
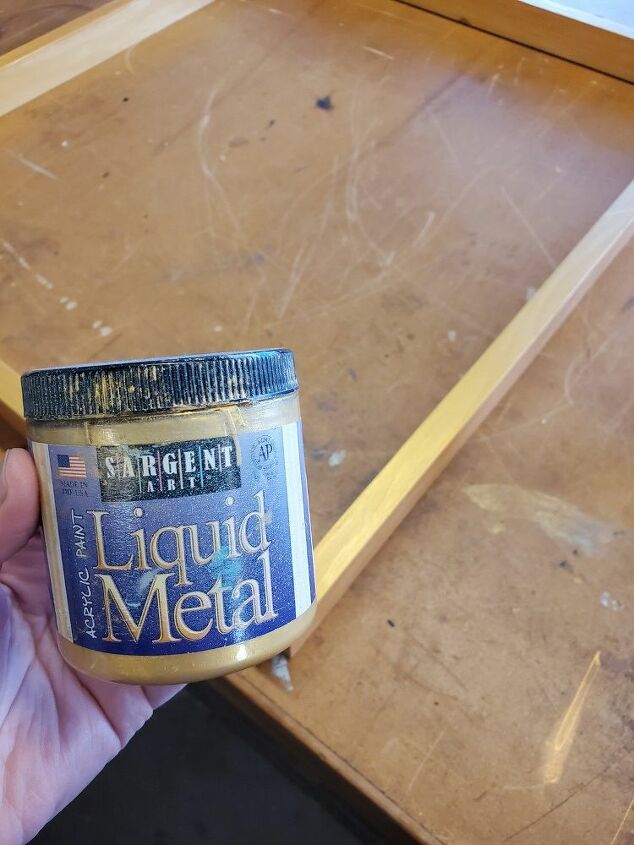
Next I sanded the entire frame with a sanding sponge and then decided on gold paint. You can also stain or clearcoat it depending on what look you're going for. I painted two coats so that the gold was nice and even but the wood grain still showed through just a bit.
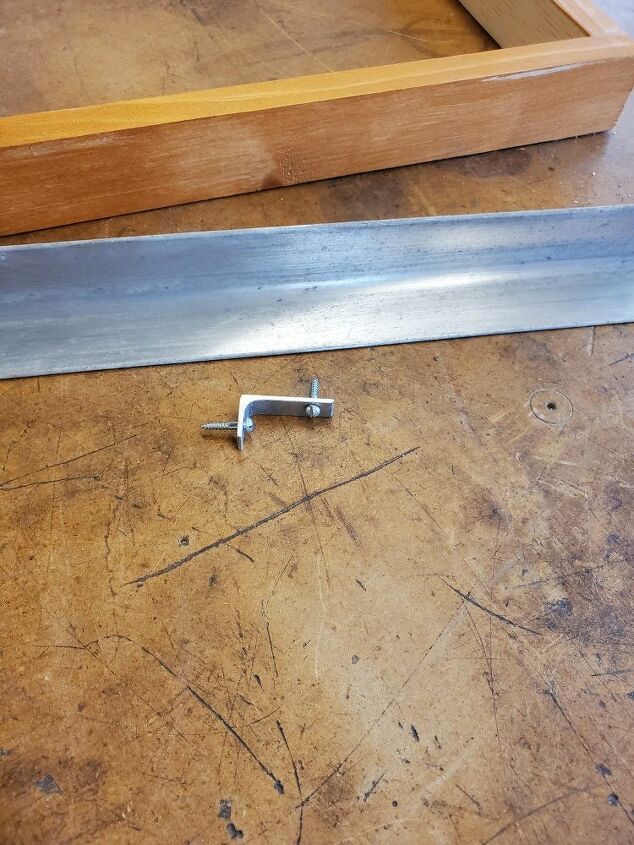
Using aluminum angle, I cut my brackets to size using a chop saw. This will allow me to attach my canvas to the larger frame and make it appear to be floating. You might be able to find something similar at a hardware store but I decided to just use what I already had on hand.
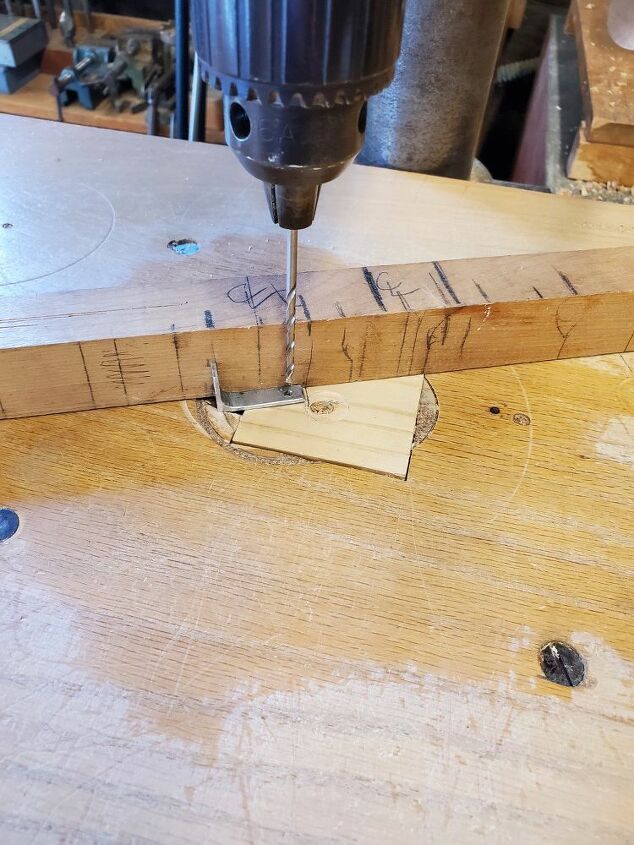
I used a drill press to drill two holes into each bracket.
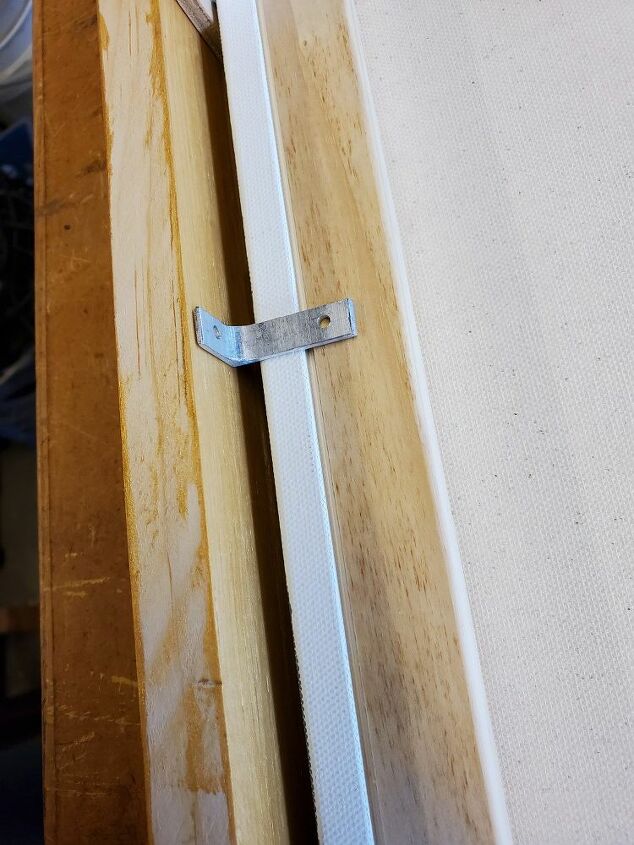
This shows where and how the brackets will be attached to keep the frame from touching the canvas. I used one bracket on the center of each side.
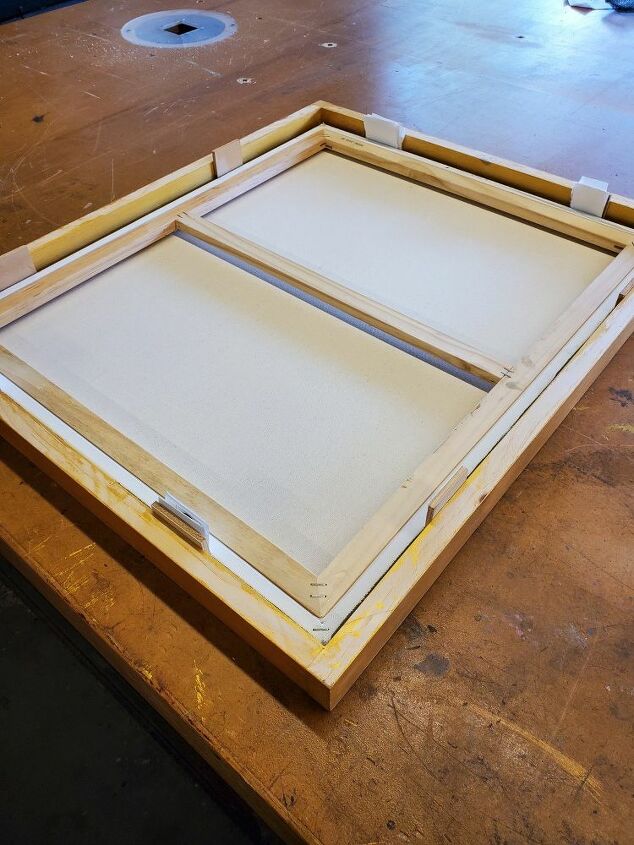
I laid my canvas upside down in the frame so it would be flush with the front of the frame. I used the 1/4 inch spacers all around to ensure an even gap on all sides. (Even though I THOUGHT I measured correctly it was a little loose top to bottom so I used folded paper to split the difference in the gap. Measure twice, cut once! 😂😂😂)
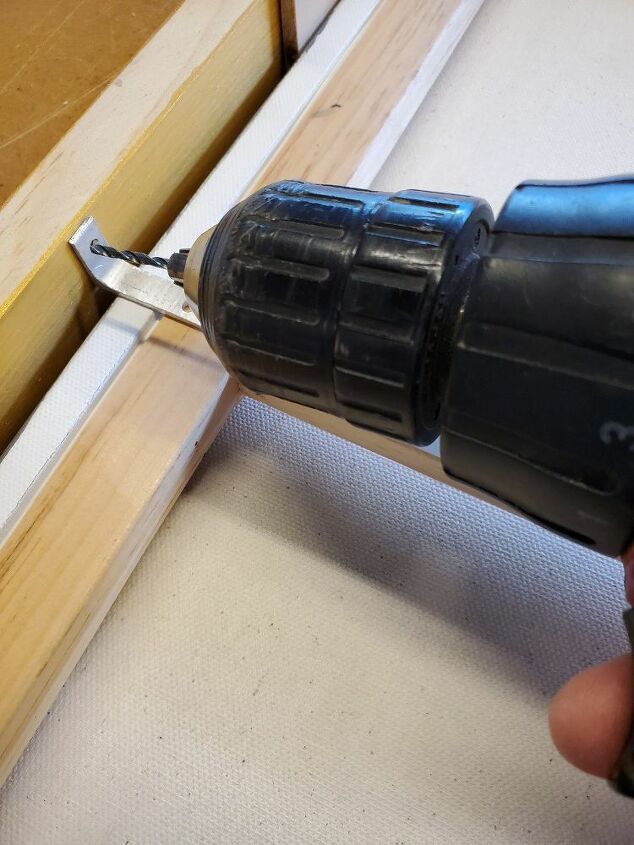
I drilled a small pilot hole to help get the screw in easier and prevent any splitting. Be sure no not drill all the way through!
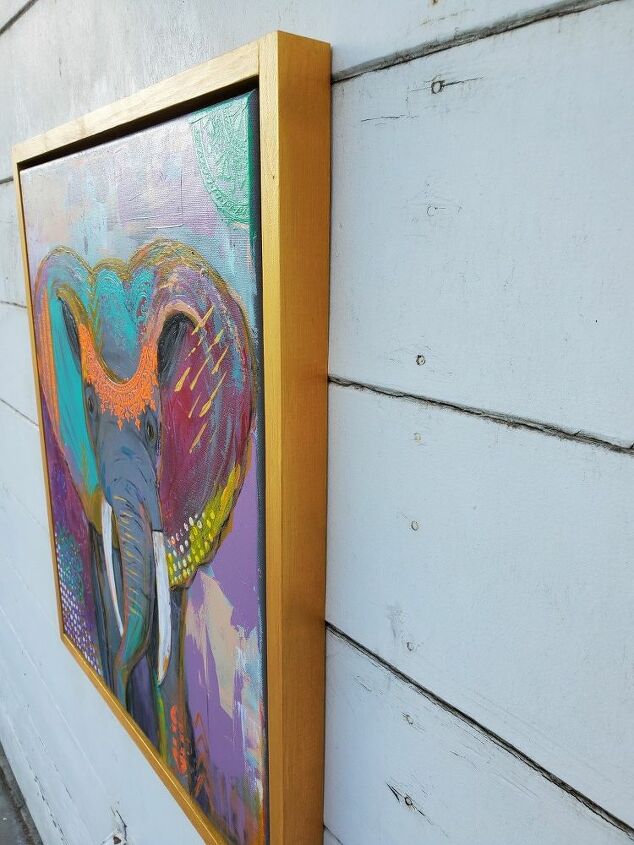
All done! Making the frame deeper than the canvas makes it look more substantial and modern in my opinion.
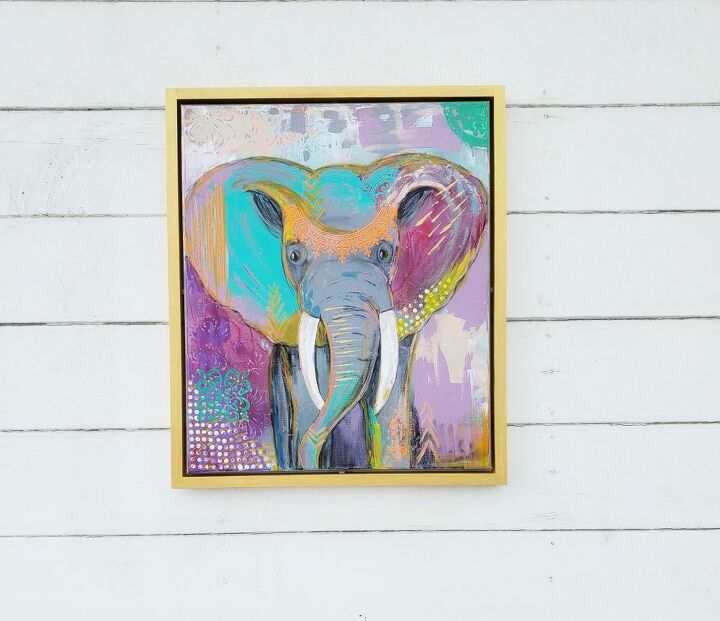
I love the separation of the floating style frame! Thanks for stopping by and following along with my latest project! To see more be sure and follow me on Instagram!
Resources for this project:
See all materials


Comments
Join the conversation
-
I love a simple box frame, I worked in a frame shop as the main framer for over 8 years, so I do know how to make my own frames and to make them a floating frame, I also know what kind of brackets to use to attach the painting, and that being said I am also an artist that frames her own work. I have always loved the look of these kinds of frames and thank you for the wonderful tutorial.
-
That's amazing! Do you have any tips on better brackets or how to make them not show as much? I have a few different ideas but want to get a good system in place so I can frame a bunch of pieces easily. 😊


Frequently asked questions
Have a question about this project?
Love the idea. Will the aluminium brackets be partially visible between the 1/4" gap?
I also noticed on the final finished product, the gap between painting and frame appear black. Is that just shadow from the photograph, or did you paint the inside of the outer frame black?
Terrific hack. Here's another tip: when you are painting something like this frame gold, under paint first with RED. It makes gold look richer. Could L-shaped molding also work for smaller canvases?
Can you see the brackets from the front of the picture??