


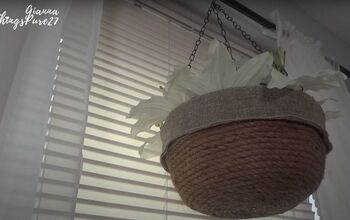
How to Make a VIntage Hanging Planter

I'm going to share with you how my honey and I made these beautiful Vintage Hanging Planters. They are truly vintage because the wood we used is at least 100 years old (we're not sure of the exact age) and all of the other details are vintage as well. How fun is that?
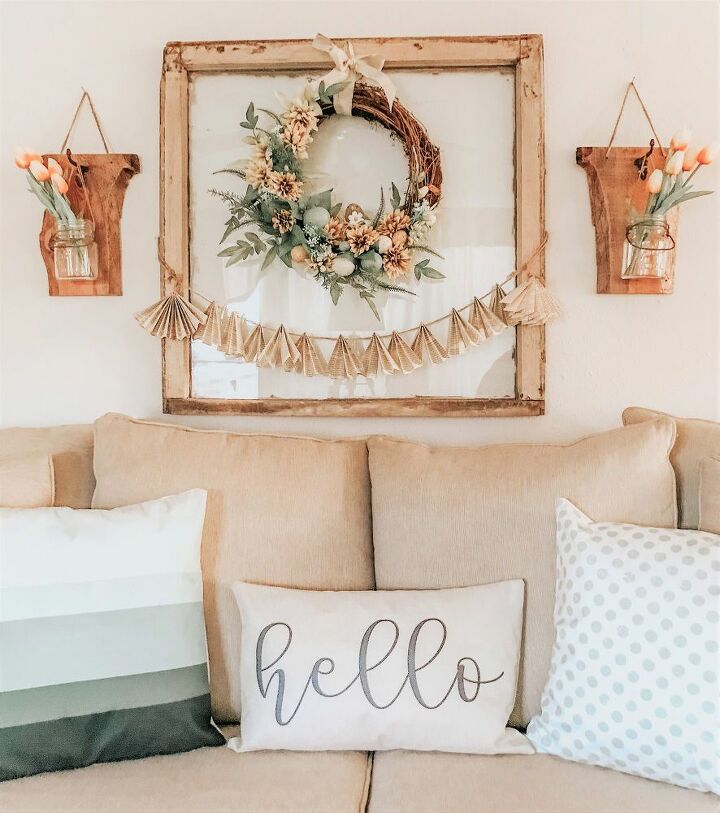
We are renting here, so nothing we do in the decorating category can be permanent. These hanging planters brought lots of beauty to our living room and best of all, we can take them with us when we find our forever home! When we moved, we made sure to bring our treasured wood with us. We had to get rid of a bunch of our other scrap wood, but not these pieces, they are like treasure!
Be sure to visit our blog to see what else we've made with our 100 year old wood.
This wood is considered a family heirloom by my honey's mother. Most of this beautiful wood that was so cherished by his mother was stolen. The wood was hand milled by his grandfather many, many years ago. Several years ago and with the urging of his mother, we went and rescued the remaining wood from the old barn on the family property.
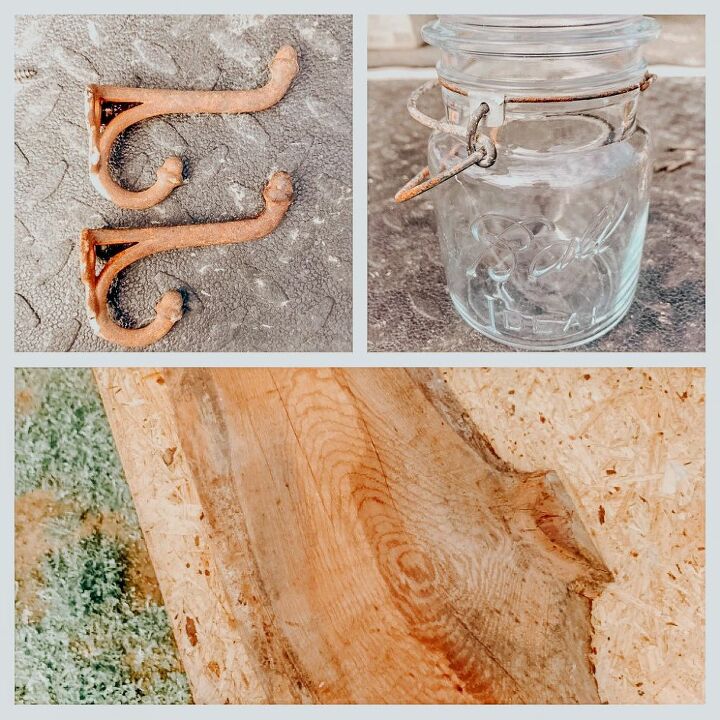
So, to recap, the wood is extremely old for sure. We have an excellent antique mall just a mile or two up the road form us. Its awesome! We found the old metal hooks, vintage Ball jars and even the brass screws to hold the hooks on with!
Visit our blog for the link to these life like tulips, you get 30 tulips for $18!
To recreate your very own hanging planter you will need the following items for each planter:
Wood - approximately 6" x 12"
Metal Hook, one for each planter
Glass Jar, one for each planter
Twine
Paint Brush
Sealer or paint - optional
Sanding block with 120 grit paper
Measuring Tape
Saw
Drill
Screwdriver
STEP 1: Cut two pieces of wood that measure approximately 12" tall by 6" wide.
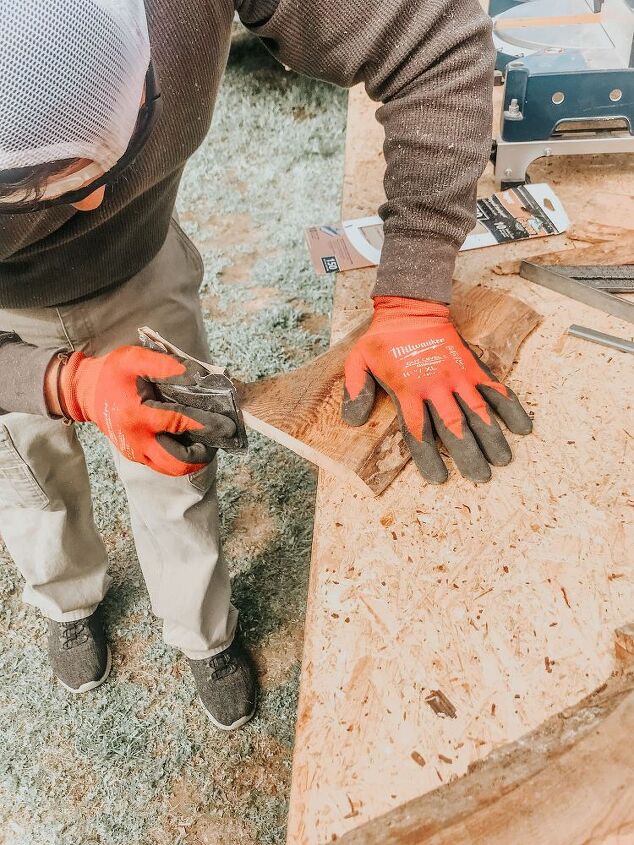
Step 2: Sand the entire piece of wood with 120 grit sand paper until its smooth and free of rough spots.
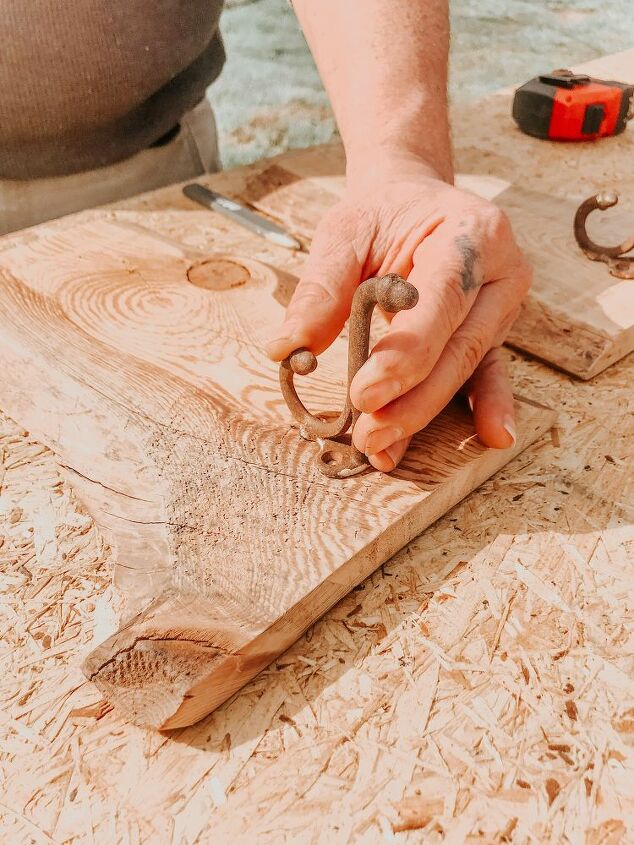
Step 3: Find placement for your metal hook. We chose center from side to side and then 1 inch down from the top. Mark the holes with a pencil.
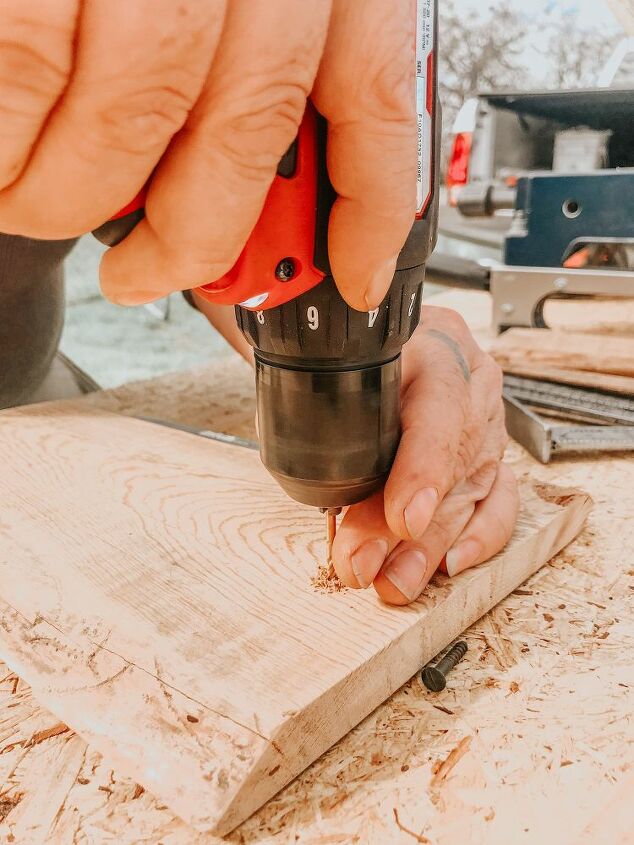
Step 4: Using your pencil marks, drill pilot holes for your hook screws. Add the hook and screws.
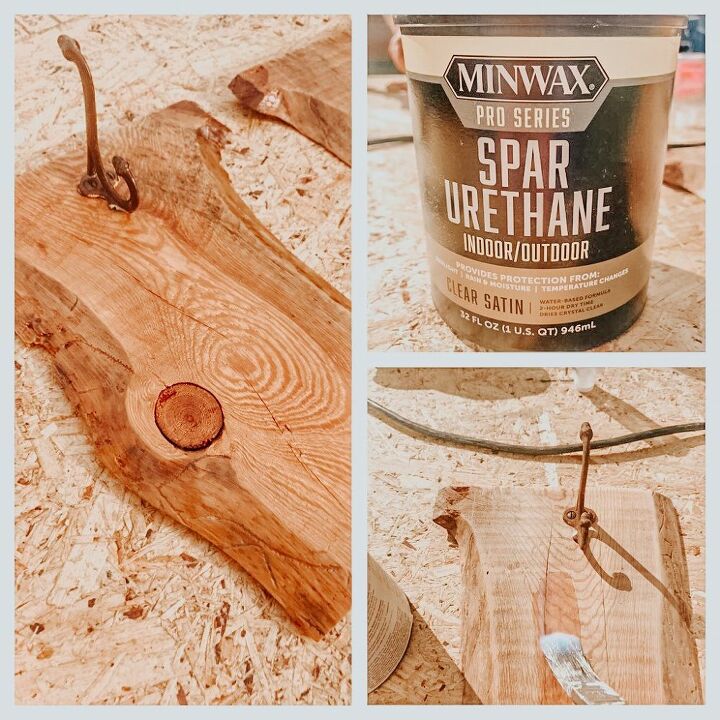
Step 5: Seal the wood. I used Spar Urethane because our wood is very old and I wanted to protect it from UVs. You can use Polyurethane if that's what you have on hand. I applied the sealer to the wood and the metal hook to preserve the look we have now.
NOTE: If you prefer to paint your wood a certain color, do the painting step before you add your metal hook.
You'll notice in the first pictures up above how light in color the wood is. After adding the sealer your wood will change colors slightly, so be prepared for that.

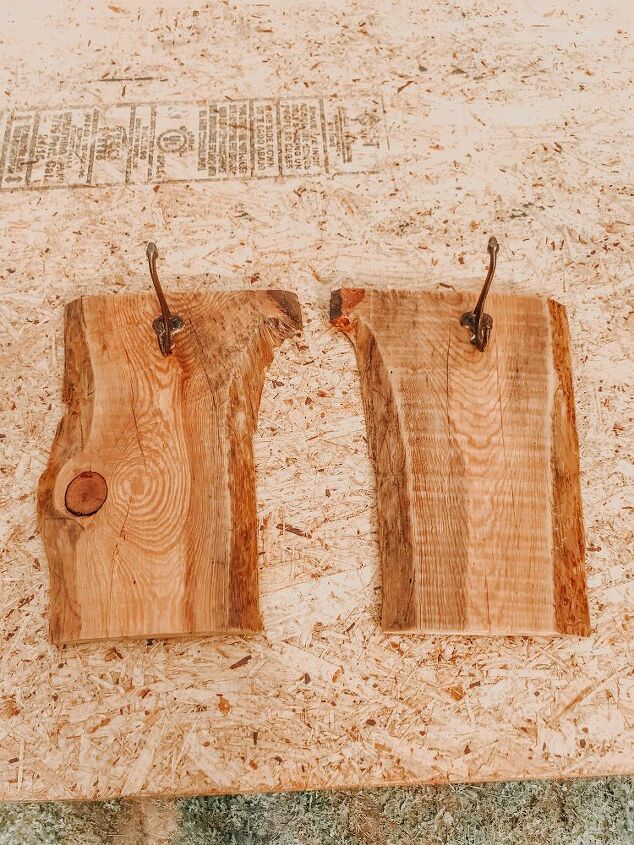
Step 6: Drill holes for the twine to thread through for hanging. Our holes are slightly above the hook top and about 5" apart.
NOTE: You can also do this step before the sealer step, but we totally forgot because we got so excited about how pretty they looked. Haha, we were like, wait, how are we going to hang them!?
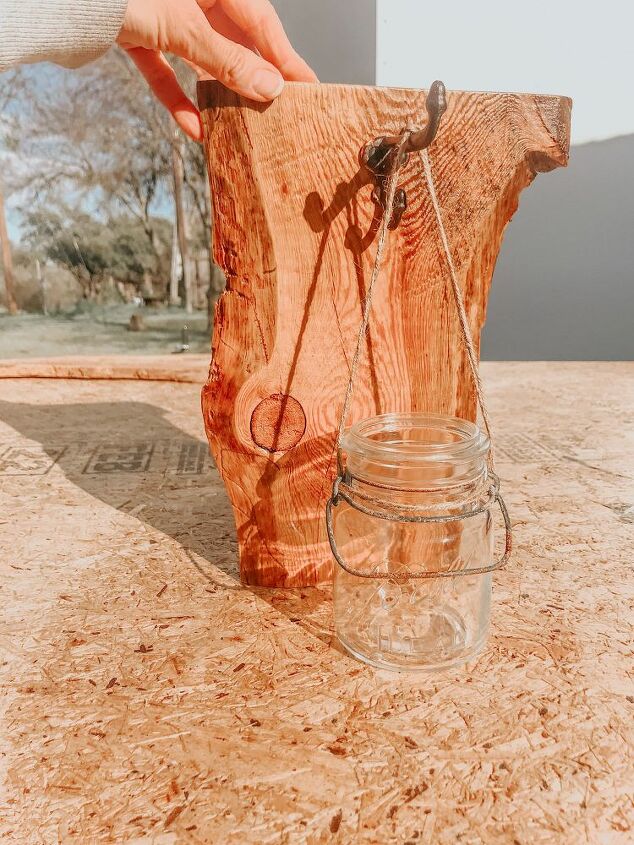
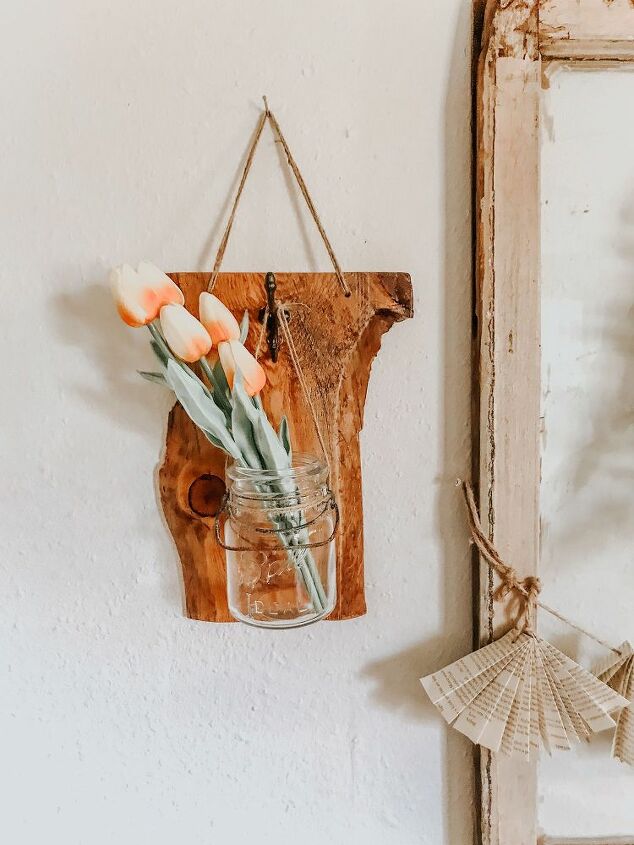
Step 7: Add jute twine to your jar for hanging. Cut twine at about 18" to start with. Since our jar had a bail on it, we threaded it through the bail hooks and up for hanging. We had to adjust the length of the twine to get it just right. Here its about an inch too long, so I shortened it. In the end you want the bottom of your jar to be about 1 inch from the bottom of the board.
NOTE: If your jar does not have the bail, then tie it around the top of the jar under the lip to hold and then add your twine for hanging to each side.
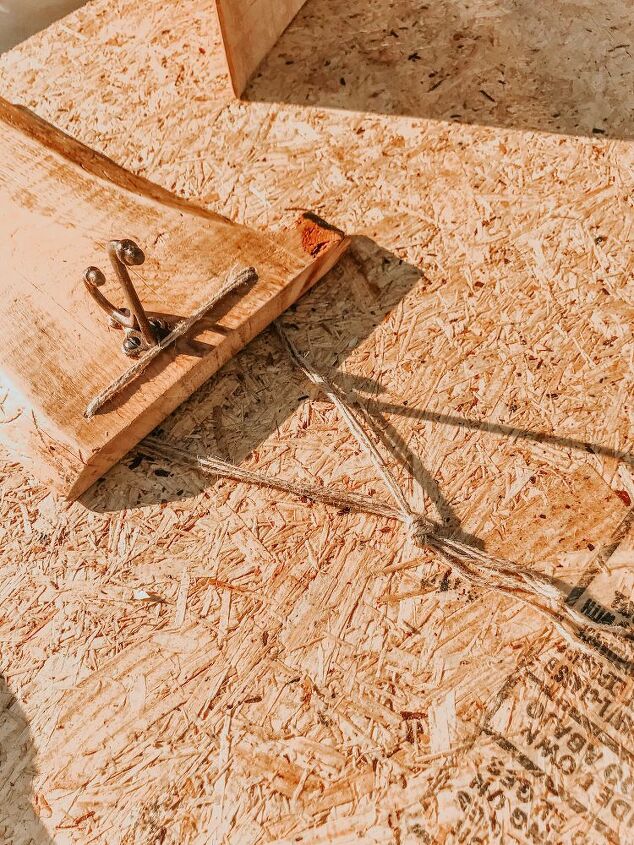
Step 8: Add hanging twine. Cut twine at about 24" to start with. Thread twine through the drilled holes and tie in a knot like you see here. We actually threaded it through backwards here, you'll want it to look like the photo below for end results.
NOTE: Depending on the size of your twine and the weight of your wood, you may need to double or triple your twine. My good heavy twine is in storage, so we had to use this thin dollar store twine and I chose to triple it for a better look!
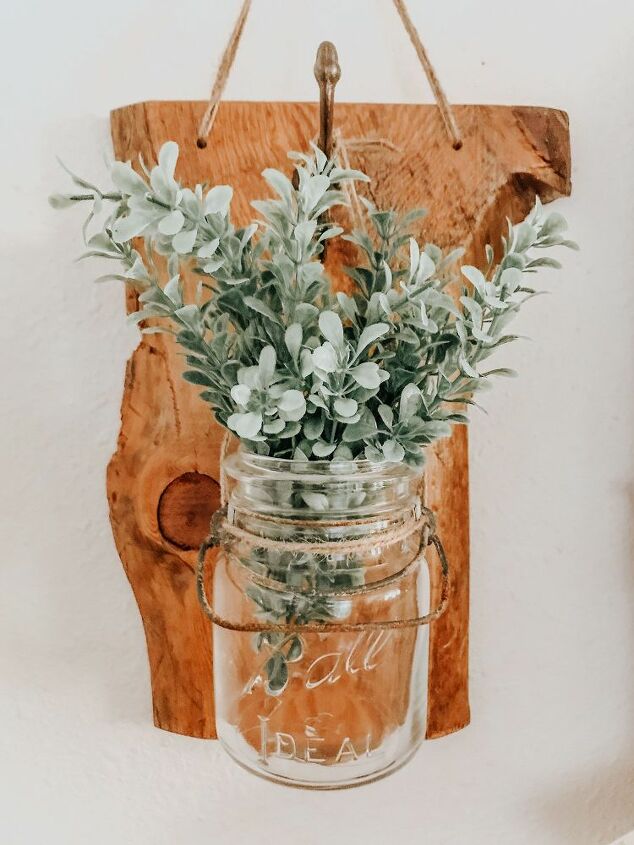
Here is the hanger with plain greenery in it. You can add anything you like to your jars, the sky is the limit! You could even add little fairy lights too!
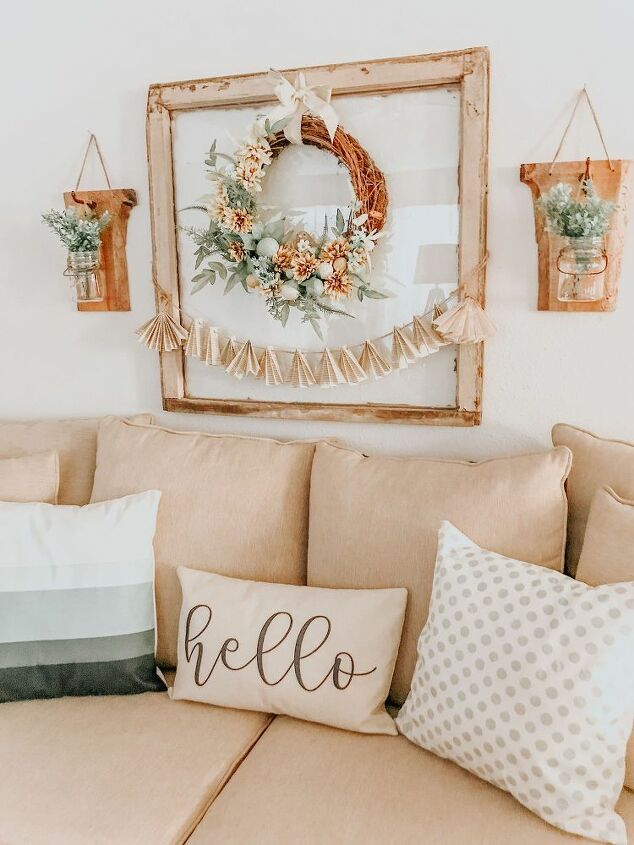
Both of these hanging planters took approximately 1 hour from start to finish to complete. I hope you will pin this idea for later and try it yourself! We had lots of fun making them and now we have a family heirloom we can pass down to one of our kids!
If you hop over to our blog you can take an inspirational Spring Decor Tour where you'll find more beautiful home decor and fun projects!
Thanks for looking! :)


Comments
Join the conversation
-
I have old barnwood pieces, the jars as well as many vintage hooks and vintage door knobs. A great idea to use some up !
-
Instead of drilling holes for the cord you could screw small eye hooks into the top.That way you wouldn't have to have the twine going across the wood.Just a thought.


Frequently asked questions
Have a question about this project?