


How Clothespins Help Pass Time... By Making A Clock and A Mirror!

Hi everyone, I so hope all is well!!
To keep you busy while cooped up inside I have two inexpensive projects you can make with clothespins! You can get clothespins on the cheap from Walmart, under $2 for a pack of 100! You can make so many things and I will show you how I made a wall clock and a mirror!
Here we go !
!
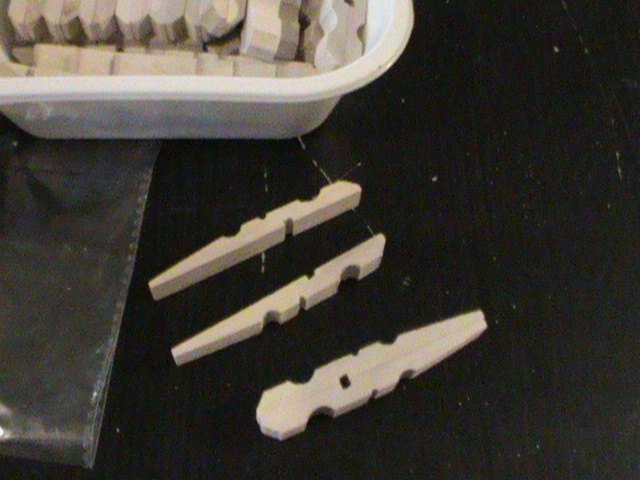
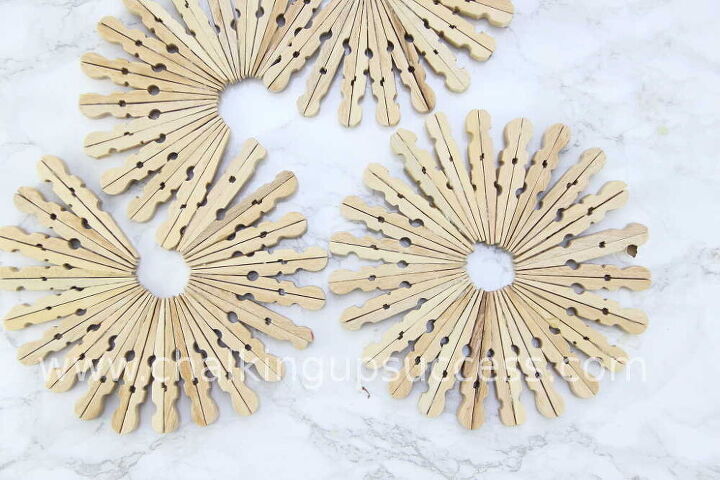
Take the pins apart, use a thin line of wood glue on the pin's flat side, now add another half pin.
For this clock I used 156 and a half, I'll explain that "half" in a later step.
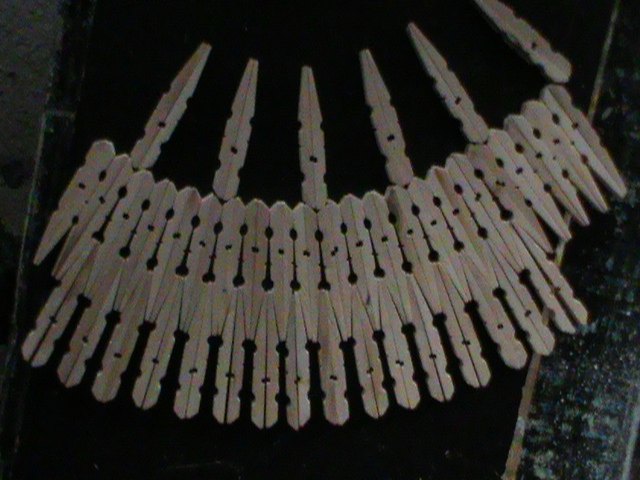
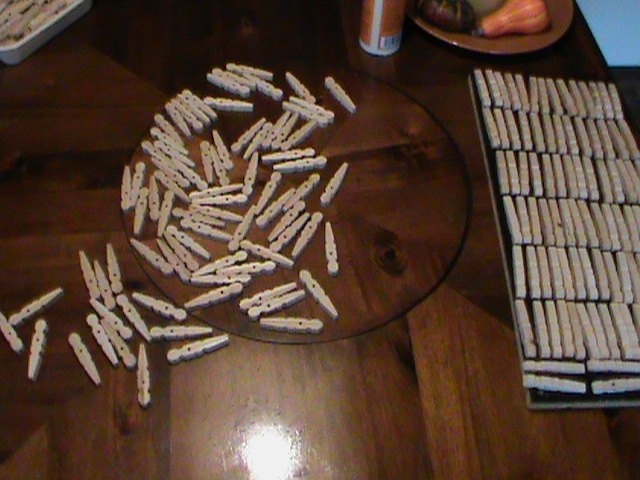
I wanted it to be big and just doing one row wasn't big enough so I added more. I really had no plan so I'm going with the flow making it up as I go
 !
!
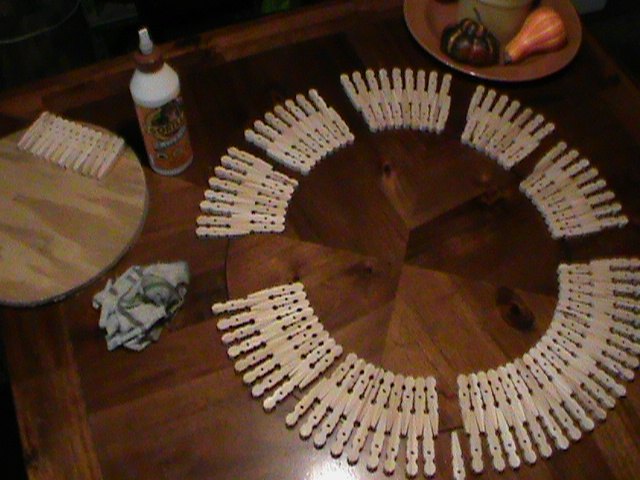
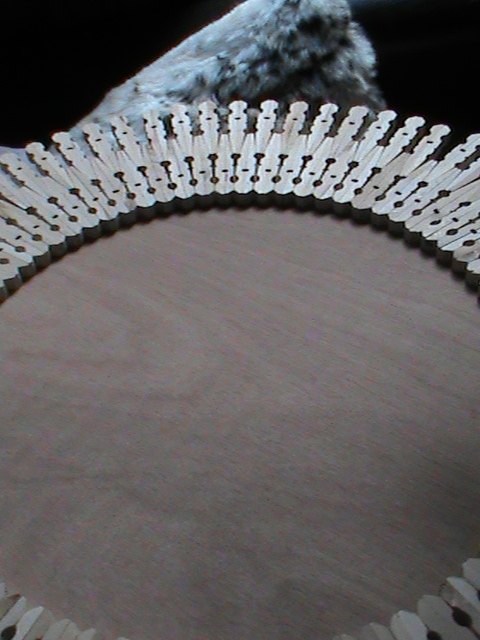
Well as you can see I did this in sections. I would glue a few together (both rows at the same time) then hold them with my fingers for a few seconds. When the sections were dry I then glued all the sections together. As the circle was drying I would press the sections together trying to get a tight hold because you can't use clamps on this so you need to keep pushing it all together. I then had a separation problem, a gap in my circle!! No, no, no must solve this!!
Well I solved that problem with the half piece! The half piece is there but you don't notice it!
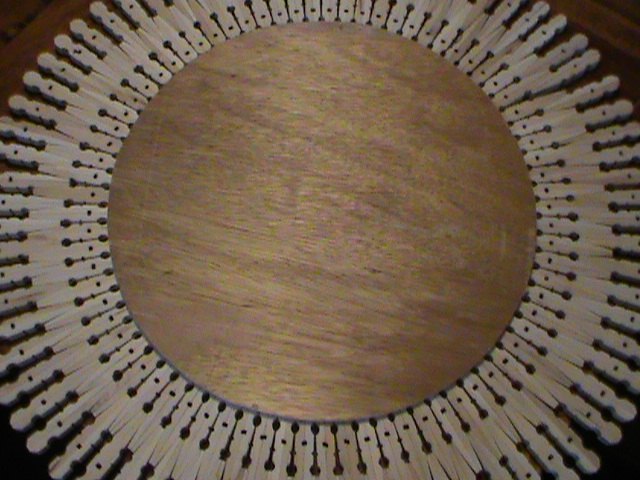
The back is a circle I cut out of wood sheeting with a jigsaw. I cut it just big enough to cover the tips of the pins so the holes would not be covered. I put wood glue on the tips only in a big circle, added the wood sheeting circle then flipped it over to dry over night. Drying time is important for it to be sturdy/stable for the paint.
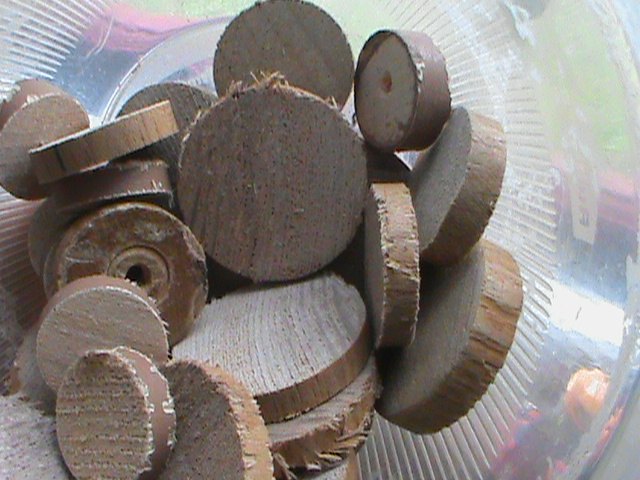
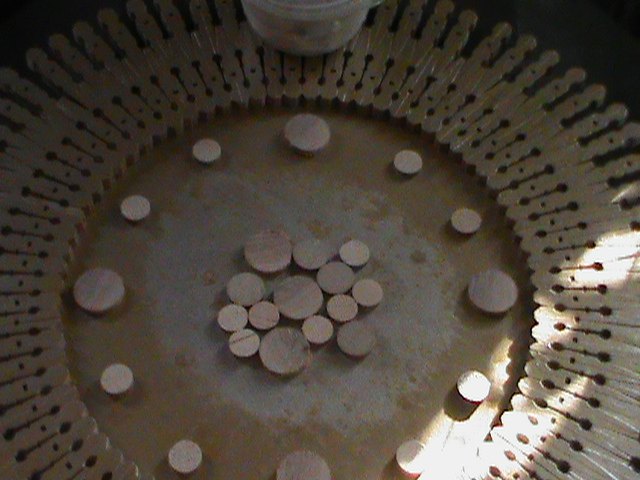
I took the wooden handles from old gardening tools (different sizes). I cut some slices with a table saw and sanded them for painting.
This is the look so far.
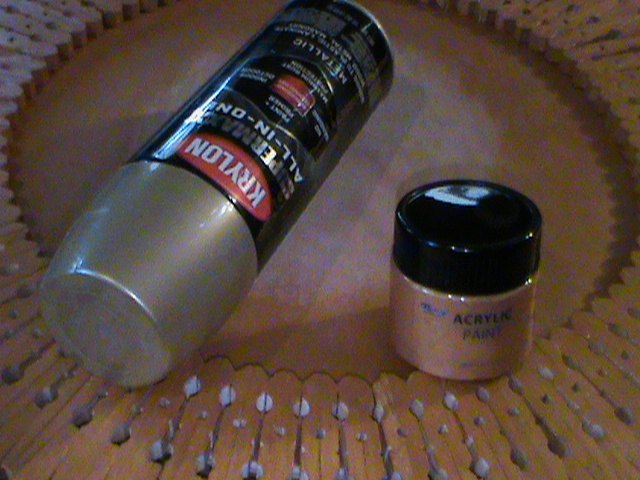
Not sure which one to use at first both are gold ! I went with the spray paint because it would get into the holes better. So much easier than hand painting to me!
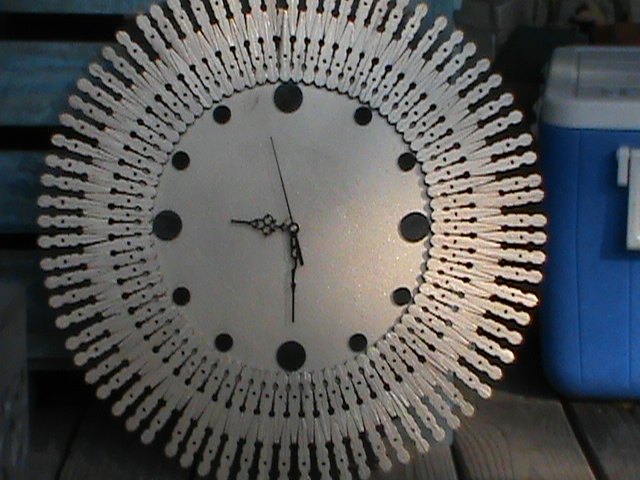
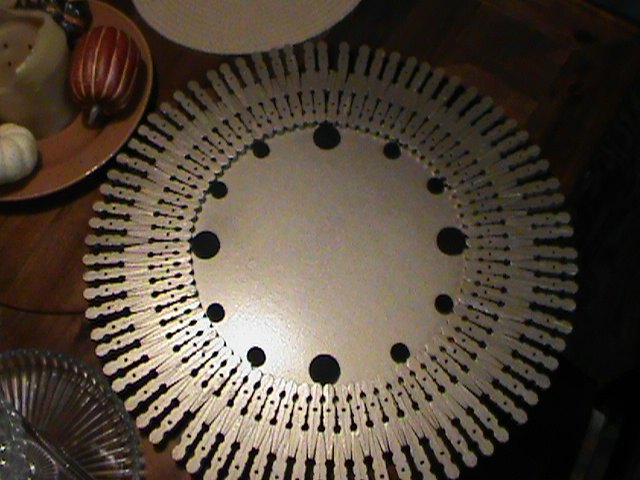
Really simple! I painted them black for a good contrasting color. You can see this from across the room with no squinting ! I put them on with wood glue.
I drilled a hole in the center, just big enough for the clock part to stick through.
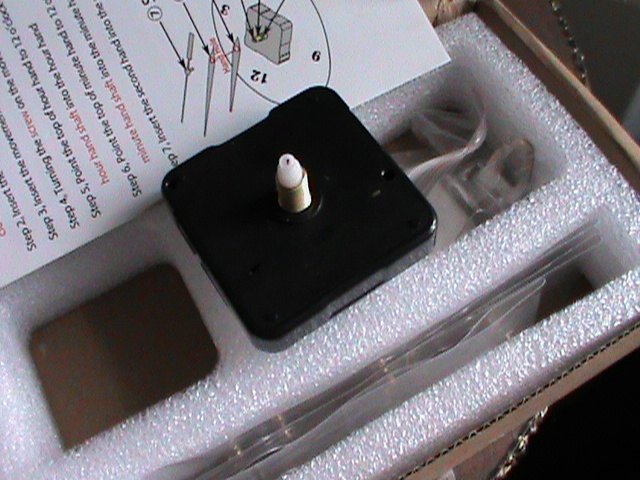
I got this new for another clock I made for a friend. The one in my clock was from an old clock, I 'm an upcycler! I use old stuff to make new stuff !! Just didn't have a pic of the old clock. The clock was very easy to put in!!
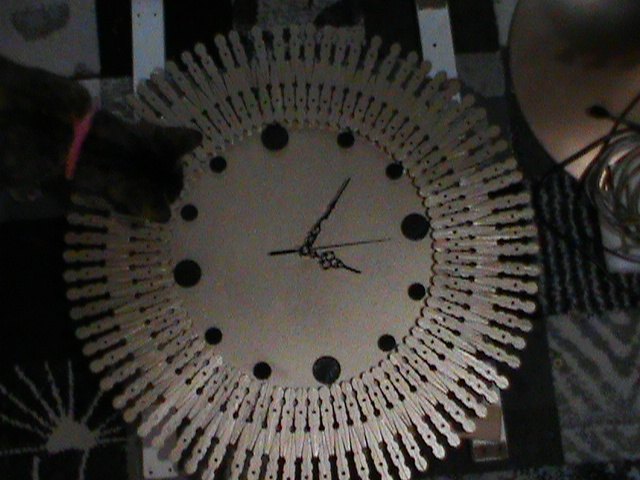
My little kitty is very interested in whatever I'm doing!!
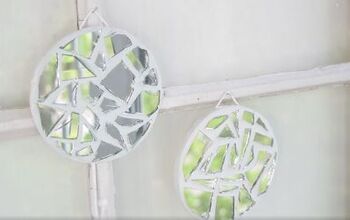
Now on to one more project, a clothespin mirror!!

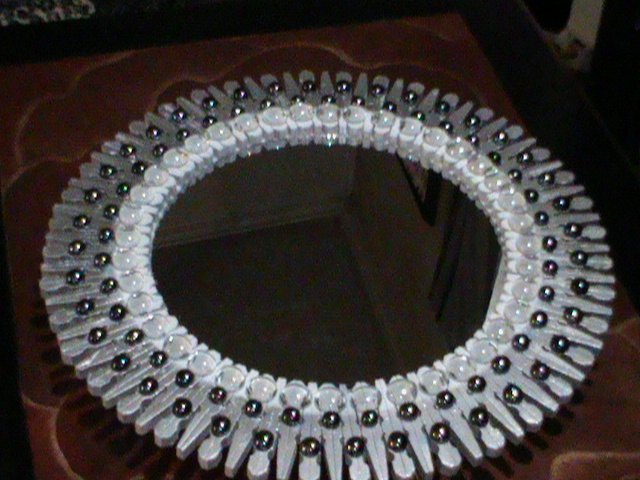
I did this a bit different in design as you can see and the process is a bit different too. I cut a circle out of wood sheeting just like I did with the clock but this time I needed the wood circle to be 2 inch bigger than the mirror I would use (mirror 10", wood circle 12"). Place the mirror upside down in the center of the wood circle and 1 inch all around will be left for gluing the clothespins on the wood. I used the mirror as my edge and glued the clothespins as close as I could to the edge of the mirror. I let this dry over night and in the morning is when I flipped it over.
This video shows you how I did this. 
You can paint it any color you want! I used black and silver spray paint on the one in this video. You can see what white and silver spray paint looks like in the pic below!
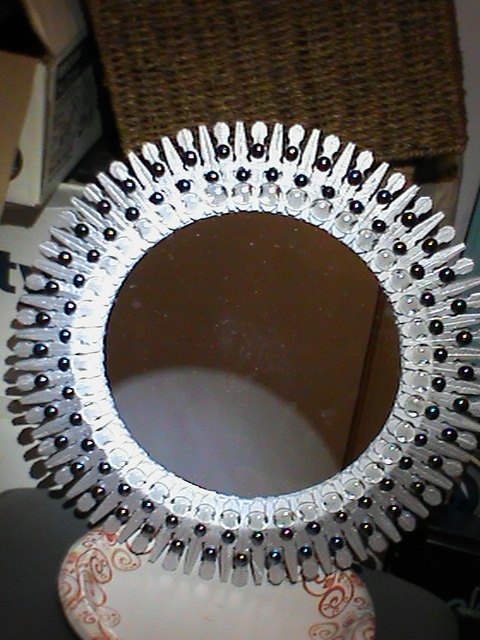
I added glass gems in different colors and sizes to this one! I think beads would look great too!! I just really love shiny stuff!!
I love all comments and of course any questions!!
 Thanks for looking at some of my clothespin projects!
Resources for this project:
See all materials


Comments
Join the conversation
-
What a great idea! I love clothespin projects too. My favourite way of using them is to make gorgeous trivets for my table. https://www.hometalk.com/diy/decorate/rooms/how-to-make-a-beautiful-trivet-from-wooden-clothespins-44318873
-
What a wonderful way to 'pass the time'!!! I love the clock. Thanks for sharing.


Frequently asked questions
Have a question about this project?