


String Art - Farmhouse Style!
I have seen some amazing string art designs and wanted to see if I could put something together on a much smaller (and easier) scale! Turns out, it is a ton of fun to make and you get a little arm workout in the process!
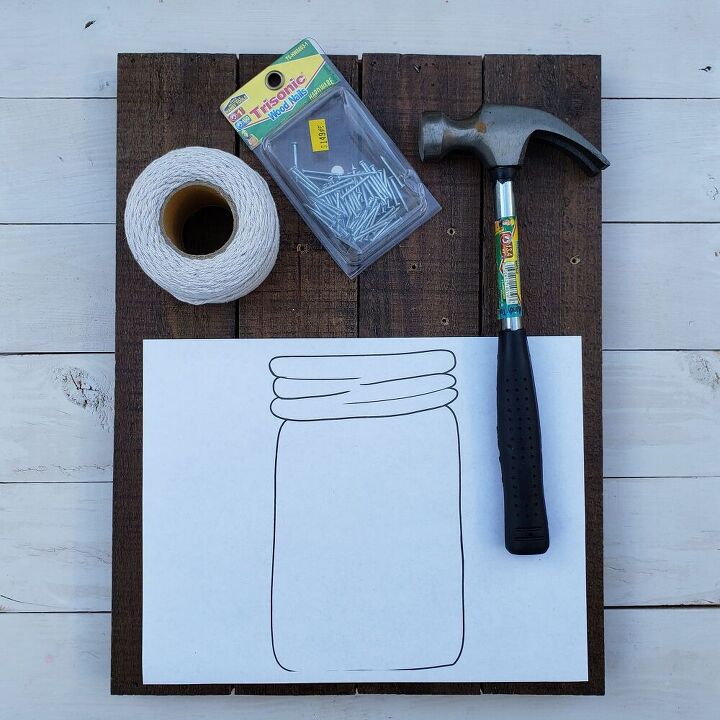
Here is what I used for this craft:
- Wood board (the one I used was from Hobby Lobby a few years ago)
- Nails with a flat head (so the string doesn't slip off!)
- Hammer
- String or twine
- Paper with design outline (if you like the jar design I used, you can find it here!)
- Sola wood flowers from Oh You're Lovely
- Greenery from Oh You're Lovely
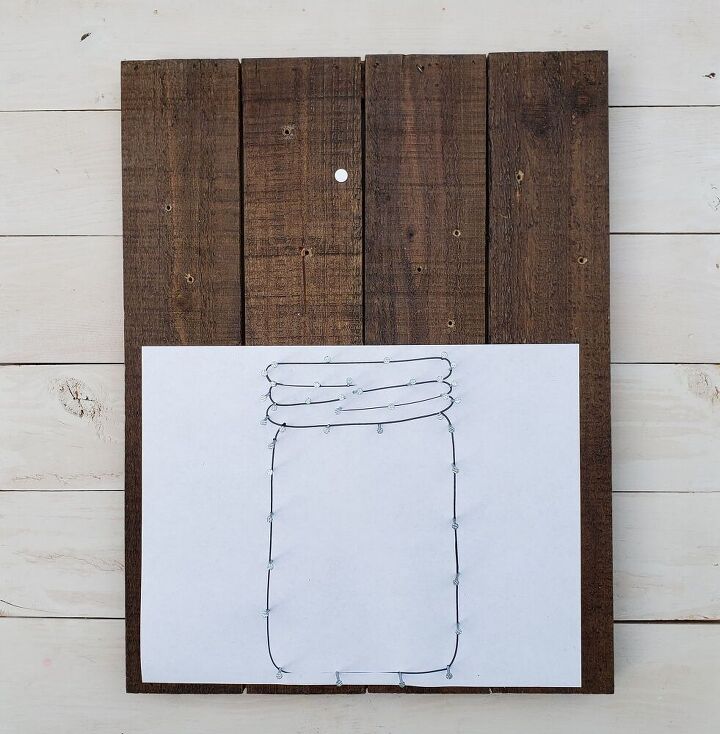
This first step can be tedious but I also found it to be a great stress reliever! Hammer the nails along the design outline. Generally, I spaced them about 1-1.5 inches apart. When I got to a rounded area (especially the lip of the jar design), I added nails closer together. This will help keep the curve of the design after adding the string.
I tied one end of the twine around a nail and double knotted it. Adding the string around the outline of the jar will be one continuous step so get ready to start looping!
From the nail where my twine is secured, I pulled the twine taught and looped it around the next nail closest to it. When you get to an end point of the design, you can double back with the twine to an outer nail. Then you can continue through the outline!
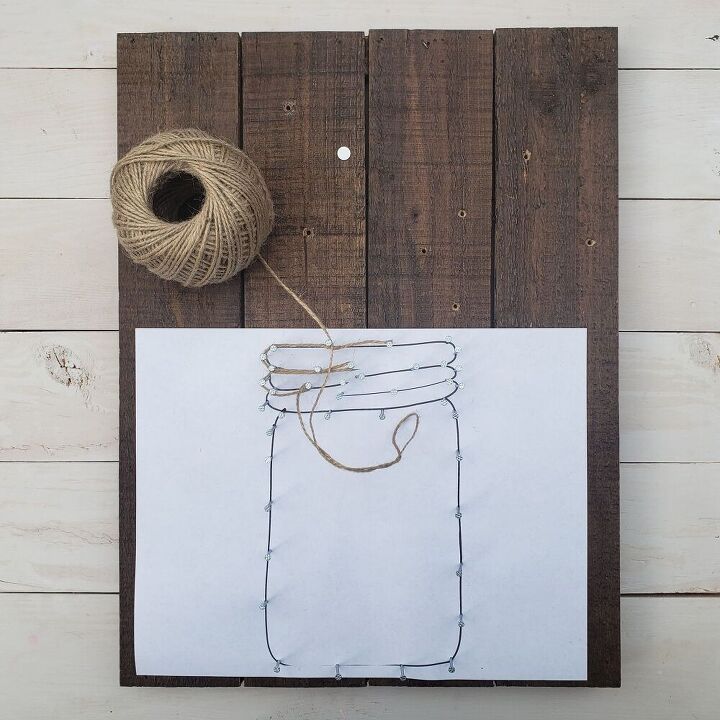
To complete the outline of the jar, I went all around the edges and tied the twine to the nail we started with. You could be done after that step but I wanted to go a little extra extra on the jar  .
.
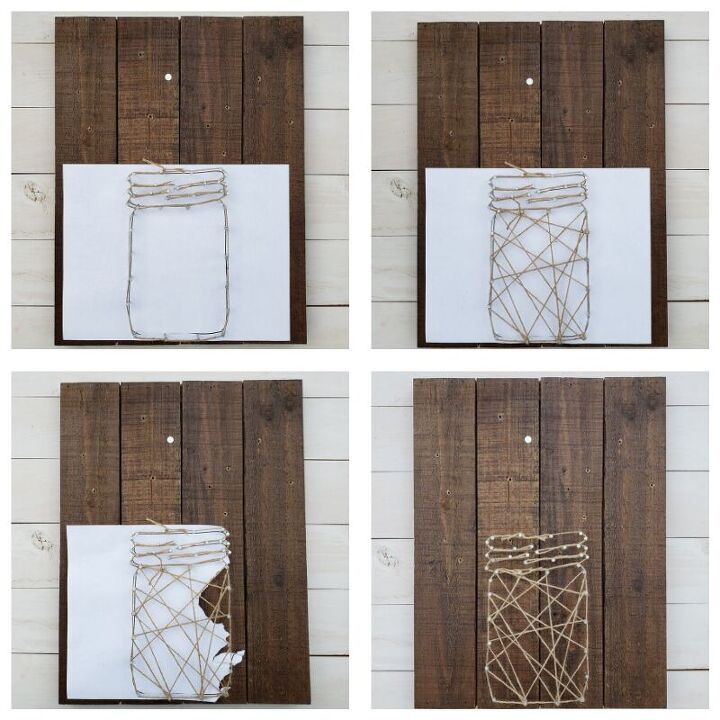
I started a new piece of twine on the main part of the jar and looped the twine around the outer nails in a criss cross "pattern" (I'm loosely using the word pattern as I just kept going until I liked the way it looked!).
Once you are done with your design, you just rip out the paper template underneath the twine.

My favorite step always is when we bring in the floral pieces! I cut a few sprigs of greenery and slid them in under the twine to create the shape of my floral section. I used our sola wood flowers that have bark on them to really bring out that farmhouse vibe! To add them, you can either stem them with floral wire or glue directly to the greenery or board.
And there you have it - a pretty home decor piece you can have out all year!
Resources for this project:
See all materials


Comments
Join the conversation
-
Love it and it looks like something I could do!
-
Oh my gosh, I just LOVE this! I think I'll make a giant one for outside this fall. Maybe tuck some lights in the jar part. Thanks for sharing! 🧡


Frequently asked questions
Have a question about this project?