


Plain Jane Entry to Upscale Beauty

Another reason you should DIY to save enormous amounts of money updating anything in your house. Read how I saved more than 90% off my bid for my entryway by doing it myself (no skills and tools required)!
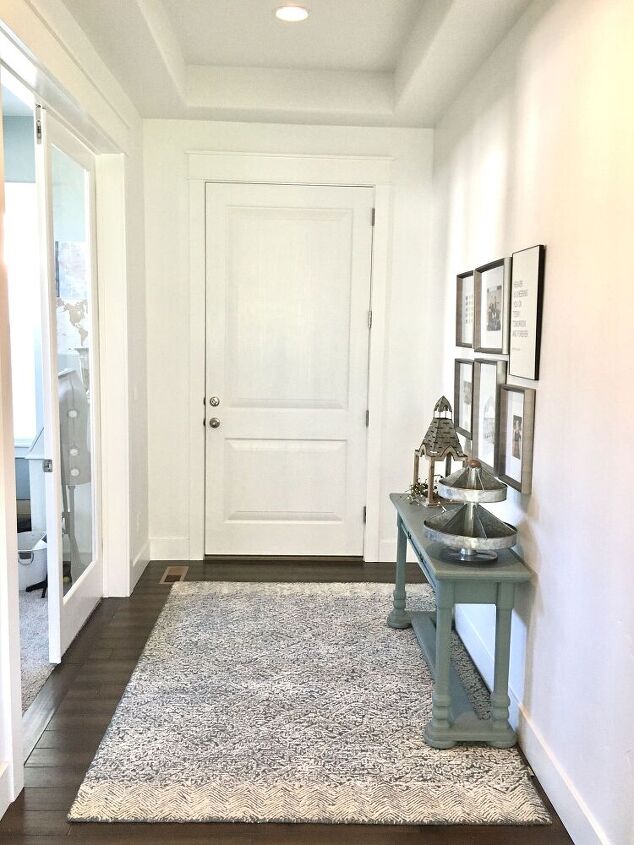
I have a pretty grand entry/hallway but it was lacking. When we built our house we painted everything white with the intention to paint on our own and add our own personality. We have succeeded with most of the rooms in our house and entry was one of the last places I wanted to tackle. Even though your entry gives you the feel of the rest of the home and is the first place guests are welcomed, I don't know why I didn't take on this project at the beginning.
Maybe it was because there are three doors, two archways, and coffer ceilings, I really wasn't sure what to do...
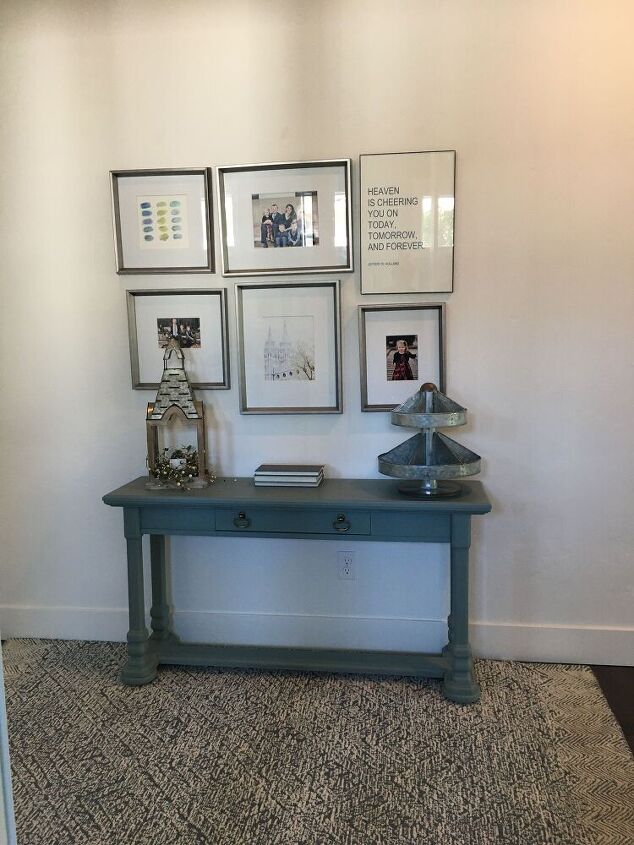
That blue/green entry table you might recognize from one of my first posts ever on Hometalk "$20 Entryway Table Turned to a Million Bucks" project was my first ever chalk paint project. Check it out on my page if you have the time. Well, that piece has been my anchor in the entryway to provide some color and personality until now...
Let me get to my story how I saved literally, thousands of dollars. When I worked for a homebuilder in Utah I had a lot of suppliers and contractors at my disposal. Since moving to Idaho three years ago, I had to start from scratch and find my own contractors. I went onto Facebook and asked around for anyone that has a contact for a woodworker.
I received a referral that came from a good friend and even my sister knew him and highly recommended him. He came by and gave it a look and gave me a bid of $4200!! GASP!!! I am sure he would have done a beautiful job but clearly, he did not want the job if he bid that high.
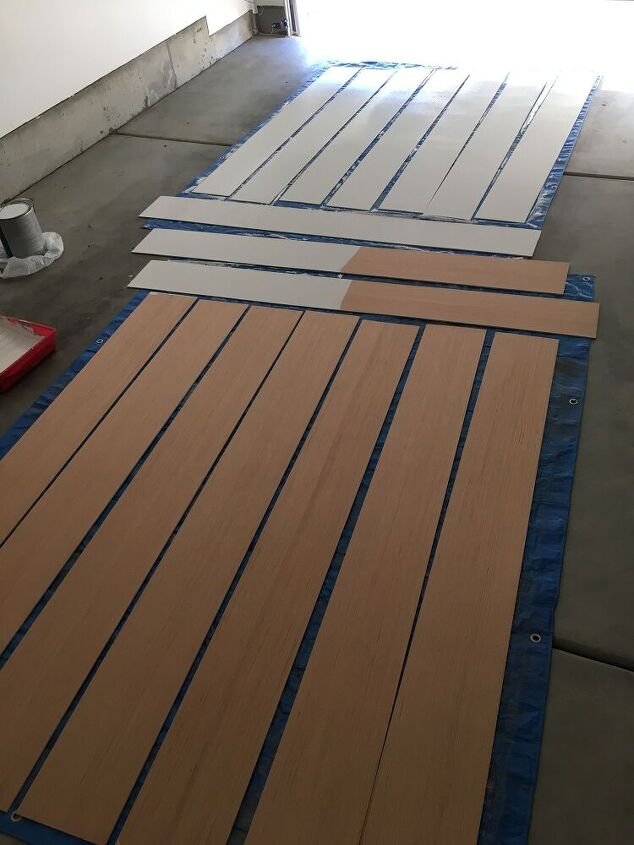
I have told many contractors how to install wainscott in homes I have designed and decorated but I have never installed it myself. I finally convinced my husband I could do it myself. Luckily, he has a lot of trust in me and we went to Lowes and bought 4 sheets of 1/4" plywood. Just my luck, the saws were down at Lowes (they cut wood for free) I had intended they would just cut down all my boards to 8" width that I needed since I did not have the tools at home to make those cuts.
My neighborhood friend and very talented woodworker came to my rescue and cut down all my boards to the widths I needed.
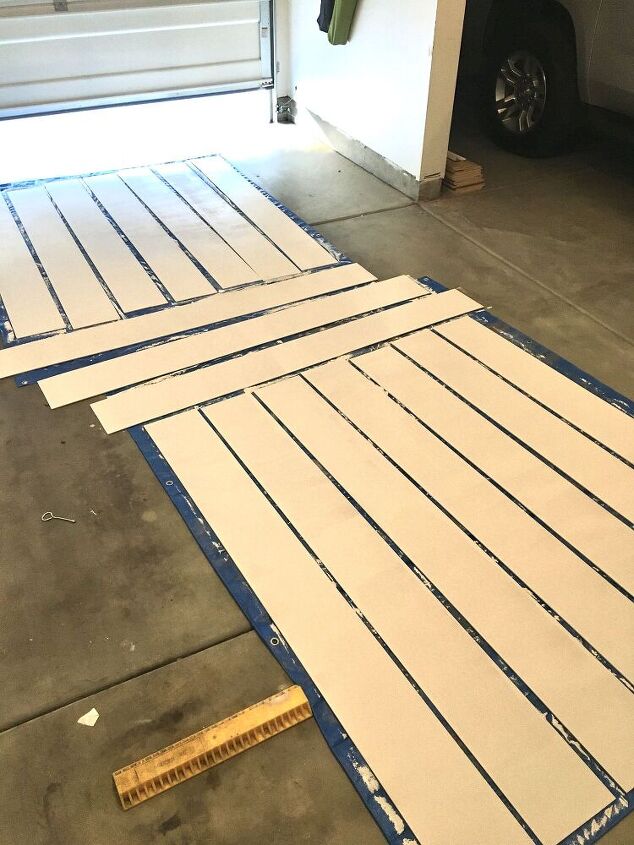
I primed and painted them in my garage Sherwin Williams Pure White to match my existing baseboards and doors.
Not only did I not have the saws to cut my boards, I also didn't have a nail gun to install them...Again, Dave came to the rescue and let me borrow his brad nailer that I definitely am going to buy one for myself.
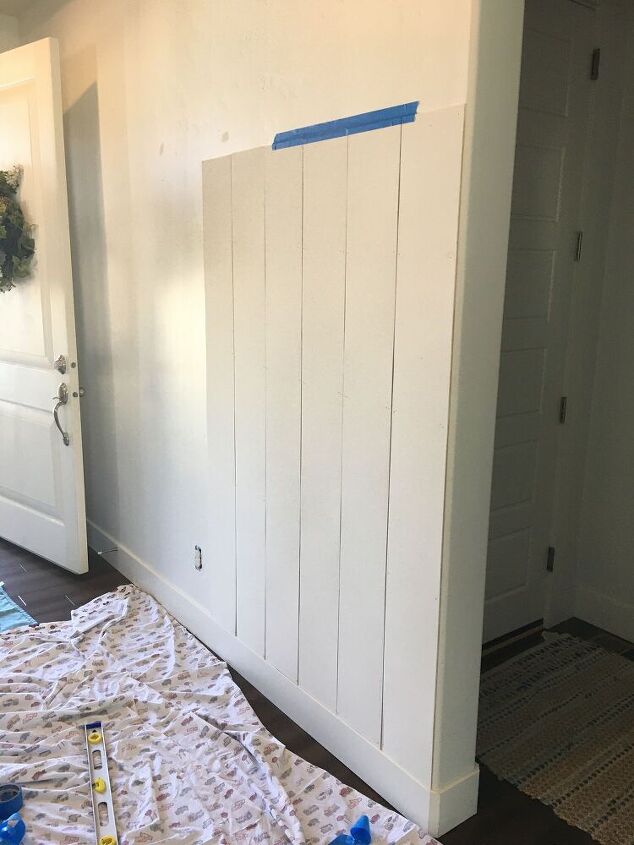
I decided to do vertical "shiplap" 3/4" of the way up the wall. My walls are 10' so I cut my boards 69" because of my 6" baseboards they sat on and my 3" trim I put on the top.
Mind you, I was working solo with tools I have never used before and was also watching my four kids so I wasn't going that fast and I wasn't able to take any pictures of me in action...

I put up my board using liquid nails on the back and as I held it in place with one hand, I used a long straight lever making sure it was straight. I also had to try to put a quarter in between the boards to make sure I got even gaps. You could also use tile spacers but I didn't buy any. I put a piece of painters tape at the top to hold it and used my brad nailer to nail on the sides every 8" down.
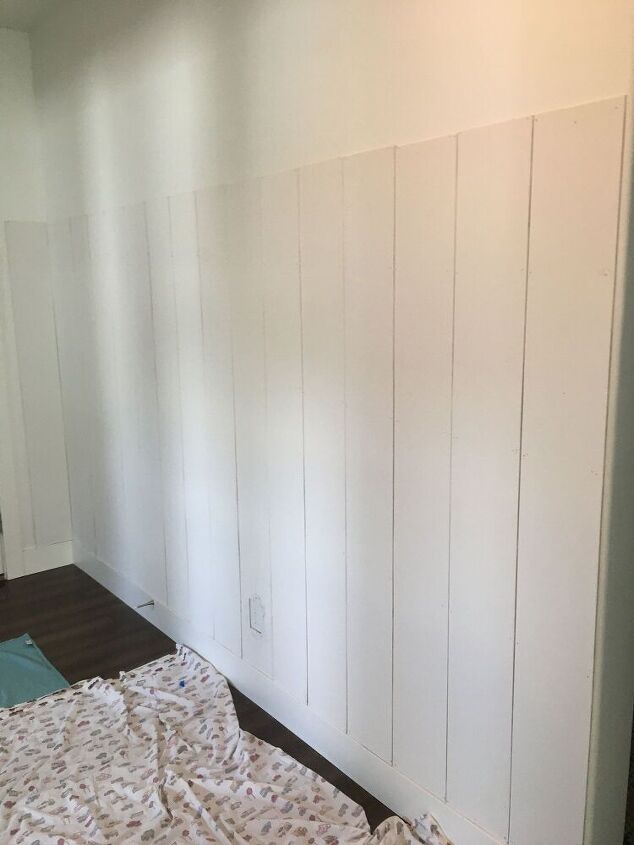
I nailed the boards up and all the way around the room. One thing I didn't get a photo of was how I did the outlets...I had three outlets and a light switch I had to work around. Measuring the boards that sat over the outlet was the trickiest part. I used a jig saw, another tool I had never used before, and ended up borrowing from another friend Joanna.
Once you cut around the outlet (just the opening behind the cover, do not cut around the cover itself) I used some electrical spacers to pull the outlets up from the screw so it would be flush with the board.
After I installed all the wood, I puttied my holes, sanded it and did one last coat of white paint. I added the 3" moulding trim on overlapping the top to hide the boards that were not completely the same height.
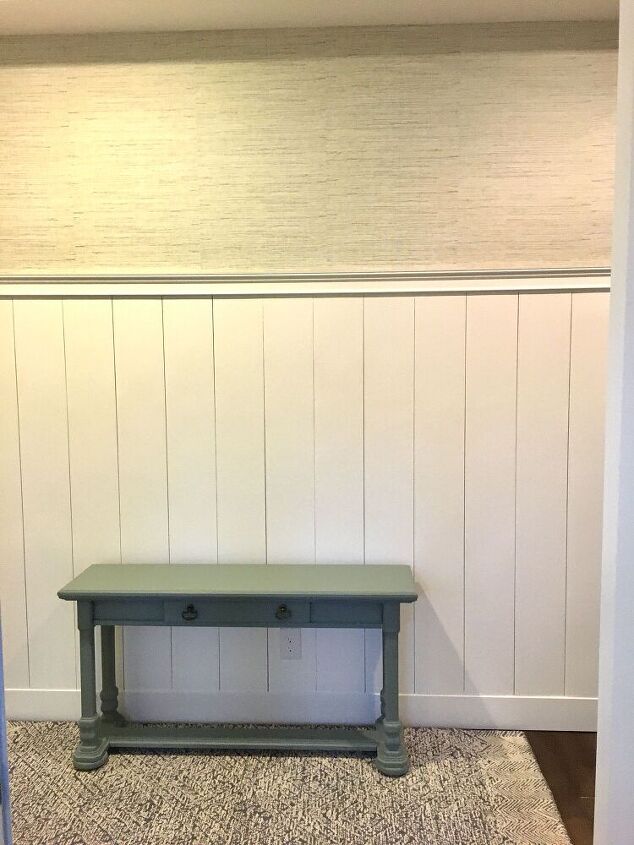
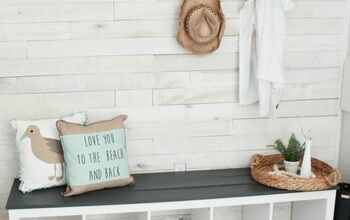
I also used peel and stick wallpaper from Lowes in Property Brothers Teal Grasscloth above.
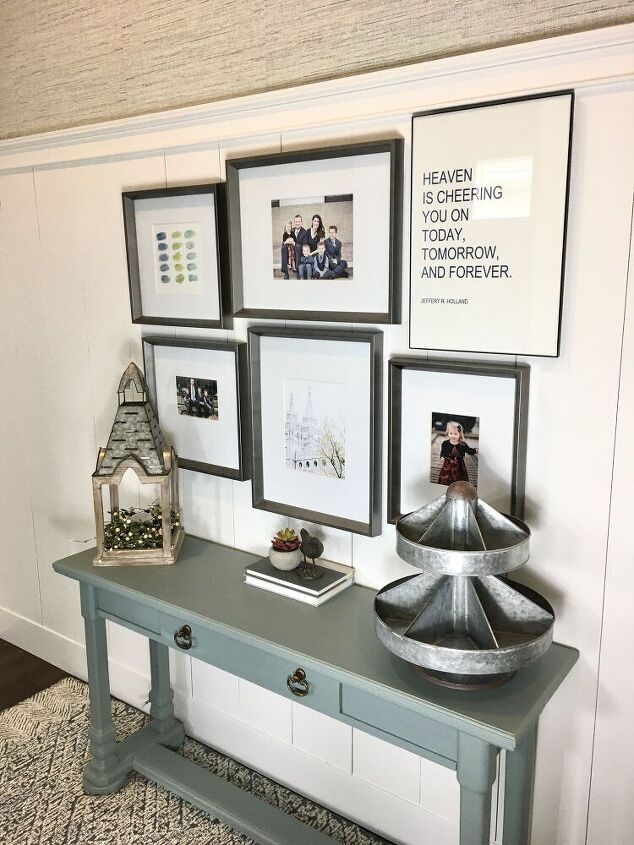
I added back my table, which colors go so nicely with the wallpaper, and hung my art back in the same spot using Command velcro so I didn't have to put holes into my shiplap.
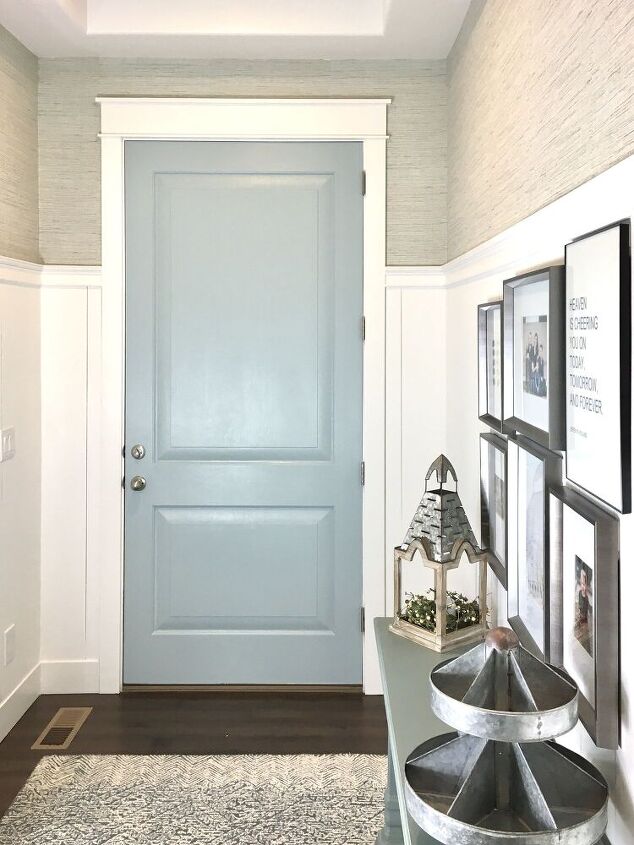
Lastly, I painted the inside of my front door for more of a pop of color in Sherwin Williams Rain. I absolutely LOVE it!!! Ok, remember my bid that came back $4200??? My total spent out of pocket was $200. My husband did do some side jobs though his work that asked him to complete a couple surveys in exchange for gift cards that we used for Lowes. We did use a $150 gift card that is not included in my $200 budget but still, $350 vs $4200 is a no brainer! Plus, I forgot to mention my bid included 3 weeks to complete, I completed it myself in 5 days and his bid did not include the wallpaper or painting the door. Time and money saved
I had never done a project like this before and didn't even own the tools to do it but that didn't stop me. If anything, I hope this will give you confidence to be able to try something on your own. I'd love to see what you plan to tackle and tell me how much you saved! Get creating friends!
Resources for this project:
See all materials


Comments
Join the conversation
-
Beautiful work. Kudos to your grit. I admire a woman who tackles a project within budget. The only accent I think you are lacking is some 'life' on the table. I would add either a real plant or a lovely silk plant like a tall orchid with flowing leaves.
-
Beautiful....Great job and it looks fantastic.....


Frequently asked questions
Have a question about this project?
I don’t have a question, just to say that it’s just a good amount of color an texture! The 4200$ and three weeks bid sounds way off base! Enjoy!
WHAT color is on the entry table?
What boards did you use for the ship lap?