


DIY Patio Makeover!

My parents patio has been very depressing, very boring and VERY underutilized the entire time they have lived in their house (since like 2004!). They rarely ever go outside on their deck! It was definitely overdue for a change. They have had the same patio set for as long as I can remember, and it is very dated. I decided to take it upon myself to give them a brand new patio where they can go outside, relax, have a nice dinner (or any meal for that matter) and just enjoy the outdoors with their beautiful view. I did several different easy DIYs to complete this makeover and the turnout was amazing, my parents loved their updated space.
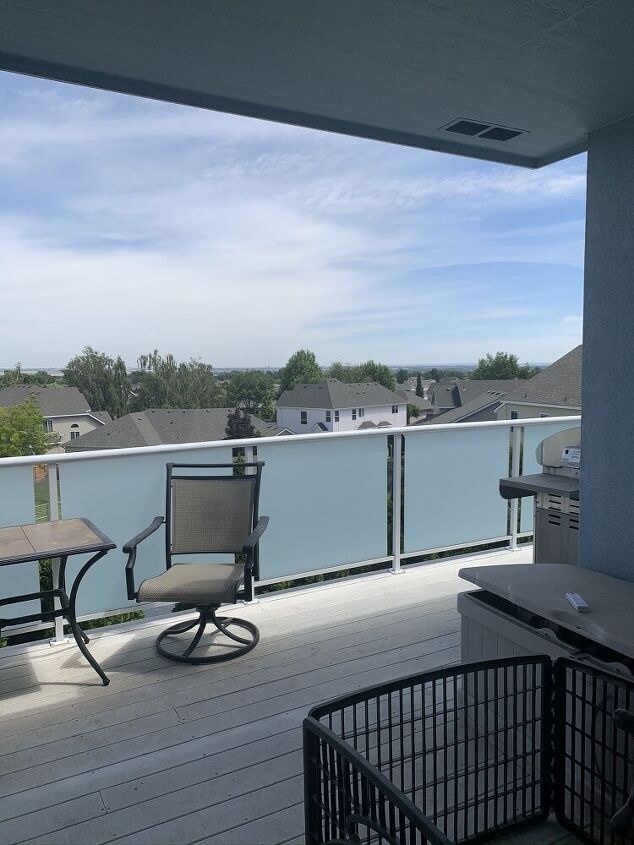
The BEFORE photos
They've got such a great view, but they literally never spend time out here. For all the years I lived at home, this was never an inviting or utilized space. It was time for a change!
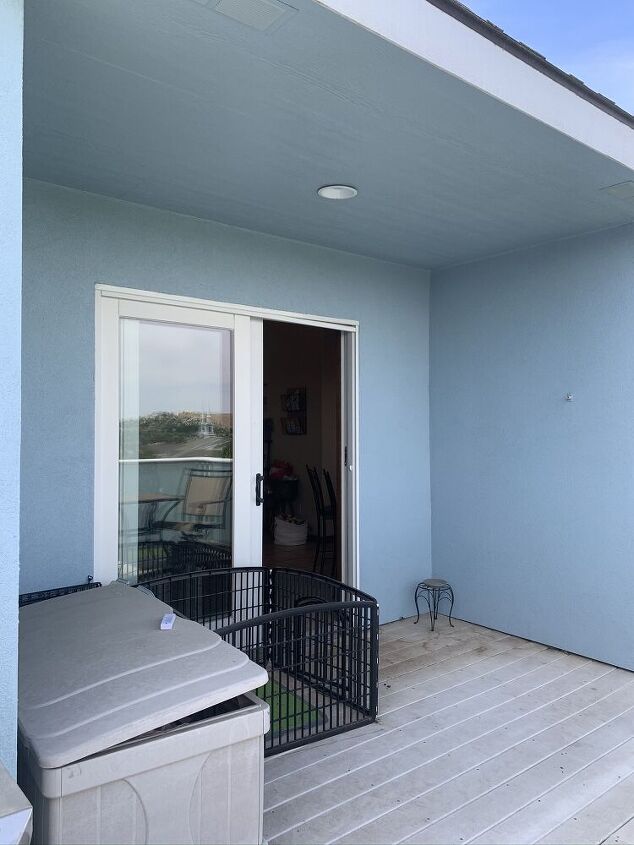
Just looks old.. dirty, unused, forgotten about. They never use the puppy crates outside, they'd been sitting there for months. The big outdoor bin holds a few things inside but we rarely ever use it, so I decided to move those to a different area that's less visible.
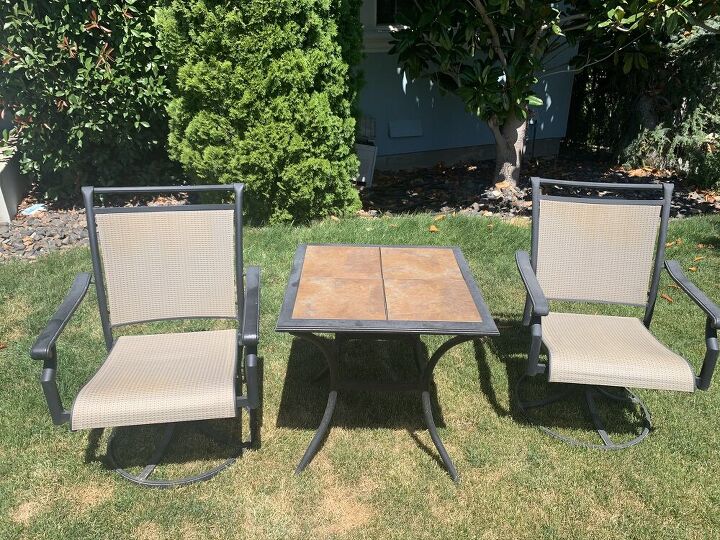
Let's talk about these hideous chairs... I almost wanted to scrap the whole set all together. We barely ever use this table except occasionally when my dad BBQs and we'll hang outside as he cooks, but with my large family and only 2 seating areas, it just wasn't very functional, nor inviting. I almost decided to sell them on marketplace or just donate them to Goodwill, but I figured to save money I could just clean them up and give them a new life. You'll see soon how I did that project, but first....
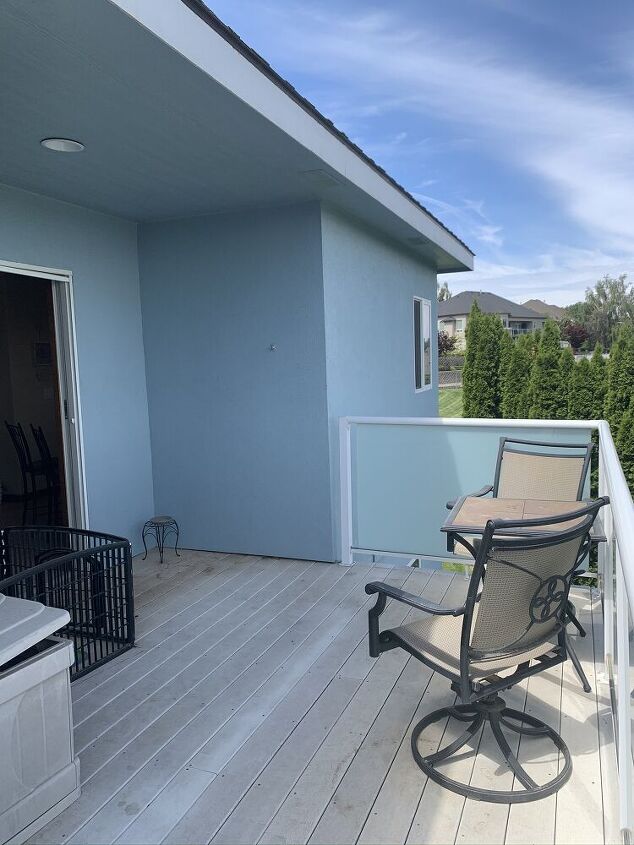
We needed some PAINT
My parents had repainted their exterior a couple of years ago, I wasn't enthused on their color choice but they like blue, so they went with blue. However, I felt that this little area here needed its own vibe. Their front door is a dark navy blue, and I felt like a beautiful navy was needed here to add some coziness and kind of make this space here its own. So, I went to our local ACE hardware and picked up some exterior navy blue paint. The color is "Midnight Oil" by Clark and Kensington.
Started the painting process!
Sorry my video editing isn't the best, but I compiled all the progress shots here of the painting process. I finished it after a whole days work. The most difficult part was making sure to cover enough paint into all the little holes and grooves within all the stucco of the house.
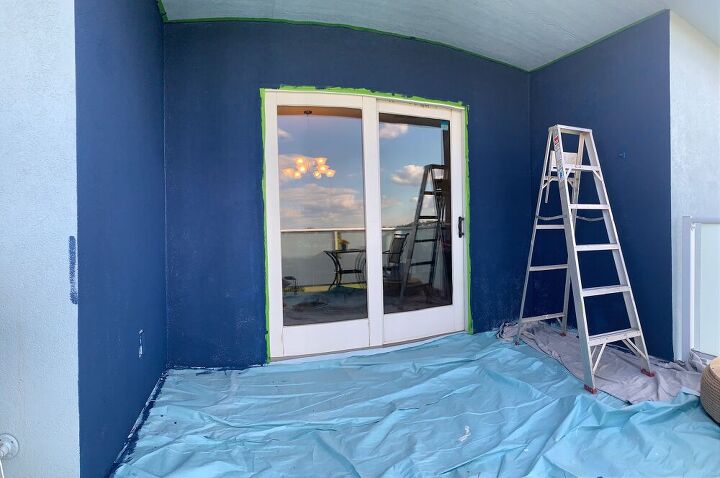
After painting
I was really happy with the progress here after painting this little cove dark blue. As you can see, I did make some mistakes on the light blue which I cleaned up with old leftover paint.
The next day I hung up some string lights on the ceiling to bring in some mood lighting. I don't know where my pictures or videos went sharing my process, I might've accidentally deleted it but it's pretty self explanatory -- I just hung up some lights with ceiling hooks :)
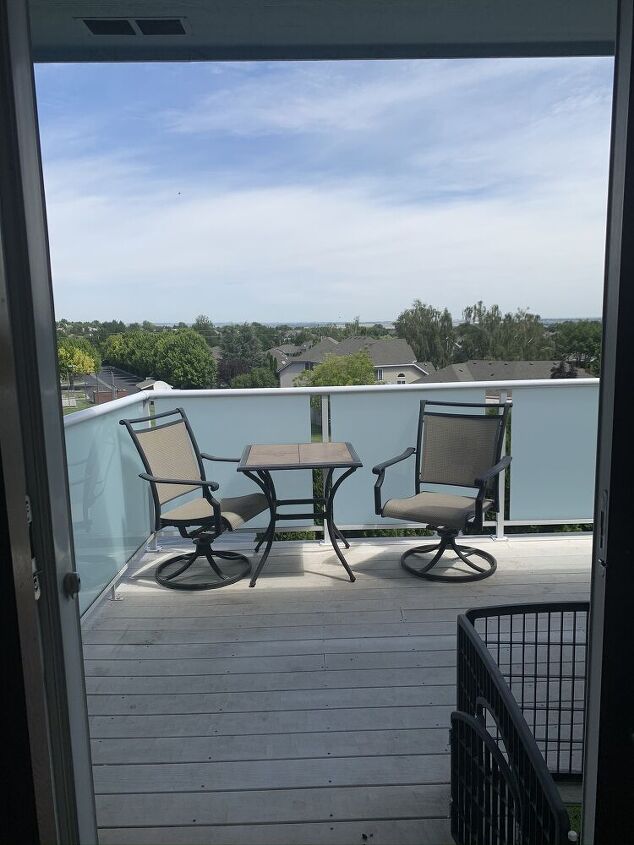
Next up.. revamped the patio set
These chairs and table have been around for years! They are nice and somewhat comfortable, but just basic and outdated looking. You have no idea how badly I wanted to trash these/donate them. But, I really wanted to have plenty of seating in this space because when we have family or friends over (pre-pandemic era, eventually will have again later lol), there were only these 2 chairs for the whole area.
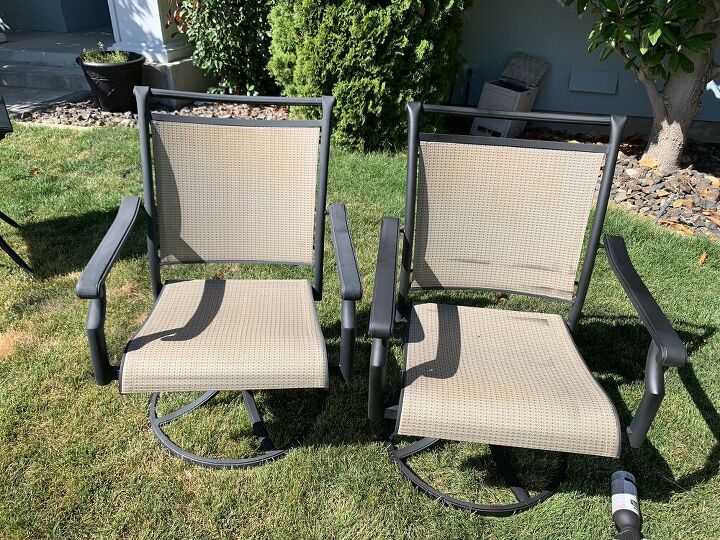
I wanted to make these look new and refreshed, so I started by hosing them down with our garden hose and gave them a good scrubbing till they were totally clean.
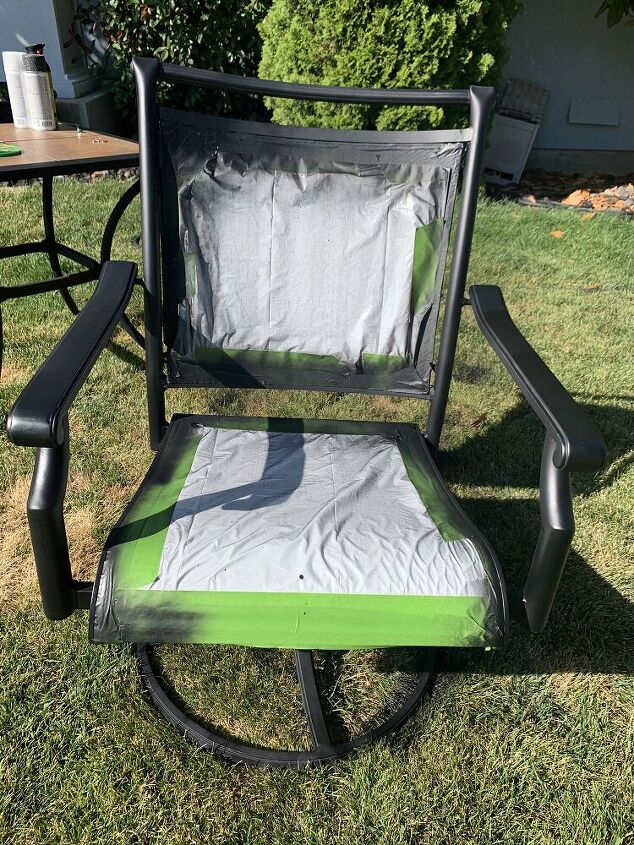
I then went and taped off the fabric parts of the seat and spray painted all the iron with a fresh coat of black spray paint. I used the Rustoleum Universal flat black spray paint & primer in 1.

This is how I initially taped it up... I spent like 30 minutes just trying to undo the back piece and rolled it up in a plastic bag and taped up the edges of the seat... Not my best work. And you'll see why.
I got paint on the fabric..
As you can see, the chair on the right has all those lines of spray paint that got onto the chair. I was really bummed because I wanted to try and keep it clean. The black spray paint did make a noticeable difference, compared to the left chair as you can see in the photo. They had dulled down sooo much over the years! Anyways, for the second chair, I was a bit more thorough on my taping.
That one came out a lot better. However, I still just wasn't feeling the way they looked against the navy blue walls on the patio. In fact, I REALLY hated them then and I was so close to just giving them up.
But then, someone on instagram reached out to my post and mentioned why I don't just spray the whole chair black? The "fabric" of the chairs was similar to like a vinyl-like outdoor material, not sure what it's called, but is able to be spray painted without ruining it. I figured why not! Make it all one consistent color. So that's just what I did.
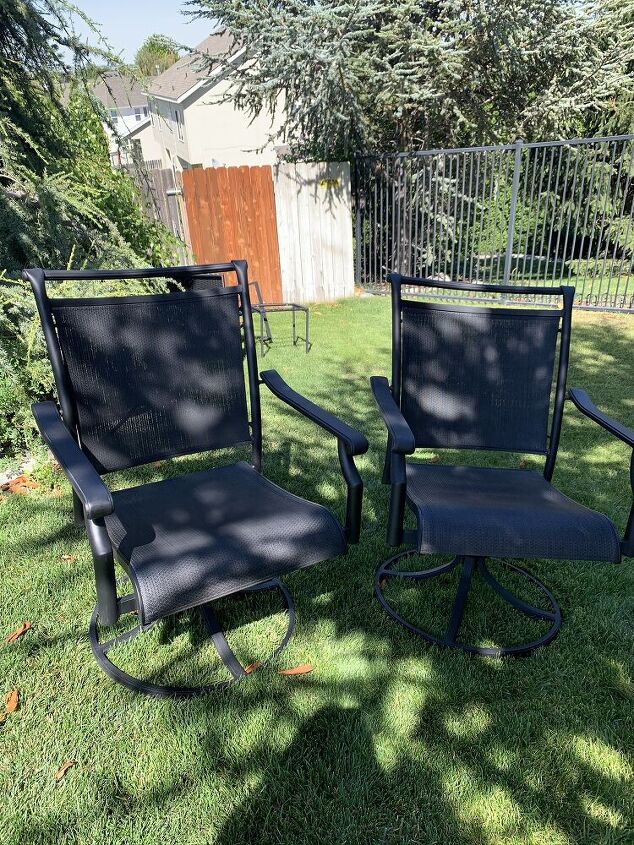
Paint it black!
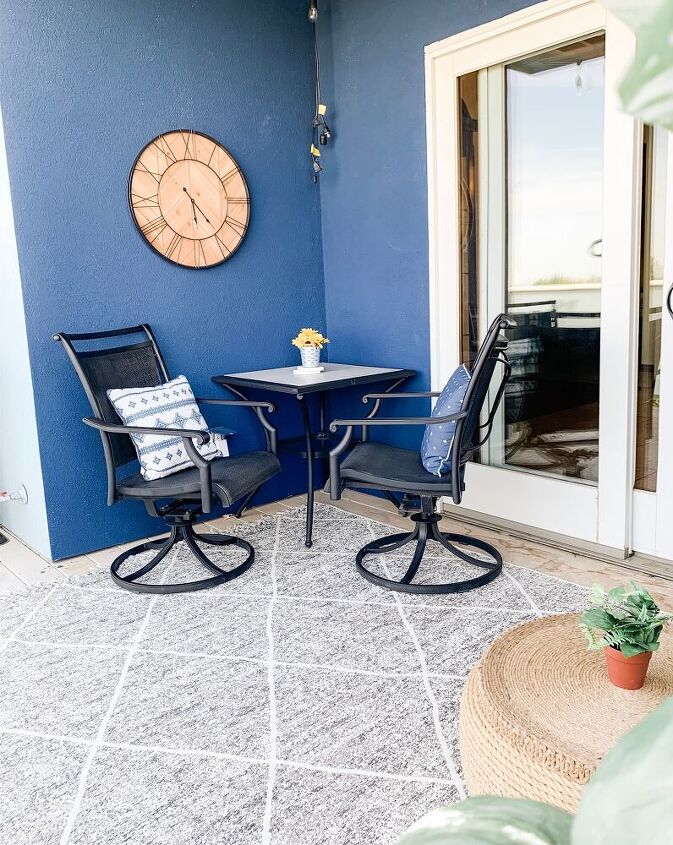
I did it, no regrets. I'm really glad I did because I was NOT feeling that ugly brown at all. I had also bought a second set of patio chairs and a small table (which you can see hiding in the background) and the base of those were also black, so I felt like this would bring more consistency in the color palette I had planned. Very happy with my choice to just go for it.
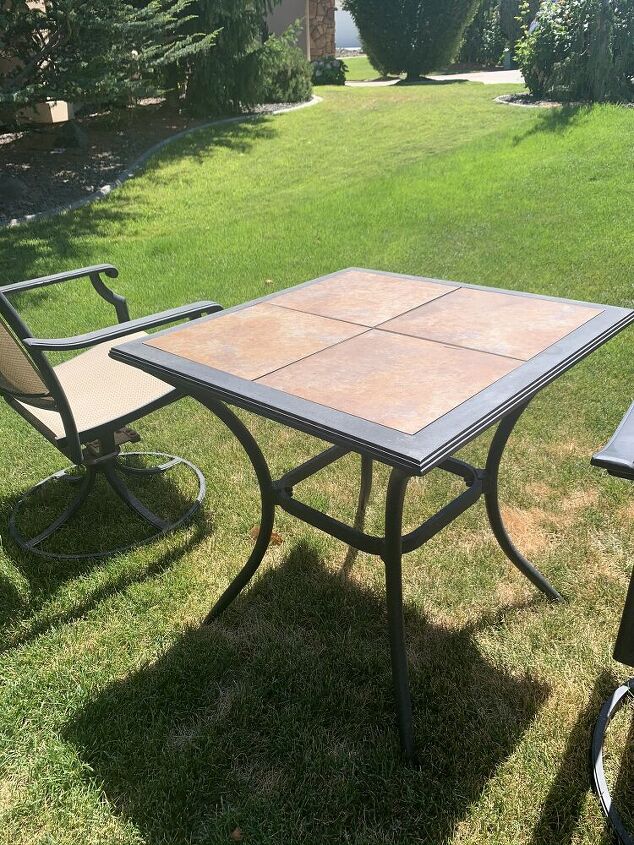
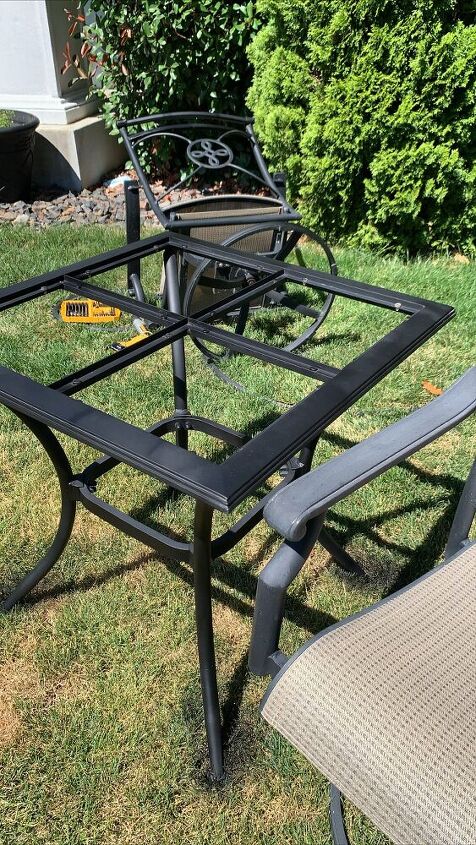
Next, the table
Here is the before photo of the patio table. The iron frame also dulled in color, the tiles very dated appearing.. I gave the frame a coat of black spray paint as well.
Look at the difference there between the two! Like night and day.

Once I removed the tiles from the table, I also gave them a good wash and lightly sanded them and added some white primer, and then I painted them a light gray and sealed it with a clear polyurethane spray paint when they were dry.
Unfortunately, I forgot to take AFTER photos of the table and chairs together.... (I know, what were you thinking Emily!?) but you will see them again in my full reveal photos down below!
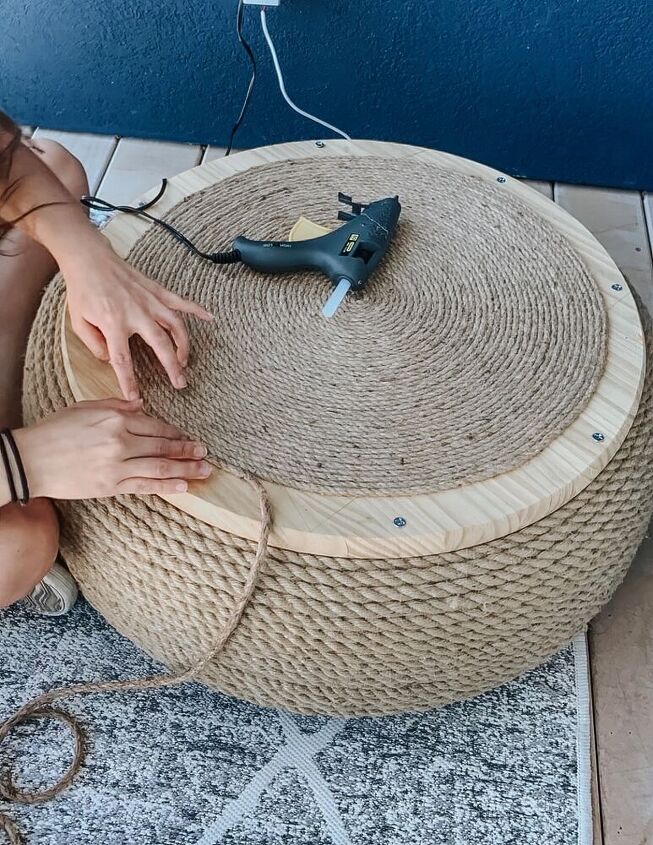
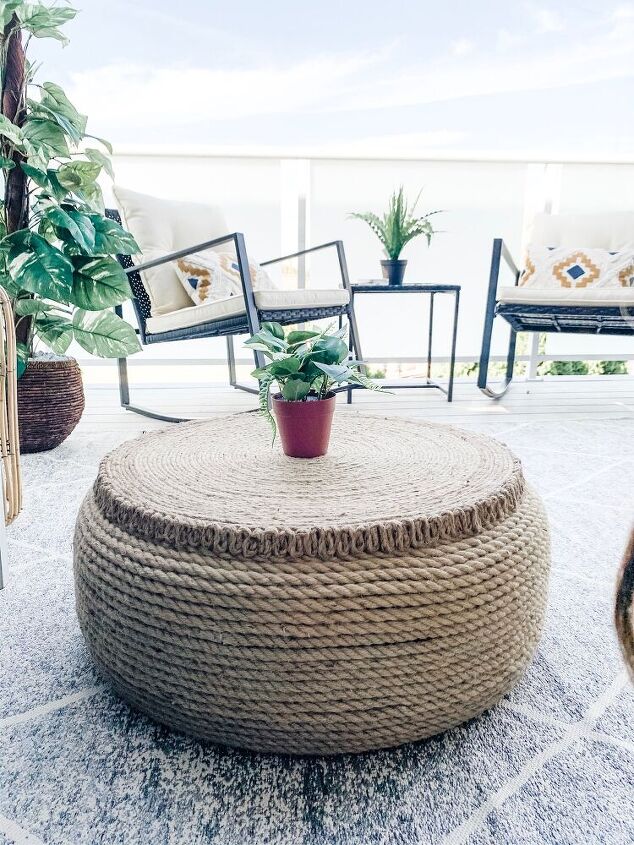
My next project was this tire/rope ottoman..
I created this super cute ottoman from a tire, rope, a wood circle and of course some hot glue and I have a full tutorial on it here linked below! I loved how this DIY turned out, it looks AMAZING in this patio space!
https://www.hometalk.com/diy/build/furniture/diy-tire-rope-ottoman-44317411
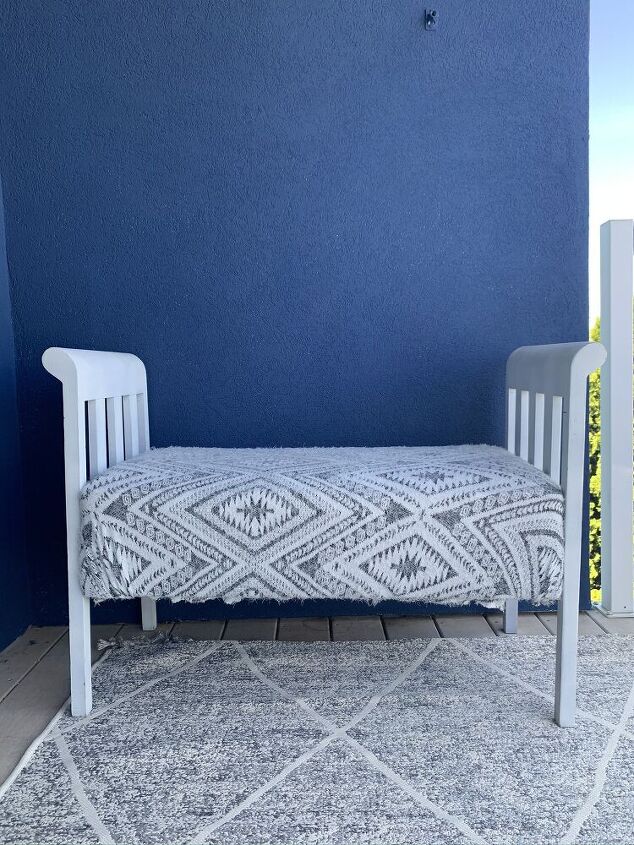
Bench Before
For my third and last DIY project, I reupholstered this little bench here in this before photo. I have had this bench sitting in my apartment without an official space for it for months! I have been wanting to replace the fabric on it but I just never got around to it cause I didn't have a place.
When I started doing this project makeover, I knew this bench would fit perfectly here! I bought some really pretty navy blue patterned fabric and switched it up.
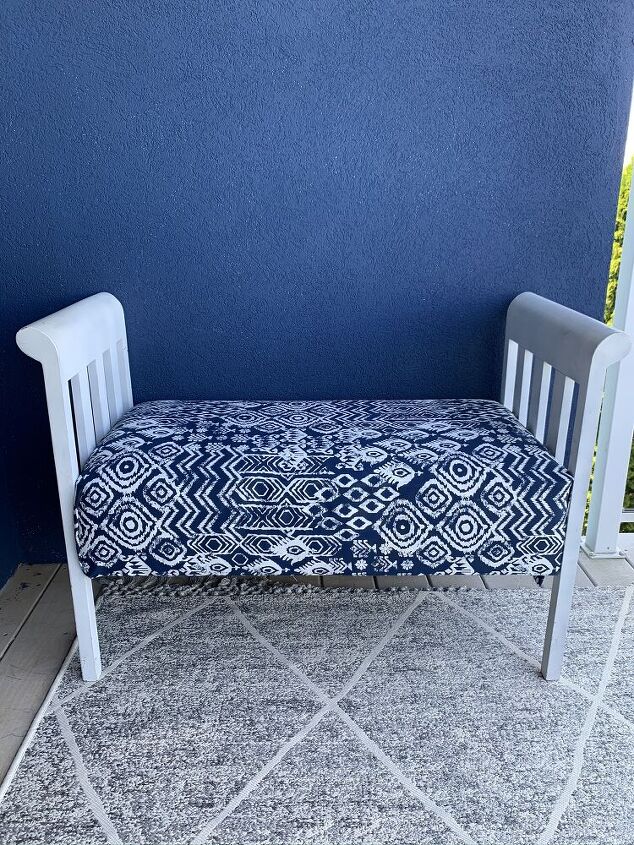
All I did to switch it was unscrew the sides from the seat, remove the old fabric with a scissors and staple remover, lay out the fabric and trim it to size. Then I just used my staple gun to secure the new fabric in place.
So far on this makeover you have seen me:
- Repaint the inner cove area blue
- Create a cute ottoman/coffee table
- Revamp the patio set
- Reupholster the bench
- Add string lights
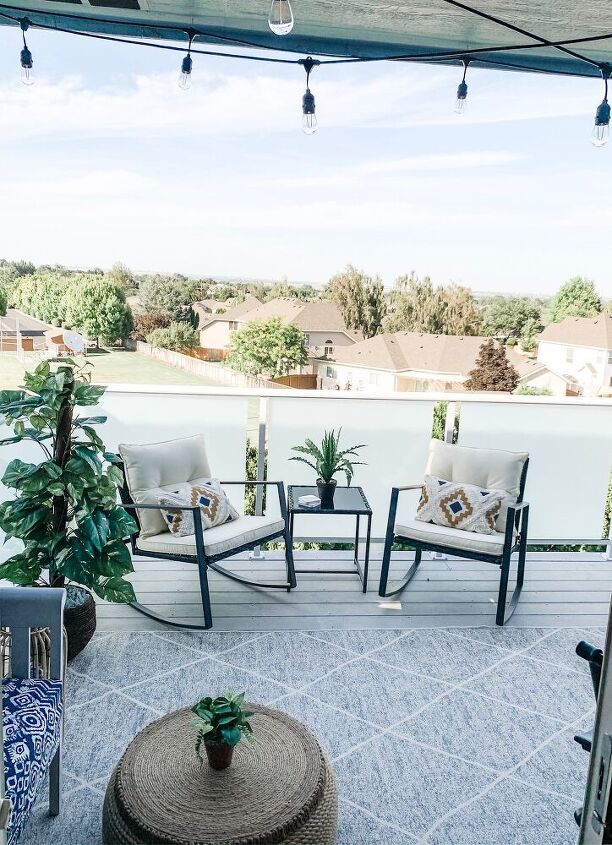
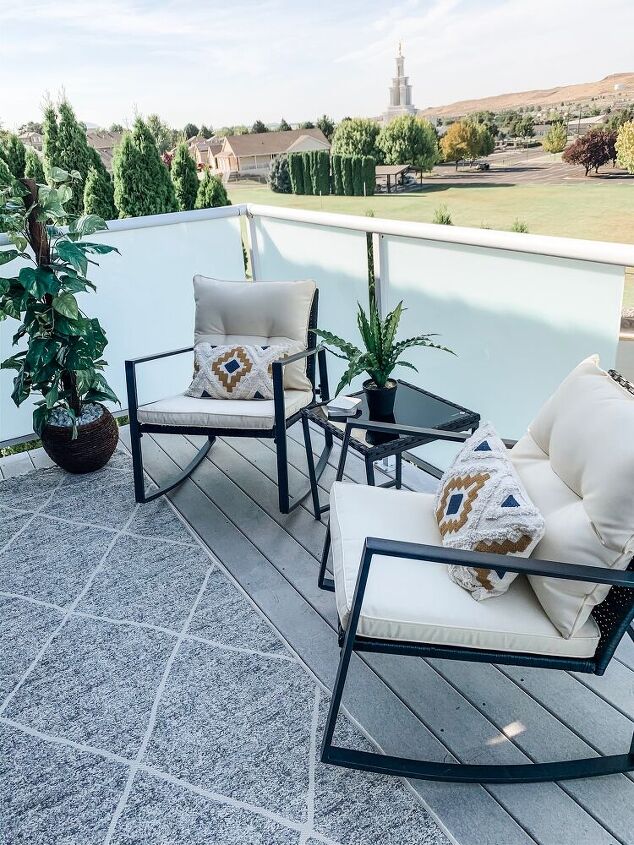
The last things were for me to buy some decorations, plants, an outdoor rug, and bring it all in together. A few days into this process I went and bought a brand new modern patio set to add as well, since I wanted at least 6 spaces for seating. I got the set from Wayfair and I love them! Once all my projects were complete, I brought everything all together and styled it.
Are you ready for the final reveal?! Here it is!
Reveal time!
Wow, look at this view! This is the new patio set I bought, styled with some outdoor pillows I got from Hobby Lobby, and these are actually fake plants here (my parents are black thumbs). I love this new view walking out onto the deck!
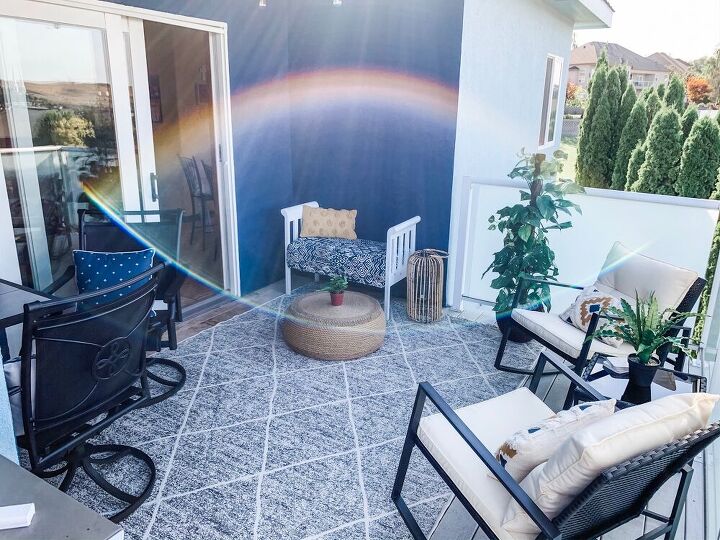
If you forgot what this space looked like, scroll back up to the top to get a good look, cause WOW! What a difference!
That back corner there with the bench was looking a bit bare by the way, so I went back a few days later and added a hanging plant and another pillow to go with the small lumbar pillow.
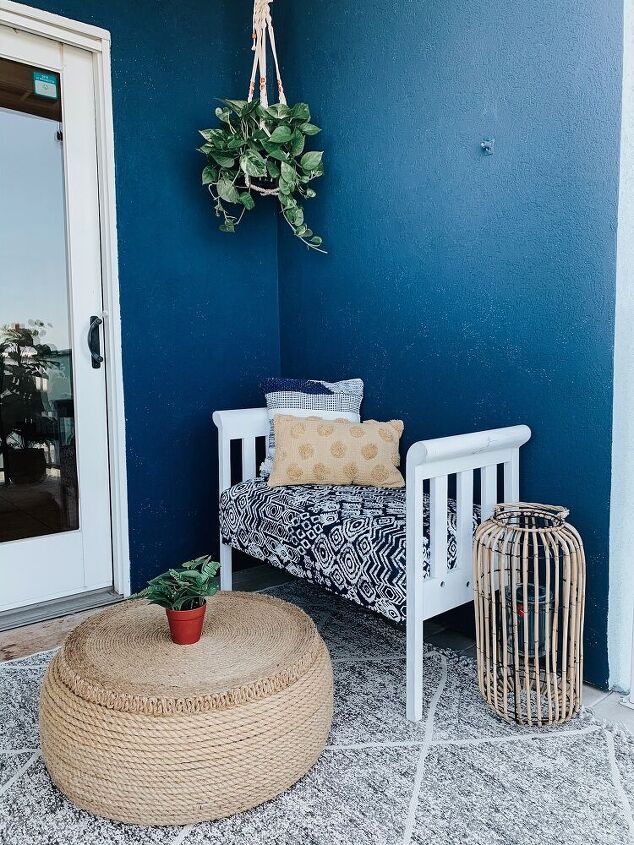
That hanging plant brought in color and life into this corner and, being the only living plant I added here and the fact its a pothos, I'm confident my parents will be able to keep her alive. If not, I will! Love this corner here.
Here you can see the updated patio set! I should have gotten a better shot of the table, but as you can see here it looks much better than what it was before.
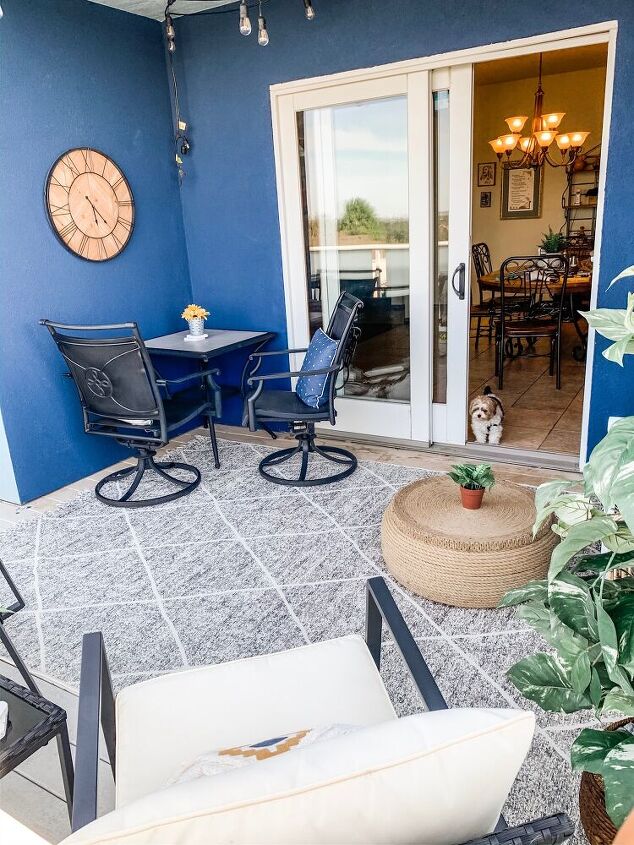
I am loving this makeover and my parents loved it too. This was a gift to them for mother's day, father's day and also their anniversary which was this month! It's so nice to finally give them a beautiful outdoor living space where they can enjoy a nice meal outside, enjoy the view and just relax and unwind.
I hope you guys enjoyed following me along in how I made over this space! Thanks for making it this far!
If you're interested in more home makeovers, DIYs and home decor, follow me on my instagram @emgraceyourspace 
Have a beautiful day!


Comments
Join the conversation
-
I know you parents are very proud of you and appreciate all you've done! Hope they enjoy for many years!
-
Great job!


Frequently asked questions
Have a question about this project?
Where is the BBQ you said your dad cooked on as you said you used to sit on the patio?
Your make-over looks excellent, well done, and a very generous loving gift I hope your folks use often. One thing though, I can't tell from the pics but it looks very sunny so also probably hot, could you add an umbrella or two in stands, to be opened when a particular seating area is being used?
Love it all! Does your ottoman get rained on? If it does--how well is it holding up. I would love to do this for our patio but it would be in the sun and rain ALL the time!