


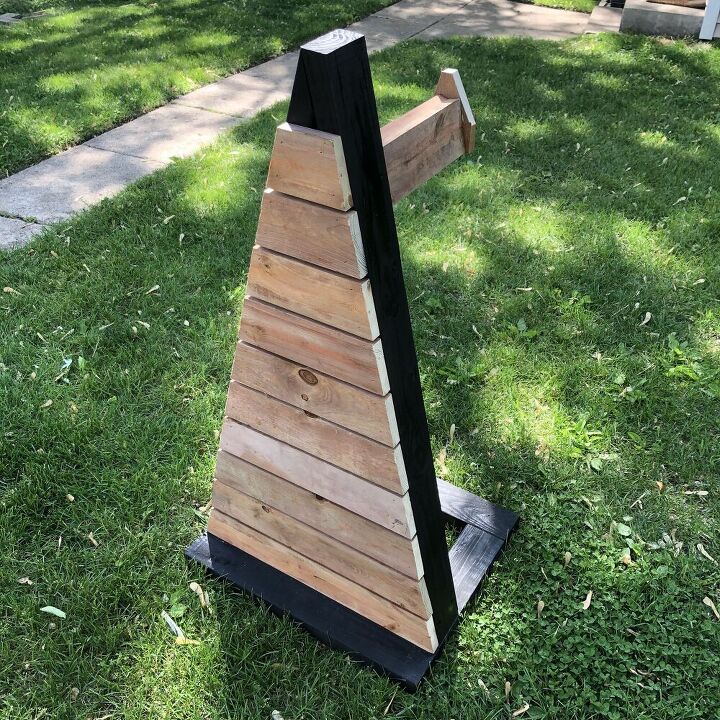
Scrap Wood Hose Rack

For two summers our garden hose just sat there on the ground (quite the eyesore) because we didn't love the racks we saw in the store. On a Sunday with no plans recently, I decided to do something about it with whatever scrap wood I could find in the shop. I love the cedar slat look, so with that theme, I went to work. This angled black and cedar rack that also hides some of our internet and electrical boxes on the house was the result.
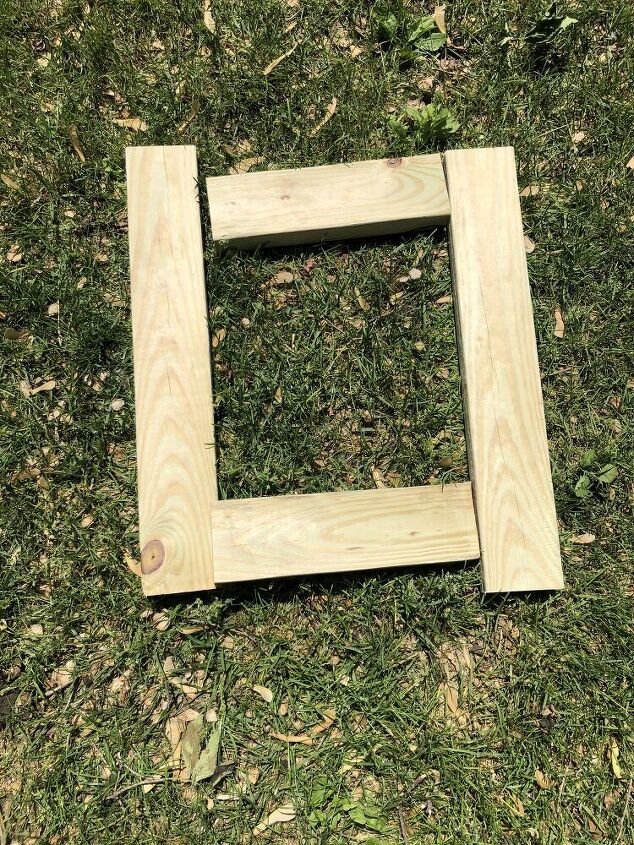
The first step was assembling a base. I cut two 2x4s at 22" and two at 12". Then, I used Thompson's WaterSeal to treat each board.
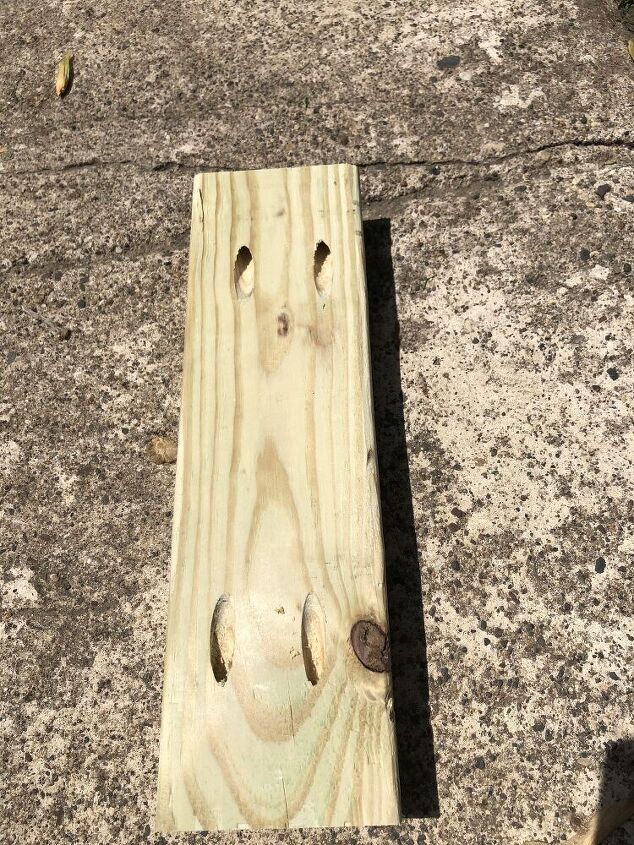
I drilled pocket holes in the ends of each short piece. But, if you don't have a pocket hole jig, you could screw the base in a number of different ways.
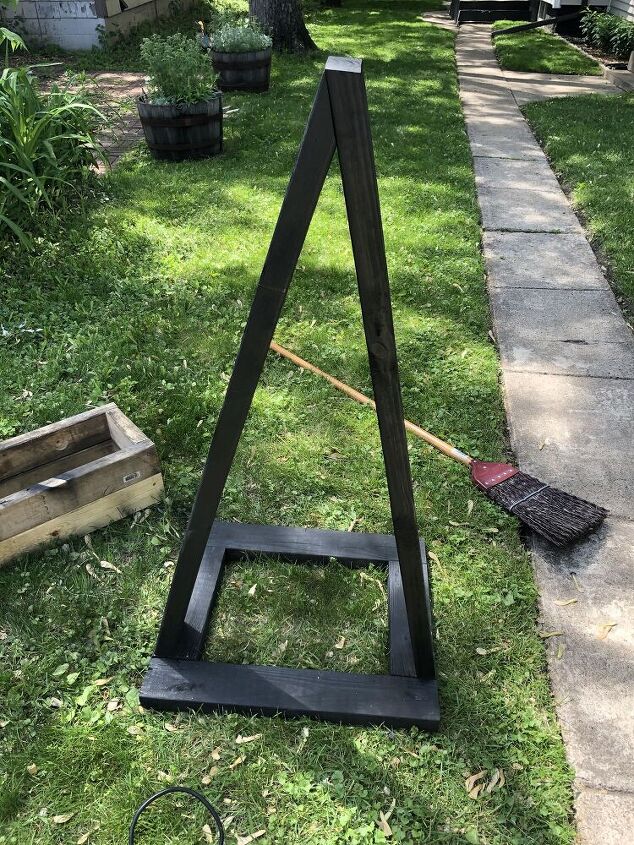
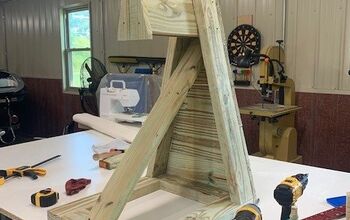
For me, there was some trial and error involved in assembling the stand. I wasn't in the mood for math, so I eyed it up and made a few cuts until things fit. It wasn't the most efficient, but it worked.
The first board was 42 1/2" long with a roughly 10-degree angle cut at the bottom. The second board was also 42 1/2" with a 10-degree angle cut at the bottom. After attaching the first board to the base, I held the second board in place and marked the angle for the top cut. (photo below)
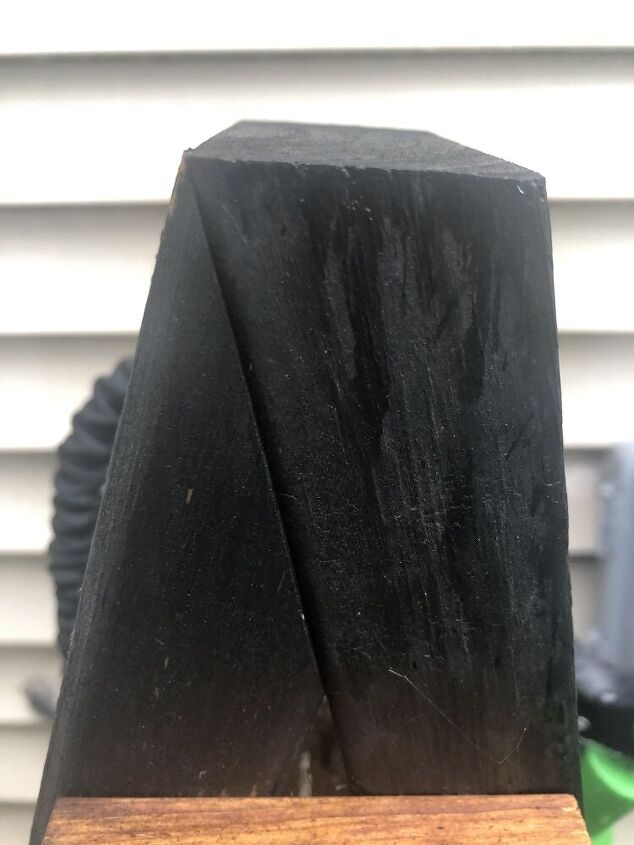
Again, but holding the board on the left in place on the bottom and behind the board on the right, I was able to trace the angle for the top cut. I used construction screws to attach each piece of the frame and used black spray paint to cover it once assembled.
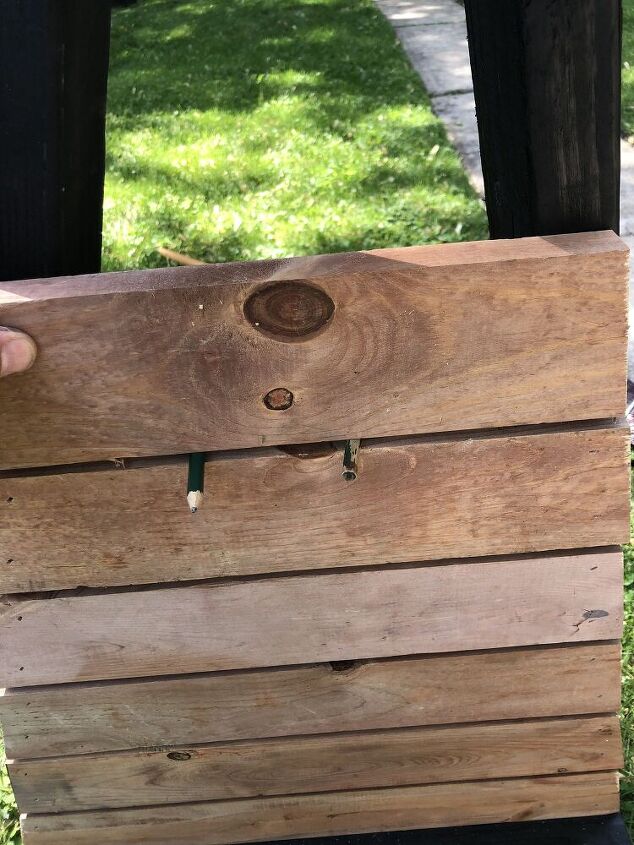
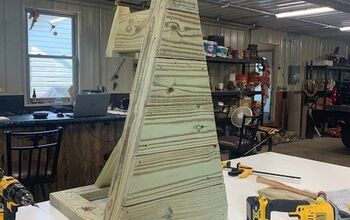
I used leftover 1x4 cedar tone boards from my last project (the modern slat window planter) to create slats for the front of the hose stand. I used pencils as spacers between the boards. To mark each cut, I once again held the board in place and marked the angles on each side. I used deck screws with small heads to attach the slats.
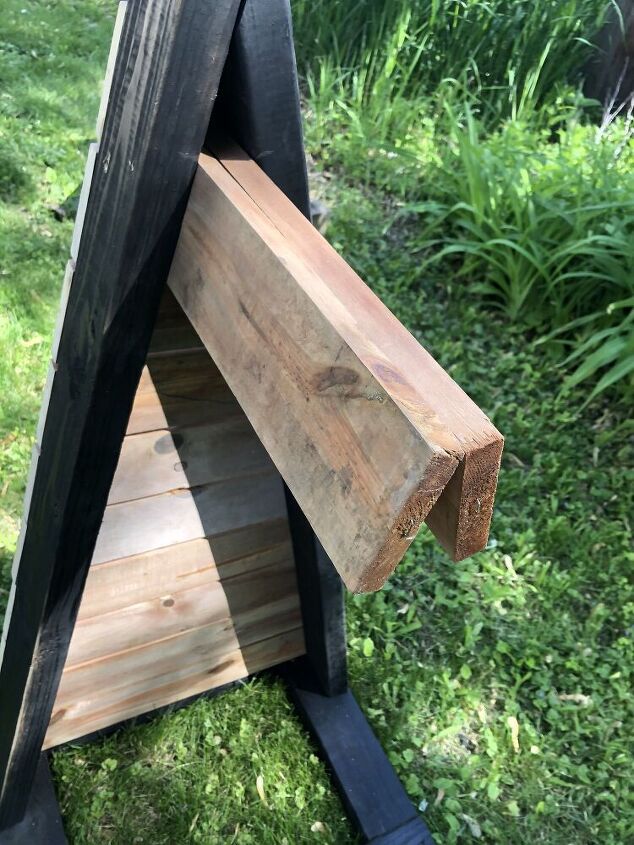
I also used the 1x4 boards to build the hose hanger. I cut two boards at 14" each, held them inside the 2x4 frame and attached with screws.
I used a 5" piece of 1x4 to make the end of the hanger. I cut angles on each side to match the style of the piece and attached.
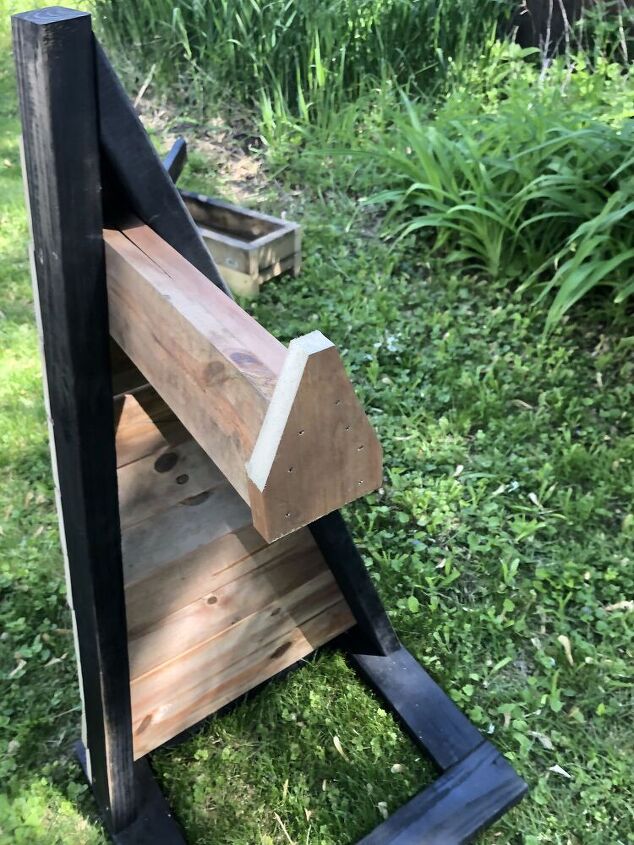
Once the hanger was attached, I added an additional angled 2x4 for extra support.
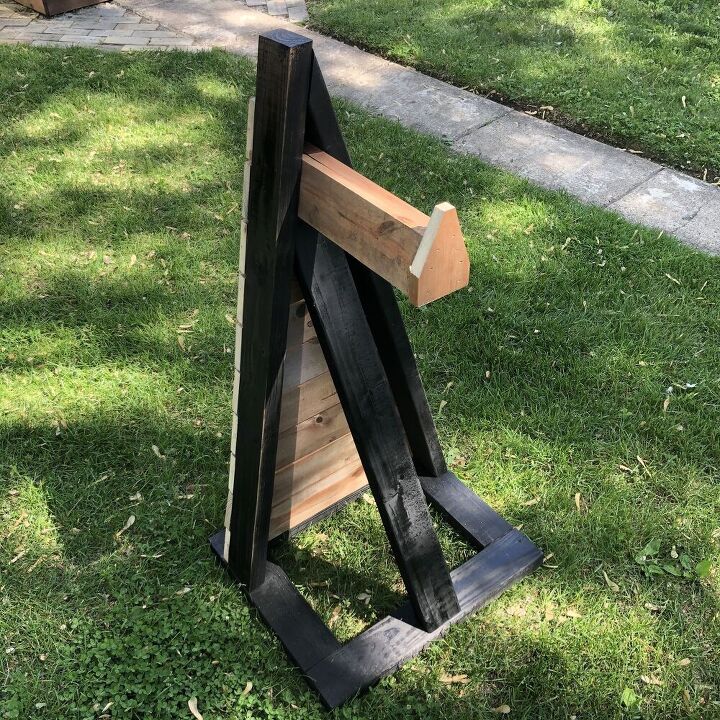
Here is the finished product. Follow me on Instagram at @woodyworking for more simple woodworking DIY or home improvement projects. Happy building!
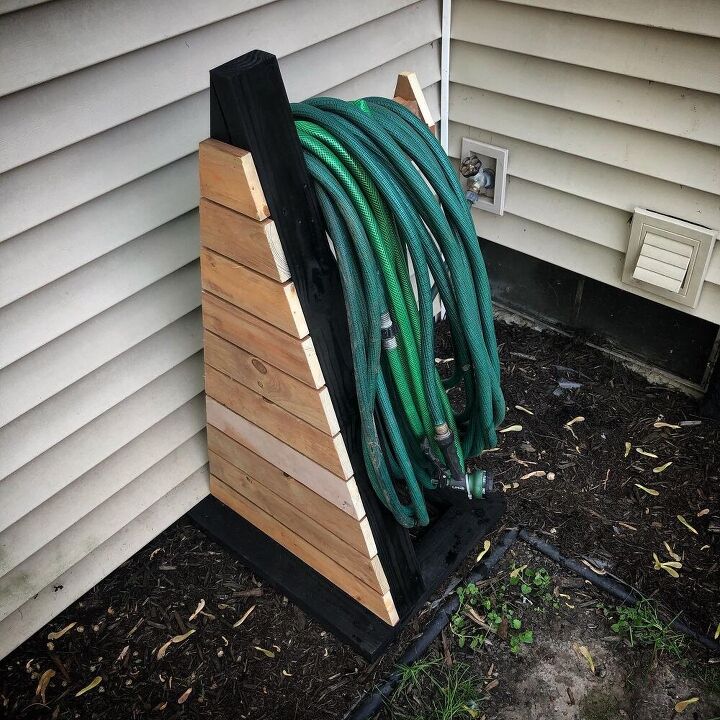
The holder was plenty strong for our long hoses, but looks even better now that we have an expandable black hose hanging on it (highly recommend BTW!)


Comments
Join the conversation
-
Being the star of your own one-women 'wet t-shirt contest' at my age & weight was unnerving! Good luck with the shade
-
My mother seen this and had to have one. So I made her two.


Frequently asked questions
Have a question about this project?
What can I do with a head board?