


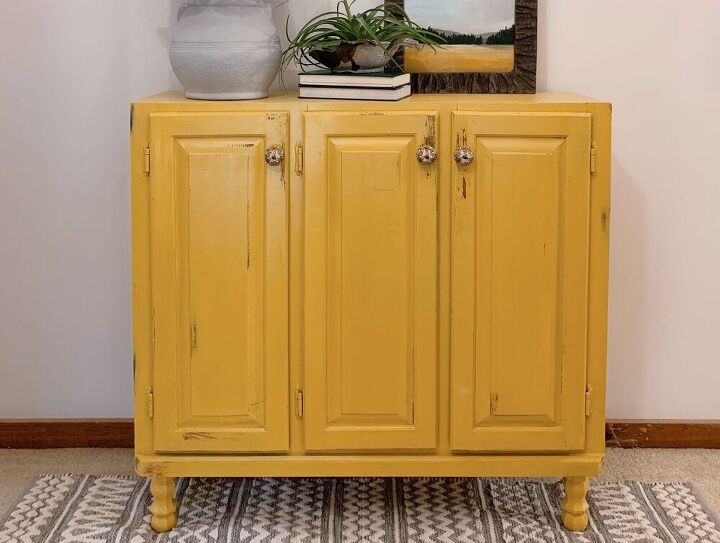
Kitchen Cabinet Repurposed as a Console Table
Do you ever see kitchen upper cabinets in thrift stores and donation centers? They can very easily be made into something new! Upper cabinets are usually only 12” deep, so they are the perfect depth for a console table. Here’s how I did a simple project to repurpose one of my old kitchen cabinets into a console table:
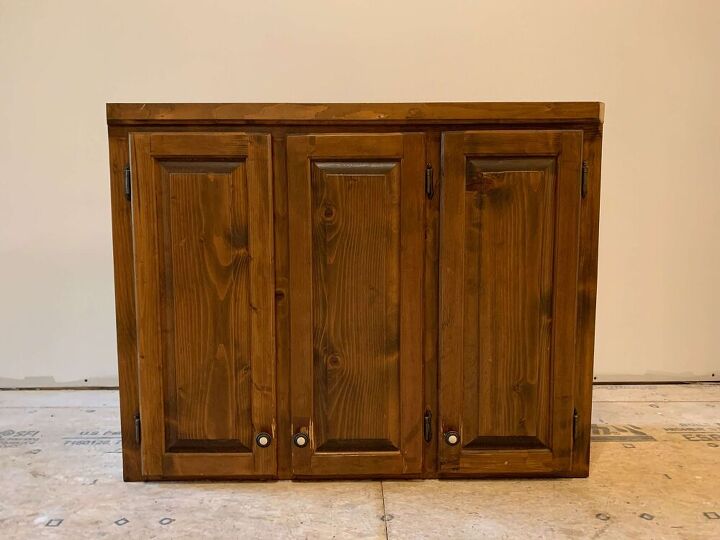
I've had an idea of how to repurpose one of our old kitchen cabinets churning in my brain since we took them down. This cabinet, plus some legs, and paint could equal a really cool console table!
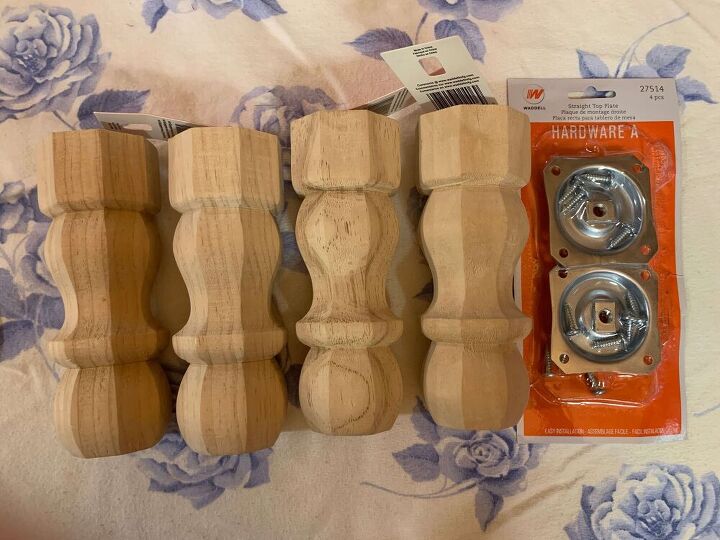
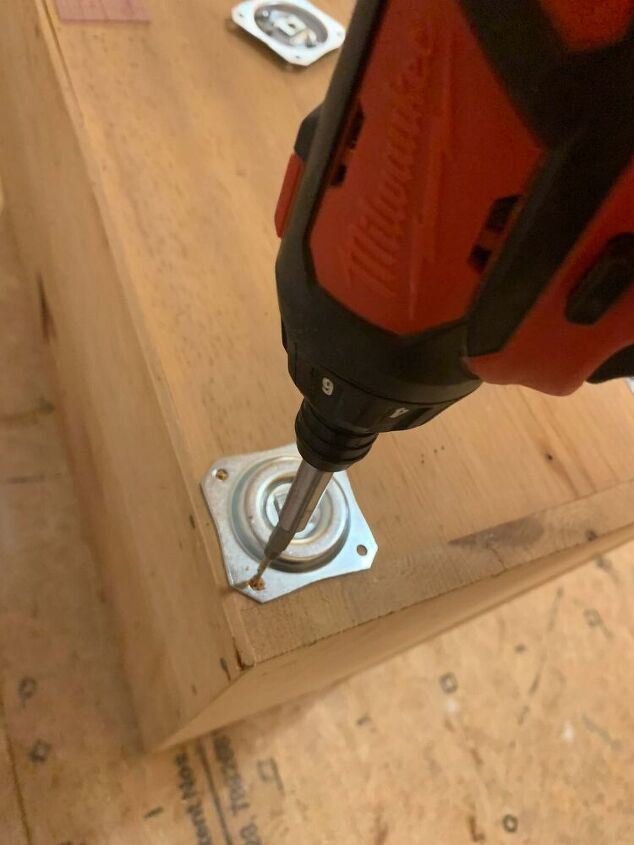
My goal was for it to look like a piece of furniture. I picked these 6" tall legs and they each needed a plate to attach them to the cabinet. I got these from Lowes for about $28 total, but there are some cheaper options out there.
Install Furniture Legs
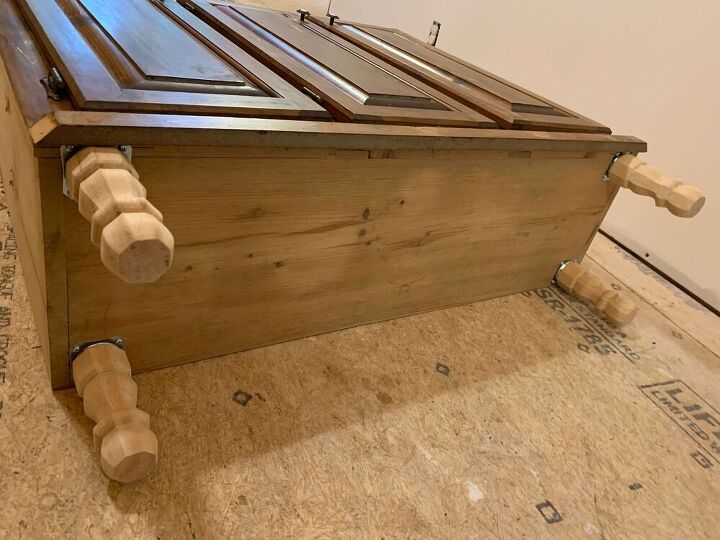
I decided to flip the cabinet upside down to become my console table. This was for two reasons: The knobs would then be at the top. Also that piece of leftover crown molding looked better on the bottom to me.
I wanted to install what would be the front legs up as close to the front of the cabinet as possible for stability. I marked the center of the end of the piece of wood there.
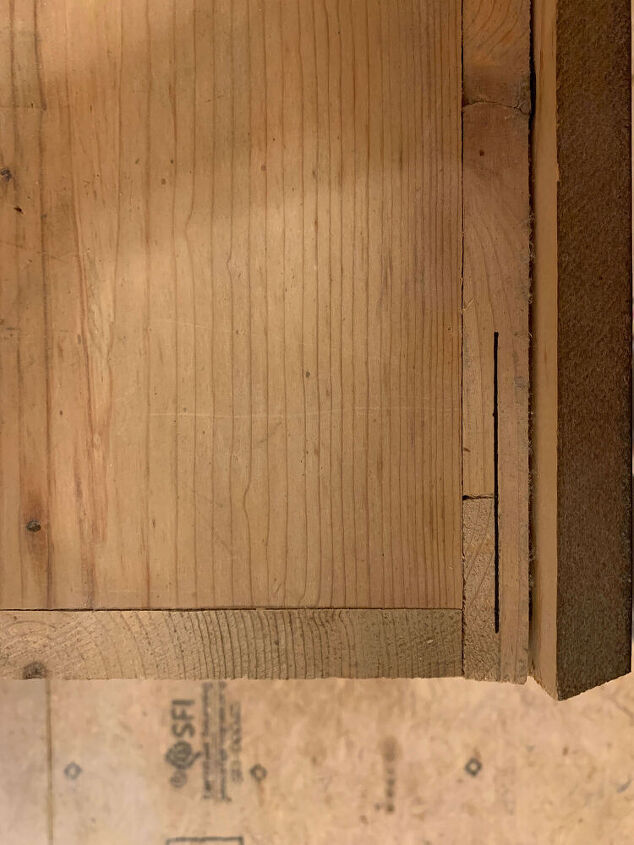
I pre-drilled those two holes and the the two for the back feet that went into the end of a board so the wood didn't split when I screwed in the screws. The other two screws for each plate went into the face of a board so I didn't predrill them.
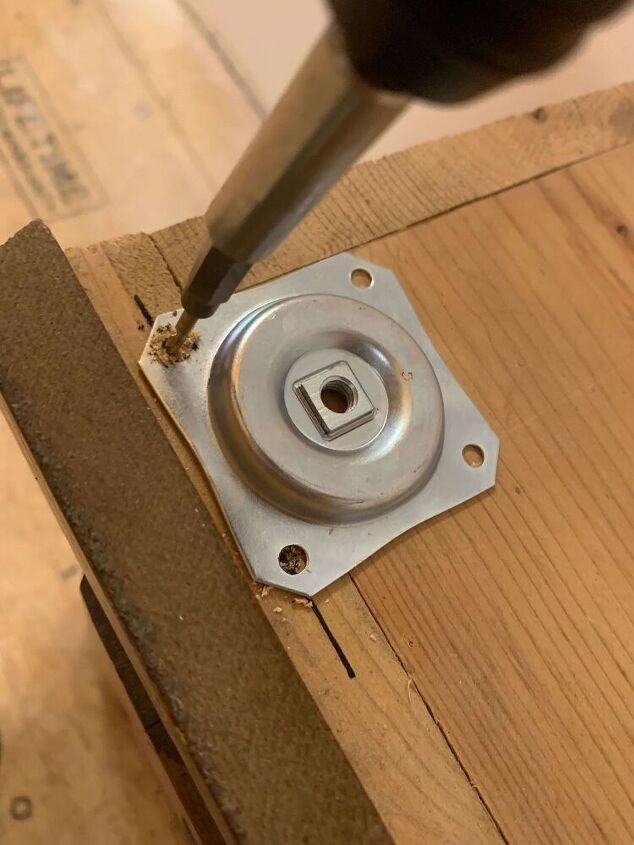
After all four leg plates were screwed into place, I screwed the legs into the leg plate hardware.
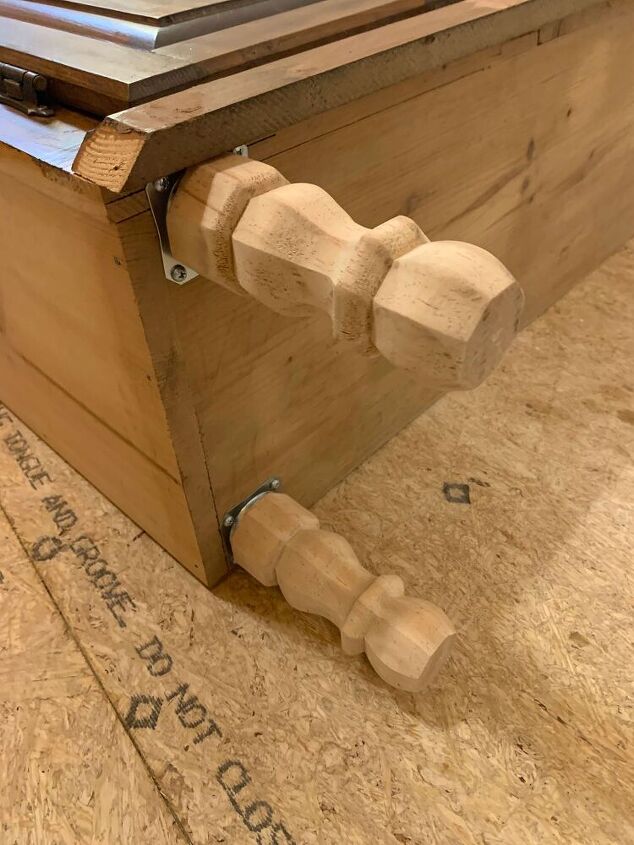
Be very careful when standing the cabinet upright. As with any furniture, it can be easy to snap the legs off if you try to use them as pivot points. It may be a two person job to lift it up and turn it instead of trying to use the legs to pivot the cabinet up.
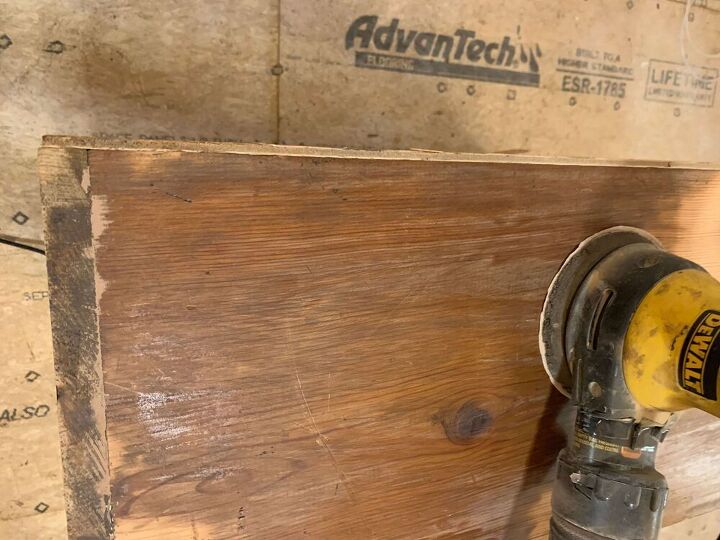
Patch and Sand
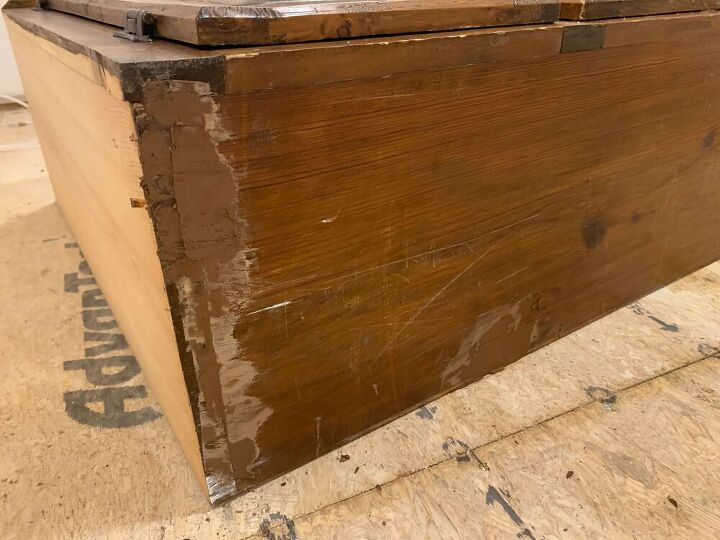
This step totally depends on the cabinet being used. My cabinet is rustic, so it had some things I wanted to patch. It had unfinished sides with some nail holes I didn't want to show. It also had some small gaps on what would be the top of the finished piece that I wanted to patch.
Since my cabinet was a little more rough construction than many, when I sanded the wood fill I also sanded down some high spots to even them out. I sanded the top of the back panel down a little since it wasn't completely even with the top of the cabinet. There were also some deep scratches and gouges that I sanded out.

Paint
I wanted major impact with a bold color, so I chose a deep gold and distressed it.

Add Hardware
Originally I put the same cabinet knobs back on, but then I found some I really liked for the cabinet and replaced them.
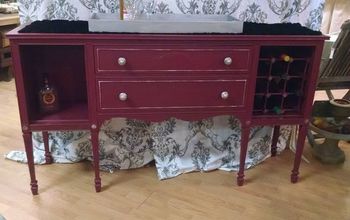
And here's the finished console table made from a kitchen upper cabinet!
For more details and photos, check out my blog post for this project at
https://www.therootsofhome.com/2020/09/kitchen-cabinet-repurposed-as-console.html
If you like my projects, I'd love for you to sign up for my newsletter here! You'll get my blog posts emailed to you!
Resources for this project:
See all materials


Comments
Join the conversation
-
Great job... totally would do that if i had room in my dining room! Its gorgeous!!
-
So many folks are wise to the many uses of this type of cabinet that they are getting harder to find--but so worth the search! I keep a list of sizes I want for various uses in my purse and when I find one--I pounce!! LOVE the bold color!!


Frequently asked questions
Have a question about this project?
Just wanted to say it came out Great!! Love the color
I 💛 the color and wish more people would use it rather than the same white, black or gray. And I’m crushing so hard on the lamp shade!!! Did you embellish it yourself? It’s so cute, funky, and unique!
One small thing I’d do in the piece is simply add long pulls. I prefer them and think they’d look cool on the piece. But that’s just me. You did a great job.
LOVE your color choice! Looks fabulous