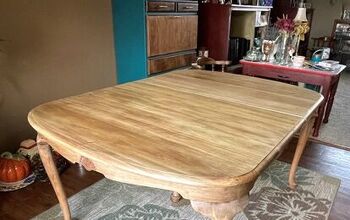
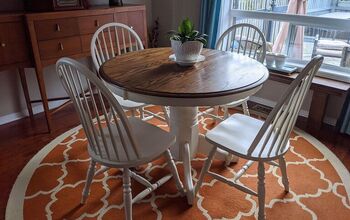
Original tabletop
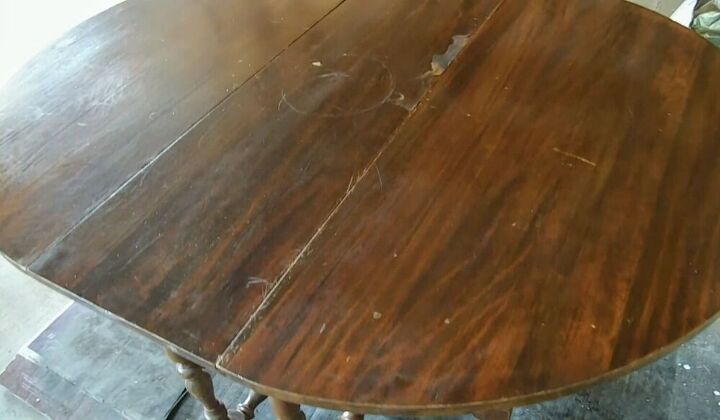
Here is the original tabletop. As you can see it has had many good years of use, but definitely has potential to look new again.
I got this table for $20. The top was worn, scratched, burn marks, water stains - it was a mess. It was a sturdy table but I knew I could refinish it and give a new, beautiful, country-style look.
Original tabletop
Here is the original tabletop. As you can see it has had many good years of use, but definitely has potential to look new again.
Paint & Varnish stripper
I've never used a stripper, so I thought this would be a great project to give it a try. I always sand until I get down to a wood surface that I can restain, but I wanted to try to get to the original wood without getting covered in sawdust. So I covered the entire tabletop and let it sit for about 4 hours.
Scrap off the varnish.
After the stripper sat on the table for a few hours, I grabbed a plastic scrapper and started scrapping. The instructions said not to use a metal scrapper, to avoid causing scratches. This step definitely took more elbow grease than I anticipated. Once I got off as much as I could, I used a rough sponge with soap & water and scrubbed off any access.
Second round of stripper
The first round of stripper didn't get off much of the varnish. So, I applied a second coat and let it sit for another few hours. When I started scrapping this second coat off, it went much smoother. I also used soap&water and a rough sponge when I was done removing this second layer of stripper.
Sand
After two rounds of stripper, there was still small bits of the original finish that needed to be removed. I grabbed a sander and started giving it a final smooth finish. While I ended up with less sawdust, I still spent a lot of time doing two rounds of stripper and giving it a final sanding - therefore, I was not impressed with the time consuming technique of using a stripper.
Stain
I did two coats of Minwax Red Mahogany wood stain. I absolutely love how the variations of colors came through.
Paint the table legs
I used a cream color to paint the legs of the table. To make sure that I got full coverage, I gave it all two coats and flipped the table upside down to make sure I got everything covered.
I did three coats of polyurethane over the entire tabletop.
I sprayed the bottom with a satin clear coast by Rust-oleum.
And here is the final look with the sides folded down.
Final look with the tabletop fully open.
Here is a before and after of the tabletop.
The finished product is well worth the work. That wood grain just POPS!
Gorgeous table.
I had mooned over an old table in my friends’ basement awhile ago, with barley twist style legs,...
A client asked me to upgrade her dining room table, to a matte black (or somewhat matte) this was...
Currently trending right now, Farm Tables and Farmhouse Decor are EVERYWHERE! I recently had a...
I do all sort of projects in my craft room and it feels like I never have enough work surface area,...
For this DIY project, I created a mercury glass lamp base, using a glass base I found at our...
This was a large undertaking and a couple of days work but we saved so much money by doing this...
We built our dining room table several years ago and I had stained it dark. I grew a little tired of...
Over the last few months, we've been slowly but surely updating our old wallpapered & white carpeted...
Have you ever been offered a piece of furniture that was solid, sturdy, had character but just...
I love it when I find decent furniture on the side of the road. Today's post is definitely a...
Give that ugly, old banquet table a new lease on life by adding a new table top.
Do you need to add a folding table or two in order accommodate more dinner guests during the...
A friend had this old drop leaf oak table that was the perfect size for their garage apartment but...
if you are a wood dining table lover, this project is definitely the one you are looking for. When i...
Do you have a furniture piece that has a great finish but the stain color is not what you want?...
I built this table last summer using framing lumber for under $100!
I’ve had this table for years. It was inexpensive and is made from pine which I bought stained with...
I bought this dining table and chair set for £100 6 years ago. I love the chunky base of the table...
Lately, I've been cooking up a storm. Like, three squares a day, and it dawned on me that I haven't...
I was out in Orewa and saw a very interesting Mosaic chair, I thought that something similar would...
I have had a hard time figuring out how to store my craft paints. All the storage options are so...
Lets face it, built-in showers never have enough storage. Here’s an easy fix, no drilling of tiles...
Hello! I am crazy about plants. I have them all over my home. I always looking for ways to...
Creating fun and beautiful couldn't be easier and this piece is perfect for leaving up all Winter...
After completing the wall between my dining room and living room, I felt that something was still...
Hand painting boho style throw pillows is one of the most therapeutic DIY’s I’ve done recently. When...
This dresser needed an update! So I turned the lights on ✨ this dresser became so elegant and...
Anyone else really love plants but super tired of paying $50-$100 for cute plant stands. I certainly...
We recently renovated our basement into a game/living area. The ceilings were pretty low with the...
Today I’m going to walk you through a DIY window box tutorial. It’s super easy and coordinates...
I love up cycling breathing nd life into old tired worn furniture and so when I saw this pair of mid...
This simple pantry shelf cost my $50 in products (not including the containers) and was super easy...
Hello everyone, I'm Cindy and blog at Cloches & Lavender. I have posted a few times on Hometalk...
Have a question about this project?
What stripper did you use? This turned out beautiful!
Whatever brand of stripper you use, apply it and then cover with plastic wrap. This cover keeps the stripper moist and if you’re patient enough you need only apply one time. For timing, follow the manufacture's instructions but also add additional time if needed for the product to work.
Did you paint over the old finish on the legs?
What about using the liquid refinisher that just melts the old finish and redistributes it? That's the easiest way to refinish a piece of furniture. This is a picture of the Mahogany restorer, but they have other wood finishers too.