


DIY Black Shiplap Planter
I feel like I find inspiration for new projects everywhere I go! I recently saw planters in a hotel lobby that I absolutely loved! The planters were rather tall and held snake plants. I wanted to make my own with a little twist by adding my favorite thing...shiplap! That's how this black shiplap planter came to be!
I started with a basic plant window box that set the width and depth of my planter. I suggest using a planter box without any drain holes. If you get one with drain holes, simply plug them.
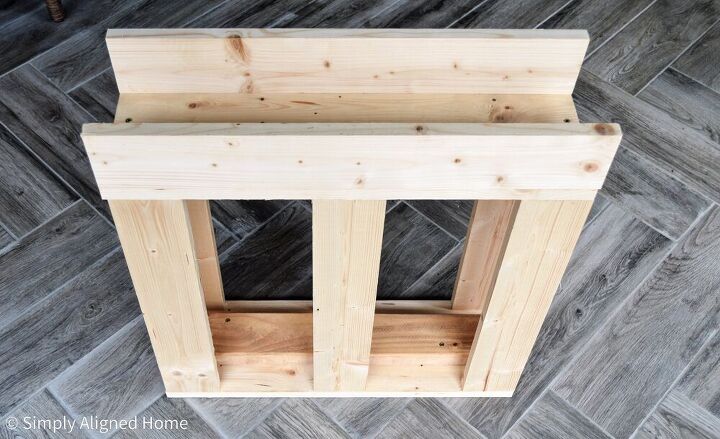
I created a small base that was the full width and depth of the planter using both 1x4 and 2x4 wood. I used the 2x4 as the vertical supports and the 1x4 as the base and to support the shiplap. (I tried to use all of the scrap wood that we had laying around the garage.)
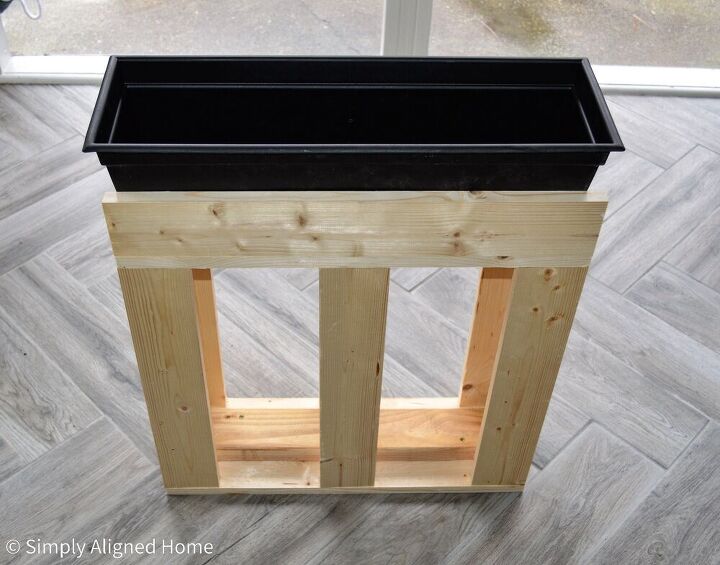
Once the frame was complete, I placed the planter box on top. It fit snugly on top of the frame, so I didn't bother securing it in any way.
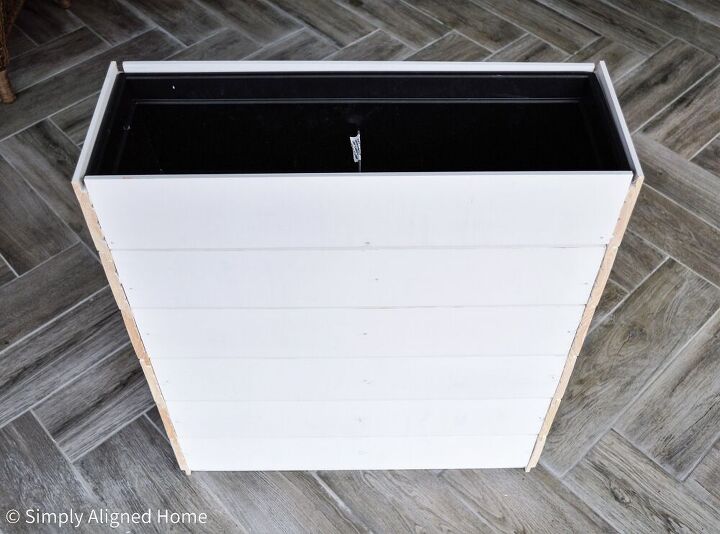
Once I had the base complete, I glued and nailed the shiplap to the base. I made the front and back pieces of shiplap the full width of the frame. I overlapped the end pieces so that they were flush with the front and back shiplap pieces.

I also used the trim pieces that I had left over from my shiplap project to trim the planter. I started by wrapping the base of the planter with flat trim.
I then trimmed out the top of the planter with an outside corner moulding. I added the outside corner moulding to the four corners as well.
Once all of the trim was on, I caulked all of the joints.
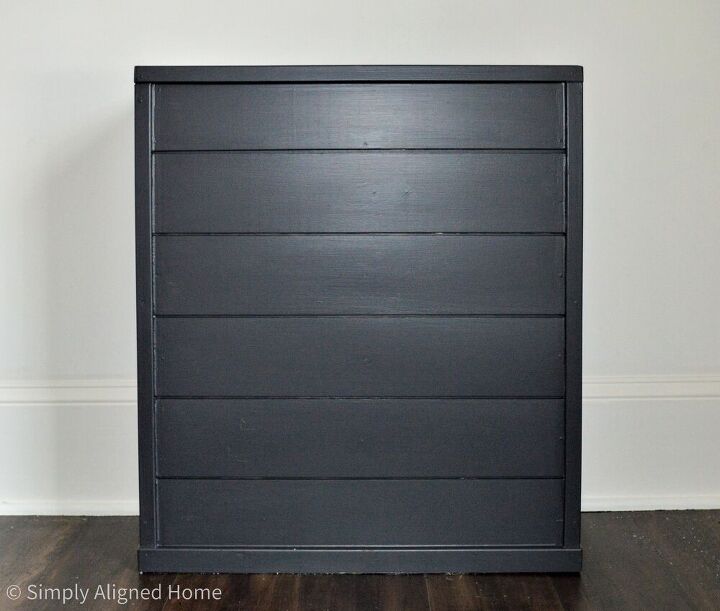
I finished off the planter with some flat black paint. I used a small paint brush for the spaces and a large paint brush for everything else.
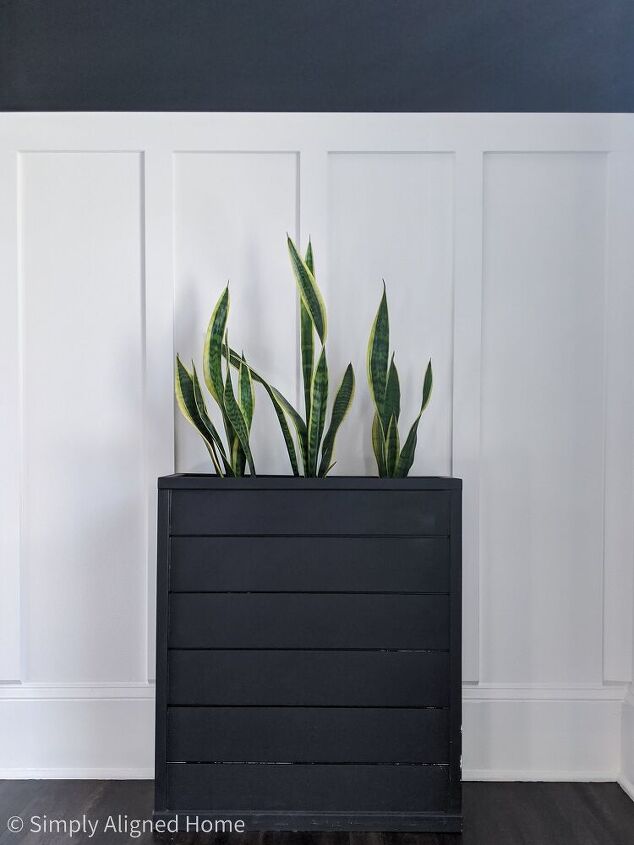
The final piece was the snake plant. I bought a pot that had three different snake plants in it. I separated them and evenly spaced them in the planter.
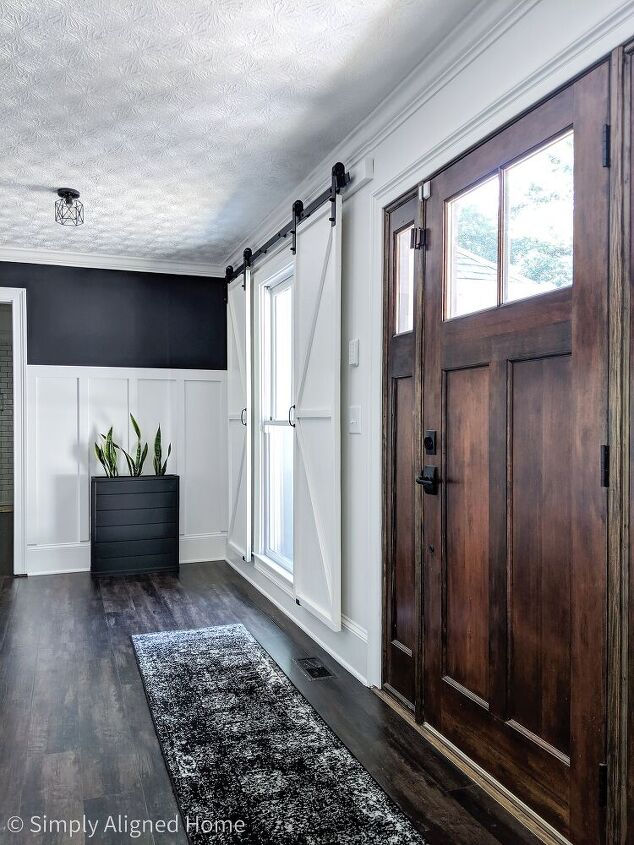
The planter ended up being just under two and a half feet tall. The snake plants complemented the planter well and added just a little more height. It is the perfect addition to our entryway!
Resources for this project:
See all materials


Comments
Join the conversation
-
Very classy looking ❤️
-
I like it also. Looks very good


Frequently asked questions
Have a question about this project?
Maybe this is one of those rare “stupid questions” but I wanna know anyway. How did you anchor the supports to the top and the bottom of the frame? Did you make pocket holes?
How do you remove dry mod podge from painted wall?
Your entry way is beautiful. I’m definitely going to try this in a smaller scale for my home.