


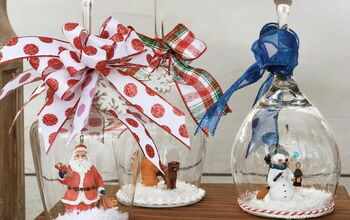
How to Make a Cute DIY Personalized Snow Globe
Do you love a cute snow globe? I’m so excited to show how I made a DIY personalized one – perfect for winter holiday decor, a keepsake, or gift!
This project requires only a handful of supplies and is super easy – it’s sure to be a conversation starter!
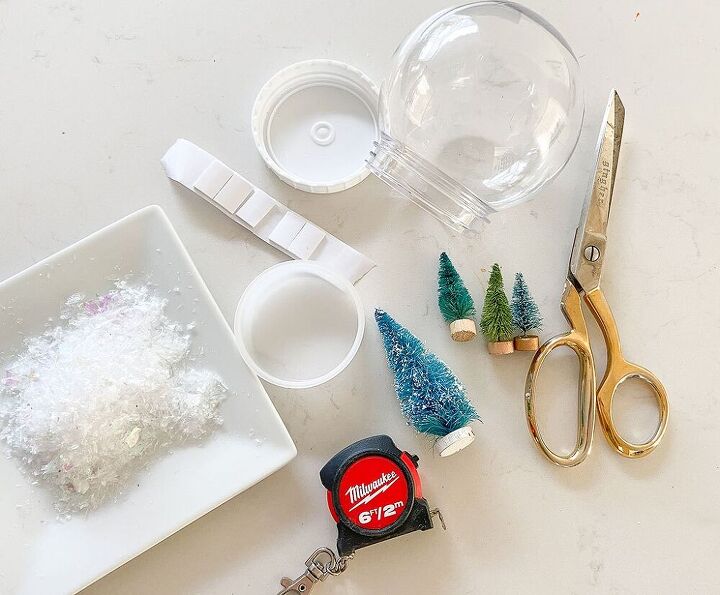
Supplies:
- 3-4 bottle brush trees in your desired colors
- Family photo or kiddo (showing full bodies)
- Sticky back foam tape (or hot glue gun)
- Plastic or glass globe with lid (a jar also works)
- Scissors and Exact-o knife
- Tape measure or ruler
- Faux snow (or epsom salt)
- Ribbon (optional)
You can get all the shop-able links here if you're interested.
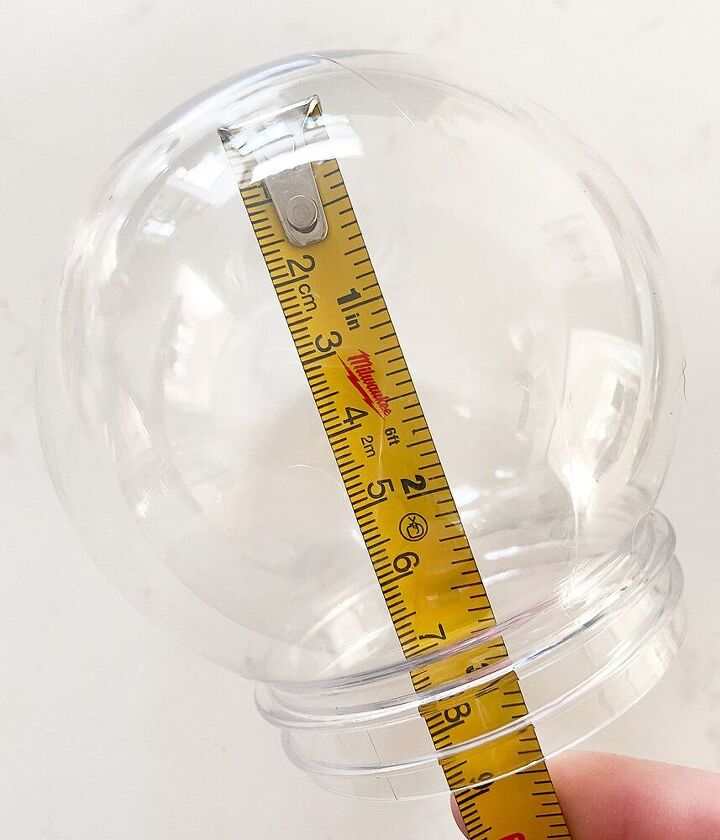
Take a ruler or tape measure and decide how tall you want your photo to be – I decided on 2.75″ tall.
Open your favorite photo editing software (I use Photoshop), and size your favorite digital photo to the exact size that fits in your snow globe.
My color printer wasn’t printing the photo very well, so I decided to upload it to CVS photo center and had a 4×6 photo printed in less than an hour.
It cost me about 40 cents – worth it!
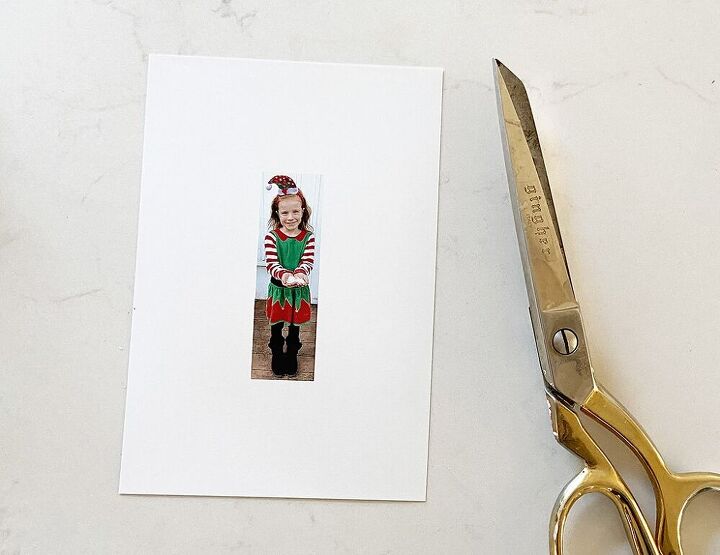
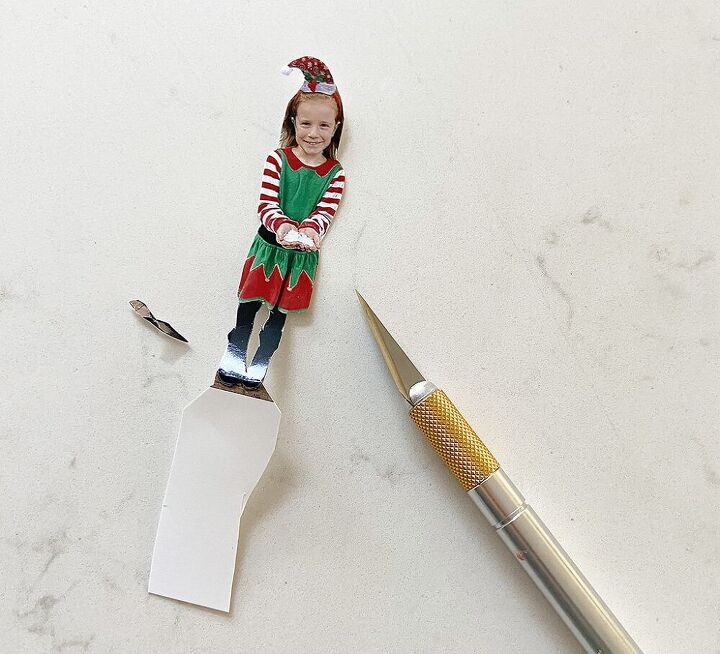
I used my scissors to cut around the photo, and then took my Exact-o knife to cut the smaller areas.
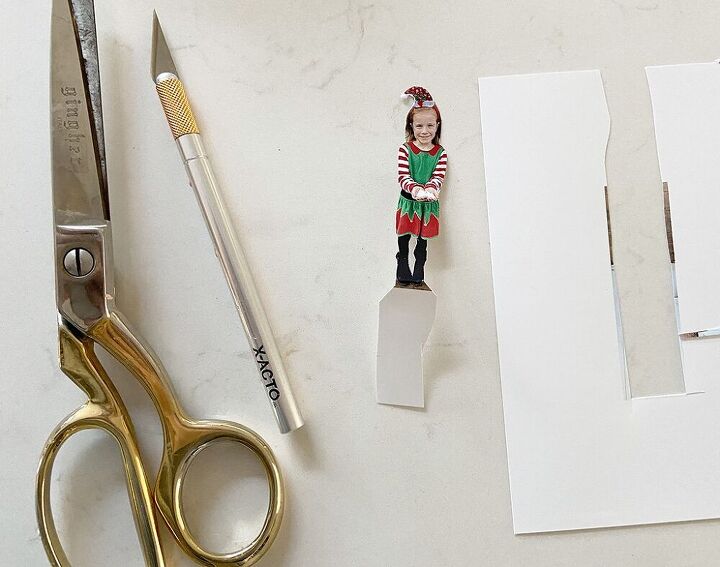
Make sure to leave a tail on the bottom of the photo so you can fold it and use it to stand the photo up in the snow globe.
It doesn’t have to be perfect since you won’t be able to see it once it’s taped down to the globe base.
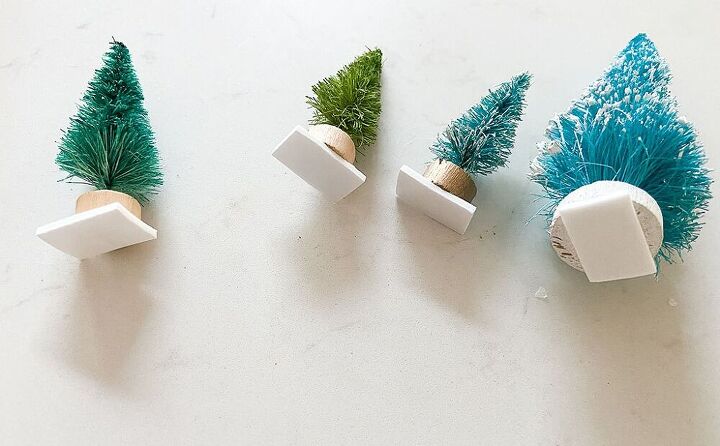
Take your reversible stick foam tape and pop one on the base of each tree. You can use a hot glue gun if you’d rather. I prefer the tape since it’s easier to adjust as needed.
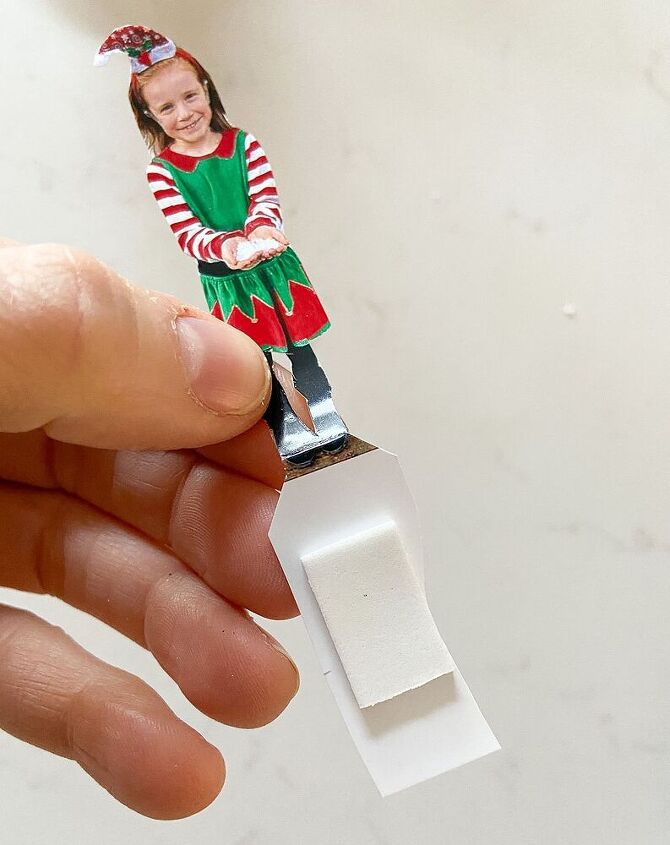
Fold the tail of the photo back and add a foam sticky on that as well.
Take the inner base of the snow globe (or the lid if you’re working with a jar) and start gluing or taping your trees and photo down toward the center until you’re happy with the placement.
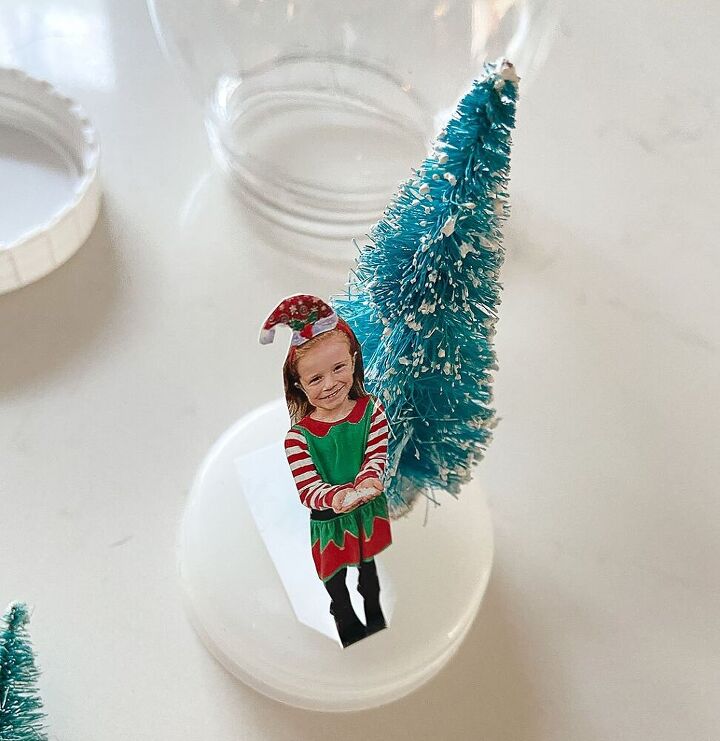
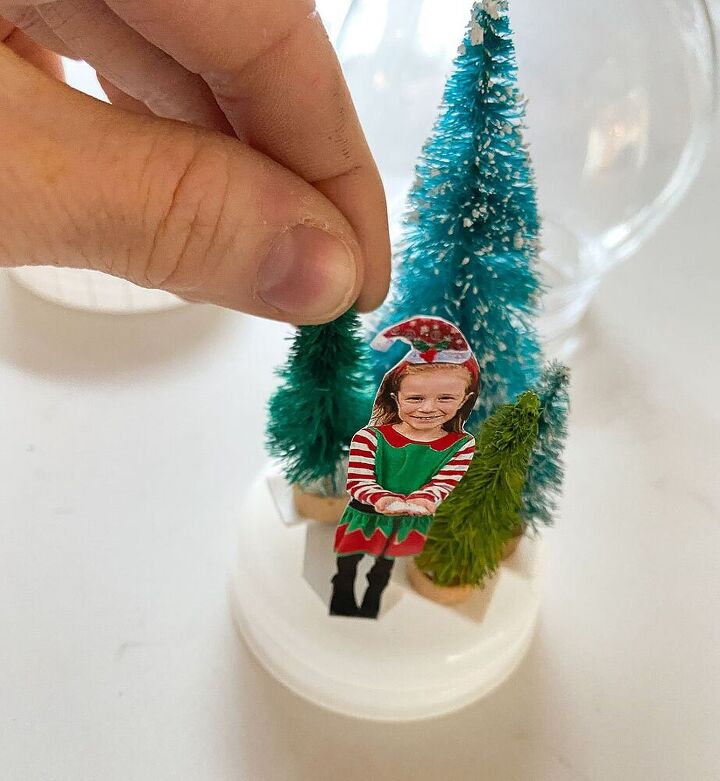
Add in as many bottle brush trees as you wish! My trees came in the colors shown, but you can always spray paint them other colors if you wish.
Once you’re happy with the layout, add in a handful of faux snow (or epsom salt).
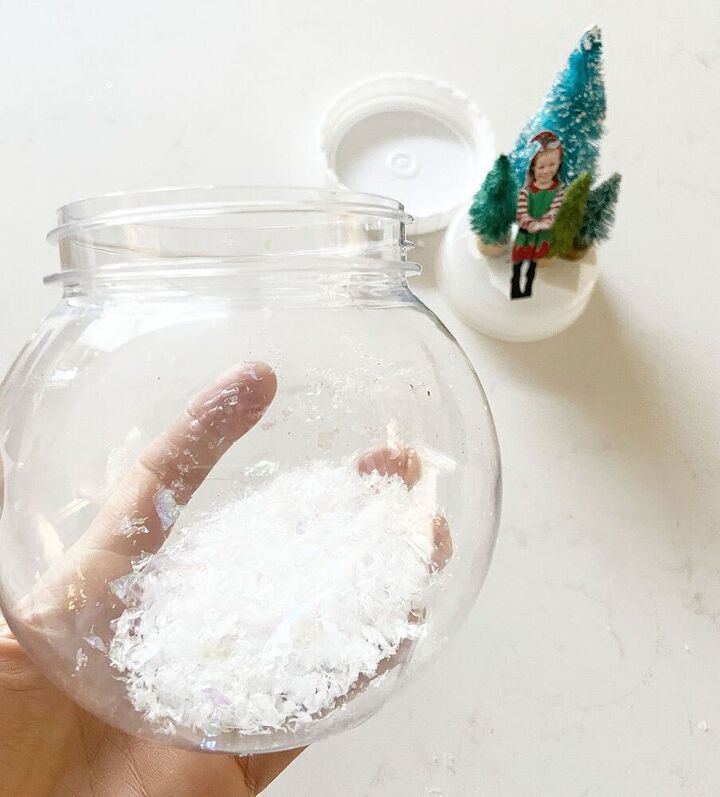
Flip your lid upside down and carefully place into the globe securely.
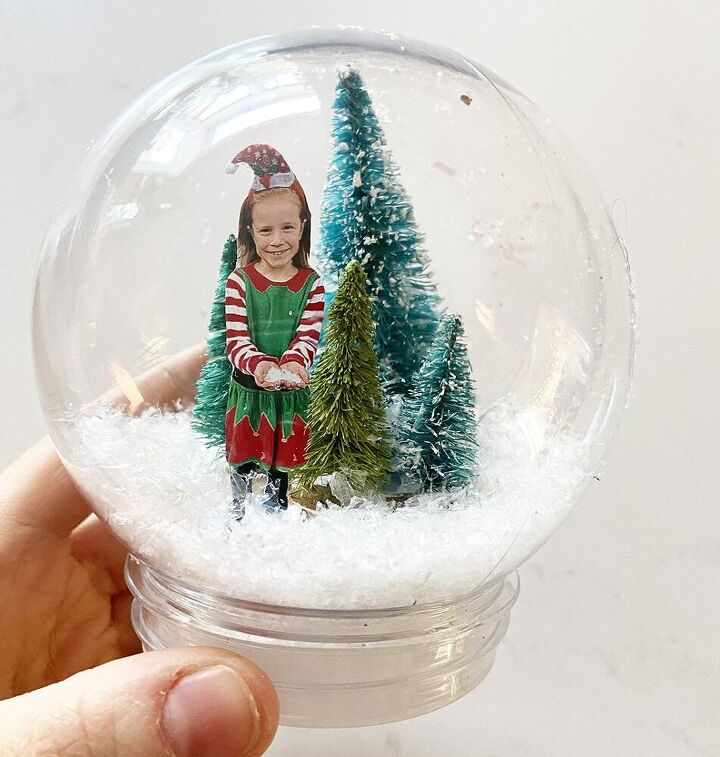
Gently flip the globe right side up and shake until the snow is placed to your liking.
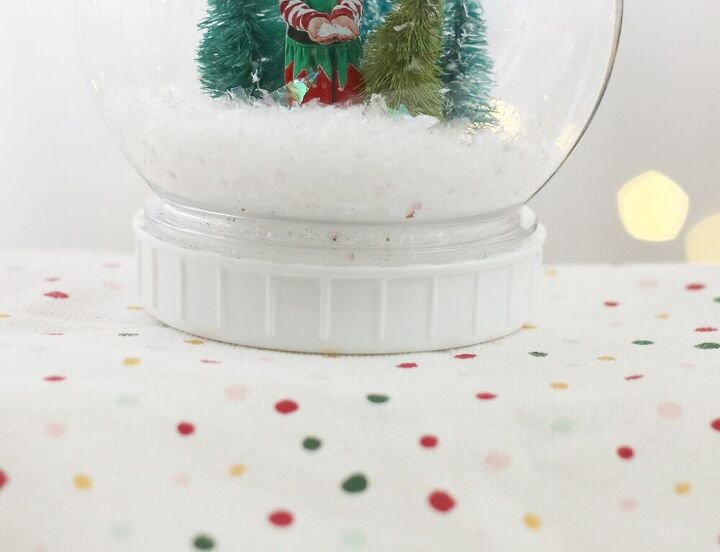
Add the secondary lid if your snow globe has one.
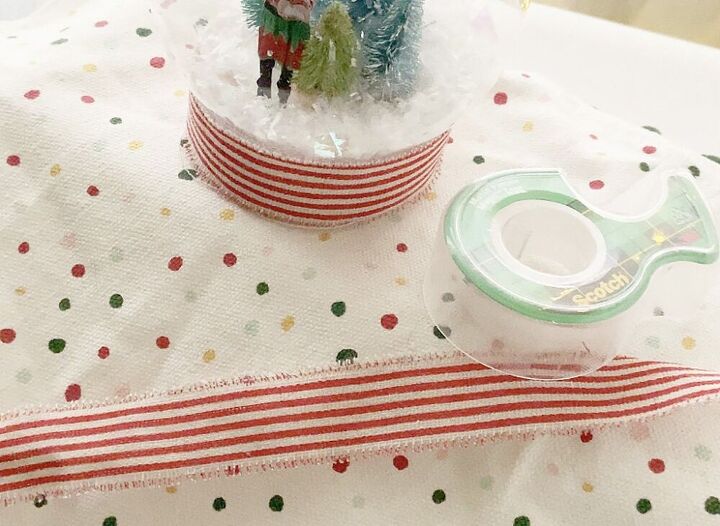
I thought the white plastic base was too plain, and contemplated spray painting it, but decided to simply tape a ribbon around it – I love the ribbon detail!
I absolutely love how my DIY personalized snow globe turned out and will cherish it for years to come!

What do you think, totally doable right? I will definitely be making a few more to give to the grandparents as gifts. I just love how it turned out and it only took me about 30 minutes.
If you make one of your own globe I’d love to see it! Please tag me in your Insta, Twitter, or Facebook photos – I’m always so grateful when you Pin my work as well.
Resources for this project:
See all materials


Comments
Join the conversation
-
Fabulous !! Just love that this is personalized ..... how awesome is that !!! Thanks for sharing. 👍️ 🤶 👏
-
As children grow up so fast, to really capture the moment, I would add the year date inside the globe somewhere. (Perhaps on a little wooden sign at the bottom of the trees.)


Frequently asked questions
Have a question about this project?
I just wonder, over time, doesn't the picture wily and start to bend? Maybe glue the picture to cardboard? Also another thought is to print out 2 of the picture (maybe reverse one) and glue them back to back so you can see the child both ways.