


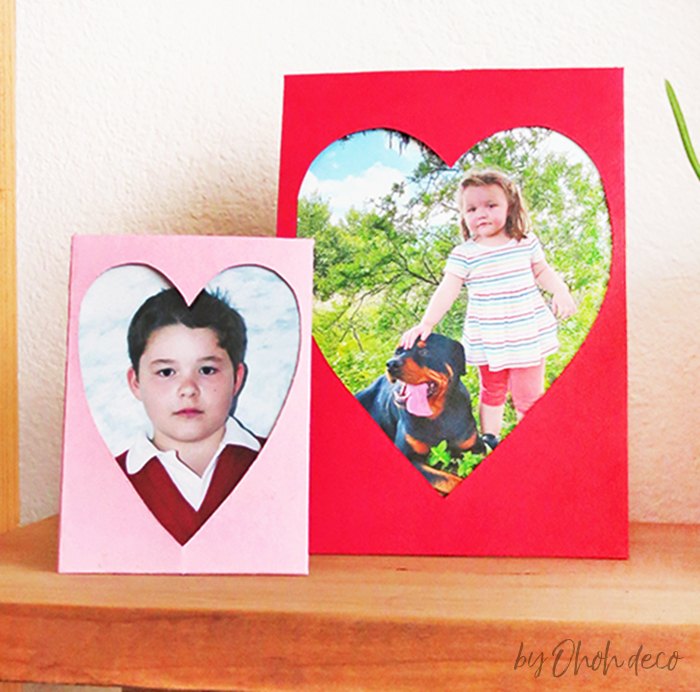
DIY Heart-shaped Photo Frame

Have fun making a heart-shaped photo frame with paper in less than 10 minutes. This easy papercraft is perfect to frame your favorite pictures.
This craft is super easy to make, you just have to print the template on cardstock and you can start making your paper photo frame.
You can get the template on my blog.

There are 2 size templates available: one for 4x6 inches photos and one for smaller pictures of 4 1/2 x 3 1/2 inches.
Take the front piece of the frame and cut it following the straight lines. Once the shape is cut, fold following the dotted lines.
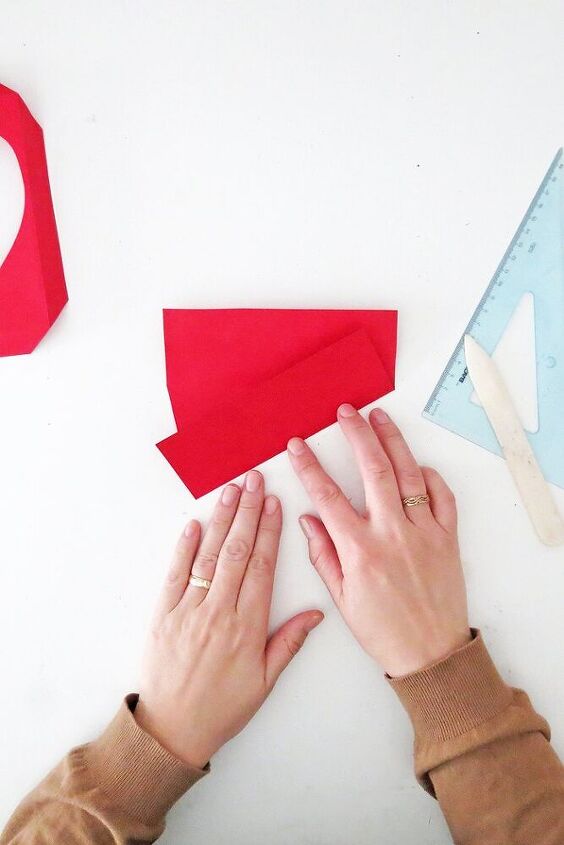
Take the back piece and cut it following the straight lines. Then make the central folds following the dotted lines.
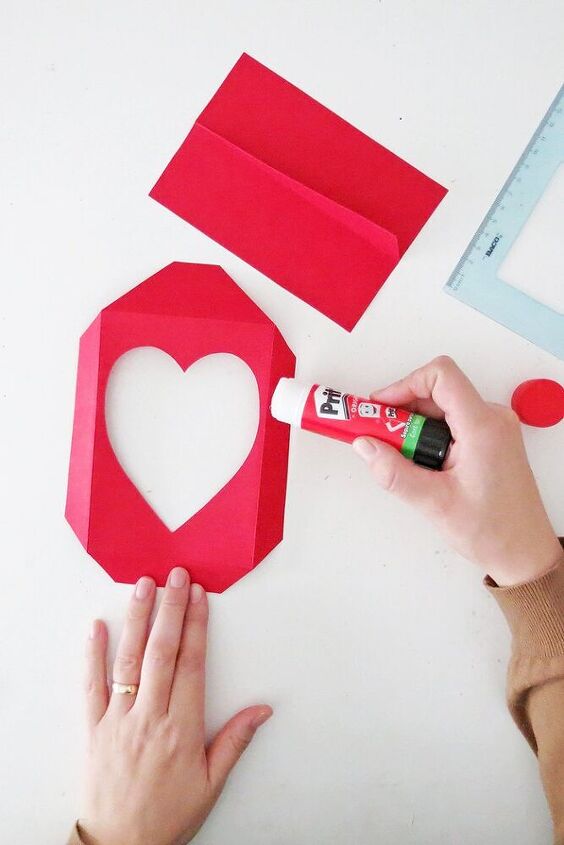
Time to assemble your frame. Add some glue to the flaps. Align the front and the back piece and glue them together.
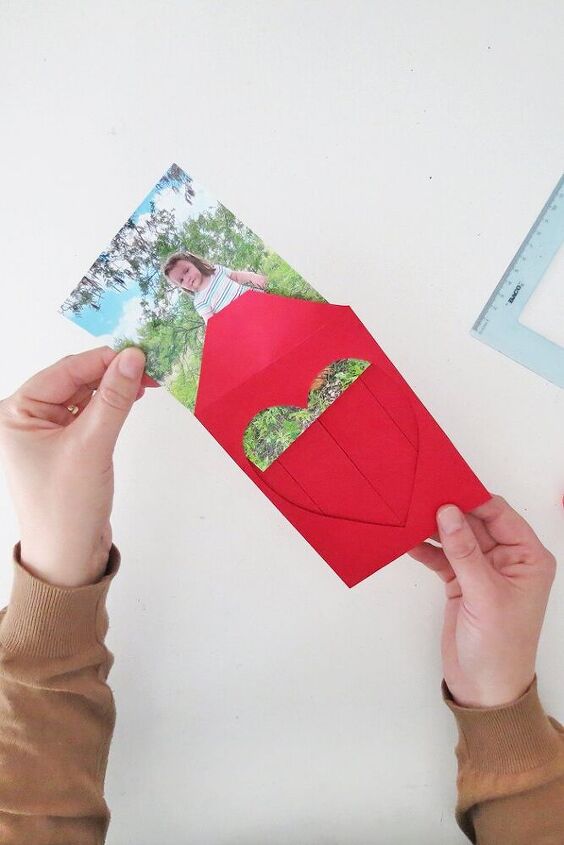
Slide your favorite picture in, and done!
The templates include a detailed tutorial and an easy-to-follow video tutorial to help you create your paper photo frames in no-time.
Get the frame templates and start crafting cute heart-shaped frames 

These heart frames make a perfect gift for valentine's day.
These paper frames are super easy to gift!
You can slide them in an envelope and mail it to your loving one.
Or, if you live nearby, you can drop one in your friend's mailbox or slide it in under the door.
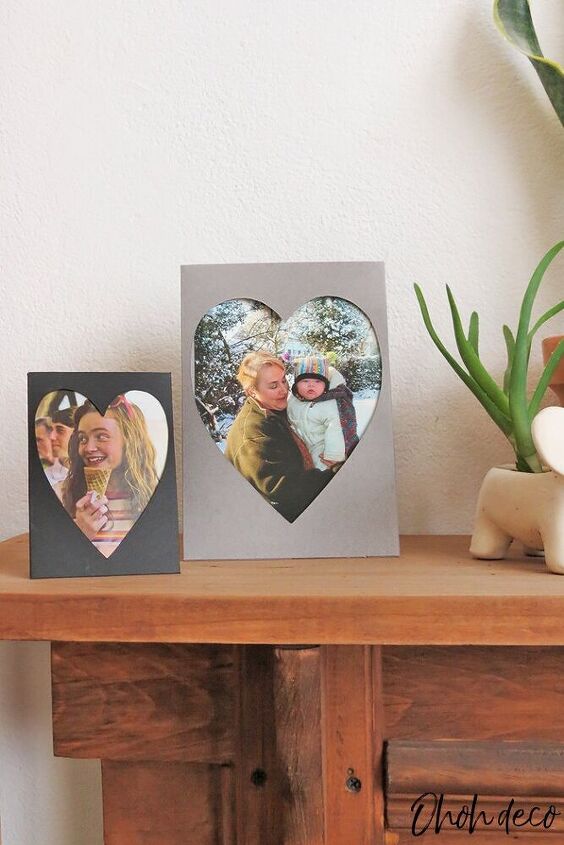
You can make the frames in any color you like. For a better result, prefer using cardstock paper. You can also decorate the frame with stickers and letters.
Watch the video and start making these easy paper photo frames
Resources for this project:
See all materials


Comments
Join the conversation
-
Really cute and simple to make! ❤️
-
Something that can be used in the elementary classroom with several grade levels. THANK YOU!


Frequently asked questions
Have a question about this project?