


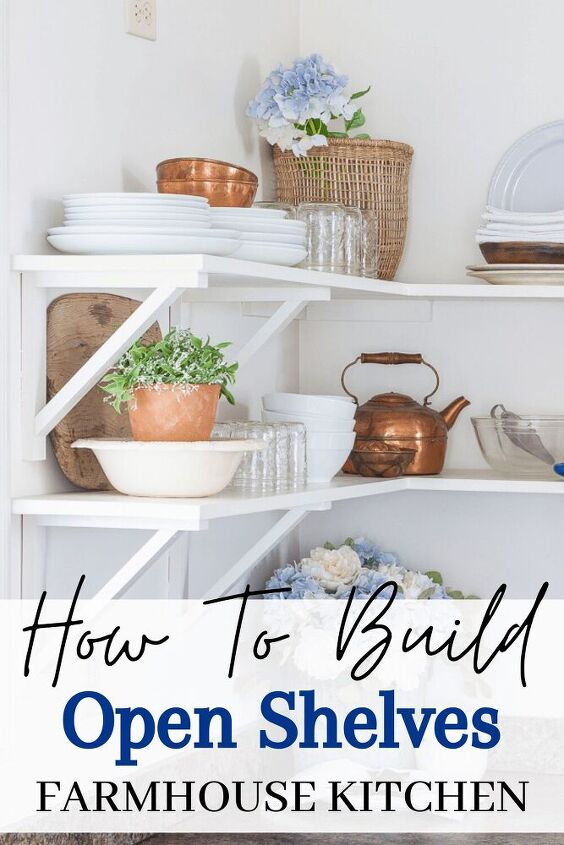
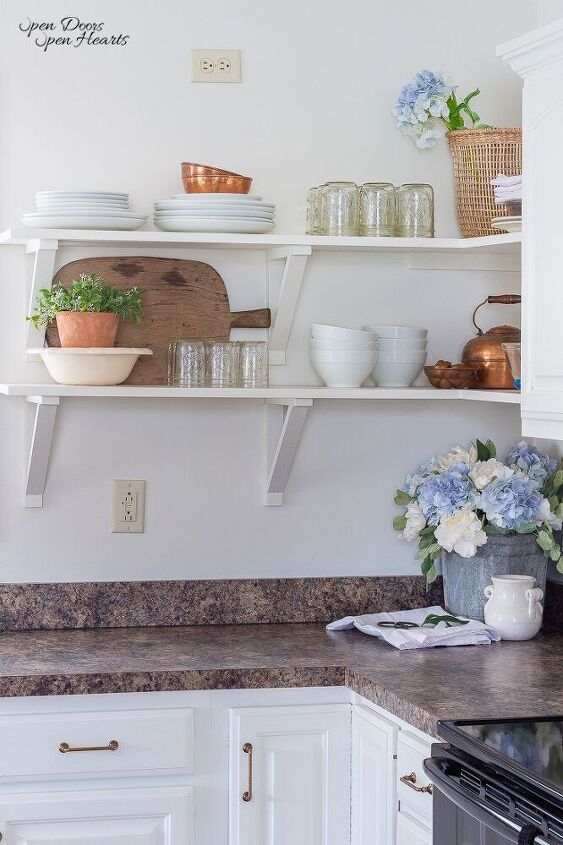
Simple Farmhouse Kitchen Open Shelves | How to DIY Brackets
We finished these farmhouse kitchen open shelves a few months ago, so I decided it was time to show you guys how we DIYed them! They were so easy and since we did them ourselves we were able to customize them to fit our specific needs.
Disclosure: There are some affiliate links below, but these are products I recommend. I won’t put anything on this page that I haven’t verified and/or personally used.
It must be indoor DIY season over here or something. We have been working on project after project lately. I know it will slow down soon though because,
GARDEN SEASON!
Soon we will be spending most of our time in the garden!! Ekkkk!
So, we’re pushing to finish up the girls’ room and some of the other little DIY projects we’ve started to free up more time for the garden.
We plan to build a chicken run, beds for the herb garden, a few trellises for our veggies, and maybe a split rail fence. We also plan on transplanting some lilac shoots, peony bushes, and hydrangea bushes.
GUYS!!! The Spring and Summer are going to be full of garden and I can’t wait!
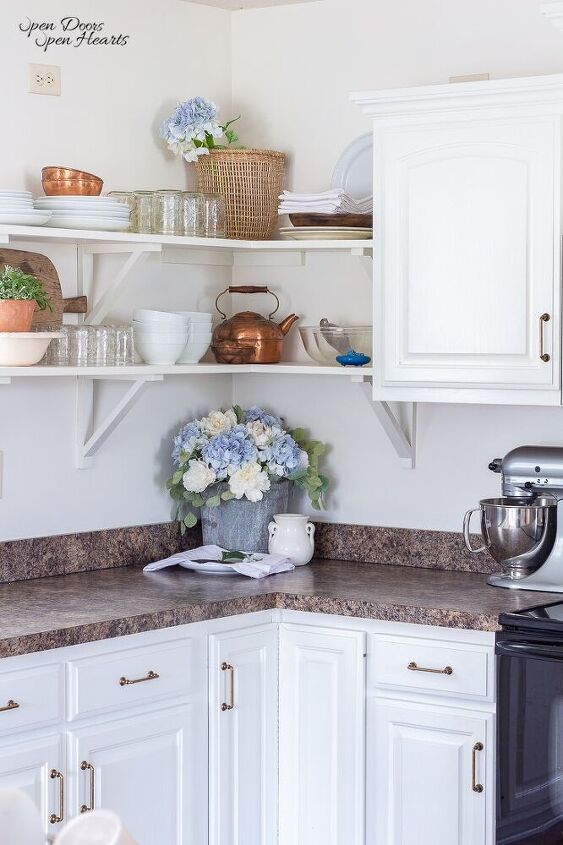
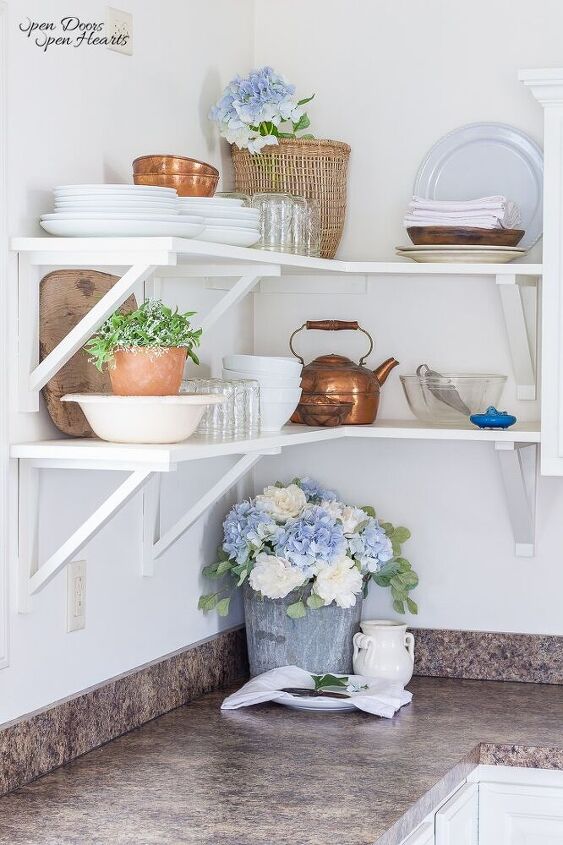
Until then, let’s talk about these DIY farmhouse kitchen open shelves.
Before we get very far into this, I want to show you what our kitchen looked like before we put the shelves up.
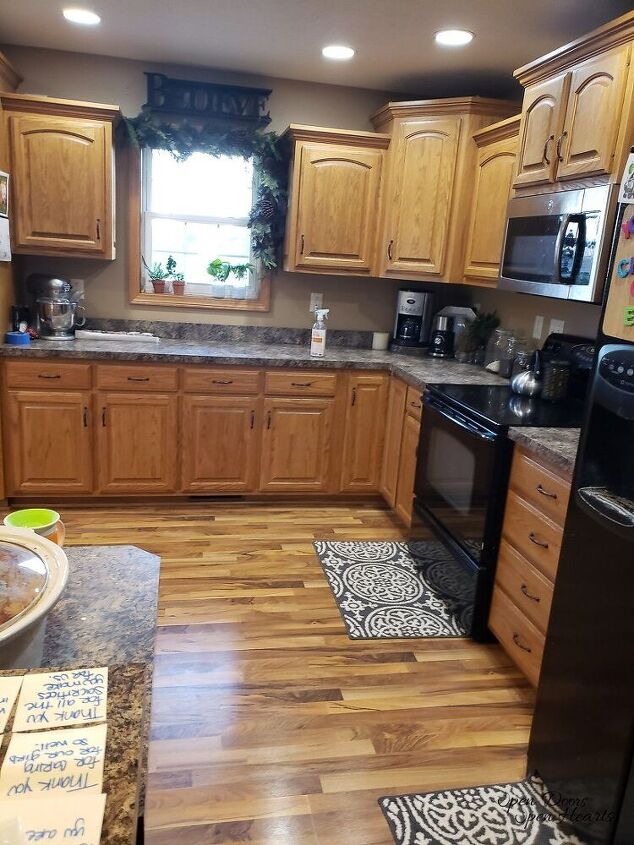
I know the quality of this image is terrible, but it shows the difference and transformation.
Why Farmhouse Kitchen Open Shelves?
Convenience
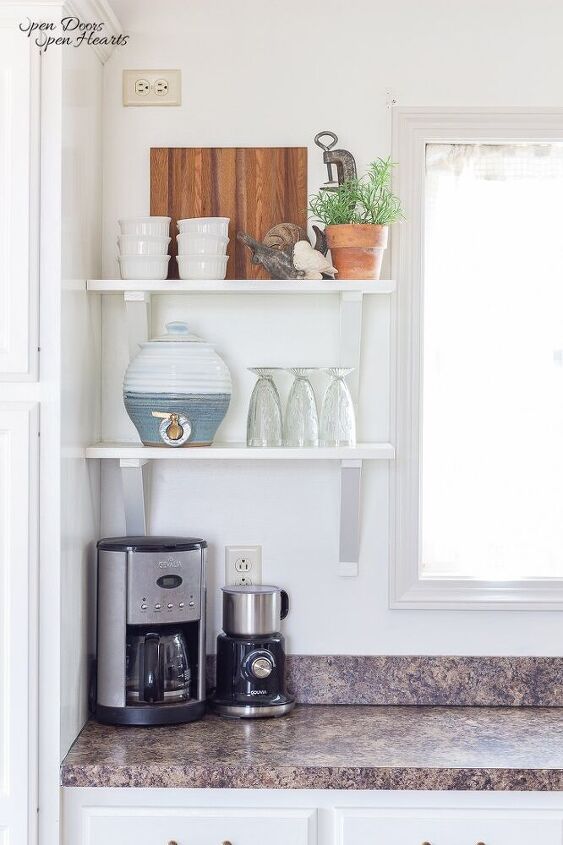
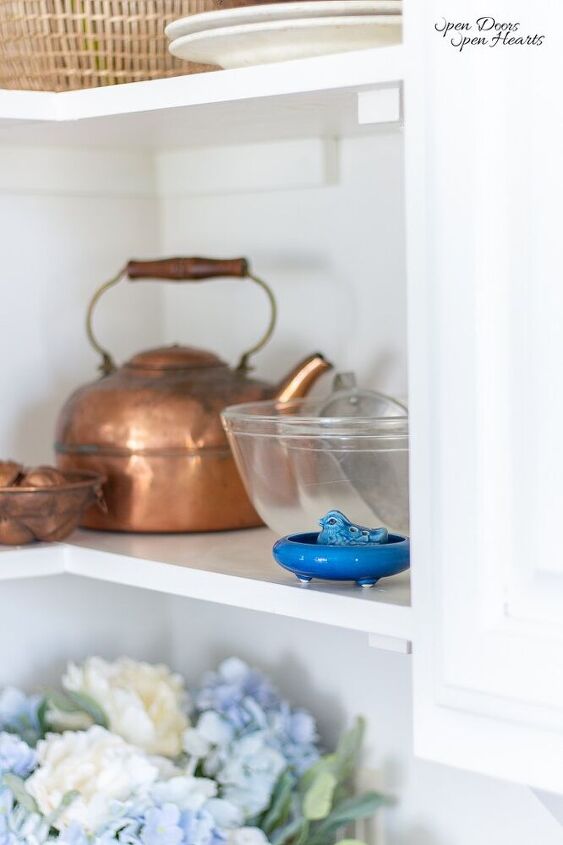
Do you remember my post about the DIY wall rack? I told you how easy it is to have the pots and pans out in the open. That’s how I feel about the farmhouse kitchen open shelves.
They are so nice! I can easily grab whatever I need.
Opening cabinet doors isn’t terrible, but I love not having to.
I just reach and grab. It’s the little things in life haha!
European Farmhouse Style
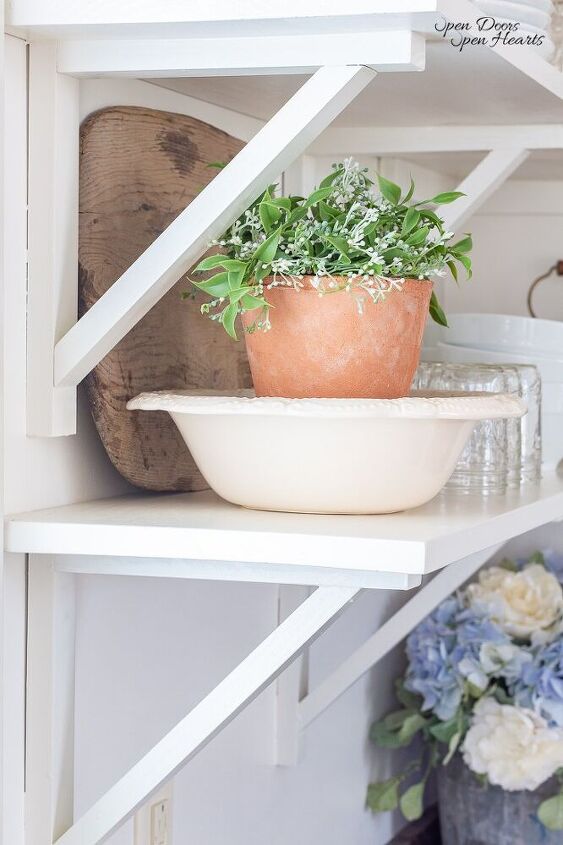
I touched on this in my post about European farmhouse elements, but I love the way this style takes a function and turns it into beauty. Shelves are practical for a kitchen. But when you mix farmhouse kitchen open shelves with the styling of an old European farmhouse it becomes beautiful.
Simplicity
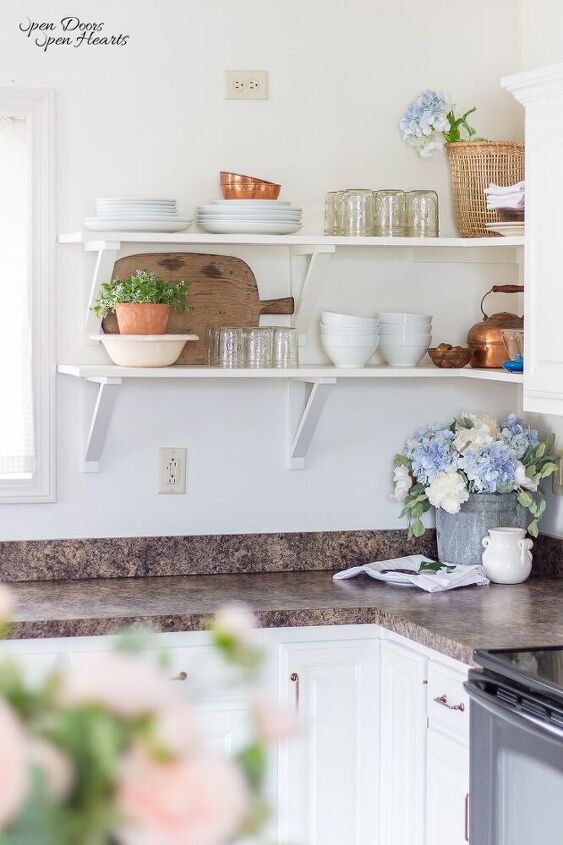
The farmhouse kitchen open shelves have created simplicity in the kitchen that it didn’t have before. It feels less cluttered and more spacious.
I didn’t even realize it at the time, but once we took the cabinets down it really opened the kitchen up. It made the kitchen feel bigger. It sounds crazy that something as simple as removing cabinets would do that, but it truly did.
I remember when we first took the cabinets down and my mom came over. The first thing she said was how big it felt now.
I love that!
Even though everything on the farmhouse kitchen open shelves is visible, it’s styled in such a way that it feels simple. It reminds me of a time when days were slower and things were simpler.
Materials
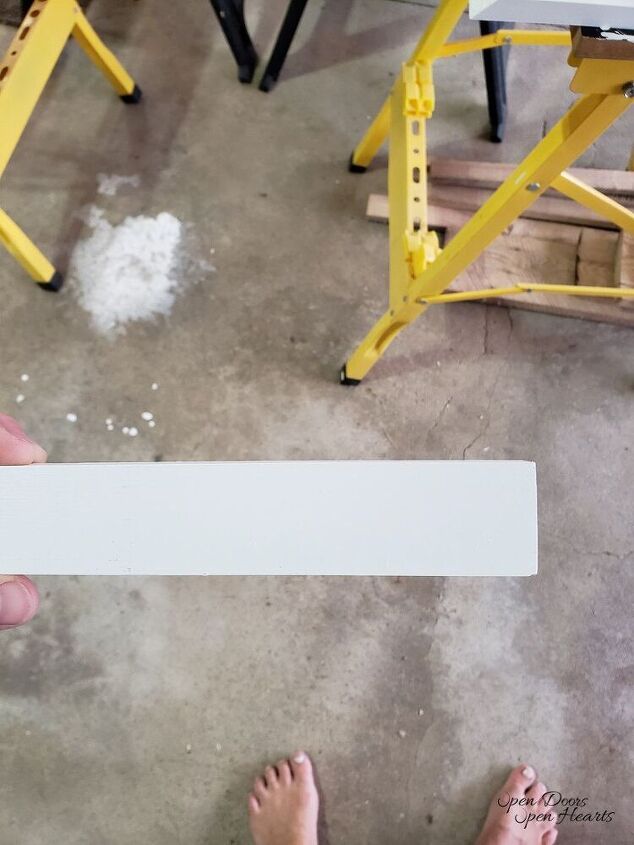
1×2 Wood
Wood Glue
Sandpaper
Primer
Paint
Pencil
Tools
Miter Saw
Nail Gun
Square
Tape Measure
Countersink Drill Bit
Right Angle Attachment
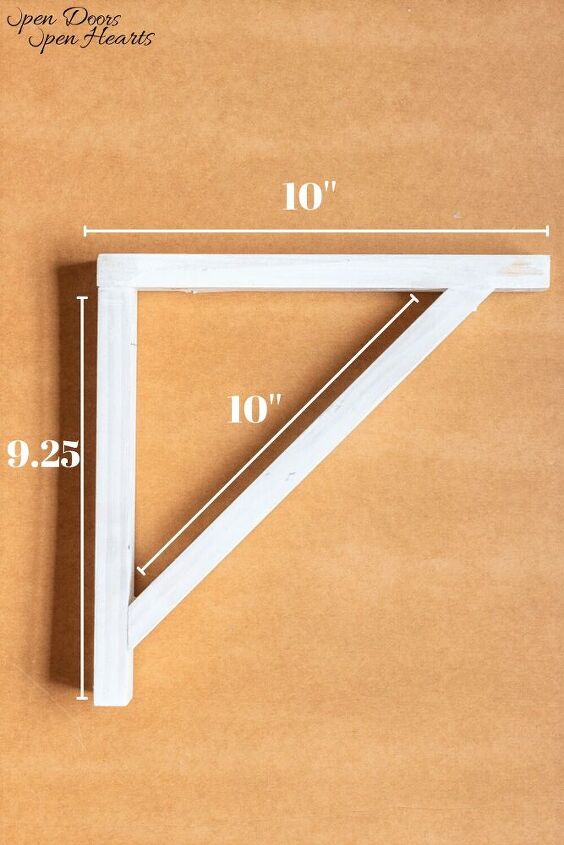
Dimensions
We used 1×2’s cut to:
10”
9.25″
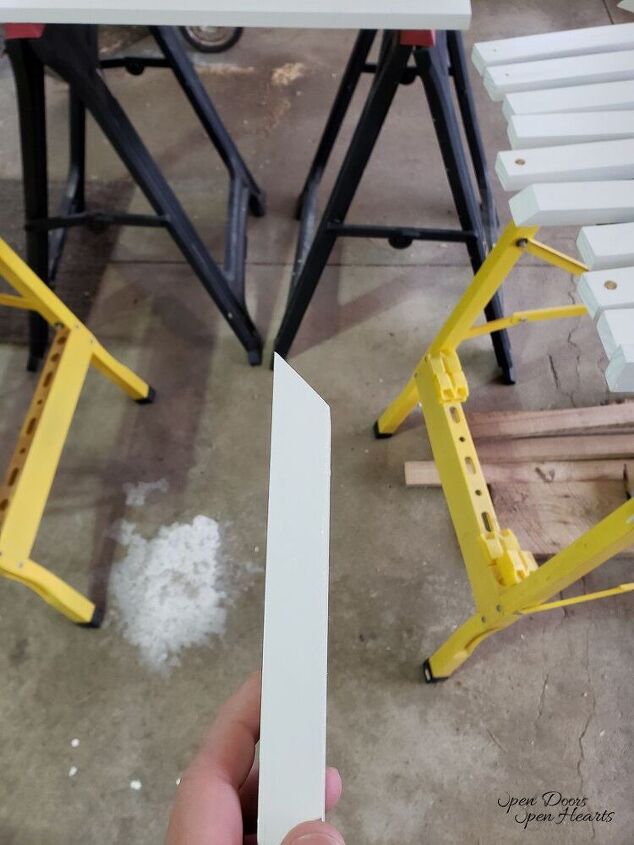
10” (with 45-degree angle cut on each end)
Instructions
Step 1.
The first thing we did was put primer on the 1×2’s (It makes it so much easier to do this when the wood is one long piece vs a bunch of shorter pieces.)
Step 2.
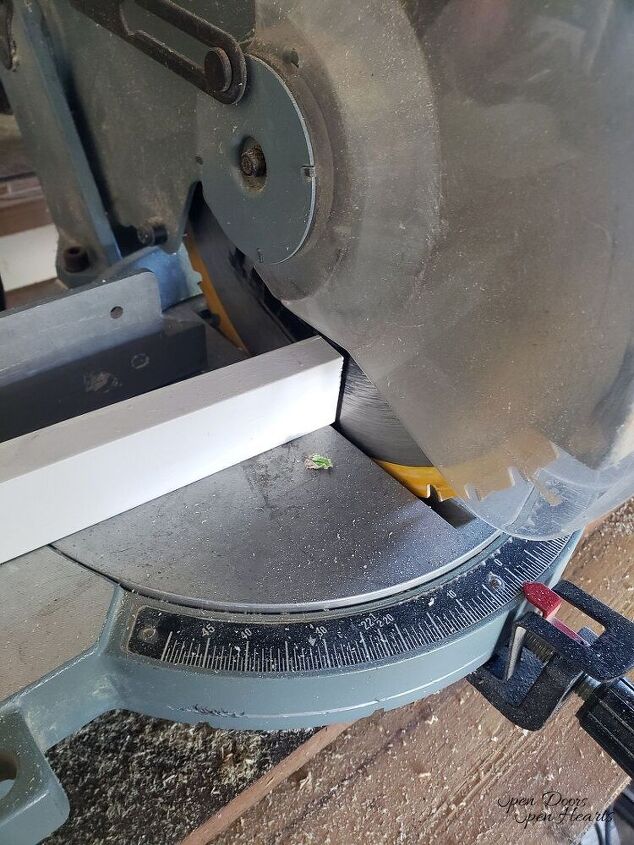
The next thing we did was use the miter saw to cut the 1×2’s to the appropriate lengths. To cut the pieces with 45-degree angles we measured how long they needed to be and set the blade of the miter saw to 45-degrees then cut the 1×2.
Step 3.
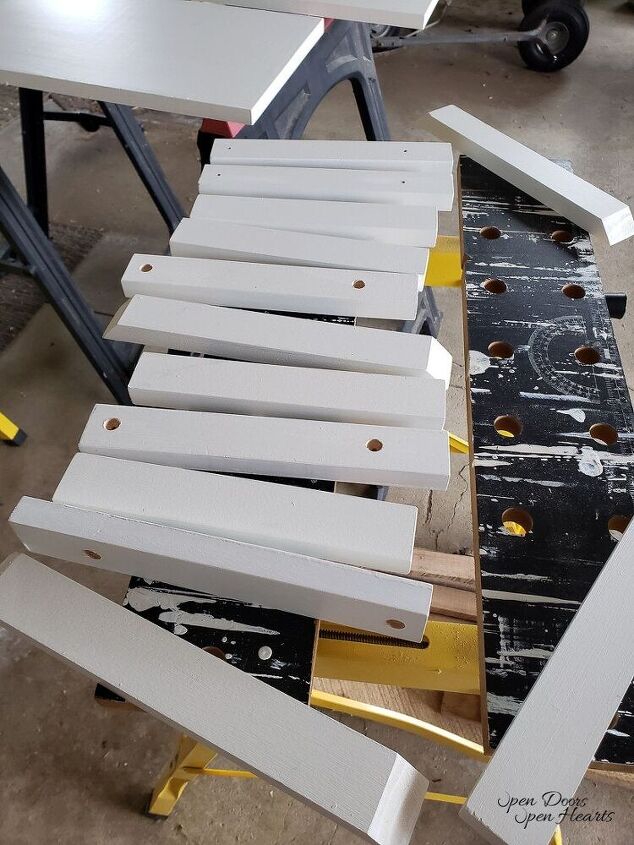
After the wood was cut we sanded the splinters and rough edges down and touched up with primer, and then applied the first coat of paint.
I recommend getting everything painted except your final coat of paint before you assemble the bracket. I did it both ways and found this to be the easiest method.
When the bracket is assembled it was difficult to get the primer and paint into all the joints and not leaves runs.
Step 5.
Next, we drilled countersink holes for the screws in the pieces that would be against the wall (the 10” pieces).
Step 6.
After that, we glued and nailed the end of the 9.25” piece to one side of the 10” to create an “L” with equal sides.
Now that we had the “L” shape, we took 1 of our pieces with the 45-degree cuts on the ends and glued and nailed it in-between the 10” and 9.25” pieces.
We used a square to ensure the two legs of the brackets were at 90-degrees.
Step 7.
After the glue was dry we painted the second coat of paint on the brackets.
Now the brackets are ready to be installed on the wall!
Over on the open shelf blog post, I shared some helpful hints on how to mount the brackets to the wall and best practices for shelf installation. Head on over and get those tips so you don't have to learn those things the hard way like we did.
I can’t wait to hear all your thoughts on this project! It’s been so fun hearing from you about the girls’ bedroom makeover and the DIY Wall Rack recently!
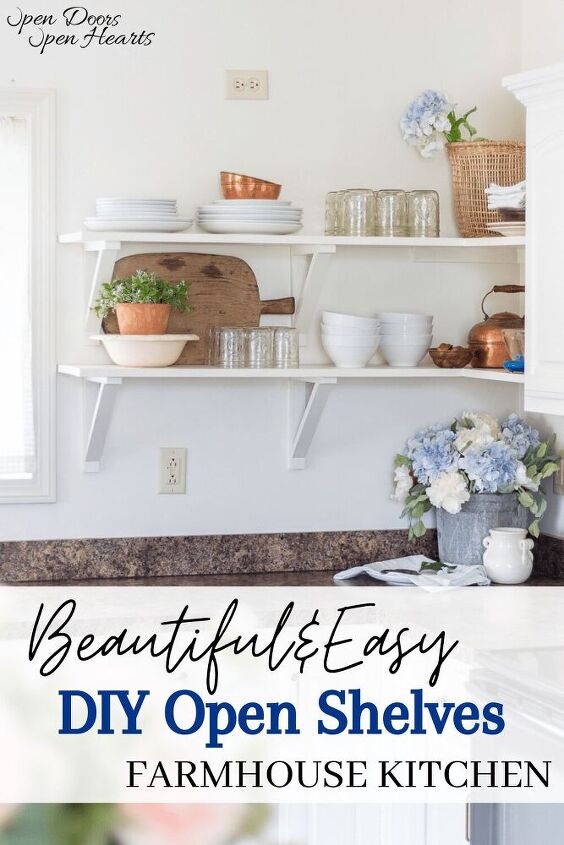
Pin it for later!
Thanks so much for stopping by! Make sure you follow along on Pinterest, Facebook, and Instagram so we can stay connected in between posts!
Also, join the mailing list and never miss a thing!
Have a great week! XoXo
Open Your Doors,
Aliya
Resources for this project:
See all materials


Comments
Join the conversation
-
Although I probably won't be building open kitchen shelves I do love the way you staged it. What caught my eye was the antique brass kettle. I have the twin and will use your picture for reference when i stage my new kitchen after I move
-
It’s really nice. But I’ll bet it will be a challenge to keep it clean & dust free. It would have been nice to see an after picture of the whole kitchen like the before pic.


Frequently asked questions
Have a question about this project?
Like the new look! (Am bemused by those elevated outlets! Were they inside the old cabinets, too?)
I have an open dish cabinet and love it, it made my small kitchen look bigger and since I painted the wall and shelves a different color than the rest of the kitchen it adds a pop of color. Yours look great too. I would like to see a picture of your kitchen from the same spot/area you took the first pics showing your whole (or most of) kitchen to get a better overall vision of how many shelves and where you have open ones in respect to your whole cabinet arrangement.
No after photo of the whole kitchen? I would love to see one as compared to the whole kitchen before photo.