


How to Diy a Concrete Bar Top - in a Weekend!
Hello! Today I am popping in with an easy DIY of one of my favorite design elements in my recent kitchen refresh. My bar top concrete countertop. I love the mix of the concrete with the warmth of the butcher block, and best of all…it’s pretty easy to DIY yourself.
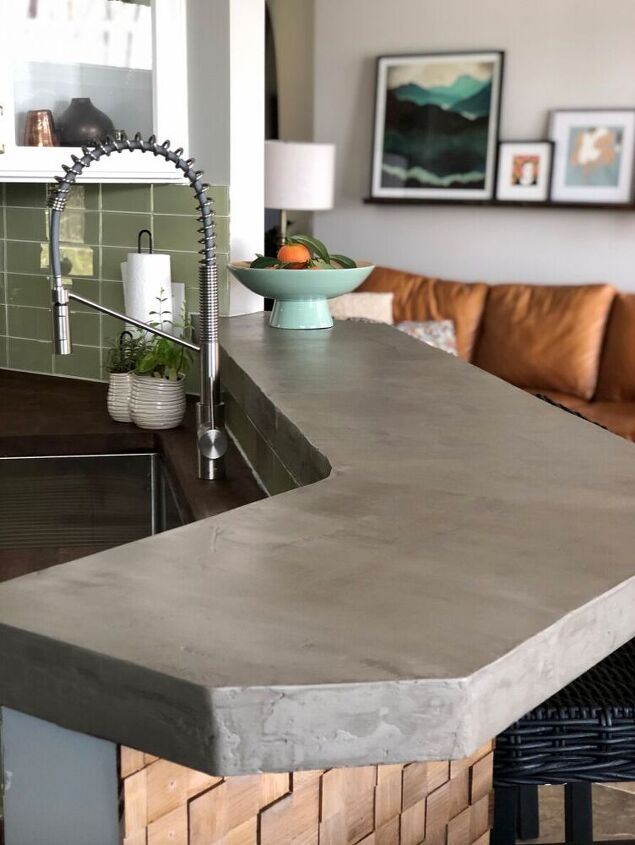
When we worked on our kitchen refresh for The One Room Challenge, we had six weeks to finish the space. That’s a bit intense considering this is our weekend home and allows about twelve days to get everything completed. BUT I LOVE the look of concrete in all forms (especially on countertops), so my heart was set on poured concrete to compliment the butcher block. About a week into the reno, I realized that the actual wall would need some sort of reinforcement to hold a 2 + inch concrete countertop (my dream), and we would need brackets or something to hold the weight. Yikes!
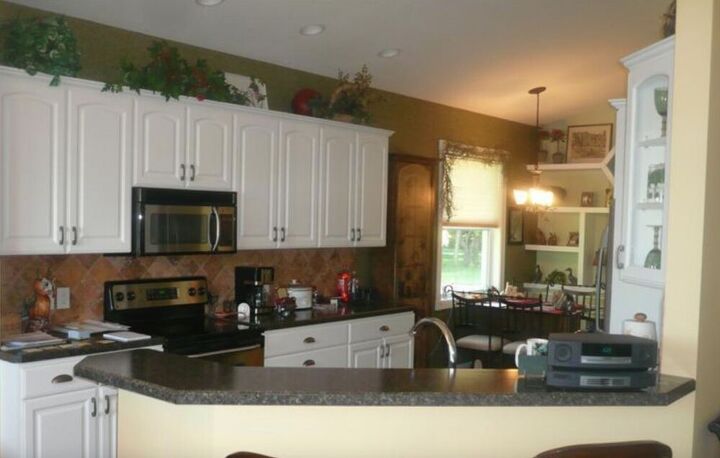
Here are the Formica countertops when we bought the house.
I didn't want to have brackets added to support the counter because one, it would take up valuable space, and two, we were quite honestly running out of time (remember we only had six weeks to finish). So I thought, okay, I need a plan B. I had used a skim coat product once before at our rental home, and it has held up really well. So I decided I would use the same product here. You can peek at that DIY countertop here.
This is a simple DIY project, and I’d say even a newbie DIY’er can do it. It does require some sanding, which is messy and does require some patience. But I am confident you will love the results!
Here are the materials I used:
Handy Paint Pail (with disposable liners)
Paint sticks to mix the product
Sandpaper (I hand sanded this time)
Rags
- This post contains affiliate links. If you purchase from these links, I may receive a small compensation.

The first thing I did was add plywood to give me the extra depth I was looking for. I like a larger profile countertop as it looks more substantial. We cut the plywood to the same size as the Formica by tracing the outline onto the plywood from the bottom and used wood glue and some screws to attach.
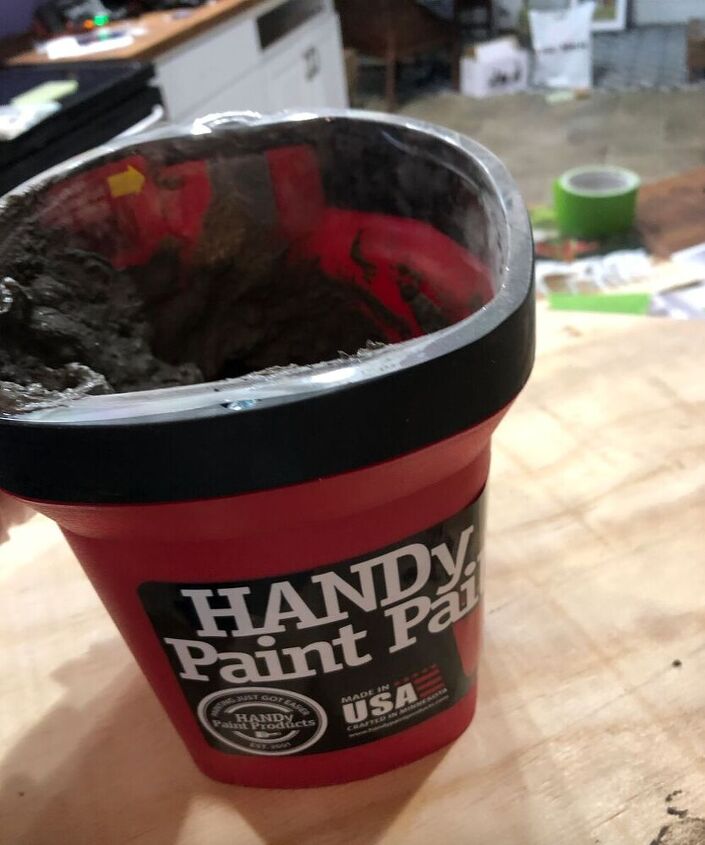
I mixed the product according to directions. NOTE: Small batches work best; otherwise, the product dries out too quickly.
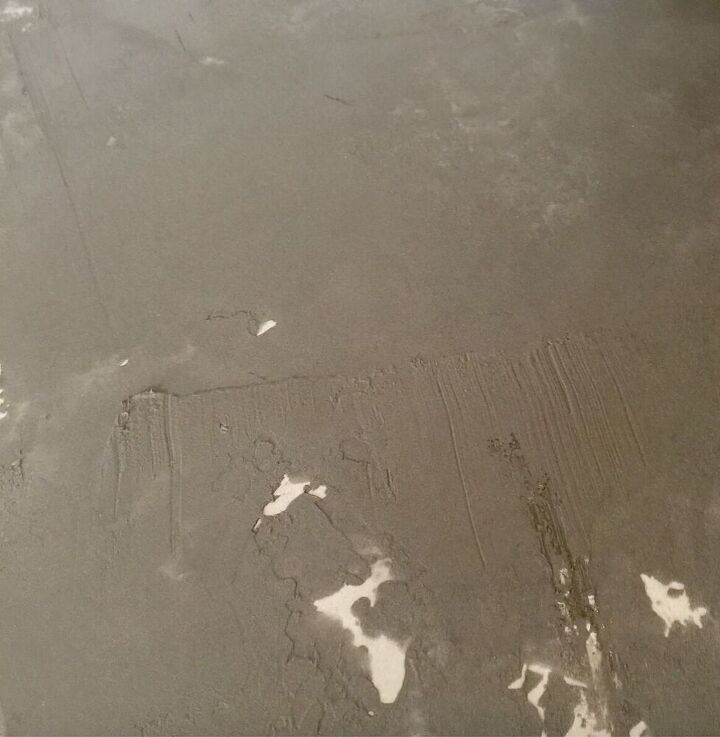
The trick is to apply the thinnest, most even coat possible. The idea is to layer the product slowly. Let it completely dry to the touch (I waited 2 hours for each coat) and then sand to a smooth finish. Wipe clean and add another layer, and repeat.
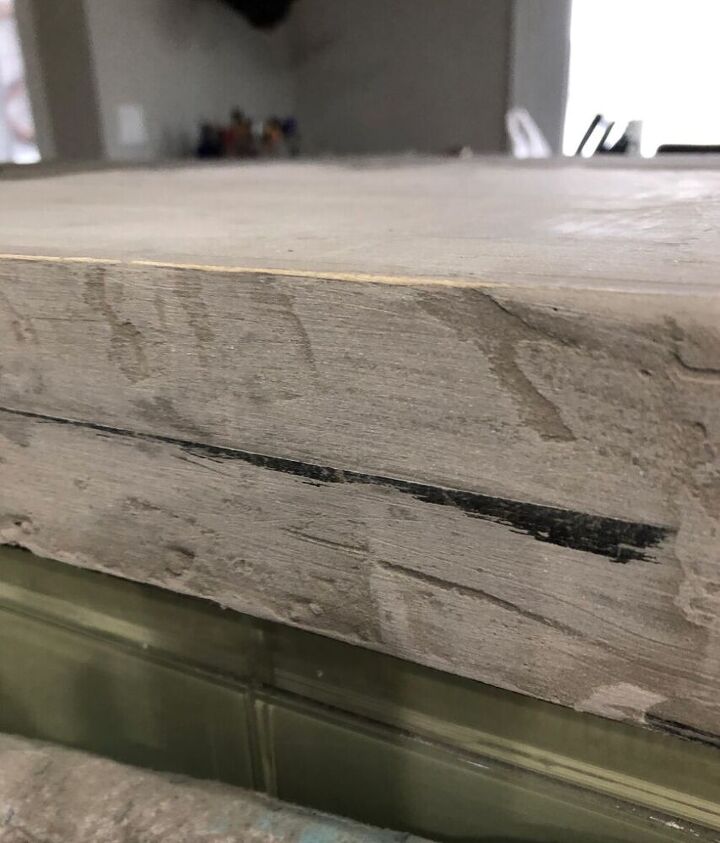
I also wanted to eliminate the beveled edge of the Formica countertop. We no longer had them with the butcher block, and a beveled edge simply screams the 1990’s. So we cut the plywood straight, and I filled the gaps with the product on the edges.

This is four coats before sanding the last coat. I think I could have gotten away with three coats, but I got a little heavy-handed with the sanding on coat three and needed to even it out a bit.
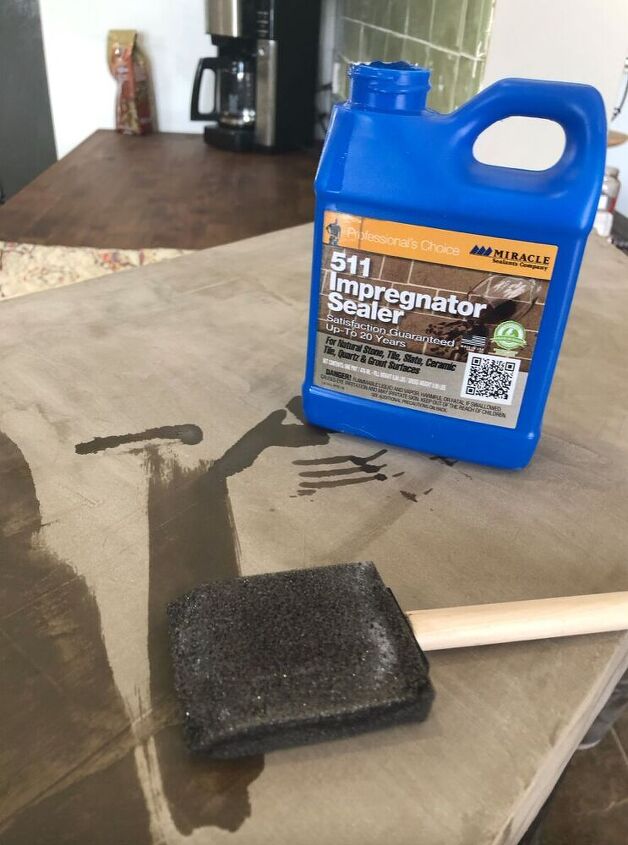
The next step was the 511 Impregnator. This is to seal the concrete so you won’t get water stains and food stains. I used three coats (letting them dry well in between applications) that I spread with the sponge applicators.
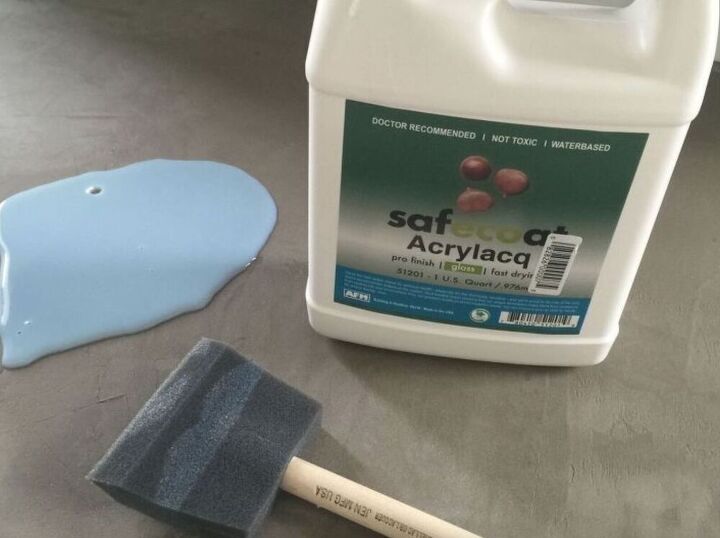
Once the 511 Impregnator is dry, you will want to seal it with a food-safe product. I choose Safecoat Arcrylacq because I used it before, and it has excellent reviews. I used 4 coats that I very lightly sanded between each coat. I chose the gloss finish for a touch of shine.
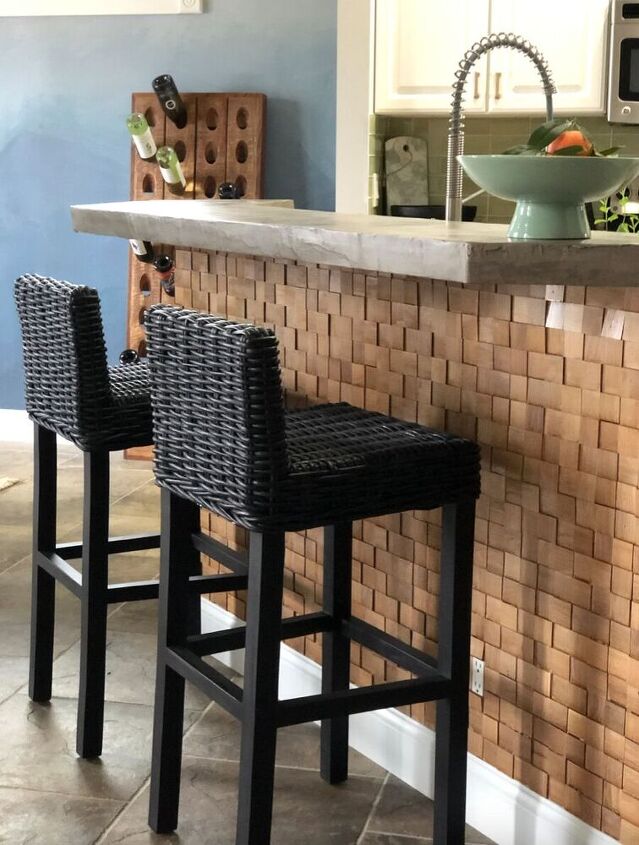
That’s all there is to it! A bit tedious, but I LOVE how they turned out!!! I left the edges a bit rough because I like the industrial feel. I caulked where the concrete met the wall. For more after pics head over to https://www.alifeunfolding.com/blog-1/2019/5/28/how-to-diy-a-concrete-bar-top-in-a-weekend


Comments
Join the conversation
-
The below referenced link comes up with a securing issue. You might want to check it out.
https://www.alifeunfolding.com/blog-1/2019/5/28/how-to-diy-a-concrete-bar-top-in-a-weekend
-
I really enjoyed seeing your project. What an improvement. How is the counter top holding up after approx 5 years.


Frequently asked questions
Have a question about this project?
What grit of sandpaper did you use? I never know when to use heavy vs fine. Fine doesn't seem to smooth enough and heavy just makes it rougher.
Hi! I was thinking about doing this to my
office built-in counter top. I have the 3/4” plywood in place now, but have been back and forth on a tile top or concrete. I’m leaning toward concrete. Yours is an inspiration!!!
Quesrion, did you have problems with the concrete sticking to the side of the counter? Or will it stay up as it dries?
Lib is, your island looks fabulous. I went to your blog to see how you’d I’d the wood on the front of the island, but couldn’t find anything. Did you use shims? How many pkgs? Did you cut them all to a smaller length?