


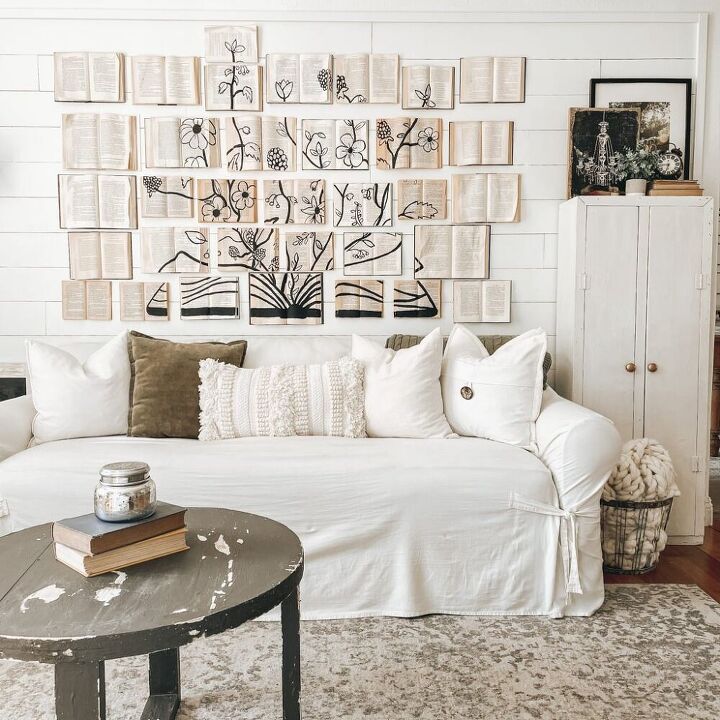
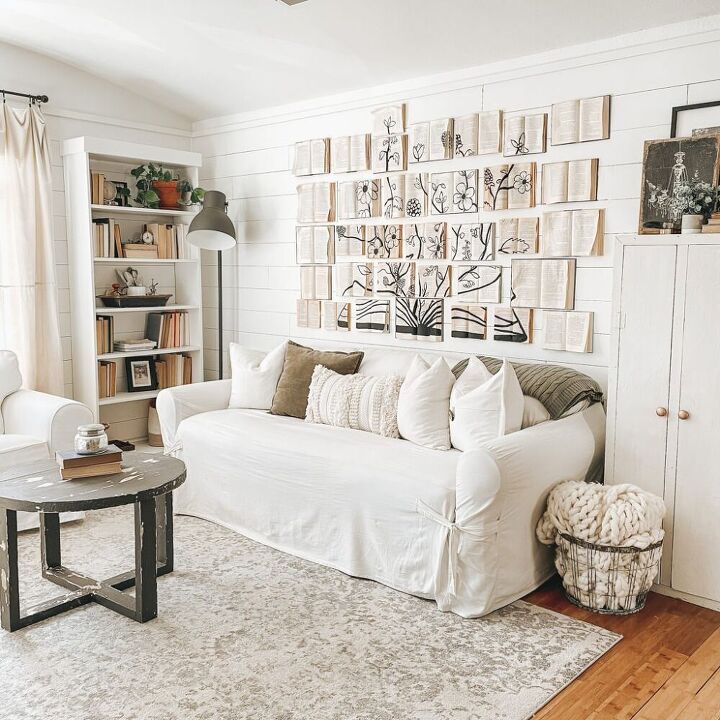
Do It Yourself Coffee Table on a Small Budget ~ $40 for the Win!


I was really wanting a round coffee table, but was not wanting to spend $200+ for it, so DIY to the rescue.
I will be explaining exactly how I made it. There are different ways that you could do certain steps. I’ll go through different scenarios at the end 🙂
Materials
- 2 1″ x 8″ x 6′ {I used whitewood}
- 2 2″ x 4″ x 6′
- 4′ x 4′ plywood {this is to add extra thickness to your table}
- 30 1 1/4″ pocket hole screws
- kreg jig
- wood glue
- 4-5 1 1/4″ wood screws
- plunge router {or you can use a jigsaw}
- clamps {to help hold your pieces in place}
- table saw {optional}
Step 1: Assembling Table Top
First, I cut the 1″ x 8″ x 6′ into 2 32″ and 2 30″ and placed the boards together with the two longer ones in the middle.
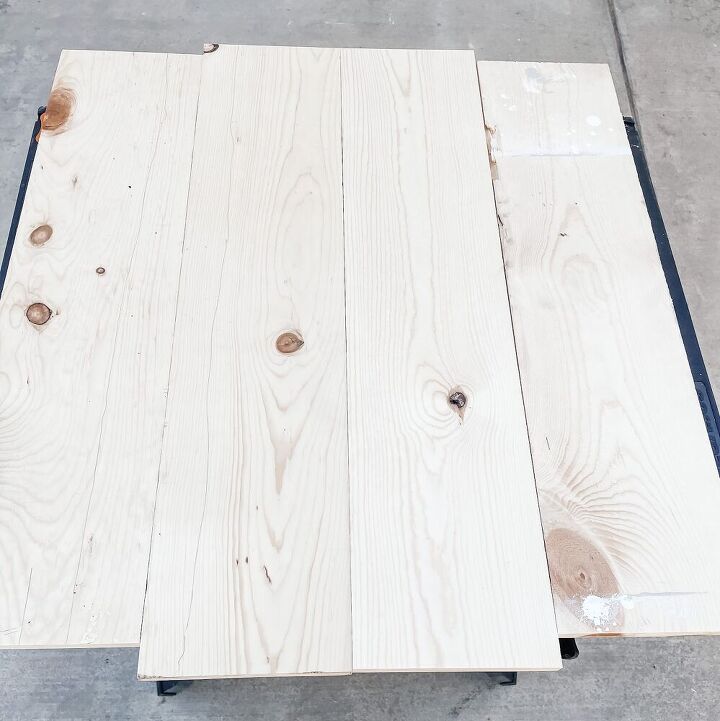
Next, I drew the arrows for where my pocket holes would be. This helped me to know where the pocket holes will go, visualize how they will screw into each other, and keep it organized. **Make sure you are drawing your arrows for your pocket holes on what you want to the bottom part of the table.
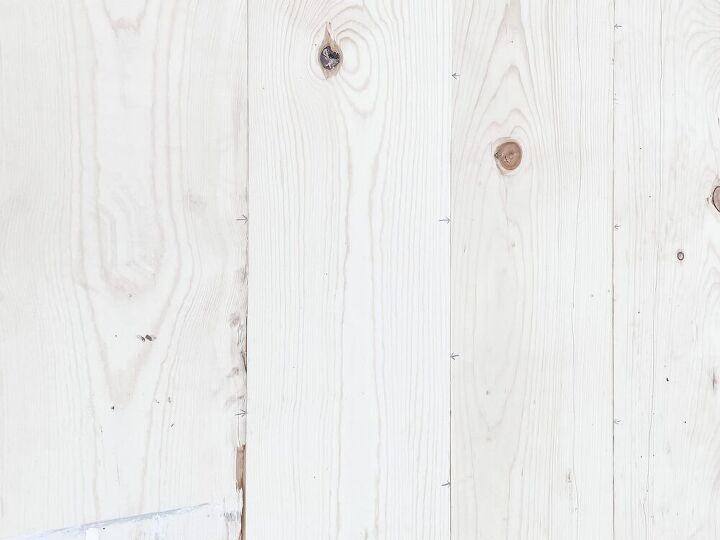
The time to drill the pocket holes has come. Make sure to follow kreg jig directions {apparently every time I’ve used the kreg jig prior to this, it happened to be set to exactly what I needed…this was the first time it wasn’t…learned something new}. The pocket holes are 3/4″ deep with 1 1/4″ pocket hole screws.
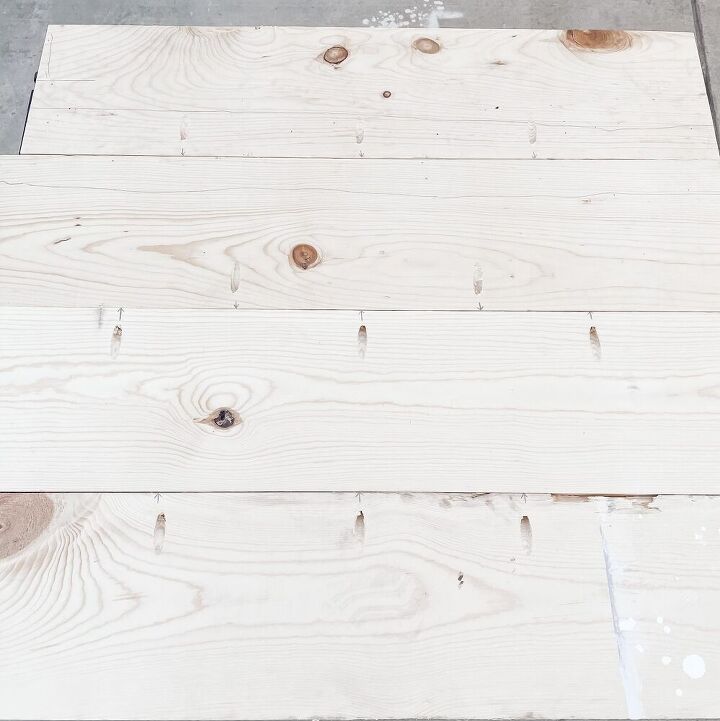
Once all the holes were drilled, I placed them in their correct placement for the 1 1/4″ pocket hole screws. I started off with the first two pieces, put wood glue in the middle, clamped it together and screwed in the screws. Then I added the third piece and did the same process. I finished it off with the fourth and final piece.
Step 2: Cutting table top
Once the boards were all connected, I used a plunge router to cut the table top. If you can invest in a plunge router, I’d highly recommend it; it has quickly become one of my favorite tools. We’ve now made 3 round coffee tables, 2 round night stands and a massive wood wreath with this awesome thing! But if now is not the time to invest in one, you can use a jigsaw to cut your circle {see end for more on this}.
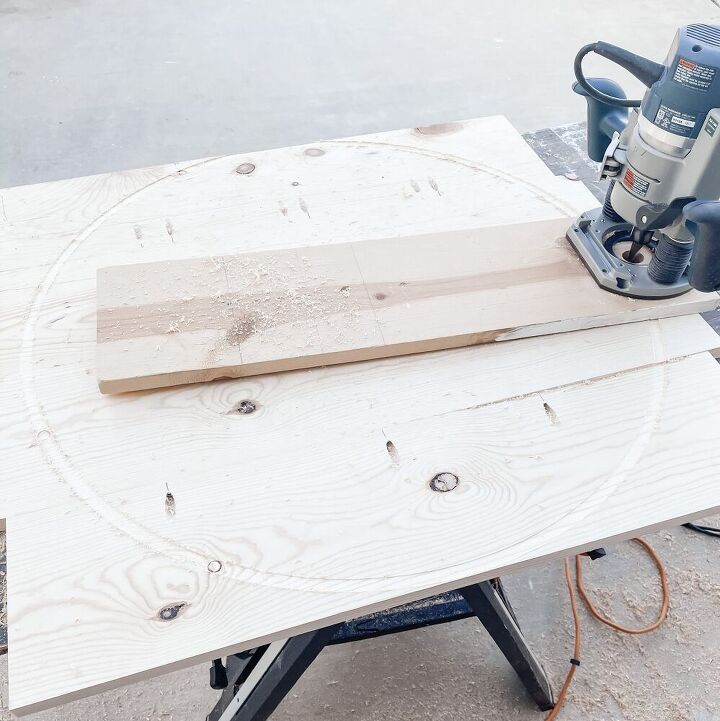
My husband taught me the best way to use this beast and I don’t think I can explain it very well. " target="_blank">Click here to see very similarly how I did it {scroll to the bottom}. The diameter of our coffee table is 29″, so the radius is 14.5″.
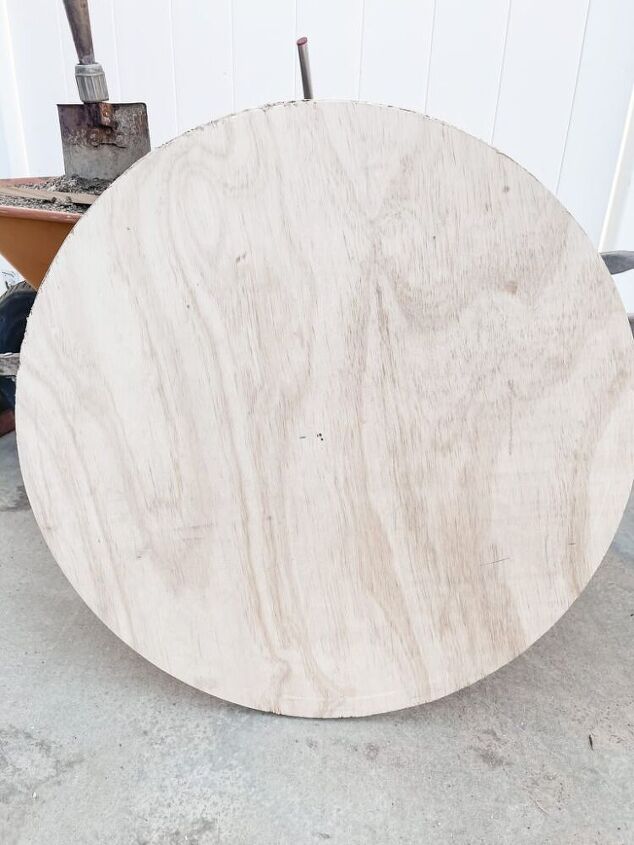
Next, I took the 4′ x 4′ plywood and used the plunge router to cut another circle of the same size.
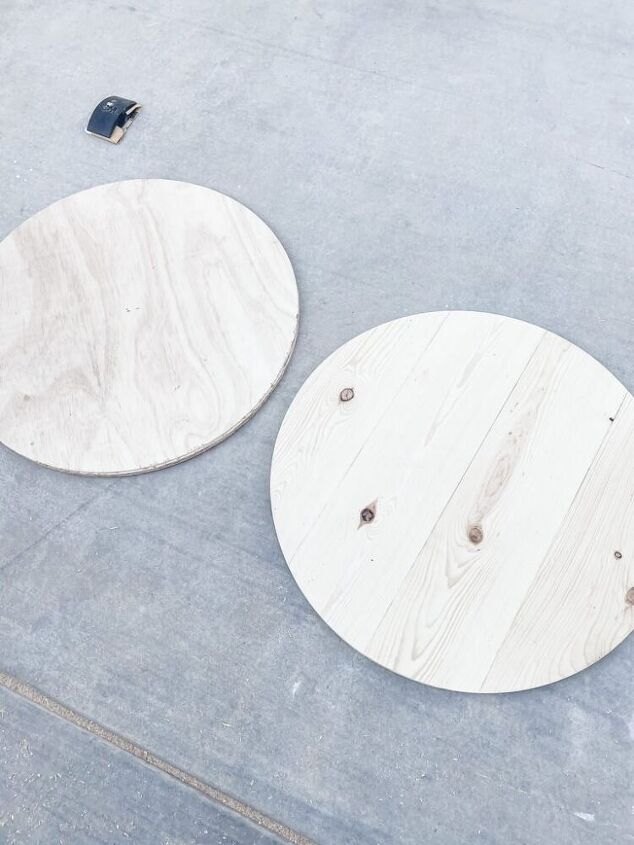
Here is what it will look like once you have both your pieces cut {see below for why I did two pieces instead of one 2″ thick}. to secure these pieces together, I put wood glue in between and screwed a few wood screws in from the bottom. The table top is now complete!
Step 3: Cutting & Attaching the Legs
Next, I took the 2″ x 4″ x 6’s and stripped 1/4″ off each side using a table saw. This is purely so I could have sharp edges vs a round edge {If you don’t have a table saw, you don’t have to do this part}.
I then cut 4 18″ for the legs. In each leg, I drilled two pocket holes {on the same side next to each other}. The pocket holes are 3/4″ deep. Once the pocket holes were drilled, I turned the table top upside down, put wood glue on, and secured the 4 legs using 1 1/4″ pocket hole screws. This part was tricky for me; it is really helpful if you have a second person and some long clamps to help secure it.

Step 4: The Base & Assembling Table
Once the legs were attached, I flipped it over to measure the base. I cut 1 of the stripped 2 x 4’s to the full length between the legs and then measured and cut 2 more for the base perpendicular to the other base.
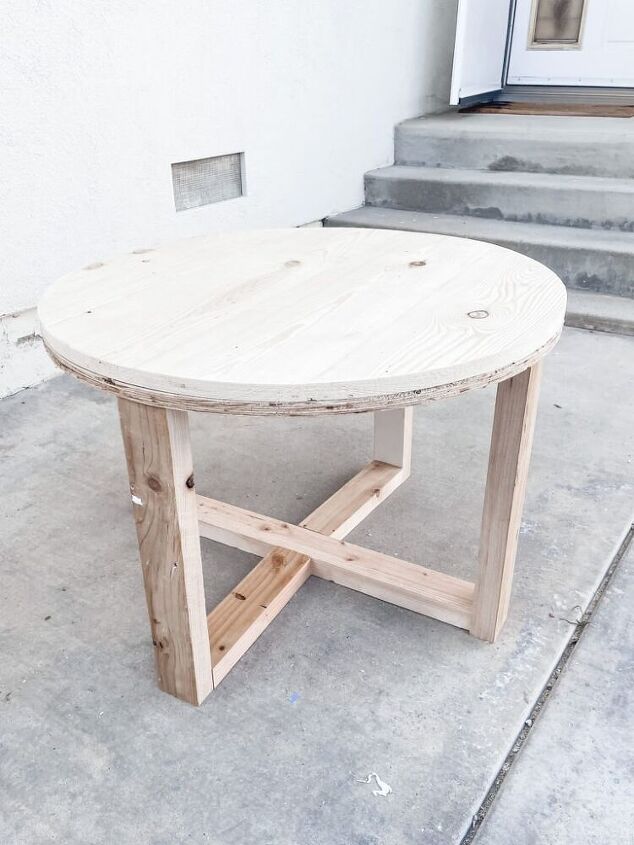
It’s time to whip out the kreg jig one more time! I drilled 2 pocket holes 3/4″ deep next to each other on each side of the 3 base pieces {there will end up being 12}. Here comes the last part! With wood glue and 1 1/4″ pocket hole screws, I attached the base.
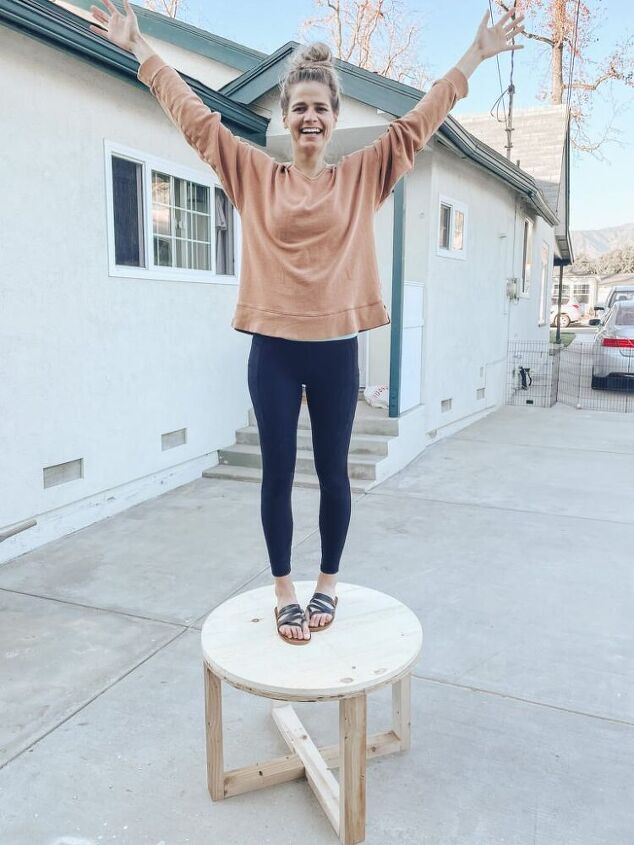
It’s done! Now is where you stand on it, do the happy dance and celebrate!
Step 5: Finishing Table
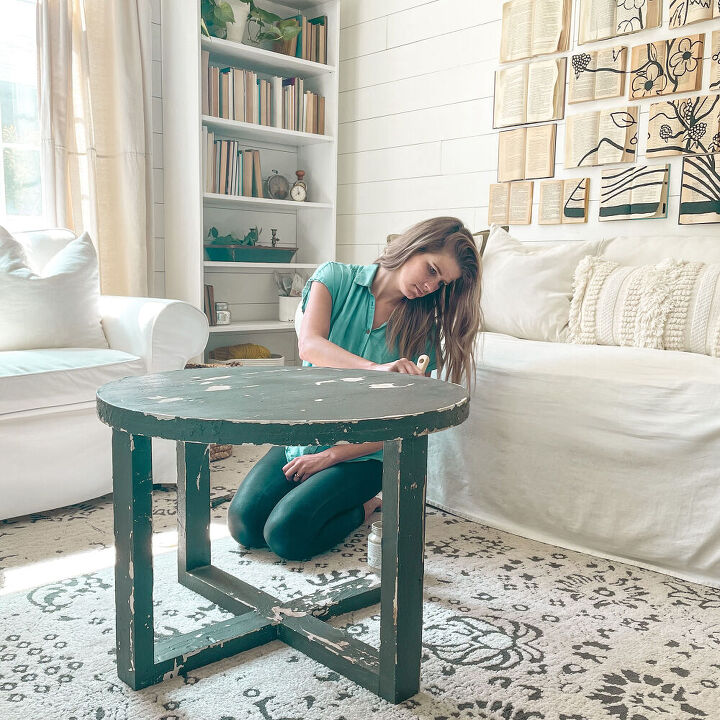
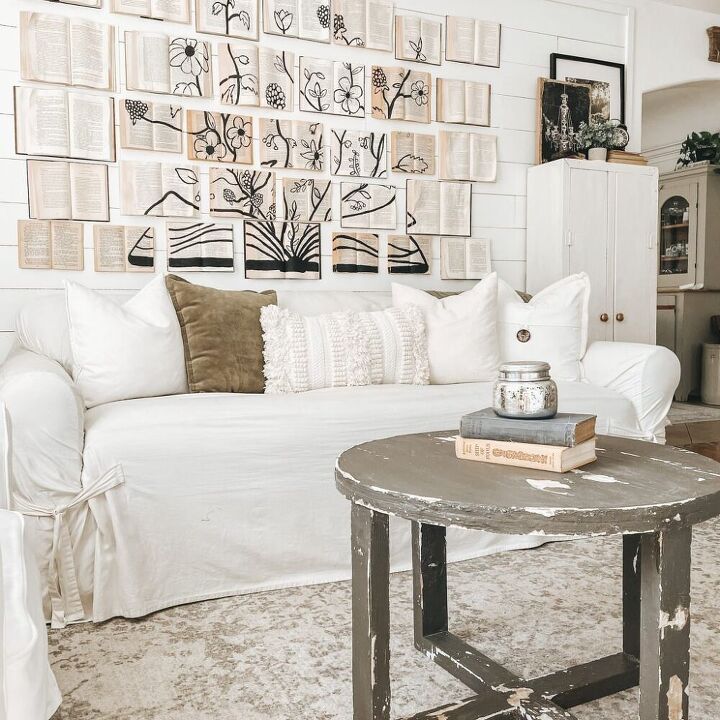
Plaster of Paris is my new favorite thing to use. I simply painted the table with primer and one layer of paint. Then I mix the plaster of paris with water {about 1 part plaster of paris to 4 parts water} and smear it all over. I made sure to really get it in the cracks of the two table top boards so it would look like 1 thick board. Once it dried, I did 2-3 more layers of paint {this color doesn’t matter too much, it is just to create thickness}. I then mix a little plaster of paris in the paint to create a chalky affect and do another layer. Once that is dry, I took a scraper and started scraping away where the thick portions were.
Other ways you could do it:
- Instead of doing 2 thinner table tops, you could do 1 thick one. You could get 2″ x 8″, but then you would have to strip the rounded edges off. I chose to not do this because the wood is a hard wood and more challenging to cut. The whitewood and plywood is softer and my preferable method when using the plunge router.
- If you don’t have a plunge router, you can simply use a jigsaw to cut your round top. I would suggest taking a pencil and string to first draw your circle. Your string length should be the radius of your table. Pin your string in the center and tie the other end to the pencil.
Resources for this project:
See all materials


Comments
Join the conversation
-
Great table! Beautiful room!
-
Like the style of the table, but the distressing part looks like you just picked up an old discarded, scuffed up table out of a dumpster!!!


Frequently asked questions
Have a question about this project?