


DIY Farmhouse-Style Sign
Learn how to turn a dated canvas print into a stylish DIY farmhouse-style sign. You can make one in just a few easy steps!
Hello and Welcome to My Family Thyme! My name is Lynne and I am so happy you are here!
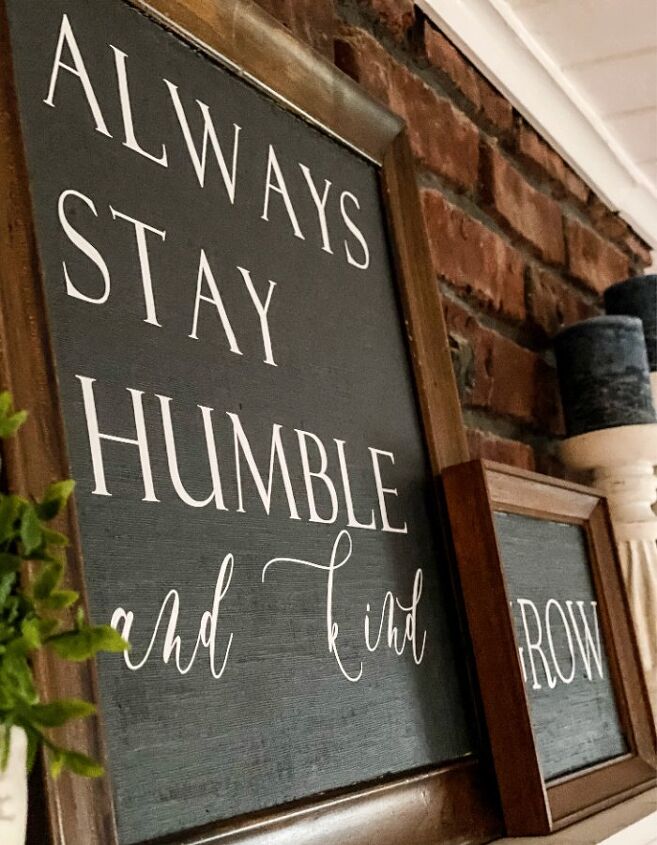
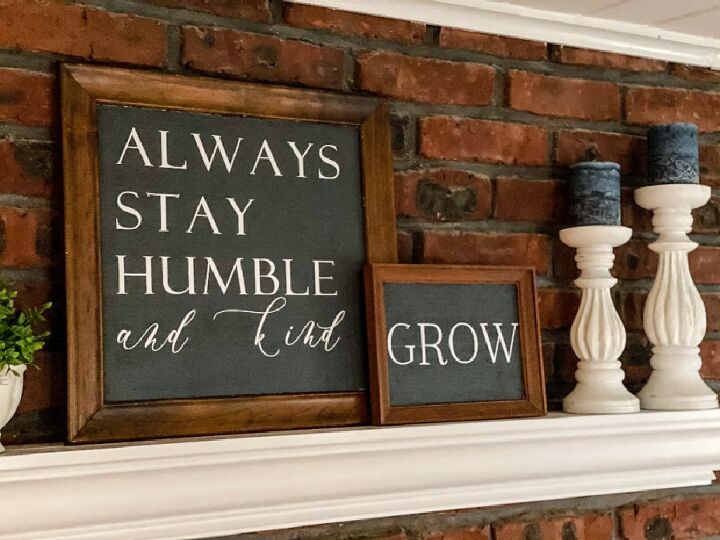
I have been in the process of cleaning out some things that had belonged to my grandparents and my mother and came across these canvas pictures. I remember them hanging on the wall in the dining room of our family home. Even though they aren’t my style, I couldn’t bring myself to part with them. Why not repurpose them? With just a few simple steps, these dated canvas pictures were transformed into these farmhouse style signs that decorate my mantle. These canvas pictures are commonly found at your local thrift. Pick up an old canvas picture, along with a few supplies and you can make a farmhouse-style sign too!
Materials:
- canvas picture with frame
- wood polish or wax
- cloth
- painter’s tape (I used Frog Tape)
- paint
- paint brush
- Vinyl Lettering (If you don’t have a Cricut Explore Air Machine to cut your permanent vinyl, you could always use pick up some letter stickers at your local craft store. If you do cut your letting with a Cricut, you will also need a cutting mat and transfer tape.)
- pencil
- measuring tape or ruler
How to Make Your Sign
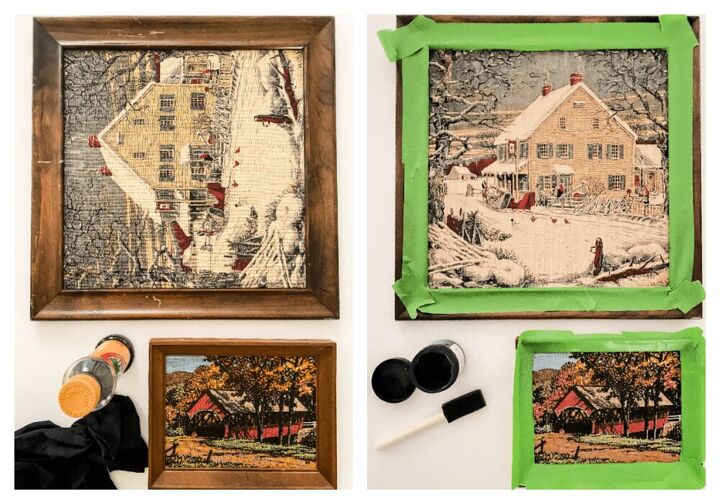
- Clean your picture and frame. I first used wood polish and then waxed the frames, wiping off any excess with a clean, dry cloth.
- Next, using painter’s tape, tape off the frame.
- Paint your canvas. You can use chalk paint or acrylic paint.
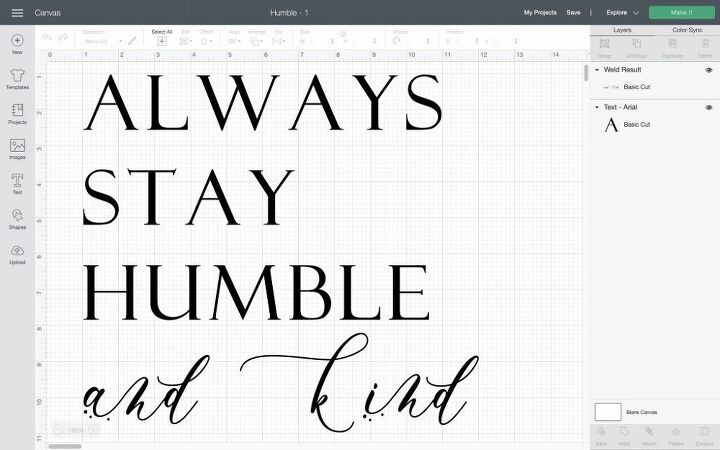
- While the canvas was drying, I used the Cricut Design Space website to design and print lettering. If you do not have access to a Cricut Explore Air Machine, letter stickers can be purchased on Etsy or from your local craft store.
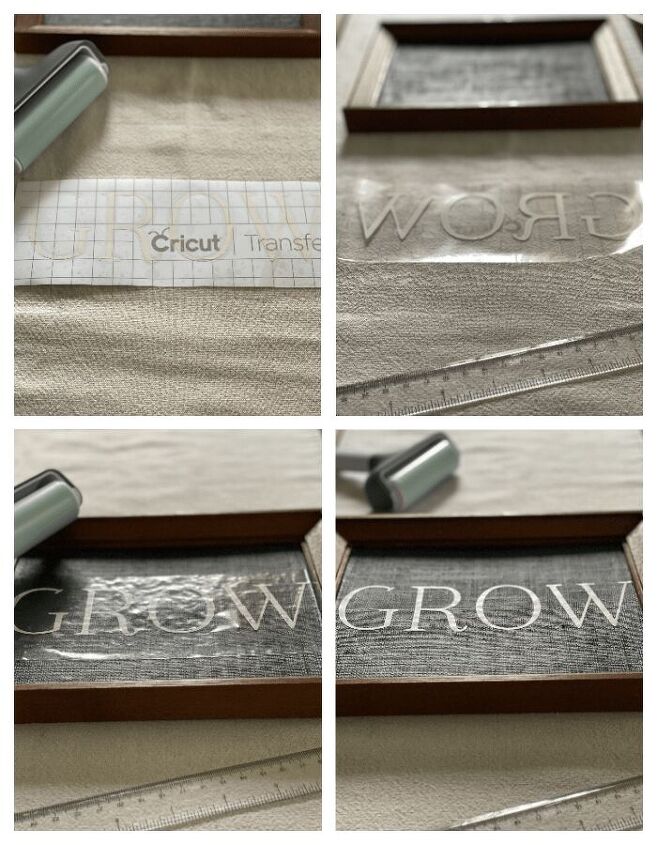
- Decide on the placement of your lettering. Measure and draw light lines onto your canvas with a pencil so that you adhere your letters straight.
- For Cricut letters, you will need to weed your vinyl, which means that you need to take the excess vinyl away so you just have your lettering left. Adhere the transfer tape and remove the backing of the lettering. Note: I always use this Cricut roller. It helps to ensure that projects are smooth. I use it when applying vinyl to the cutting map, the transfer tape to the vinyl, or the vinyl to the project. It’s an amazing tool.
- Apply the lettering to the canvas. Smooth and carefully remove the transfer paper.
- Enjoy your new sign!
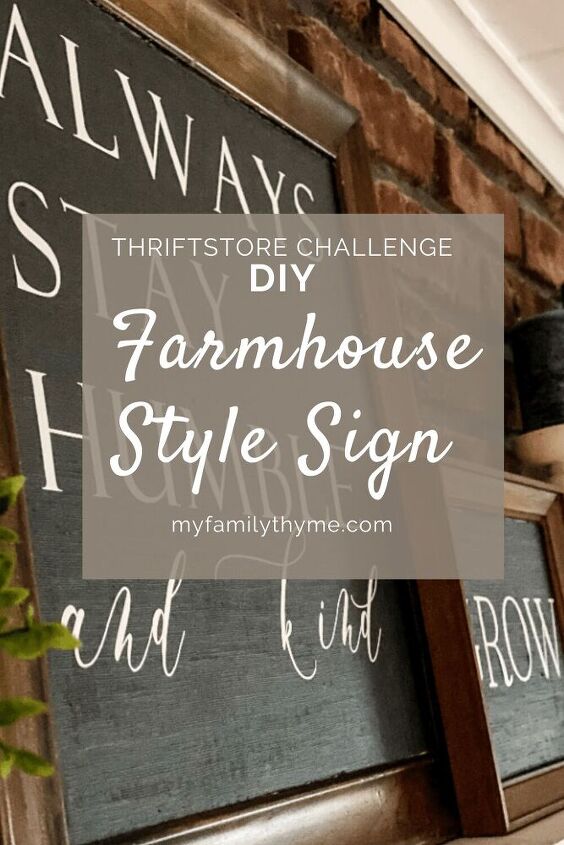
If you would like to save this post for later, pin it here!
Thank you so much for visiting today! I would love to connect with you on Facebook, Instagram, Pinterest, or on the blog!

Comments
Join the conversation
-
What an amazing transformation!
Where do you purchase your paints?


Frequently asked questions
Have a question about this project?