


The Secret to Getting Marble Counters on a Budget
Thanks to the makers of the Giani Marble Countertop Kit for partnering with me on this post.

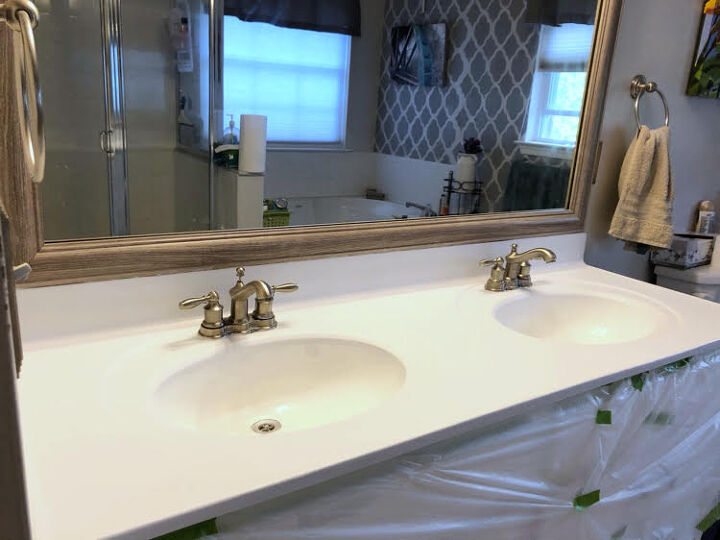
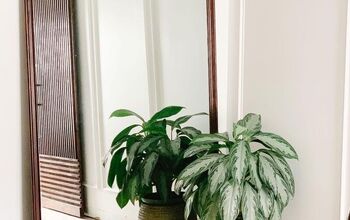
My husband and I have owned our home for about 19 years now. Some things in our house are starting to show their age. With two kids entering college in the fall, I have been looking for ways to update my home on a budget. Luckily, I have found a fantastic way to update kitchen and bathroom counters. I recently used a Giani Carrara White Marble Epoxy Countertop Kit on my master bathroom’s old cultured marble countertop and love it! My hand-painted marble veining surprisingly looks realistic, and the white marble epoxy coating provided with the kit makes my counter look so new and glossy!
I am so happy that I have discovered the Giani Carrara White Marble Epoxy Countertop Kit!
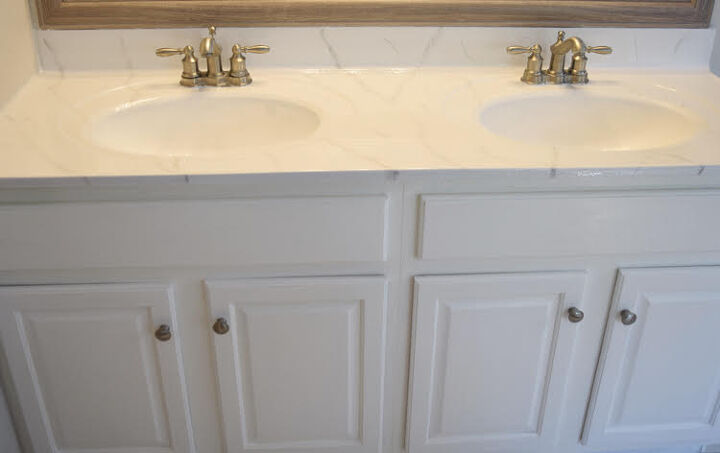
Painted White Marble Epoxy Countertops
The beauty of using the Giani Carrara White Marble Epoxy Countertop Kit is that the project is no harder to complete than a simple paint job! Even applying the epoxy coating, which I thought would be hard, was quite easy.
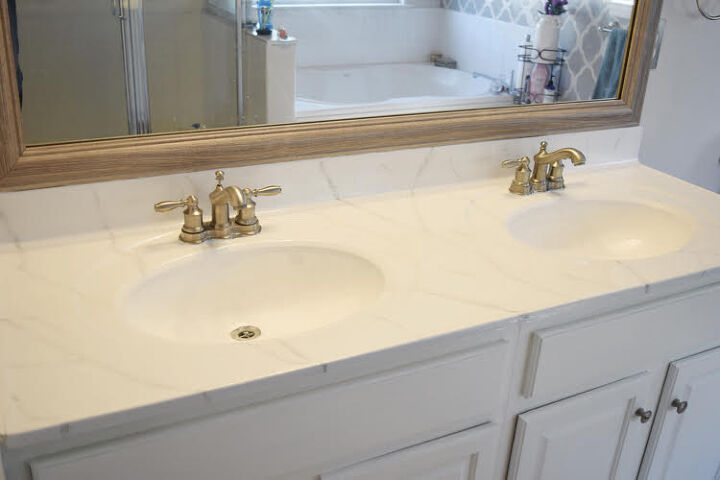
Before I stared my project, I used a product called Ekopel to resurface the once yellow looking sinks in the bathroom vanity. The sinks are now a brilliant white!
To start my project, I first sanded my countertops by hand with some 220 grit sandpaper to get some of the gloss off my old countertop. It wasn’t necessary to strenuously sand the countertop – only a light sanding was needed.
After I sanded the countertop, I scrubbed the counter clean with a Brillo pad. I used some wet paper towels to completely clean off the counter afterwards. I needed to make sure that the counter was completely clean and didn’t have any cleaning residue, etc., left on the counter. I purchased my Brillo pads and sandpaper on Amazon.
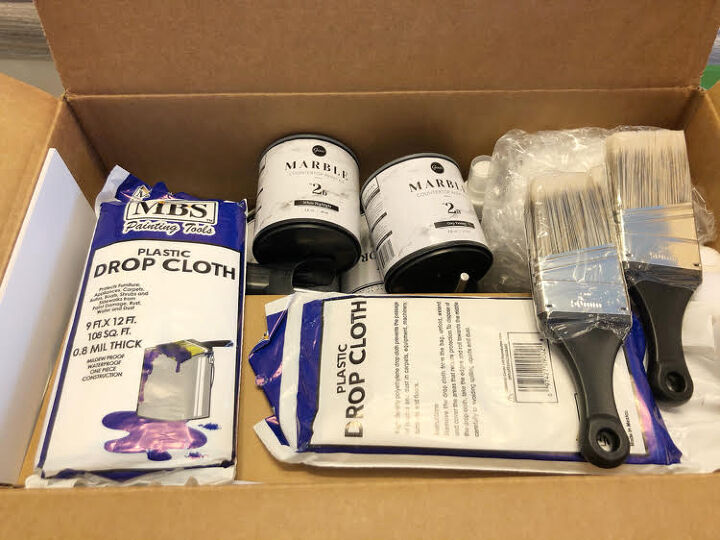
My Giani Carrara White Marble Epoxy Countertop Kit came with just about everything I needed for my countertop painting project, making my project so easy!
The paints are marked by step (1,2,3), and the white marble epoxy kit contains supplies needed to complete the project – paint brushes and rollers, paints, stirring sticks, tarps, a spray bottle and the two-part glossy top coat.
Painted White Marble Epoxy Counter Supplies
1 Giani Carrara White Marble Epoxy Countertop Kit
Brillo pads
220 grit sandpaper
Paper Towels
Frog Tape
How to Paint DIY White Marble Epoxy Counters
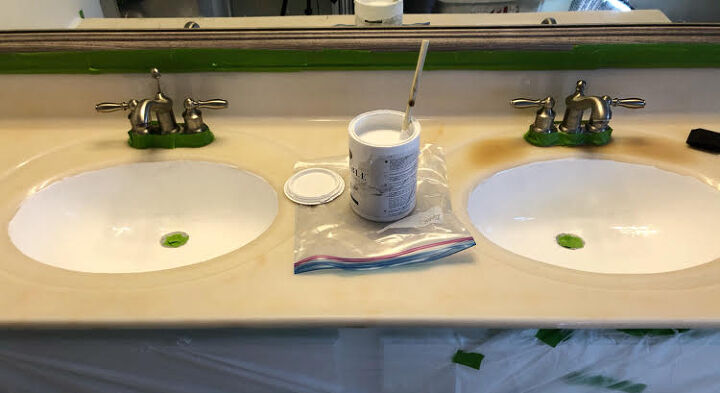
Once I had my counters prepped, my first step was to use FrogTape to tape off the wall, faucets, the bathroom mirror and the under part of the bathroom counter.
Then I set about applying the base coat from the Giani Carrara White Marble Epoxy Countertop Kit. My master bathroom vanity is a double vanity, but it isn’t that large. Getting the first base coat down for my painted marble countertop project didn’t take very long.
I let the base coat dry for a few hours before applying a second coat. I let the second coat dry for a few hours before proceeding to the next step.
Then it was time to paint on the marble veining for my white marble epoxy counters! I used the paper practice board from my Giani Carrara White Marble Epoxy Countertop Kit to practice painting the veins.
I have to admit that I dd terribly when I painted the veins on the practice board. I was almost afraid to start painting the marble veins on my countertop.
But it turns out that painting veining on an actual countertop is much easier than painting them on the provided paper practice board. The veining blends so much better on a Giani base coat of pant.
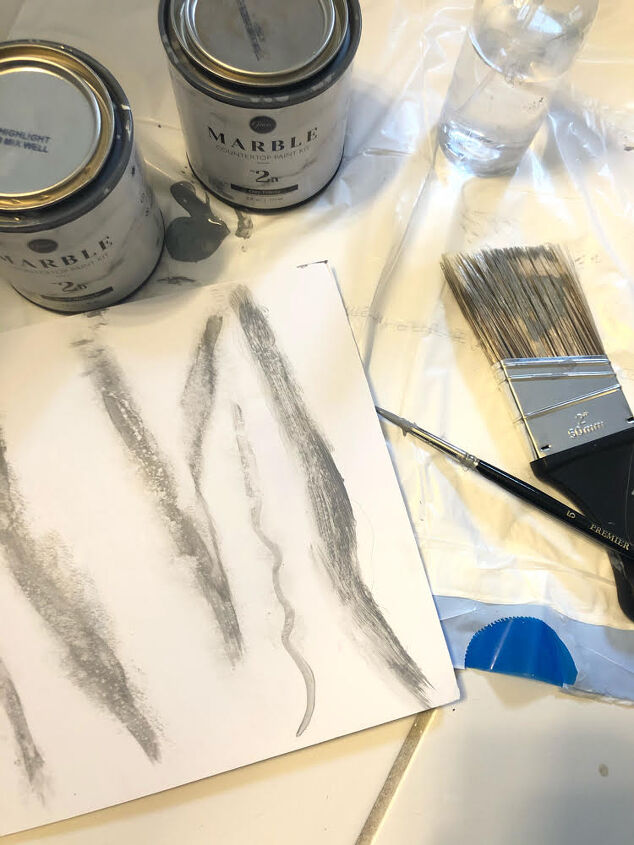
Once I started working on the actual countertop, my technique got a lot better. I made sure to draw out a rough draft of my countertop (on paper) to show how I wanted my veining to look.
Before my project, I pinned a few examples of beautiful Giani marble epoxy counters on my bathroom Pinterest board. There are so many examples of beautiful Giani marble epoxy counters on Pinterest!
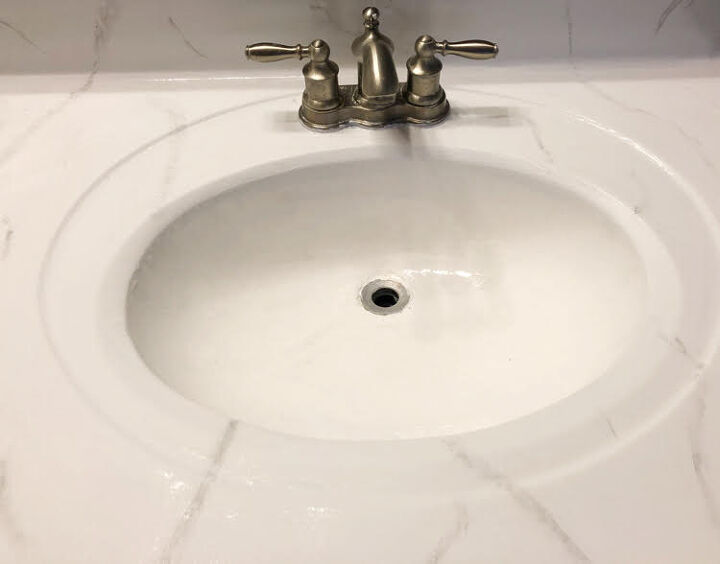
After I was happy with the veining on the counter, it was time to mix one of the cans of epoxy with a can of activator from the kit. (The kit comes with 3 cans of epoxy and 3 cans of activator.) I poured a can of activator into a can of epoxy and stirred it for 3 minutes and 30 seconds.
I used a foam brush to paint the epoxy on my counter’s mini backsplash. I worked on the counter in sections.
At first I poured on epoxy on a small section and used one of the kit’s included soft rollers to roll out the epoxy. But I found that I got a smoother application using my foam brush, so I used a foam brush to cover the rest of the counter and its edges with epoxy.
The next day I used the kit’s included sheet of extra fine sandpaper to sand down any air bubbles I found.
I followed up the other day with another coat of epoxy, using another of the kit’s cans of epoxy and a can of activator.

Before I added the beautiful Giani epoxy marble painted countertop to my bathroom, I painted the previously oak vanity white with Americana Decor Satin Enamels Paint by DecoArt (in Pure White).
Resources for this project:
See all materials


Comments
Join the conversation
-
For those of you wanting to do this, if you will use a feather for the veining, it will look like REAL veining. Twist and turn the feather with the paint on it. (You might even dilute the paint a bit so you get a really nice effect.) Test on a piece of cardboard so you know what effect you want. I did this on my girlfriend's sink and it came out spectacular. Make sure to use a nice hot blow dryer on the the bubbles that form on the epoxy.
-
It does look nice but I think you should have discussed about NOT using the product in the sink since it doesn't withstand water. This only came up when someone asked you about it. Guess you have to be real careful when cleaning the counter, too.


Frequently asked questions
Have a question about this project?
Did you do the veining in the sink bowl?
I have an all-in-one sink and counter. They are both old and ugly. Can I use this product in my sink bowl too?
Can you use this over laminate countertops ?