


DIY Kitchen Remodel
One of the longest ongoing projects in my house has been my kitchen remodel! For five years I have worked to achieve my dream kitchen. I made mistakes along the way and it took me some time to figure out what I wanted, but it was worth it in the end. Everything in this remodel was done by husband and I - with the exception of moving two outlets that were hardwired into the floor - so it was a true DIY kitchen!
The remodel cost around $3000 with an additional $4500 going to appliances that died along the way. Full details (colors, cost break down and product information) are on the blog.
Update: Y'all have been amazing with all of your feedback. The three biggest questions have been 1. Where is the microwave 2. Why did you cover that window 3. How did you make that window covering. I thought I'd answer them here for you.
1. Microwave: I moved it to the island by converting junk drawers to a slide out drawer.
2. I covered the window because of anpeeping neighbor. Our house sits on the side of a hill, so that window is at street level. A neighbor made comments about the work we've done in the kitchen yet he's never been inside our house. I made a curtain that covered the arch part (if you look really, really closely you can see the bar in the middle where the curtain ties are). It looks like I covered more of the window but 90% of what I covered is the wall.
3. The shade was made using my No-Sew Window Tutorial. You can find it on my Hometalk page or at my website (http://www.therozyhome.com/blog/no-sew-tie-up-shades). Hope that helps and thanks again for all of the wonderful comments!
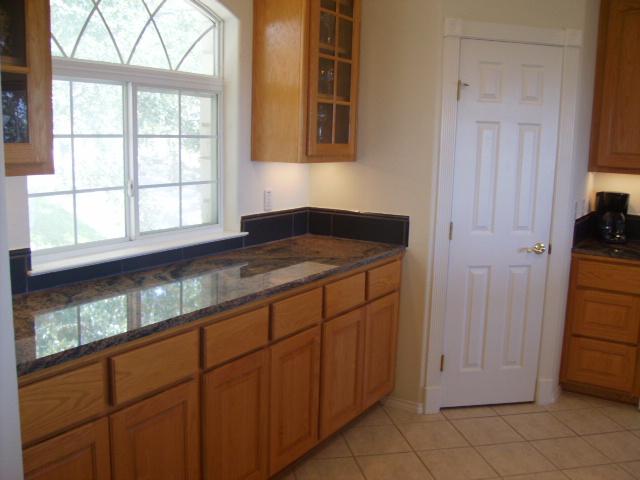
Before: Window area
Before: Overview
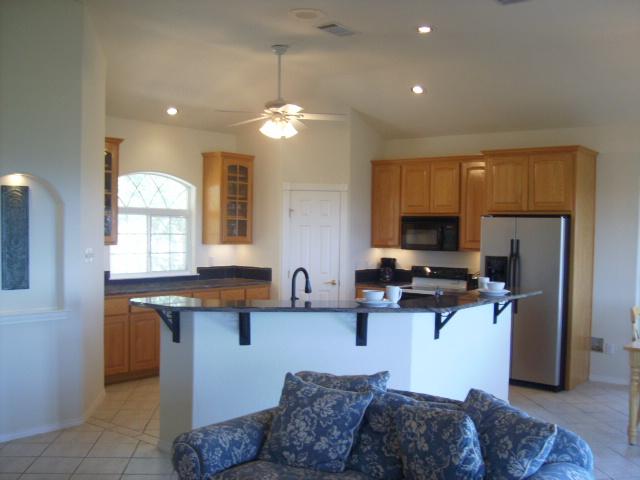
After: Overview
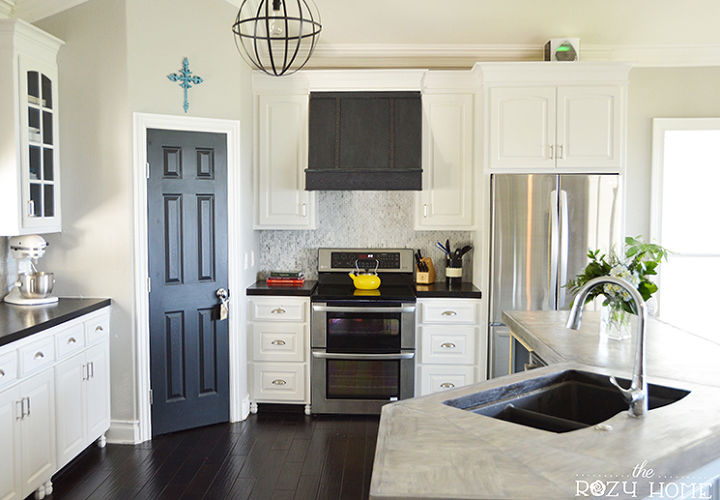
After: Range area
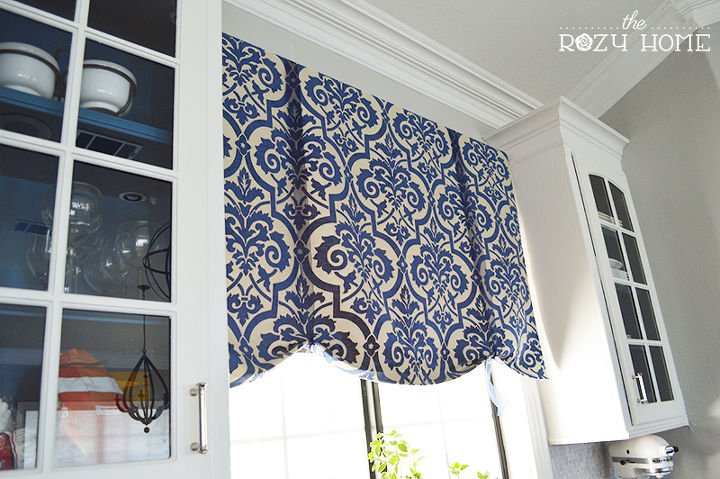
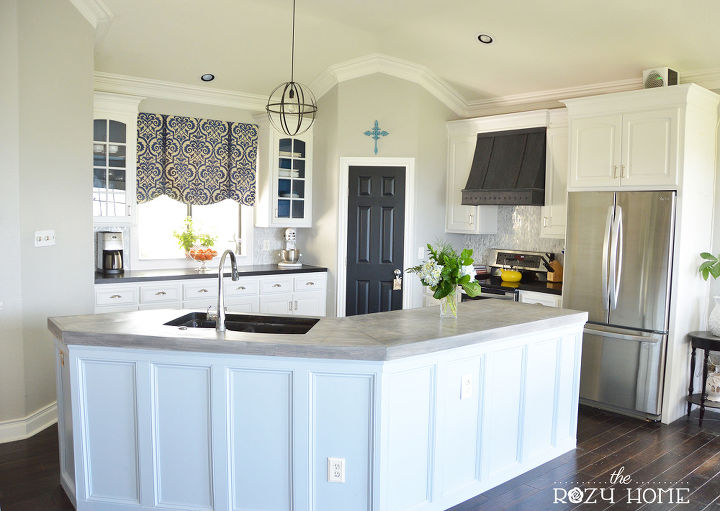
After: Window area (I used my No Sew technique on the window covering).
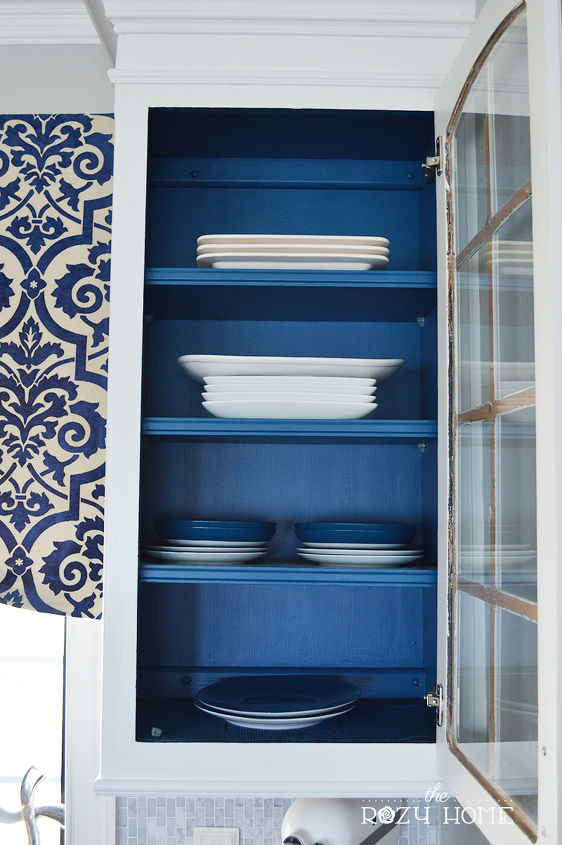
I painted the inside of the cabinets with a color I created.
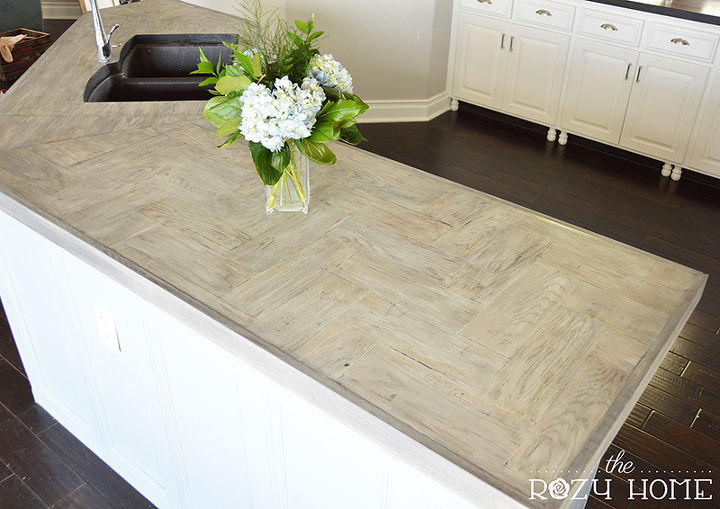
I did the island in a herringbone pattern and then white washed it.
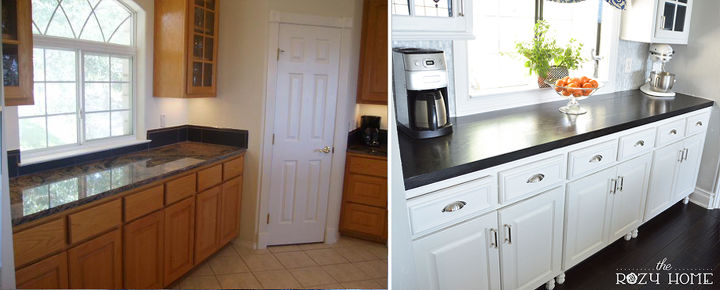
Before/After: Window area
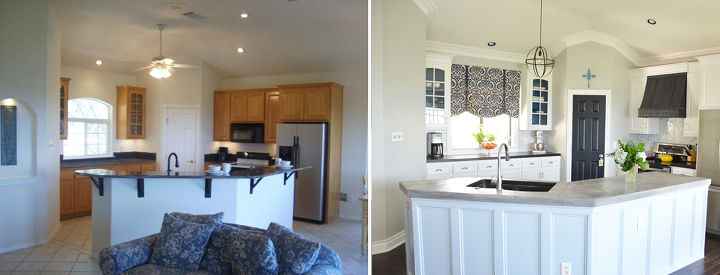
Before/After: Overview
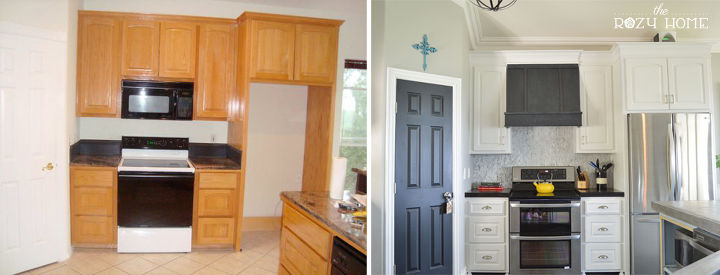
Before/After: Range area

Want more details about this and other DIY projects? Check out my blog post!
Comments
Join the conversation
2 of 264 comments
-
I love the way you used the blue. What a truly bright idea. You are gifted in this field my friend. Love what you have done. Bravo
-
I love kitchen remodels! I feel kitchen remodels can really add some value to your home. I really like the overview of this new kitchen. I love the blue and grey in the kitchen. http://www.lincolncabinet.com/kitchen_remodeling.html


Frequently asked questions
Have a question about this project?
Did you replace the granite countertops? and how did you extend the base of your island meet the edge of the countertop? I'm having trouble getting on your website