


Image Transfers on Painted Furniture--go BIG or Go Home!
4 Hours
Easy
I love to add images to my painted furniture. It really adds that special something to the piece. But I don't just print on an 8.5"x11" piece of paper. I print on Staples Engineer prints!
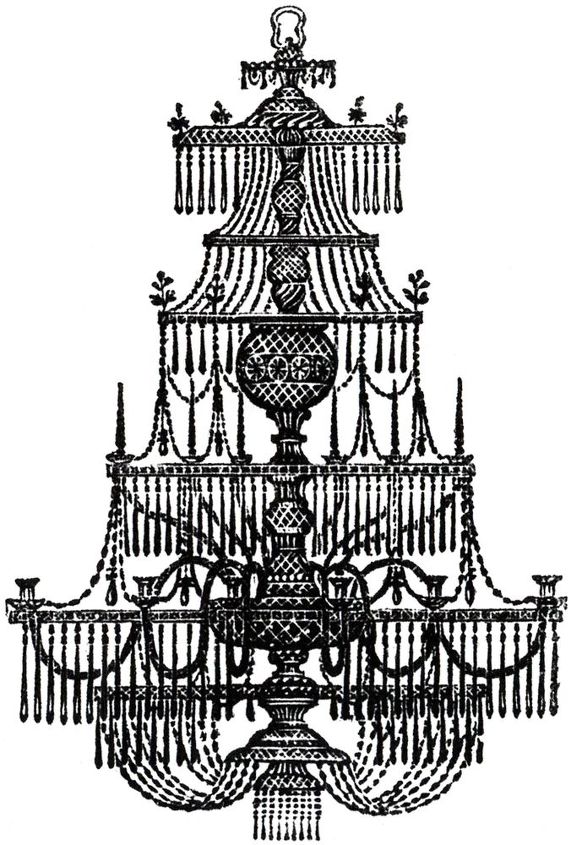
I used this this amazing chandelier image from The Graphics Fairy that I saved to my computer. http://thegraphicsfairy.com/vintage-halloween-pictures-chandeliers/
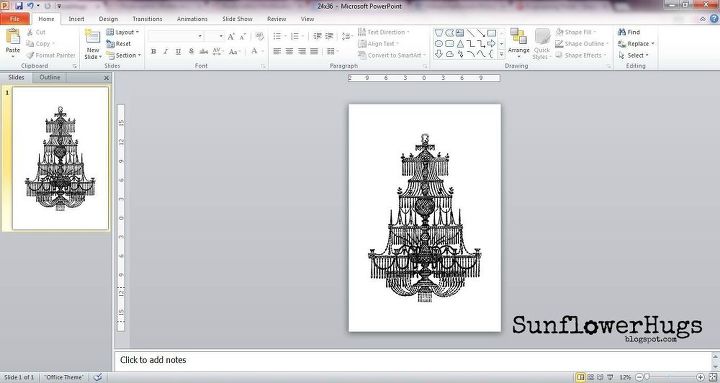
My table top measured 18"x27" and so the 24"x36" size engineer print from Staples would work for me to make the image fill the table top.
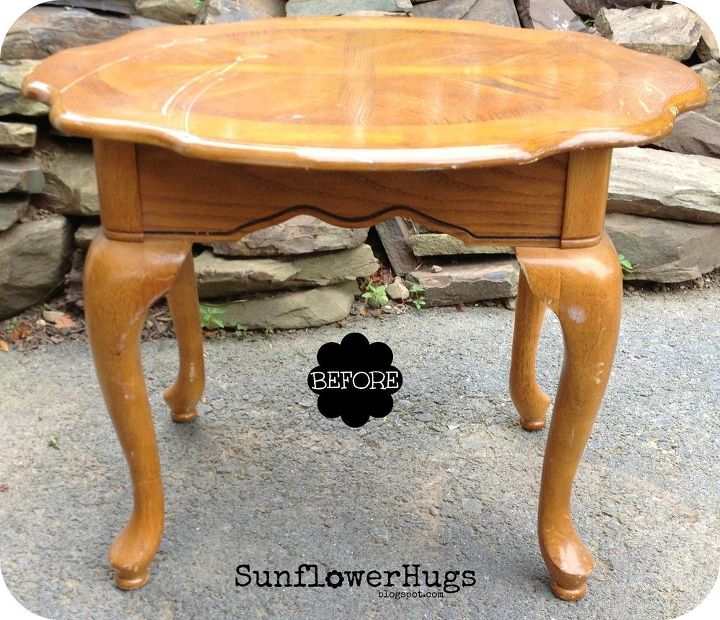
Here is the before photo of the table I was going to put it on. I painted the whole thing with 2 coats of DIY chalk paint in white. I then painted the legs in a grey color. After it was completely dry I distressed the paint.
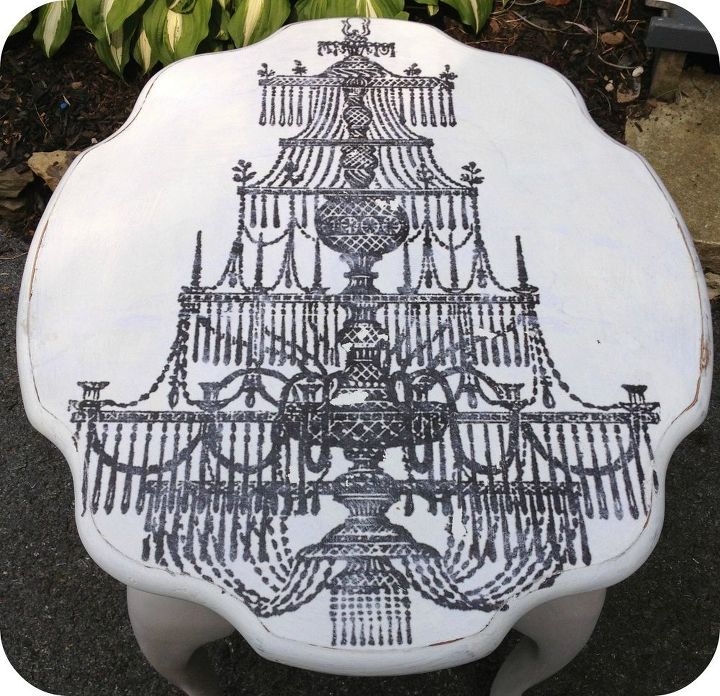
After the paper dries, you need to wet the paper and rub it away to reveal the image. I got a bowl of water and dipped my fingers in and then swirled them on the paper to remove it. You have to do small areas to keep the paper wet, so It is time consuming, but very easy. Just don't be too rough or the image may come off too. You can see some spots in the center where it came off.
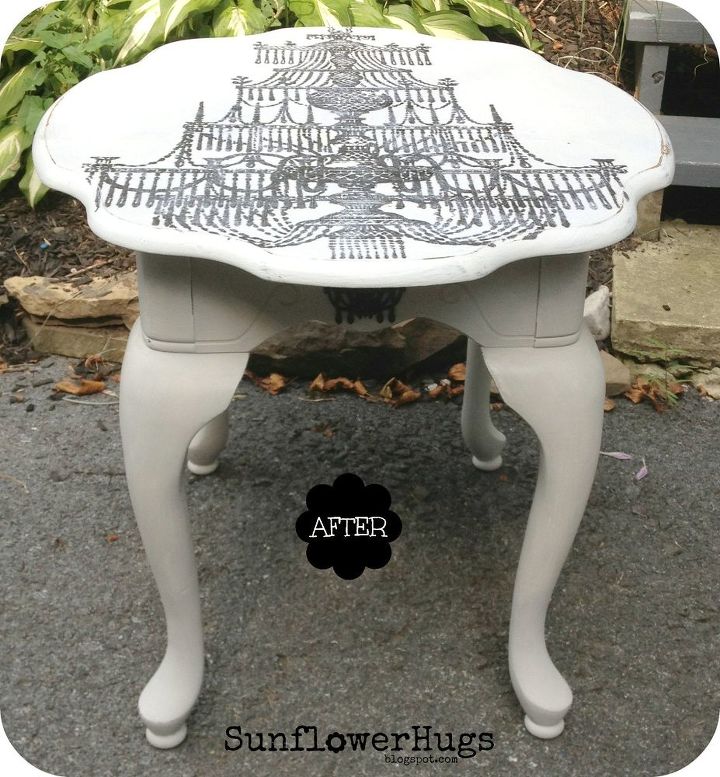
When it is totally dry and the paper is all gone, you can sand it down a little since the pulp of the paper will remain. Then just seal the top with either a coat of Mod Podge, or furniture wax.

Want more details about this and other DIY projects? Check out my blog post!


Frequently asked questions
Have a question about this project?