


How to Use a Stencil - Table Makeover
Medium
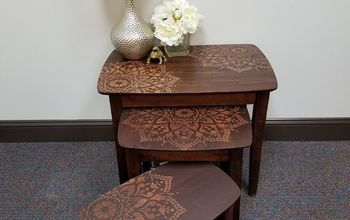
I got this little table a while ago and it just looked plain, so I decided to use a stencil to bring it back to life and make it a bit more exciting. I also wanted to try out the layered technique using black and white chalk paint.
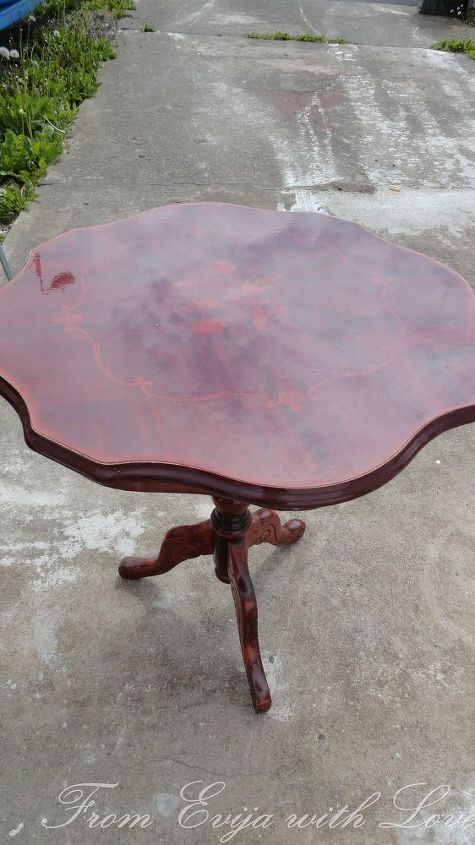
This table had a shiny veneer top, so I decided to try out Annie Sloan's chalk paint and used layered technique.
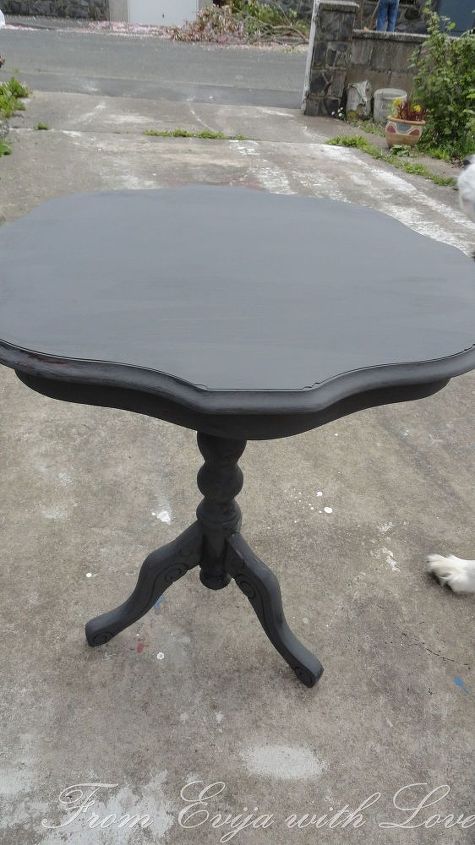
I put the darker colour on the base. Depending what effect you want to achieve, I just wanted to distress the edges so could have easily just painted the edges in black.
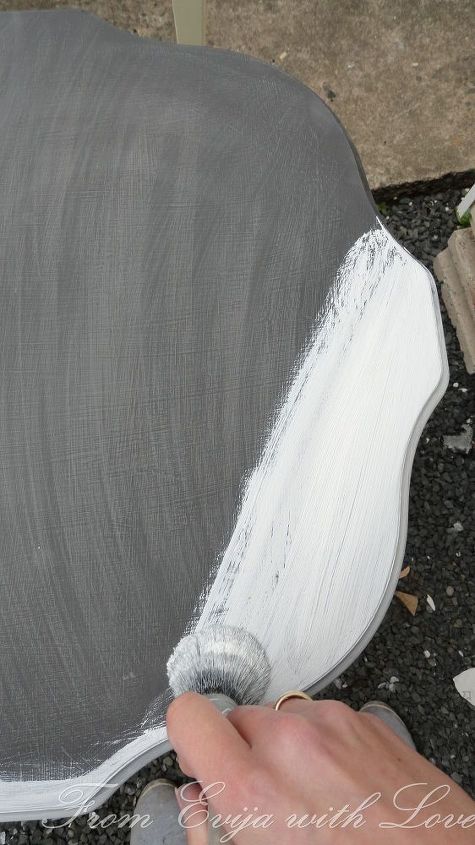
I then sanded and painted over using Annie Sloan old white, I used 2 coats and sanded in between.
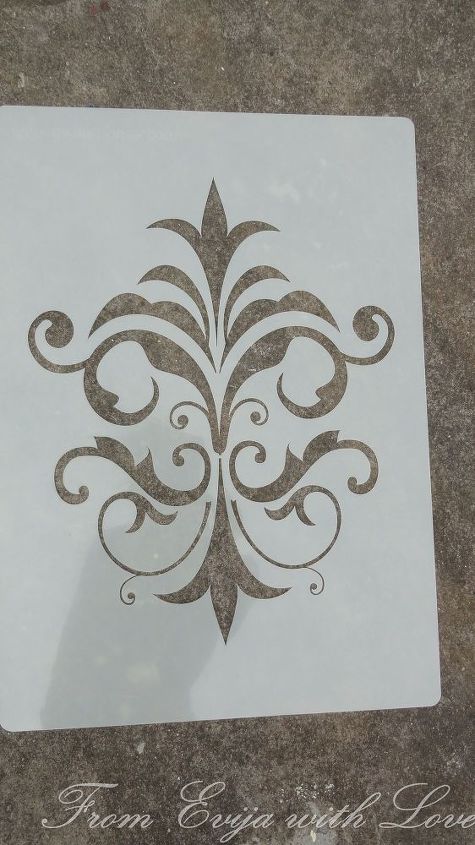
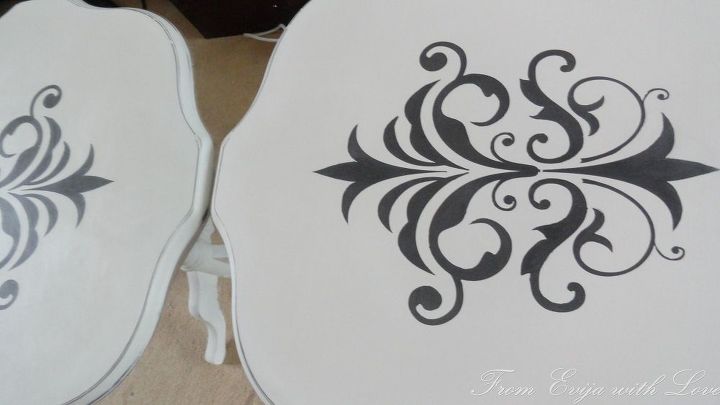
Choose your stencil
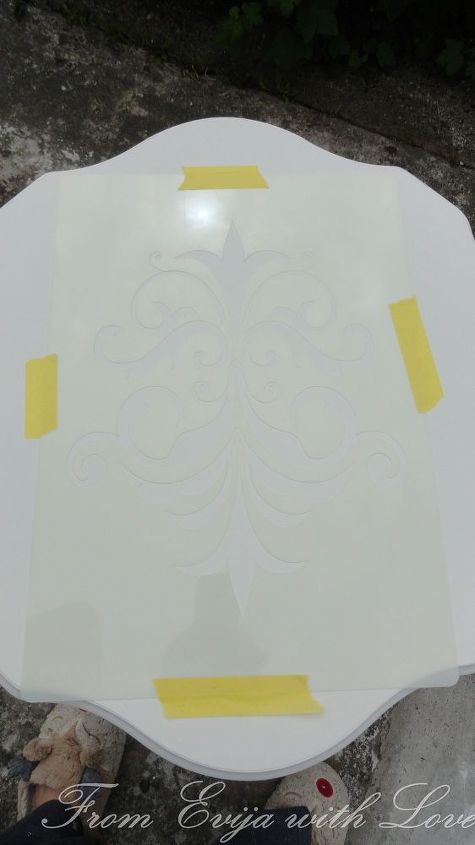
Tape the stencil to the table, so it doesn't move
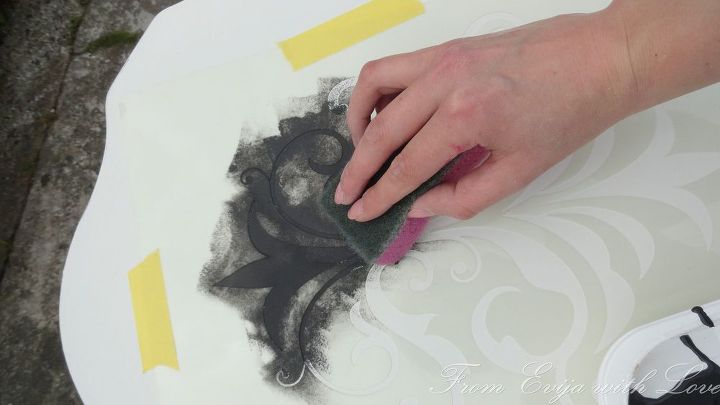
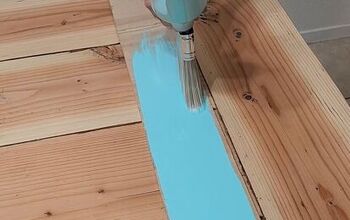
I put a little bit of paint in an empty plastic tray and used a sponge to dab the paint on the table. It is best to use very little paint to make sure it doesnt run through
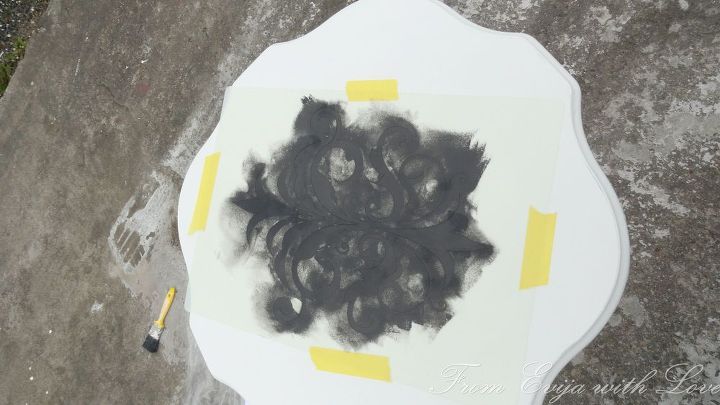
Cover the whole area, and remove the stencil, you don't need to wait until it is dry to remove it, just make sure you don't smudge it.
I then distressed the sides, waxed the table and buffed away.
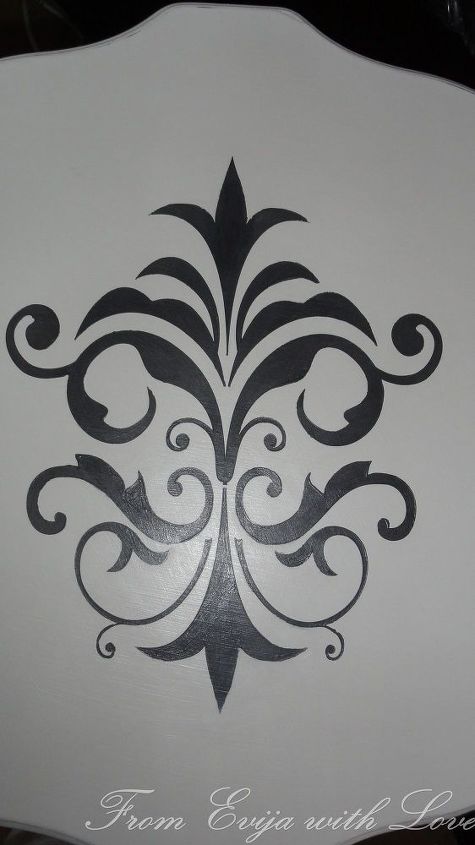
This is what it turned out to look like.

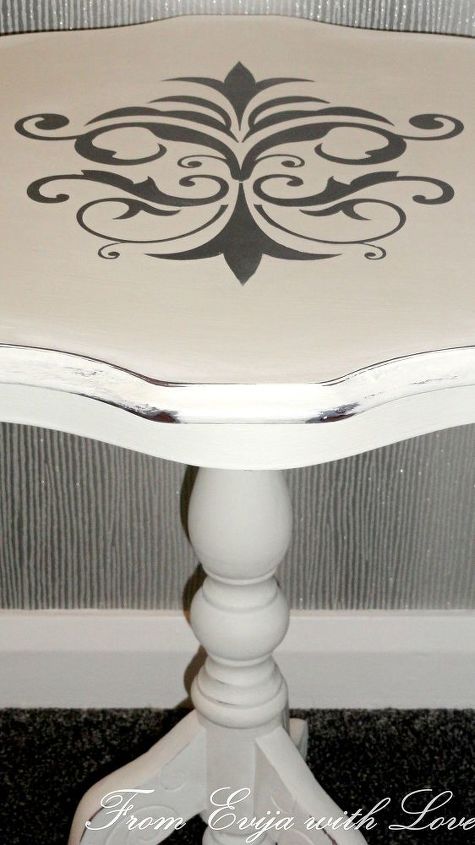
close up of the distressed areas.
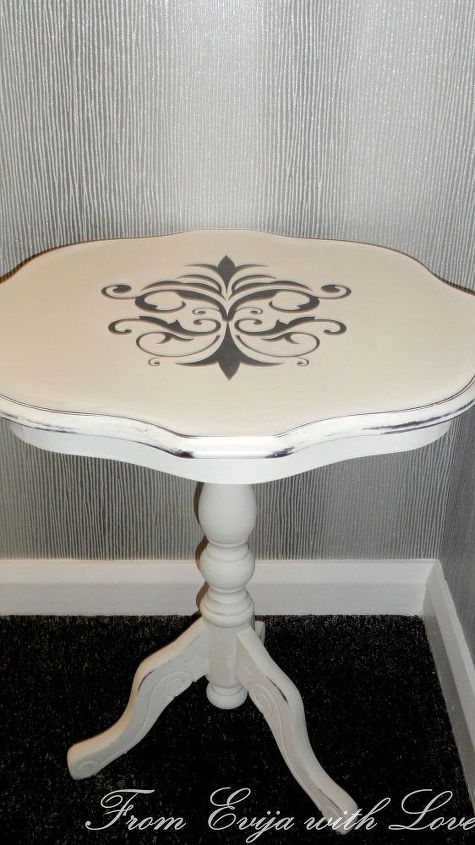
Beautifully transformed.

Want more details about this and other DIY projects? Check out my blog post!
Comments
Join the conversation
2 of 4 comments
-
I love it...hmmm. Gonna stencil my secretary desk front! Whoaaaa. Hugs
-
After seeing this post, I stenciled my kitchen cabinets! Love it...hugs


Frequently asked questions
Have a question about this project?