


Backyard Tiki Bar

by
Leisa Hart
10 Materials
2 Weeks
Medium
I always wanted a place outdoors to entertain, even if it rains.
This was a BIG project for me. I had no written plan, so a LOT of this was trial an error...this is my disclaimer :-) I am NOT a PRO
This was a BIG project for me. I had no written plan, so a LOT of this was trial an error...this is my disclaimer :-) I am NOT a PRO
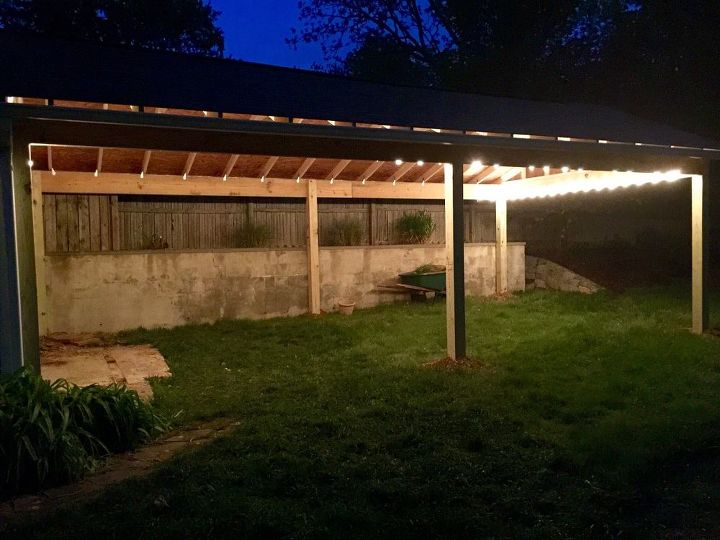
BEFORE
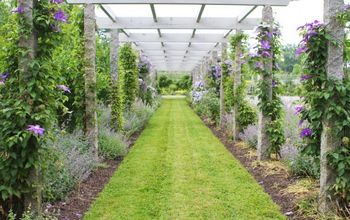
A great friend, and licensed contractor, Tom Water's and his son, built this 10x40' pavilion on the back of my garage. Now all I have to do the either wait for the grass to die....OR.. Spray it
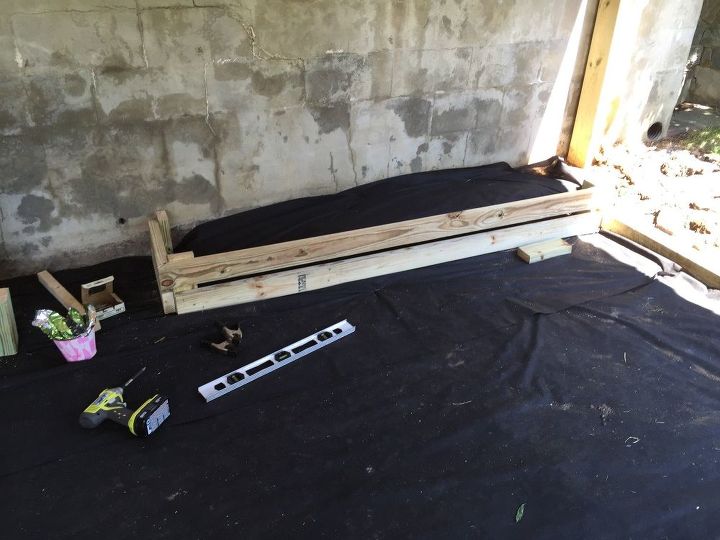
After spraying, I laid weed block to cover. I used 4x4's as a border. Then used a speed bore to pre-drill holes. Lastly, iron stakes to hold them in place.
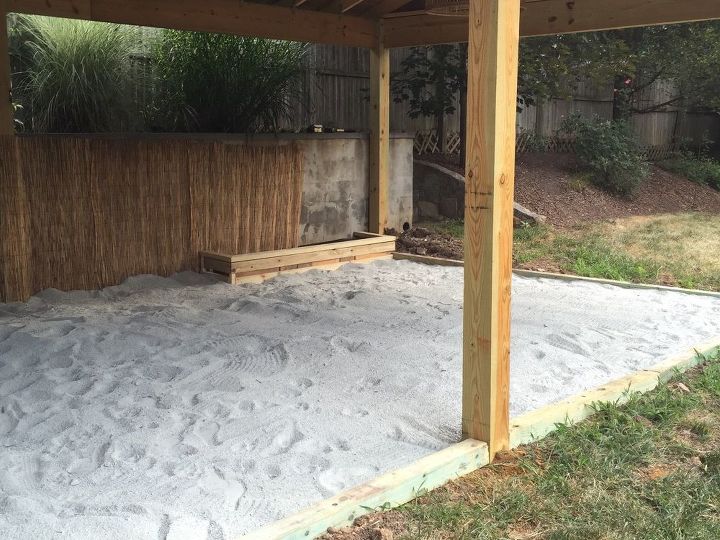
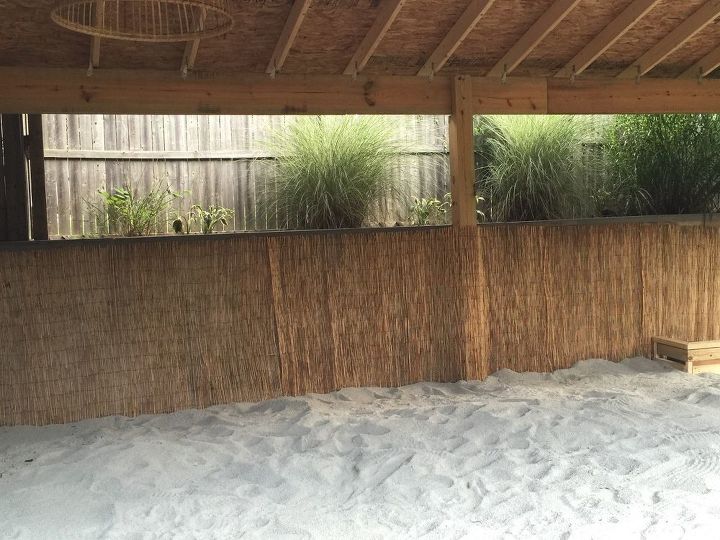
I thought of using concrete stain on the block retaining wall. A friend suggested bamboo fencing for the wall. Two words...LESS MESS. I love it. It screams TIKI.
The stone dust provides better drainage than sand. It is self-tamping, and after a few days, it sets-up like stone. In addition, later, when I am able to lay pavers, it only takes a stiff rake to loosen it up. I can then use it to sweep between the joints of the pavers.
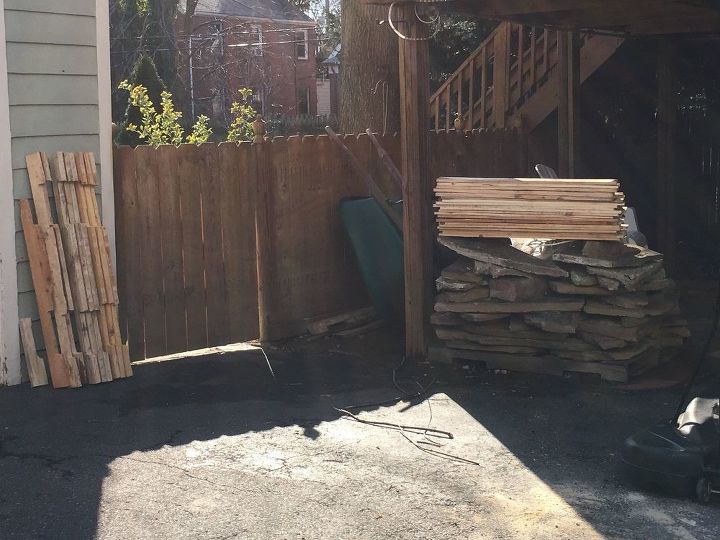
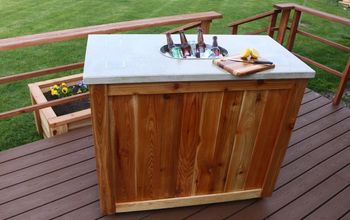
This is 3 of the pallets broken down, using a reciprocating saw. I would upload the video, but it not in the right format. You'll have to trust me that it's EASY! The other 3 pallets were left intact. They provide the framing for the bar.
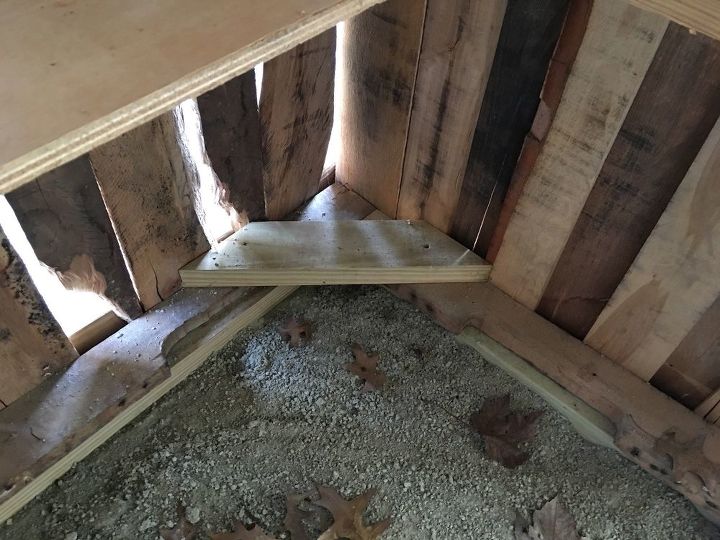
Scrap wood is used as corner supports on the top and bottom of each corner. The bar is U-shaped with one pallet cut in half. The other two pallets are placed next to one another.
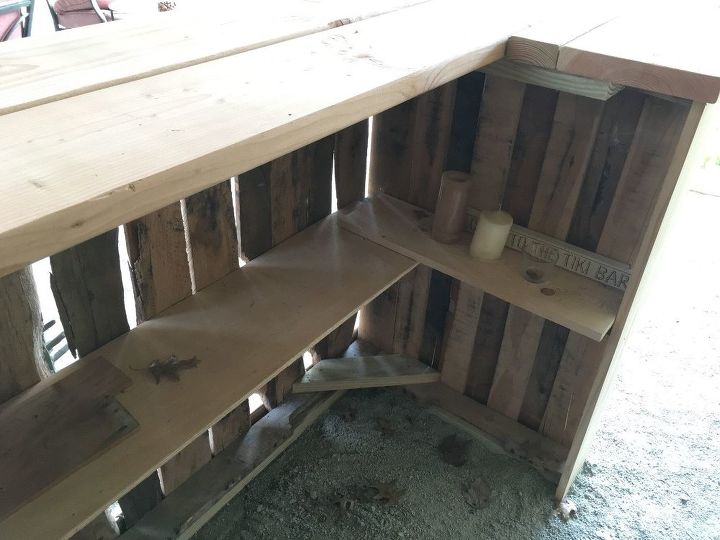
1x10 common boards are cut to length and used as shelving behind the bar. 2x8 Douglas Fir and 2x4 Pine is used to create the bar top. The Fir is pretty. I haven't sealed it yet but I can only imagine how pretty it'll be when I do. I used exterior screws to screw it in from underneath.
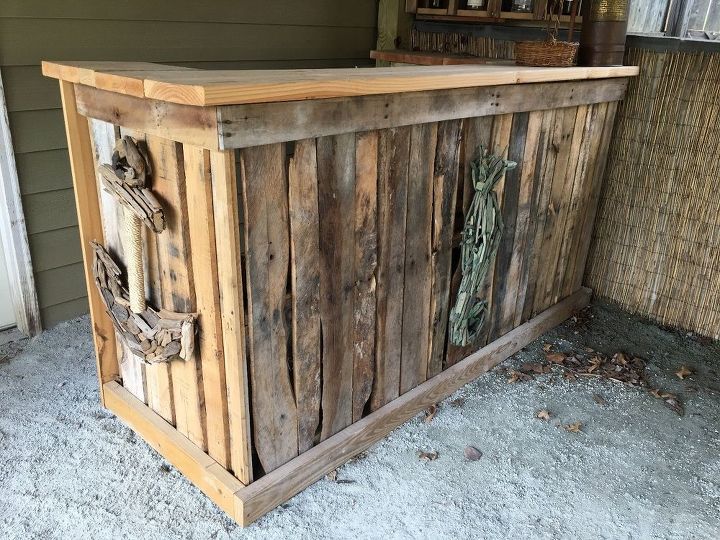
Here's the finished bar with some driftwood decor.
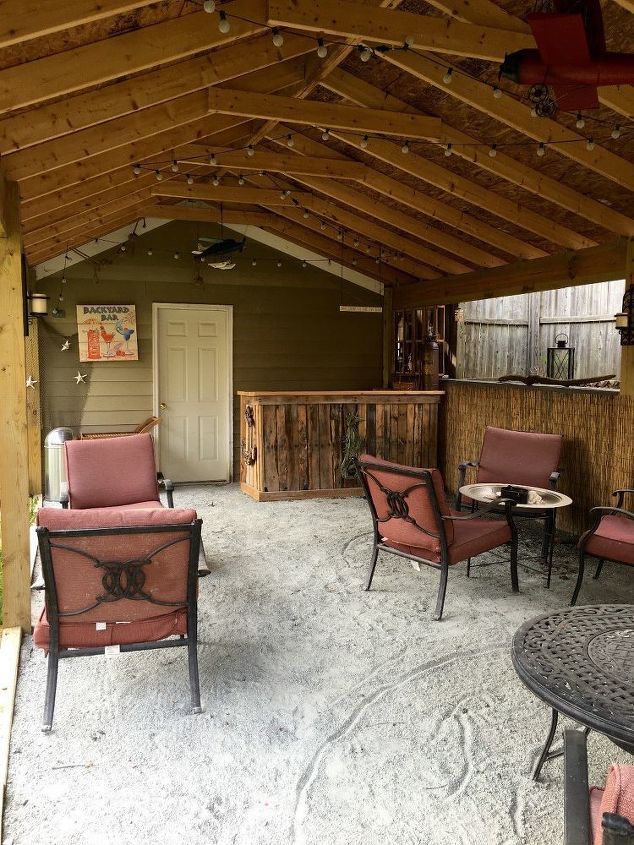

After existing furniture and cool decor is added, the bar is officially OPEN. I hope this inspires you. 2 intense weeks, 1 single Mom with the help of my son (16) and daughter (14), a really cool drill, a LOT of screws, and a sore back.
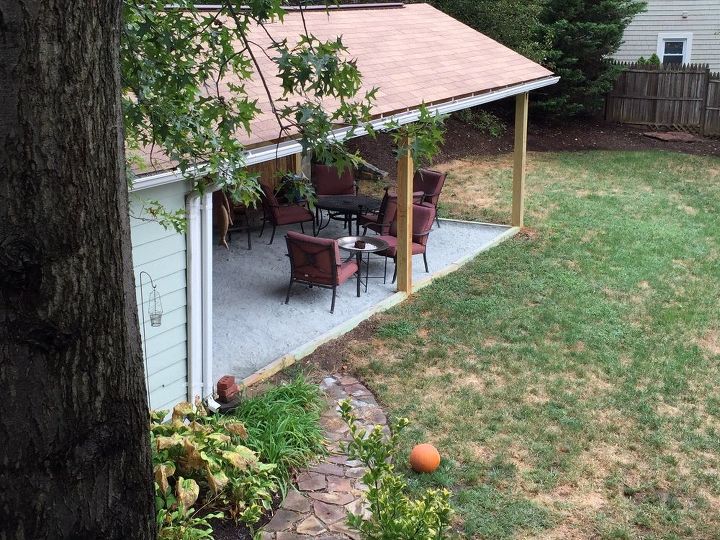
A few have asked about the roofing material and how the pavilion was constructed. Here's a view from above.
Resources for this project:
See all materials


Any price and availability information displayed on [relevant Amazon Site(s), as applicable] at the time of purchase will apply to the purchase of this product.
Hometalk may collect a small share of sales from the links on this page.More info
Comments
Join the conversation
3 of 185 comments
-
That looks fantastic!! I am in the process of transitioning/downsizing from urban to country living and always looking for ideas to create outdoor living spaces-yours is amazing-and the multi-use sand was brilliant!
-
Looks great! I've been looking for ideas for my breezeway that was built 5 years ago - it somehow got turned into the storage area - and we never finished it off. So stealing several of these ideas!


Frequently asked questions
Have a question about this project?
Very nice. How did you attach the bamboo to the block wall?
How much sand did you buy and how much was the cost? Your project turned out beautiful. I want to give this a try.
How much sand did this take and what was the cost of the sand? Congratulations. You did a beautiful job.