


Bathroom Remodel

17 Materials
$2000
6 Weeks
Advanced
So we bought a fixer upper...understatement. Closed on Thursday and spent Friday - Sunday blowing in 76 packages of greenfiber cellulose insulation 13 inches deep in the attic (no insulation, the owner had $600 electric bills in the summer). Monday the AC team arrived to replace the heatpump and all ductwork (awful, original from 1979 and full of pet hair from years of pets, 2 dogs, 4 cats occupied the house when we bought). In the process, AC guy says "your toilet is about to fall through the floor, only tile holding it up". I'm thinking he's talking about the master bath, which has a hole in the floor already.....no not so much. It was the bathroom we planned to use while remodeling. So, move i delayed while the first of many remodeling projects started after work and weekends! We had never remodeled a home, we could fix little things, change out light fixtures, I could lay tile and had in our last house in a small bath. We learned most of what we needed via YouTube.
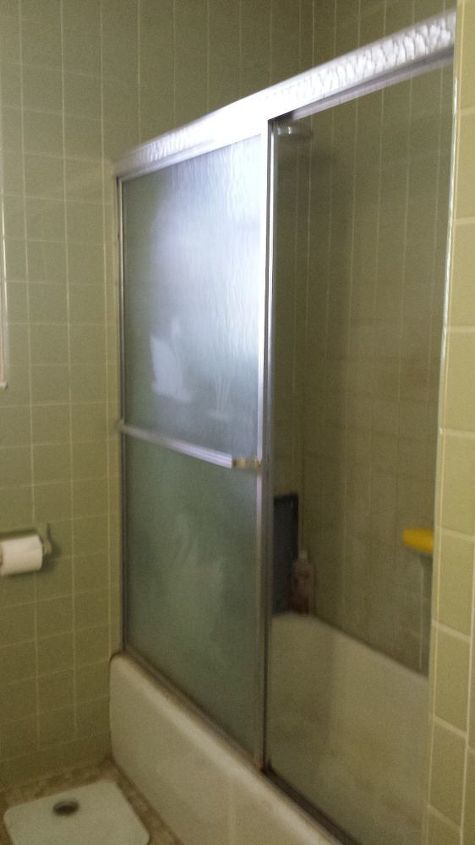
Before we purchased the house, photos while walking through (there were no photos of the inside of the home on line in the listing. Good reason!) The shower was so dirty, plumbing job, shoddy with a piece of iron over the hole you can barely see.
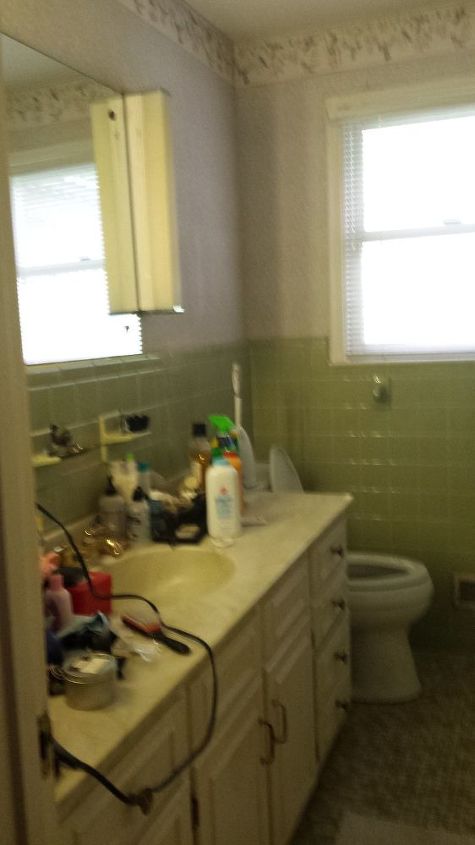
Fluorescent lighting, very old vanity, one inch tiles on the floor. Original 70s-80s design.
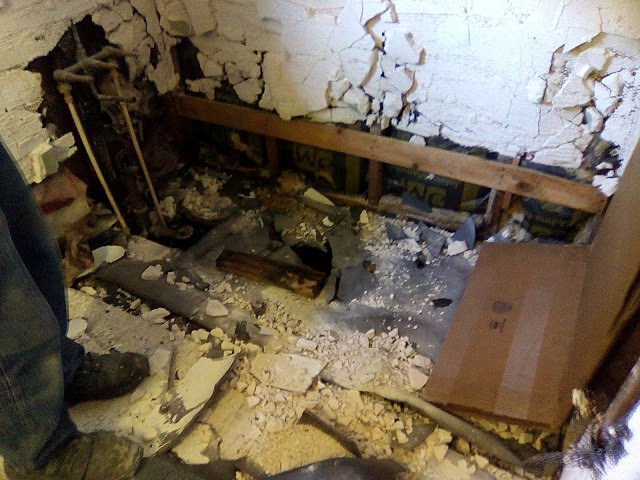
It wasn't as easy as just removing tile....the tile was on top of 6 inches of concrete mud (?) meshed into chicken wire stapled to the cross beams and studs going back to the brick wall on one wall. We used a 5 and 10 lb sledge to smash up the tile, cast iron tub, and all the walls. Used a Saws All to cut out the wire, and hammers and pry bars to remove the rest. Shovels, wheelbarrows and a roll off for all the construction debris were essential! Took about 4 days to demo. Had to YouTube how to pull out a cast iron tub, how to unhook plumbing and drains, etc.
this was where the toilet sat, it was literally held upheld up by tile and the flange/and drain pipe the toilet was attached to. There was also a very large hole under the tub. How they didn't fall through the crawl space was a miracle.
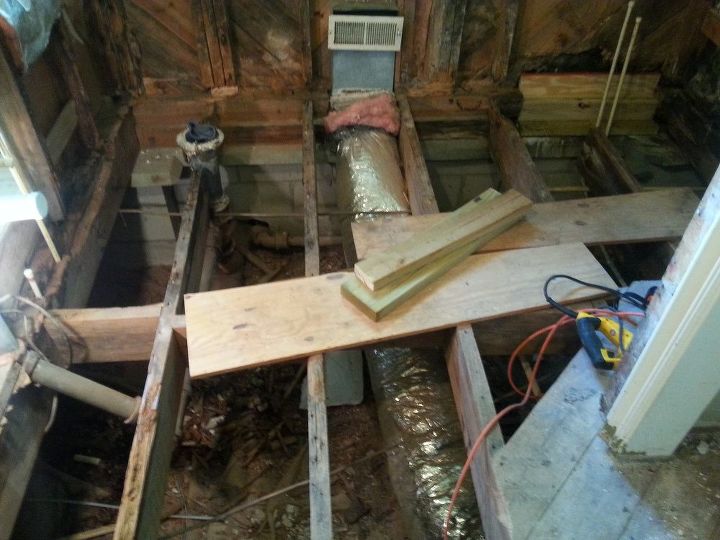
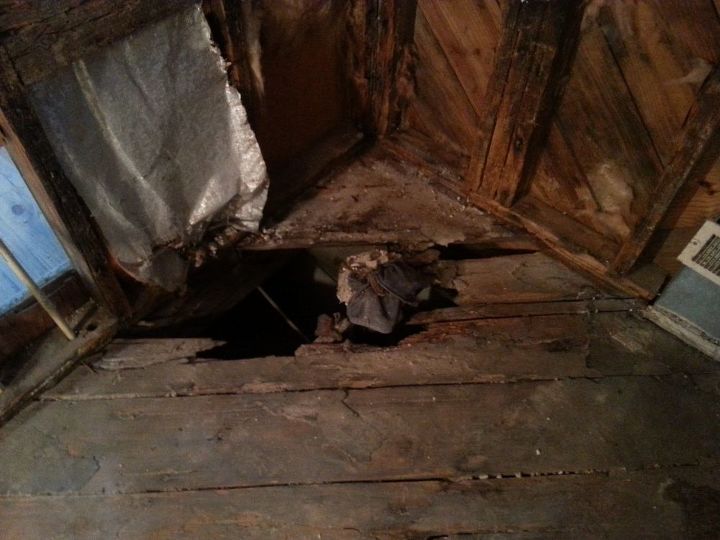
We pulled up all the flooring (except where the linen cabinet was, which was still very sturdy and solid) and girded up all the cross beams, replaced some of the header board on the outside wall, and replaced some of the plumbing under the floor. The boards we left are so old they are harder than you can imagine to try to get a nail through! We used 2x4s and 6 x 12s to reinforce the 6 x 12s holding up the floor, creating boxes of support. We created a box around the toilet and reinforced the floor under the fiberglass walk in shower, painting it with waterproofing paint all around and under it.
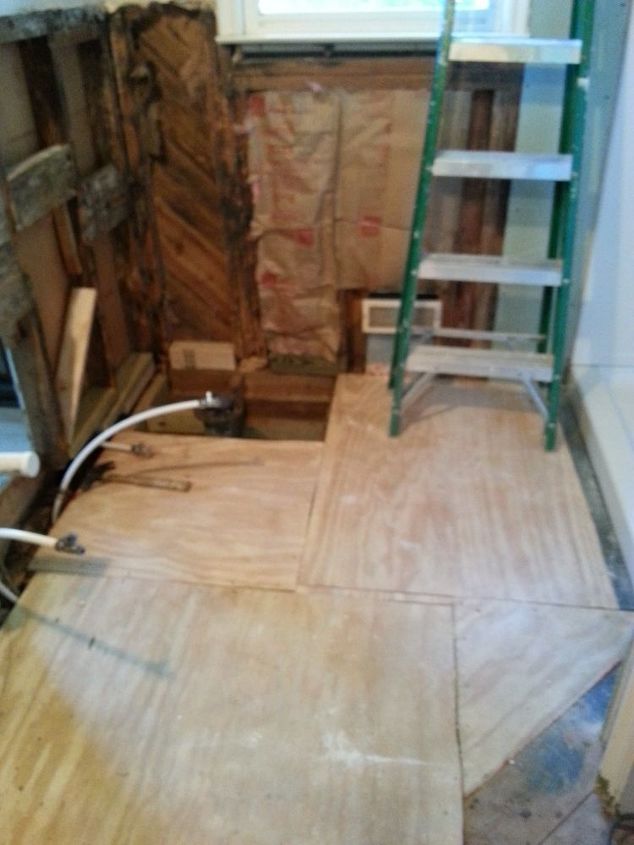
New plywood flooring nailed in place, we borrowed a nail gun as we had a compressor. We installed our first walk in shower (thank God for YouTube, had not done that before either). We used green board behind the shower and sealed it with the paint on waterproof sealant on every surface behind the shower. Probably overkill, but hey, I am not doing this one again LOL. Learned how to install the 3 piece fiberglass shower set and faucet on YouTube. Also put in new insulation in all 3 walls prior to dry walling, and after talking to a plumber changed some of the lines coming from the very old CPVC to PEX. Yes, I know some professionals don't like it for residential applications, I've heard :)
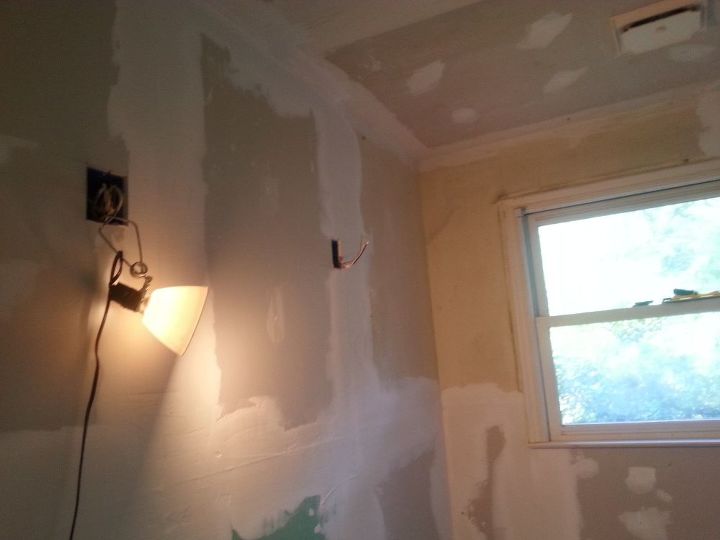
Had to move the lighting for the new lights we bought and move the wires up in the attic to go down by a different stud altogether. Researched installing light boxes on YouTube. Installed new drywall and patched the dings made in the ceiling while removing the popcorn ceiling.
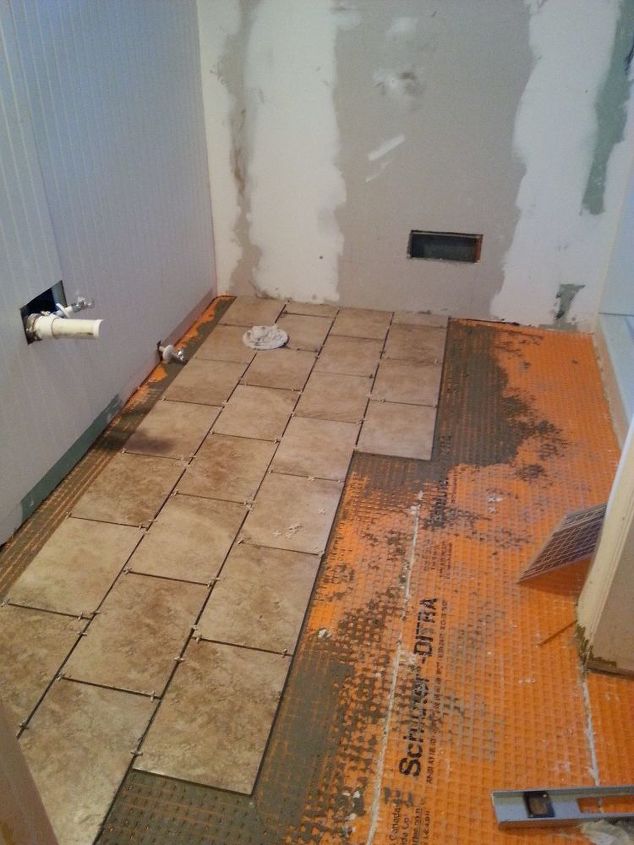
Put down Schluter Detra waterproofing substrate to tile over after researching on line. Seems this also helps with preventing grout from cracking if the house moves or settles. Since we have a crawl space, figured it couldn't hurt!

Found out I'm not so good with mudding corners evenly! So I opted instead for a knock down texture on the walls to hide all my mistakes, it did an amazing job and was easier than hiring someone to fix my mistakes. Guess I need practice! Knockdown I could do easily LOL. This was a popular finish when we lived in Arizona for new homes. You can see I'd already painted when I decided it didn't look good enough, and went back over the paint with texturing, and repainted.
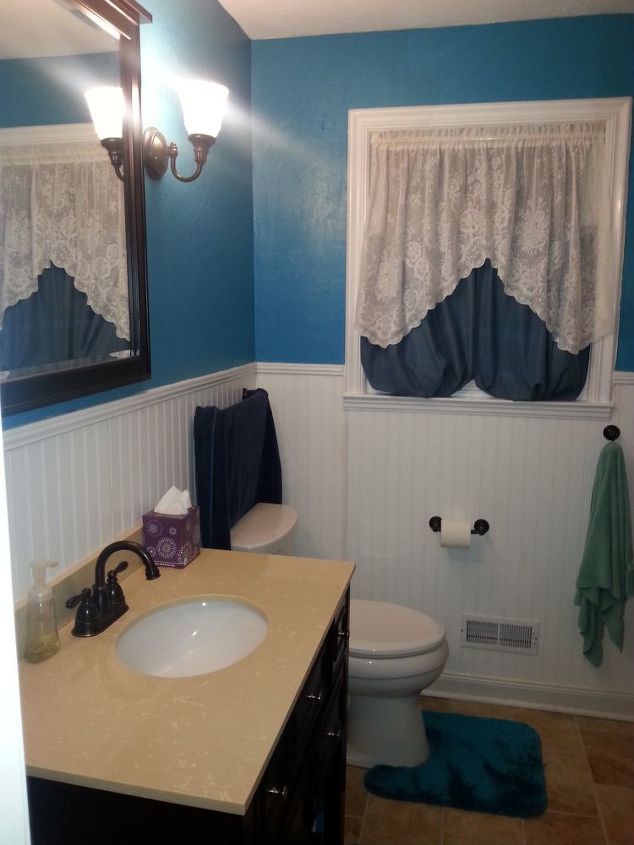
Installed the lights, the new mirror, and decided beadboard on 3 walls would be a nice design feature. It was easy to install over the drywall before painting the room. We bought trim to put at the top of the bead board and painted it white. I found a vanity on sale at Lowes and bought a faucet to match the shower. Here's where I learned a plumbing lesson the hard way. I installed the vanity, installed the plumbing, the faucet, then tried to put the last piece of cultured marble trim across the back of the vanity. I had left the vanity to sit out from the wall in front of the base board. The last piece of cultured marble was exactly smaller than the gap between the vanity and floor. WHAT? We had to uninstall the plumbing, cut the base board out to fit the legs of the vanity so it sat flush against the wall! Then reinstall plumbing and put the final vanity piece of cultured marble on the back. Somethings you have to fail at to learn how to do it right.
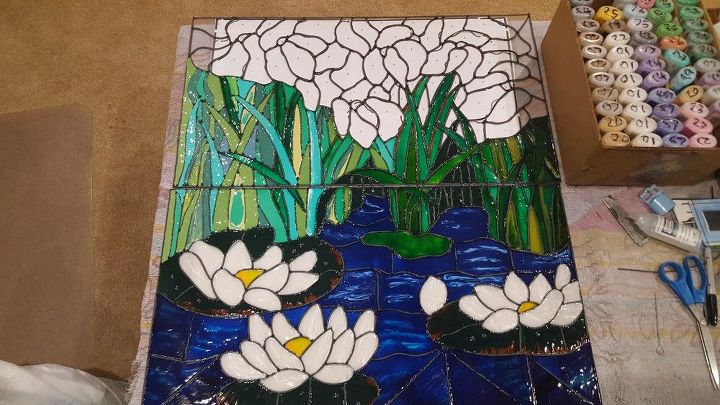
So I love painting faux-stained glass, I had Lowes cut 2 pieces of plexi-glass the size of the bathroom window panes. Then used Adobe PDF to blow up a photo I found I liked s a design. I taped the blown up design to the back of the plexi-glass. I used faux stain glass supplies found on PLAID.com, which is the plasticized paint and faux leaded lines to outline the design. After it is outlined, then you squeeze paint between the lines and use techniques found on Plaid to remove bubbles and seal the edges or incorporate shading for leaves, petals and water. I was careful to match the lines on the top and bottom panes on the design so it looked like one complete picture.

the 2 pieces of plexi glass are put in front of the panes of glass on the window using a dab of silicone in the corners and along the edge; faux liquid leading is squeezed on around the edge of the plexi-glass so that sunlight doesn't come in around the edges of the painting, just through it.

Sunlight streaming through. Total privacy without curtains! Adds to the ambience of the bathroom!
Comments
Join the conversation
3 of 65 comments
-
Love the window design. Nice to find out your toilet and tub are on the verge of dropping through the floor! Lots of hard work and a lovely bathroom.
-
Thank you for sharing that you also had a grisly avocado green bathroom.... thought they were limited to British homes! Good work fixing up that bathroom.. been there, done that. Only thing is that you made it sound quite easy when I know for a fact it is anything but!
Kind regards.


Frequently asked questions
Have a question about this project?
How did you do on permits and inspections?
Why not paint directly on the window? The oaint is plastic and peels right off. Now the extra glass is siliconed to the window. Lot of extra work.
I tried looking up that PLAID.com and plaid.com, only ended up with financial planning company sites..are you sure it is called plaid.com?
I tried searching for faux stained glass and found rabbitgoo window coverings on amazon,seems a lot easier, though not as unique and pretty colorful as your design.