


80’s Inspired Bathroom Tiles

Give boring white tiles a splash of colour with a retro 80’s design. Or any other.
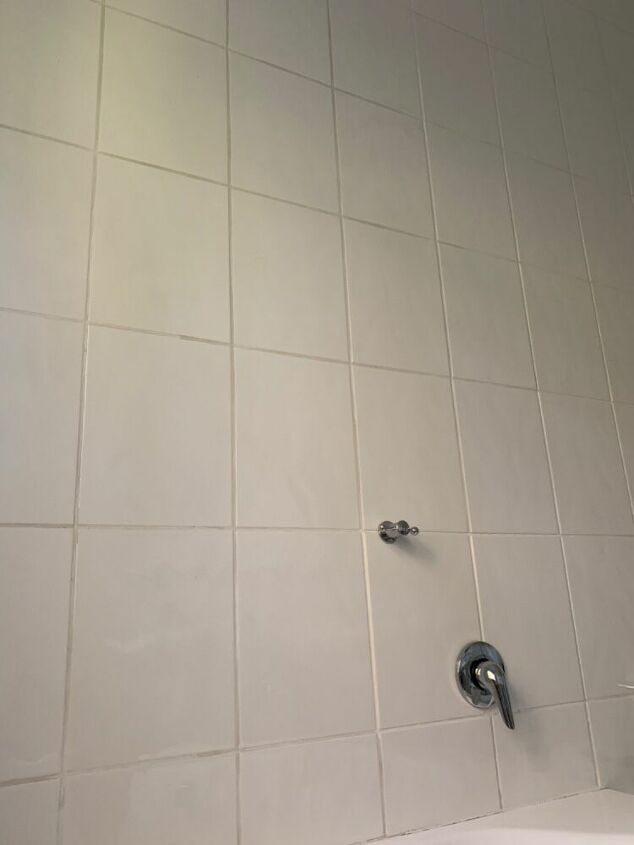
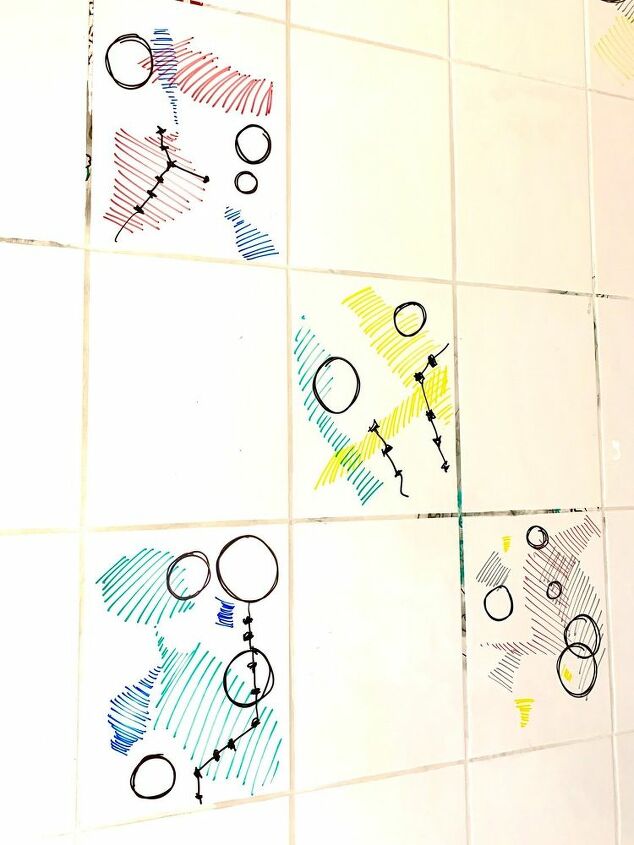
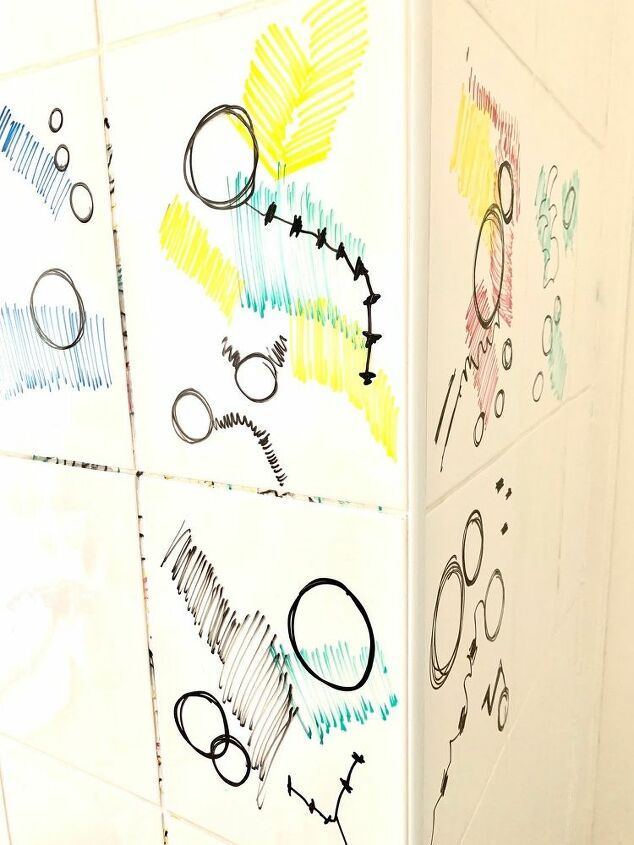
This is my view when I lay in the bath - 80’s white porcelain tiles from top to bottom. They are so out, they are actually in! News flash: tiling from roof to floor is very trendy right now, so is the 80’s grid pattern with coloured grout. Trendy that is, if you are young enough not to have seen it the first time round. Well I happen to like the 80's trend (again) and I had nothing to lose other than my husband's faith in my sanity when I embarked on this project. Remember, you can do any design you like.

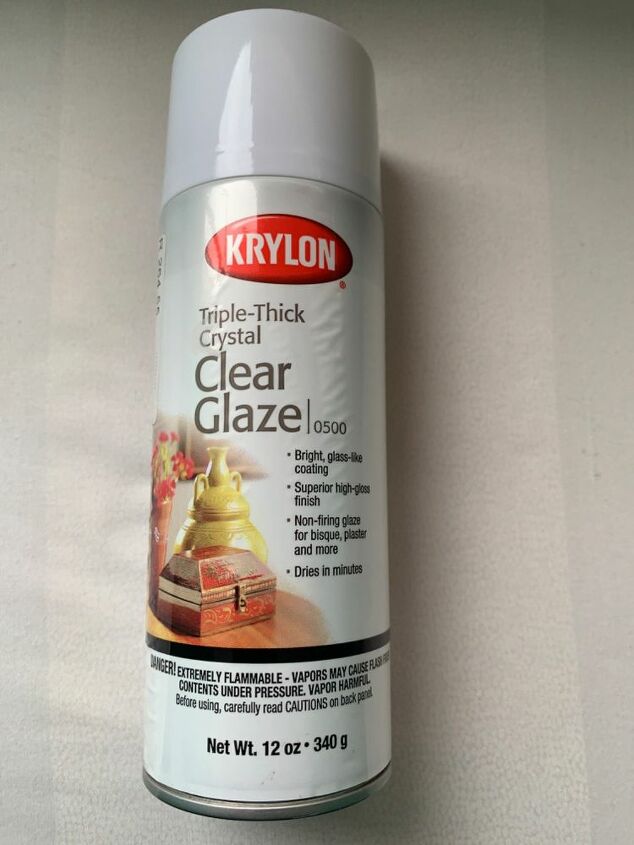
The only supplies needed are some coloured, oil-based permanent markers, acetone (or in my case the gallon of alcohol-based surface disinfectant that was hauled into the house before lock-down), toilet paper (of which you have too much right now- just admit it) and clear varnish. I used Krylon Triple-Thick Crystal Clear Glaze.
Important: The success of this project hinges on finding the best possible glaze to match your tiles. Please first experiment with both applying but also cleaning your tiles once you have done a design. You don’t want dull patches on gloss tiles or spend days doing a design that comes off at the first drop of water. Also, I did this design in a low traffic area of my bathroom, I wouldn’t advise this for the shower or anywhere that has to be cleaned frequently.
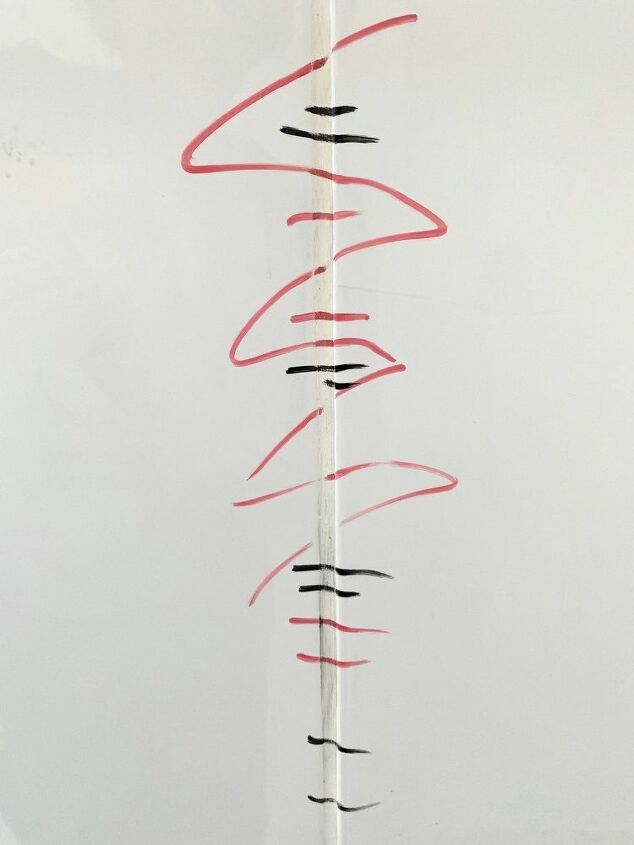
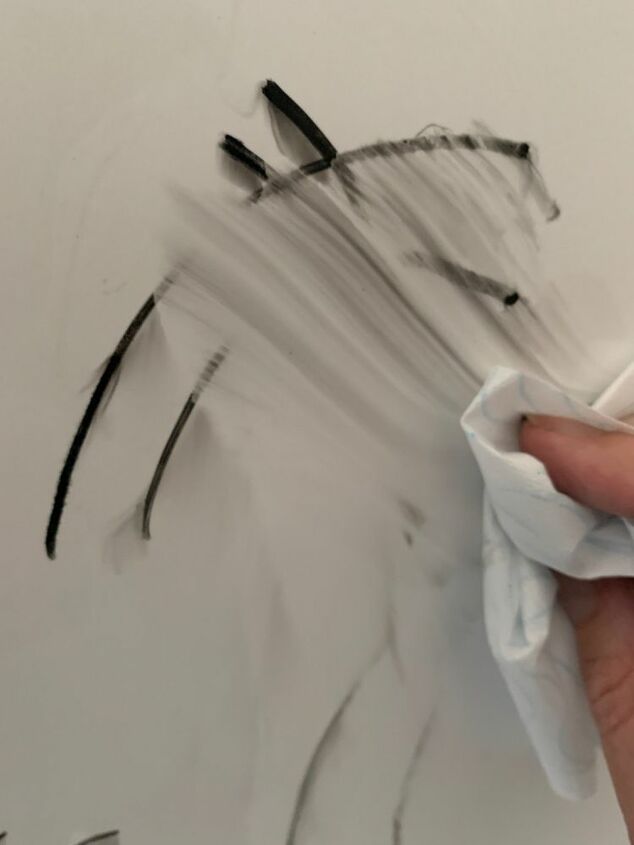
In some areas of my design the grout is also coloured. This was done by drawing over the tile and grout and then wiping out the tile design. In order for it not to look like mould, I used bright colours and kept some areas clear. I also planned in which direction I wiped. If you don’t like this feature, skip it completely.
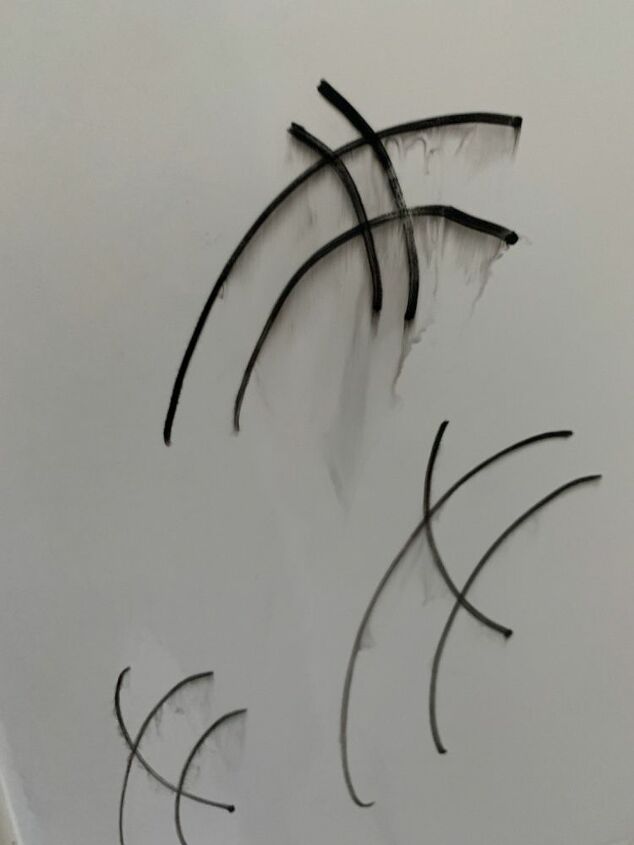
Draw your chosen design. You can erase anything except on the grout lines between the tiles. There are ways of fixing the grout with say, a grout pen but this will require a different level of effort.
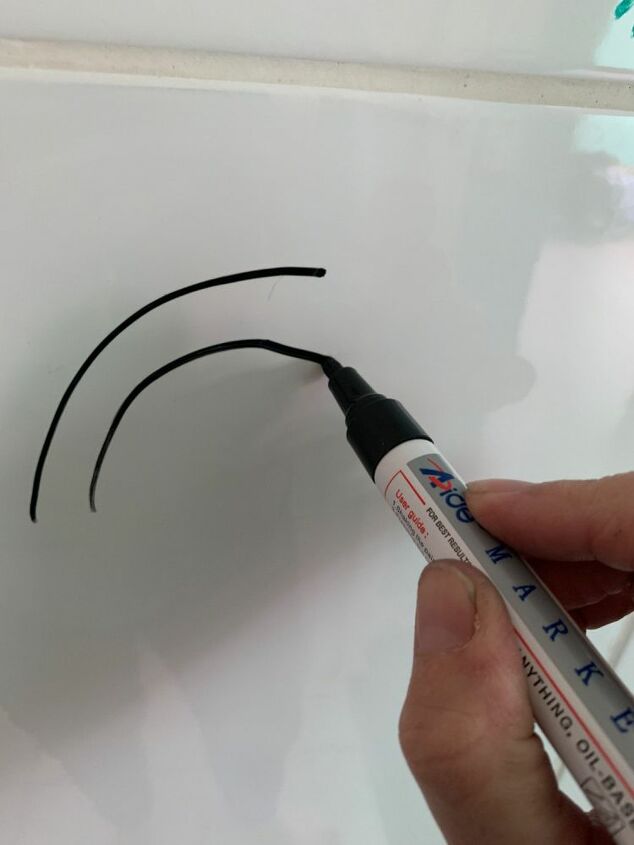
I poured my cleaner into a small spray- bottle, this gave me more control and prevented me from accidentally spraying parts I didn’t intend to. Watch out for dripping onto the grout.
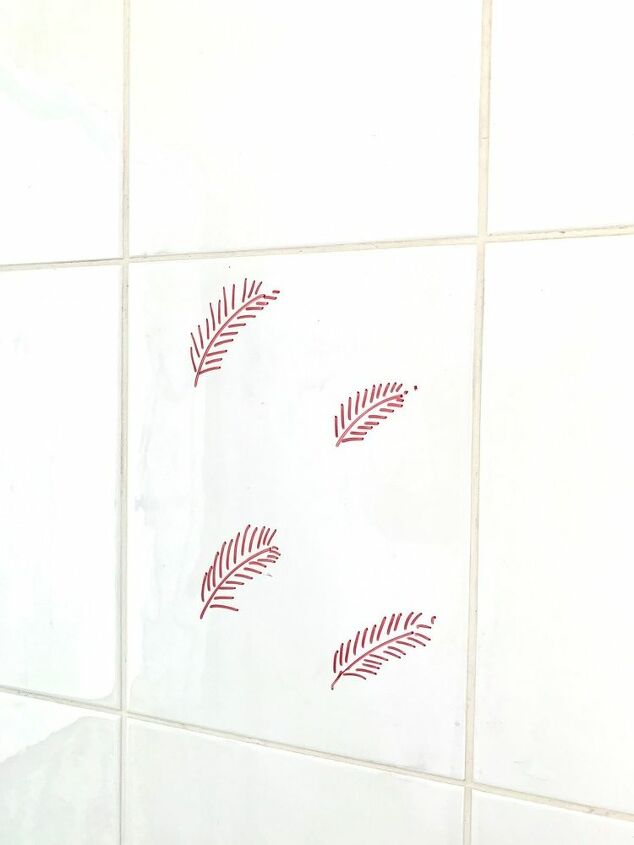
Give then design at least 2-3 even coats of your tested glaze with ample drying time in between. Some designs such as the red palm leaves above will show up patches a lot easier than my abstracts.
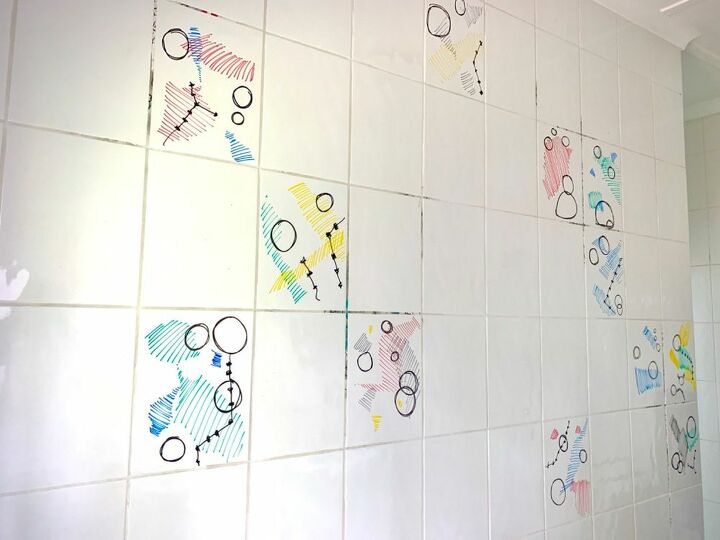
And it's done, welcome back to the 80's!


Comments
Join the conversation
-
No.
-
Oh, no.


Frequently asked questions
Have a question about this project?