


DIY Concrete Countertop!

I started this project back in February and I have to tell you, it is kicking my butt!! I have never had a project take me this long. I thought, hey, it's winter in Wisconsin, I think I will finally give my 1990's bathroom a facelift. Guess what? I am still working on it!! Life happens and you just don't get stuff done as quickly as you would like. I have to keep reminding myself, I am in my 50's and not my spritely 20's.
I am going to be posting my bathroom in the different steps that I have done so far and will post a final reveal at a later time. I feel I better post as I go, because the longer this takes me, this brain of mine might forget the steps on how I did things.
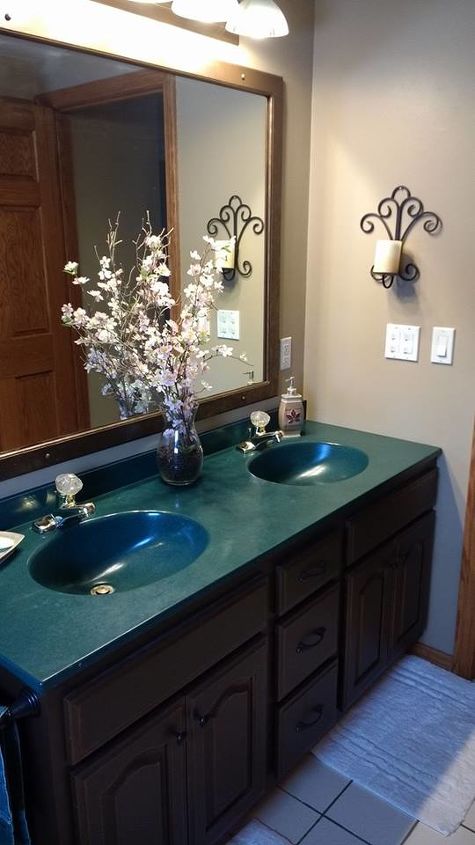
This is the counter we picked out back in the 90's. Complete with Almond bathtub, and almond toilet.
After reading so many blogs on how to do a Concrete Countertop, I figured if it doesn't turn out, we have to replace it. I posted the blogger that I found had the instructions that applied to my integral sinks: http://www.remodelaholic.com/diy-concrete-vanity-integral-sink/
If you look at this site, I literally did everything this blogger did with the application-it really is quite easy and fun!
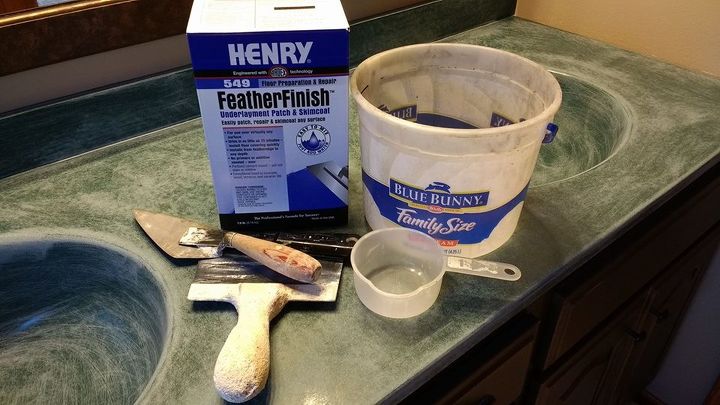
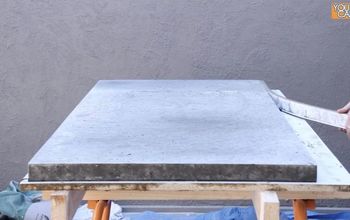
I sanded the heck out of the countertop and sinks and picked up Henry FeatherFinish from Home Depot. It cost around 17.00 and with easy instructions on the box, I went to work.

I started the project using the trowels and then remembered I had these with my tools.
If you can get your hands on some of these, I found they worked better than the trowels or putty knives. I got these when I took a class years ago for faux finishing. They are for applying Venetian plaster and stone to walls, so perhaps you could find them at a paint store, just not sure. They bend and are more flexible when applying the concrete.
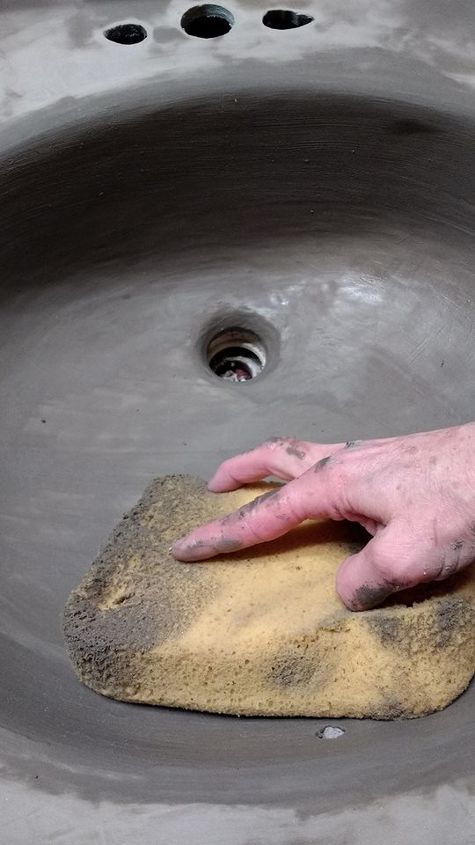
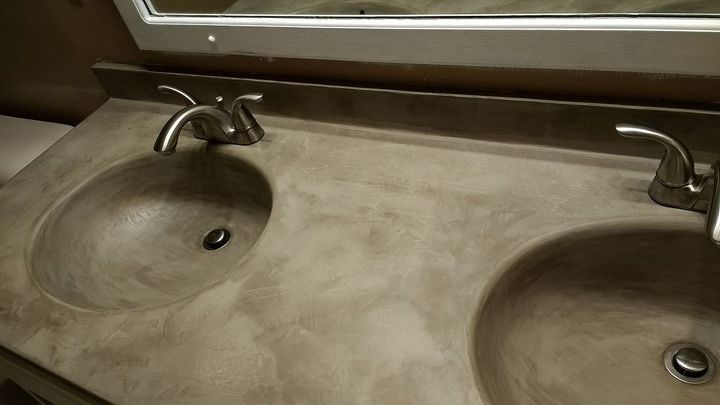
Doing the sinks were a bit tricky. I used my hands to spread out the concrete first (yes, I should have had gloves on), waited a little bit and then using a damp sponge, I smoothed out the concrete. The sponge method worked great!
The sinks were so much fun, I literally felt like a sculpture playing with this stuff.
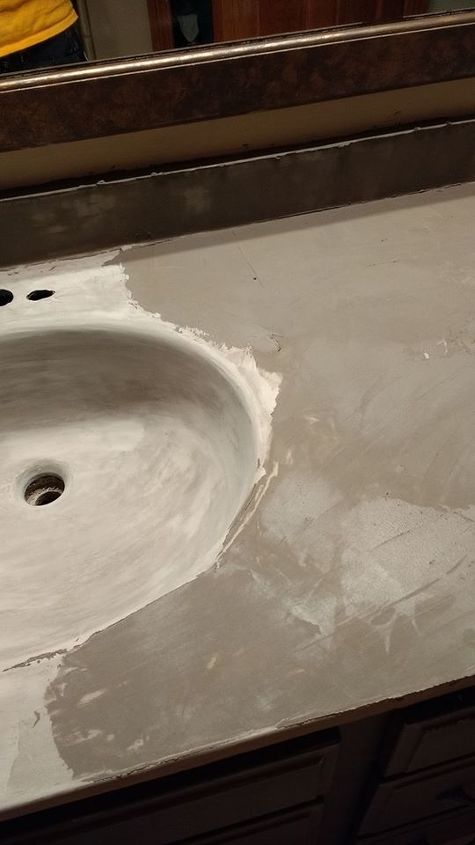
I applied 3 coats of the Concrete, waiting 24 hours in between coats. Before applying each coat of concrete, you will sand each layer until smooth.
You want to apply THIN coats. This stuff dries super fast. I would mix one batch at a time because of how fast it would harden in my pail. If you can apply it smooth, the less sanding you will have to do. Sanding is the worse part of this project. It makes a mess but the end result will be worth it.
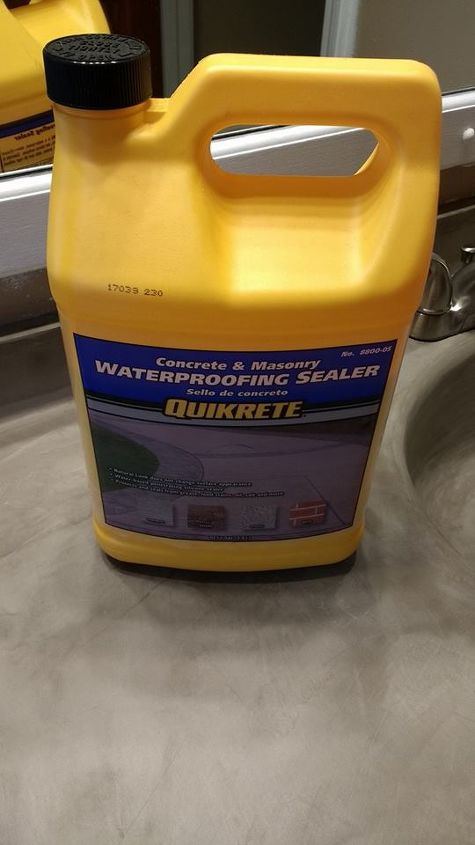
I used Acrylic Quikrete Concrete Cure and Seal for sealing . I had to order this on line from Home Depot.

Here is a Before the Concrete picture....
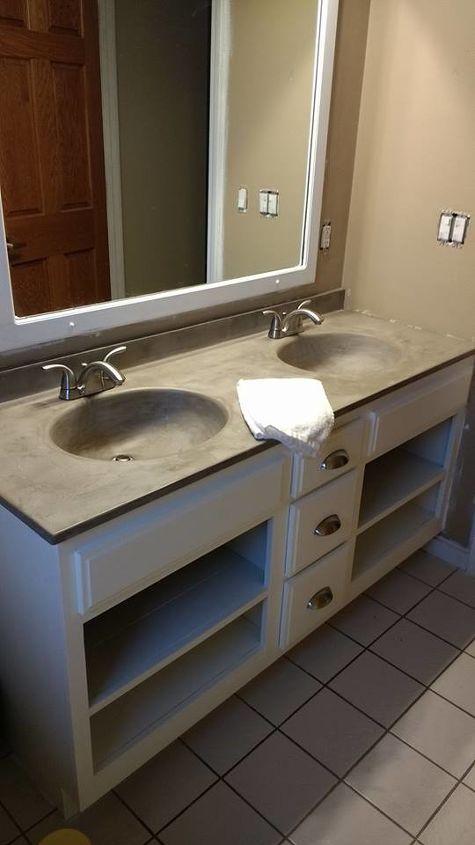
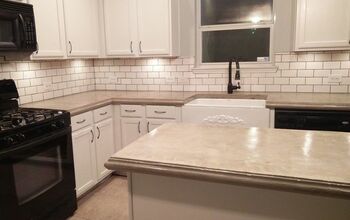
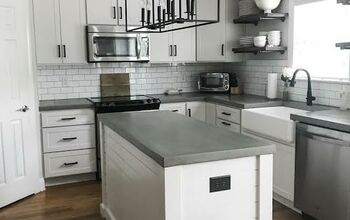
Here is the After! Complete with freshly painted vanity, shelves that I built, new faucets and new handles. Again, the bathroom is not complete but I wanted to share the first project that I tackled .
That's it! It really is an easy project, a little messy but easy. It just takes time with the waiting in between coats (that's where going to work comes in handy).
I would recommend doing this to anyone that wants to change their countertop. I love the feel of it and overall look of the concrete, it is so nice and smooth, I love it!
I will be posting soon on how I painted my bathtub and faucets...yes, I said I painted my faucets. Today, I am starting the shiplap!!
Comments
Join the conversation
5 of 93 comments
-
You make this very clear to try. On a budget you could pick up an old sink to install and do up. Brilliant.
-
Loving this idea too - my bathroom may just end up looking like yours. How is it holding up? Do you think this method would work on a bathtub or am I crazy?


Frequently asked questions
Have a question about this project?
Do you think this would work on laminate countertops? I’ve only seen it done of marble.
I have an undermount sink In my bathroom, and I like the color of it (white). Would it work to tape off the inside rim of the sink and only do the counter?
Could this be done on shower pan?